The West Cottage: Before & After
Before posting all of the sources and story behind the front tiny house renovation and makeover via a Home Tour (coming soon), I want to share some clear before and after photos of the space. We outfitted this second cottage to suit our evolving business and personal needs, and we hope it demonstrates to renters of small spaces (and folks working on a budget) how some relatively little changes can make a large impact.
On a side note, we hosted our first overnight guest (my life-long friend, Lindsay of Casa Joshua Tree) just days after completing the front house project, and she gave us the best housewarming gift ever-- a name for it! She suggested The West Cottage, because it's is situated on the West side of our "main" home, and it's primary use is oriented around our son, West. Simple and sweet. I love it.
So here it is-- "before-s" on the left, "after-s" on the right!

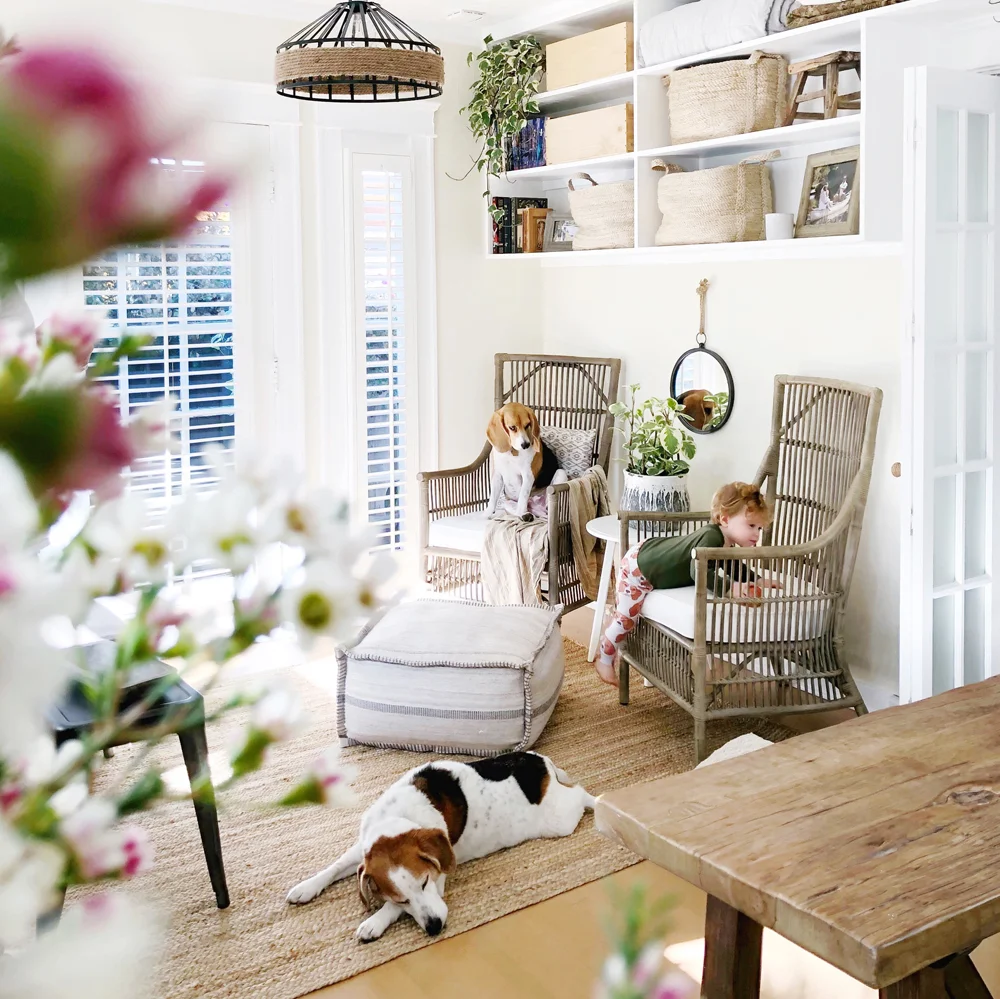
New custom bench/sofa/queen bed by Tumbleweed & Dandelion. Pendant and bench-turned-coffee table.
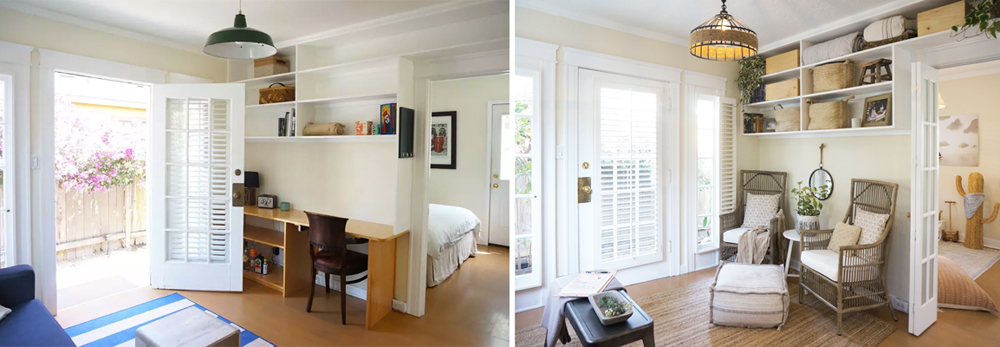
We removed the build-in desk and replaced it with two cozy reading chairs and an ottoman.

The bookshelf now stores books AND guest linens. Everything is contained in the overhead baskets or upcycled wine creates. Having West's books in the easy-to-carry jute baskets helps us stay organized. The new interior French door from saves space and lets light pass through, while still providing privacy between the main room and the bedroom.

The view from the front door. The most eye-catching difference is the absence of the oversized range-hood, and the wall cabinets. We replaced the hood with a ceiling vent, and the swapped the cupboards for exposed shelving by Tumbleweed & Dandelion.

We removed the 90-degree counter turn in the kitchen, opening up the space dramatically. We added a pull-out trash drawer, a new sink and faucet, as well as new countertops from Cambria, installed by Giallo Stone. We recycled and adjusted the old wall cabinets doors for the updated base cabinets. An upcycled console table, counter stools, and vintage rug from New England Loom round off the kitchen.

We removed the wall cabinets, slid the sink space over to be centered with the windows. We then replaced the sink and faucet, and adjusted and replaced the countertops with Cambria via Gaillo Stone.

We converted the only bedroom into a playroom for West. We replaced the overhead light fixture, refinished the walls and windows, and added elements such as a convertible crib/toddler bed, crib bedding from Parachute, a floor cushion from our neighbors at The Wolf Nest, a vintage reading chair, and a corner cabinet. Some fun touches include an oversized woven cactus, a sea turtle floor basket, and letters above his bed that are reminiscent of Venice's famous street sign. (All items above the bed are secured with earthquake putty.)

West's closet and porch doors used to crash open into one another, so we swapped the closet door out for a custom, handmade curtain from Luna Zorro. We added rattan mirrors on the little wall between the closet and the bathroom to reflect sunlight, and we set up a little diaper changing storage station via a low, windowed hutch.

We opted to save money and leave the bathroom as-is, other than updating the paint color from blue to Muscat Blanc by Dunn Edwards. We modified the accents within the tiny bath, adding a vintage rug from New England Loom, a linen shower curtain, a small accent table, and hanging baskets and plants.
Other posts about The West Cottage:
• Solving the small space interior door issues
• The accordion bench/bed

Interior Doors for Compact Spaces
I find that one of the most common and frustrating issues in tight homes and apartments are the interior doors. Despite the unique floor plans of tiny residences, they're often outfitted with standard doors that make zero sense in the setting. But how do you fix the issue of space-consuming hardware if you rent, or if you don't have the budget for an elaborate solution, such as a pocket design?

Above: The Tiny Canal Cottage has 2 interior pocket doors.
In our compact cottage, we're lucky to have two wonderful interior pocket doors, which preserve the functionality of every inch of wall space around them. But when we acquired the neighboring house, we were confronted with three full-size interior doors (within mere feet of one another) that not only ate up usable space, but also crashed into each other (and into one exterior door) whenever one was opened.

Above: The front cottage doors before our updates. There were three interior doors-- plus an exterior door-- all within mere feet of one another. They would crash into each other when opened. (That's my father with Stanlee. I hate those doors, but I love that photo!)
We couldn't open one door without closing another first. After just 24 hours in the house, the issue was already completely maddening. But we are renting that unit, and didn't want to allocate funds toward constructing pocket doors. (And there is definitely no room for barn-style sliding doors, which would render nearby wall space useless.) Still, two of the doors simply had to go.

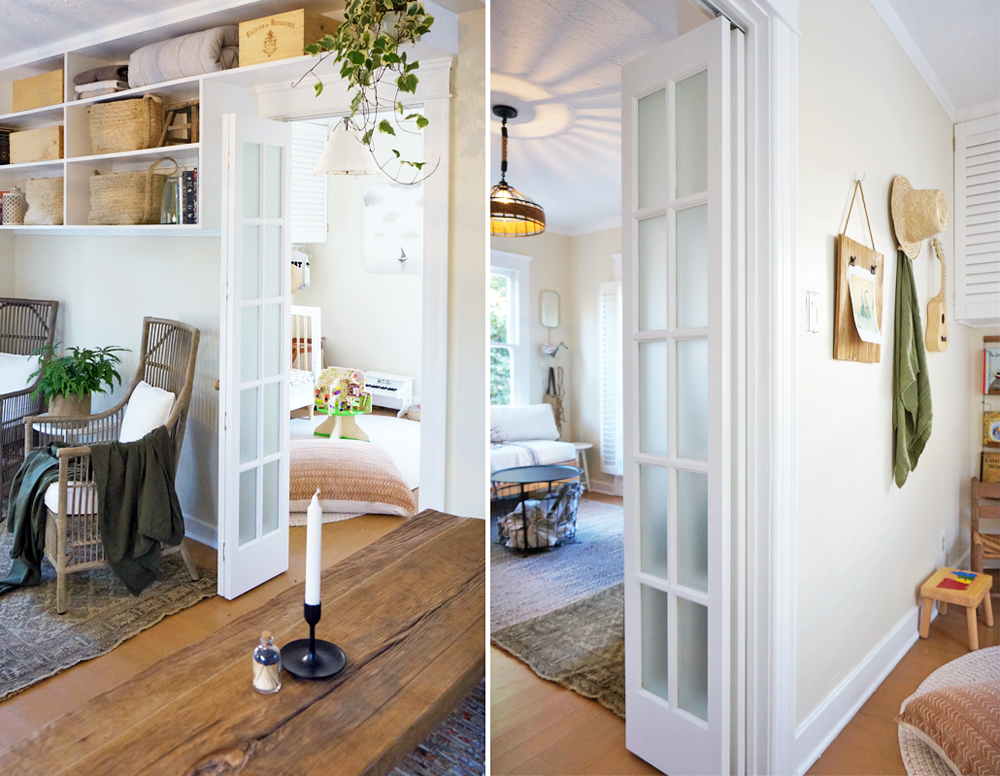
In the doorway that transitions between the living room + kitchen to the bedroom, we opted to remove the boring, typical door and install a bi-fold door with tempered panes of glass:

This new door makes a huge difference in both functionality and appearance. The glass is lightly frosted, so privacy can be maintained, but the translucent panes let light pass through, keeping the area feeling bright and airy. We painted the door white and replaced its standard door knob with something more fitting for the decor, and the end result is EXACTLY what we wanted. Now the bathroom and bedroom doors no longer hit each other, and every inch surrounding the doorway is now visible and usable. At $490, this bi-fold door is a bit of an investment (there are several inexpensive options, depending on the type of glass you choose), but it's certainly FAR easier and less costly than construction work.


In the bedroom, there's a (weirdly shaped) walk-in closet. It too had a full-sized door, which would crash into the exterior door leading to the porch when either was opened. There's a little window inside the closet, which creates a lovely coastal cross-breeze, but it was always snuffed out by the shut door. So, rather than installing another bi-fold, I decided to swap out the old door for a custom curtain from Luna Zorro:


This curatin adds texture, color and pattern to the small room, and it hides the closet without cutting off the airflow from the window. I love it-- it's a simple, functional, and beautiful handmade piece of art that helps make West's room feel that much more special.
