Our Layered Cottage Kitchen
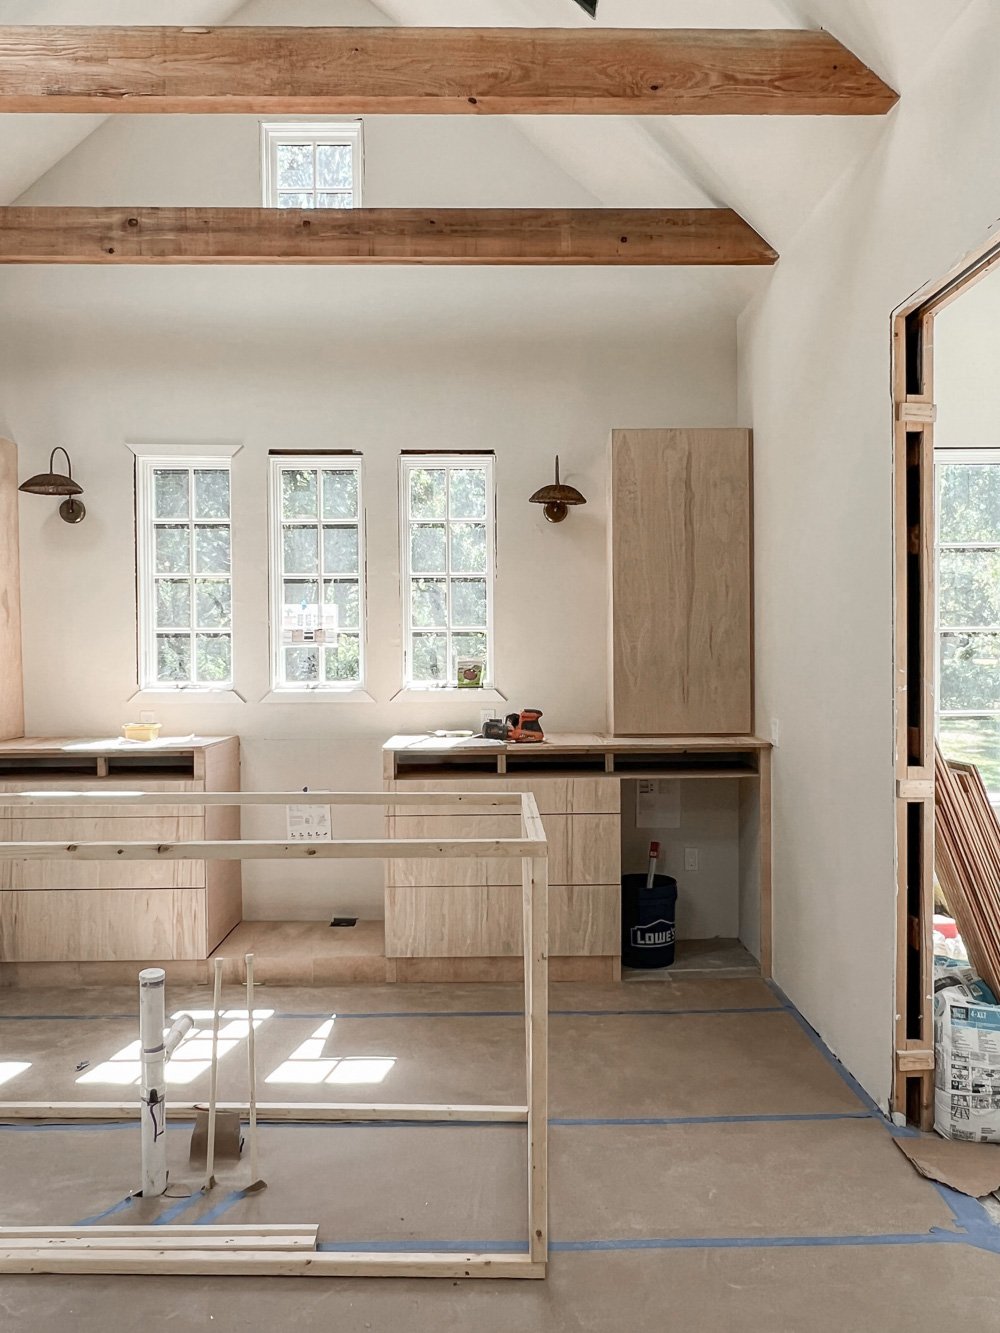
We’ve been enjoying our cottage kitchen for a month, but now that our backsplash and island countertop have been installed, it’s finally the finished space we’d long envisioned.
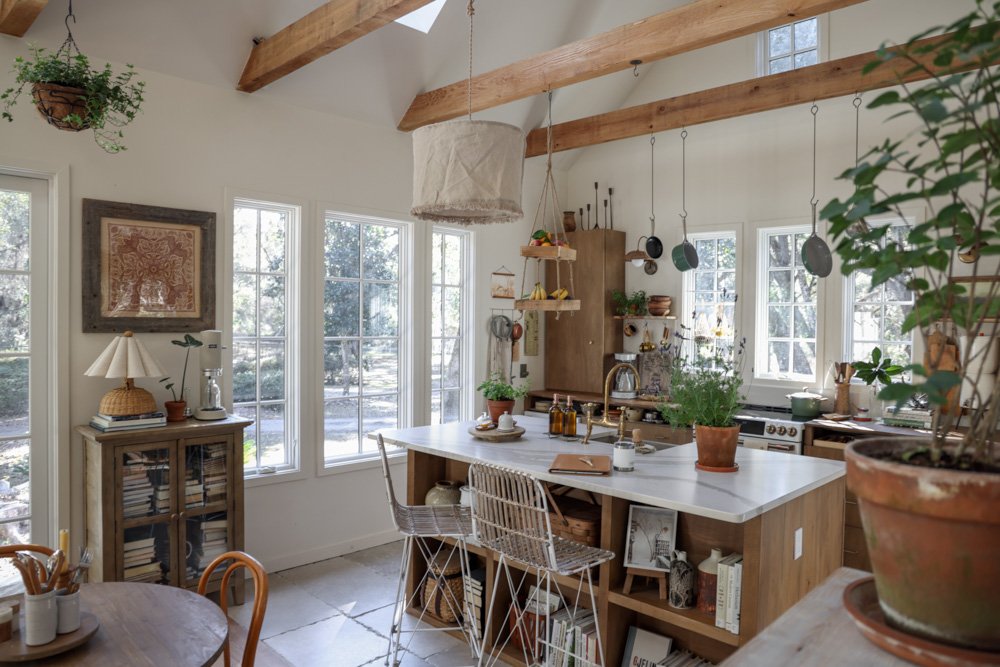
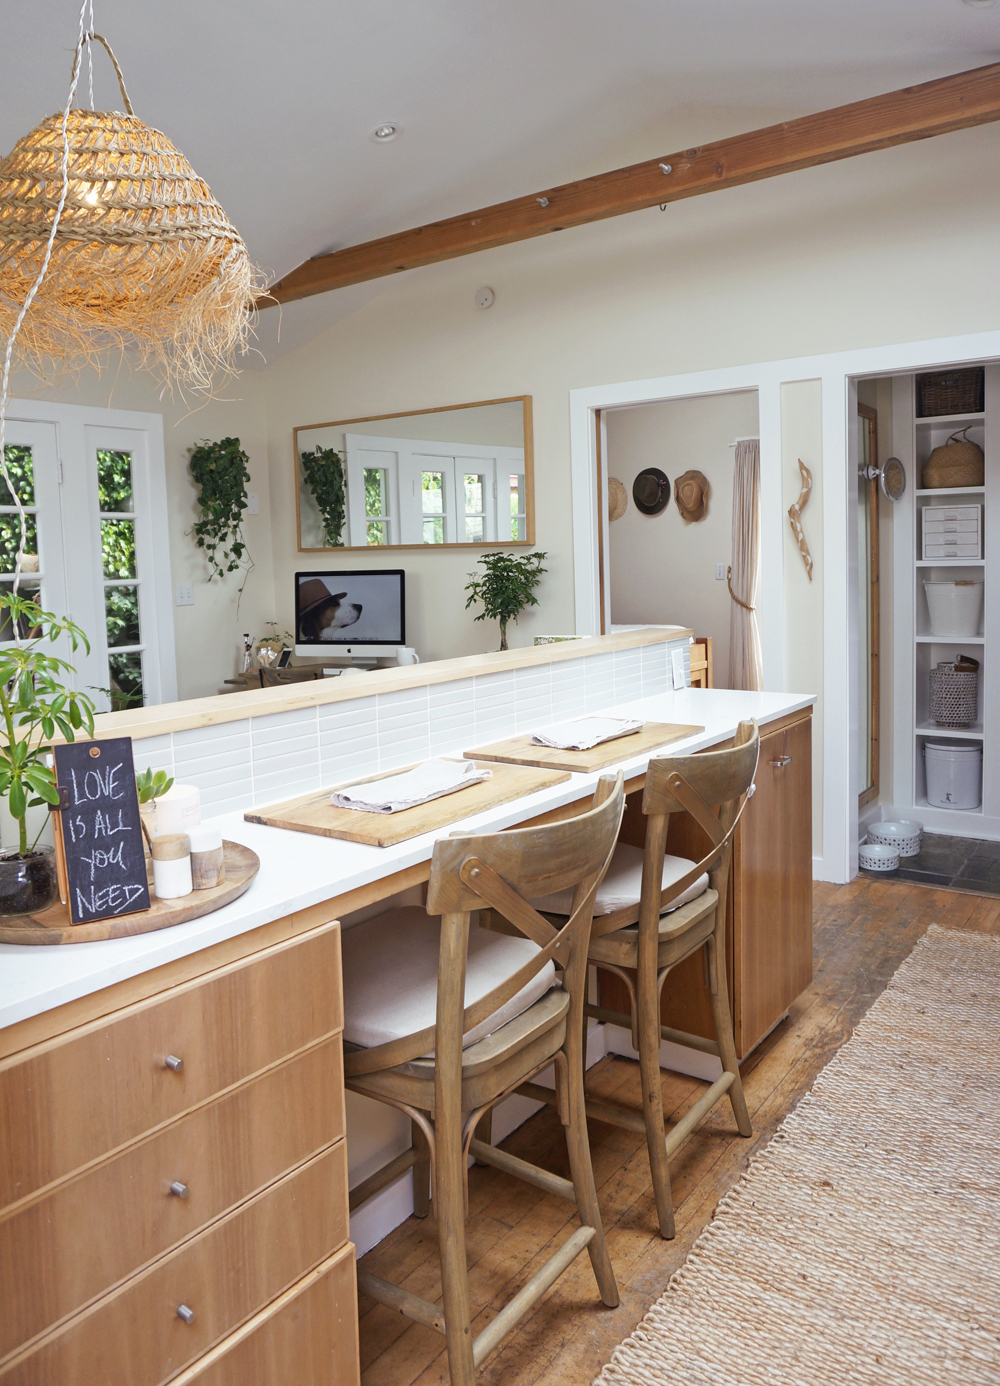
On our list of priorities when designing this space were tall surfaces, space-saving features like a retractable drying drawer and built-in step stool for the kids, and countertops that would enhance visual interest and texture without overcrowding the compact room.
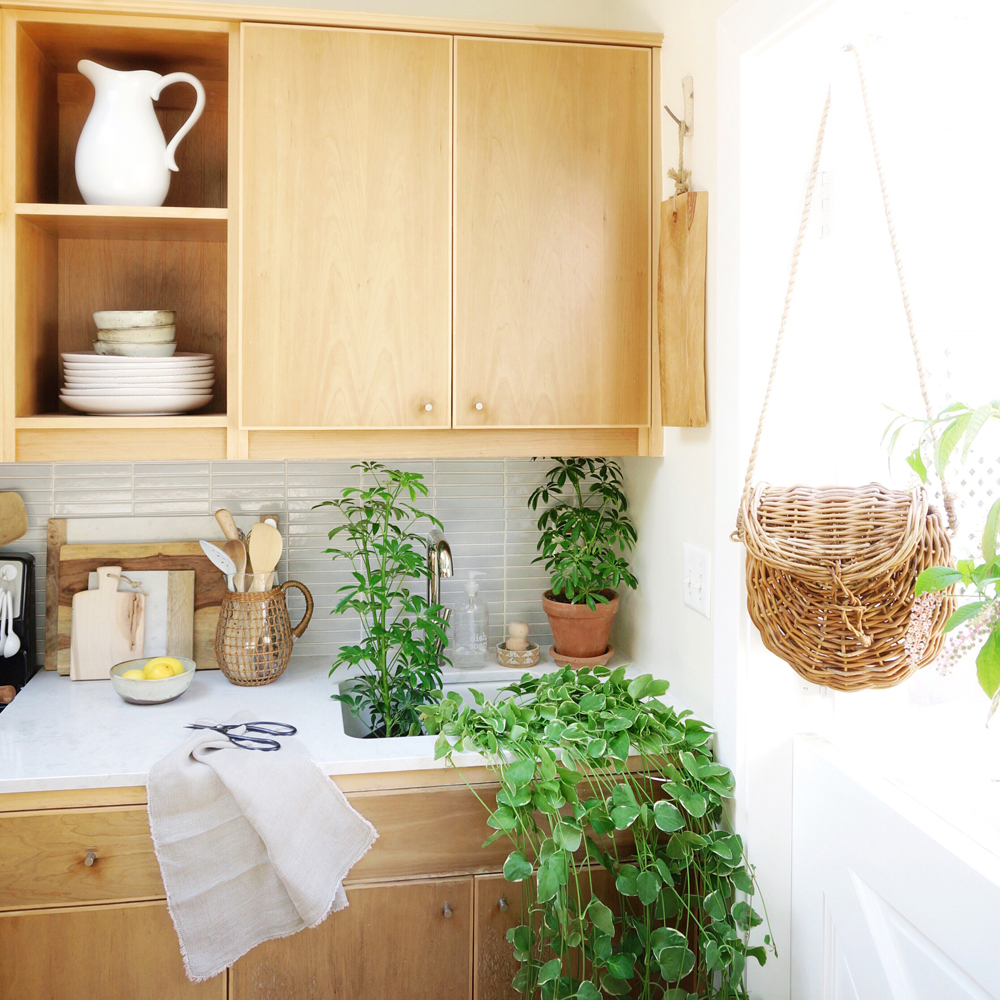
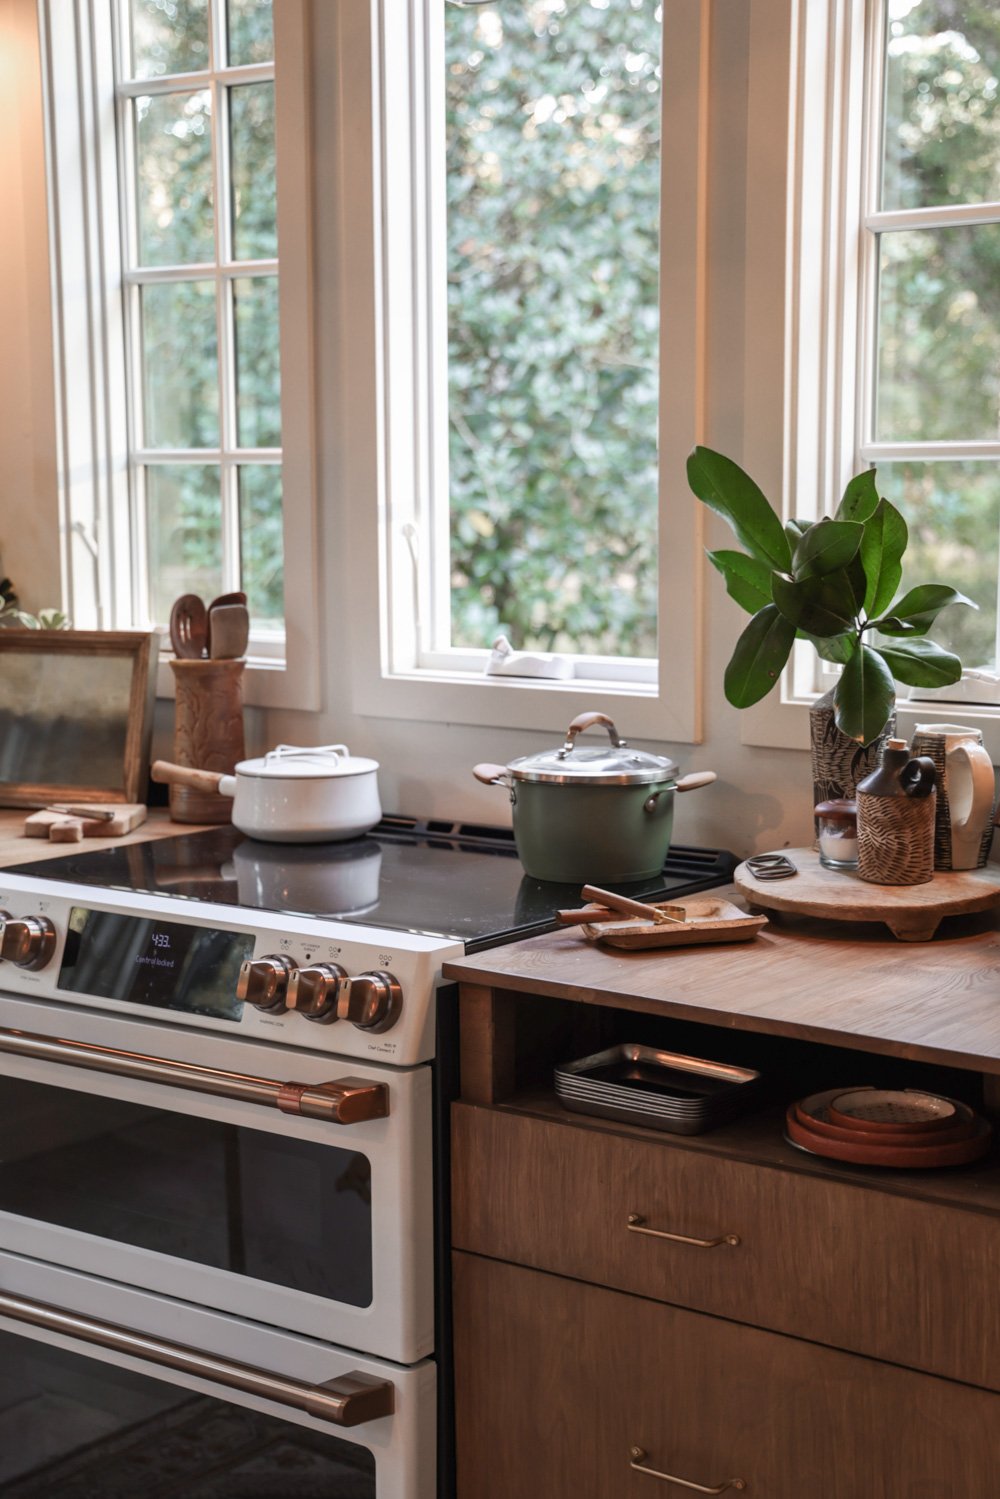
For the back counter, we used spare river recovered pine floorboards oriented front-to-back for texture and depth, and coated them in an eco-friendly hemp seed oil with a matte finish. For the island, we chose Cambria Quartz in the creamy, nature-inspired pattern Brittanicca Warm, also in a matte finish.
In order to tie the two contrasting surfaces together, we used another Brittanicca Warm slab for the backsplash.
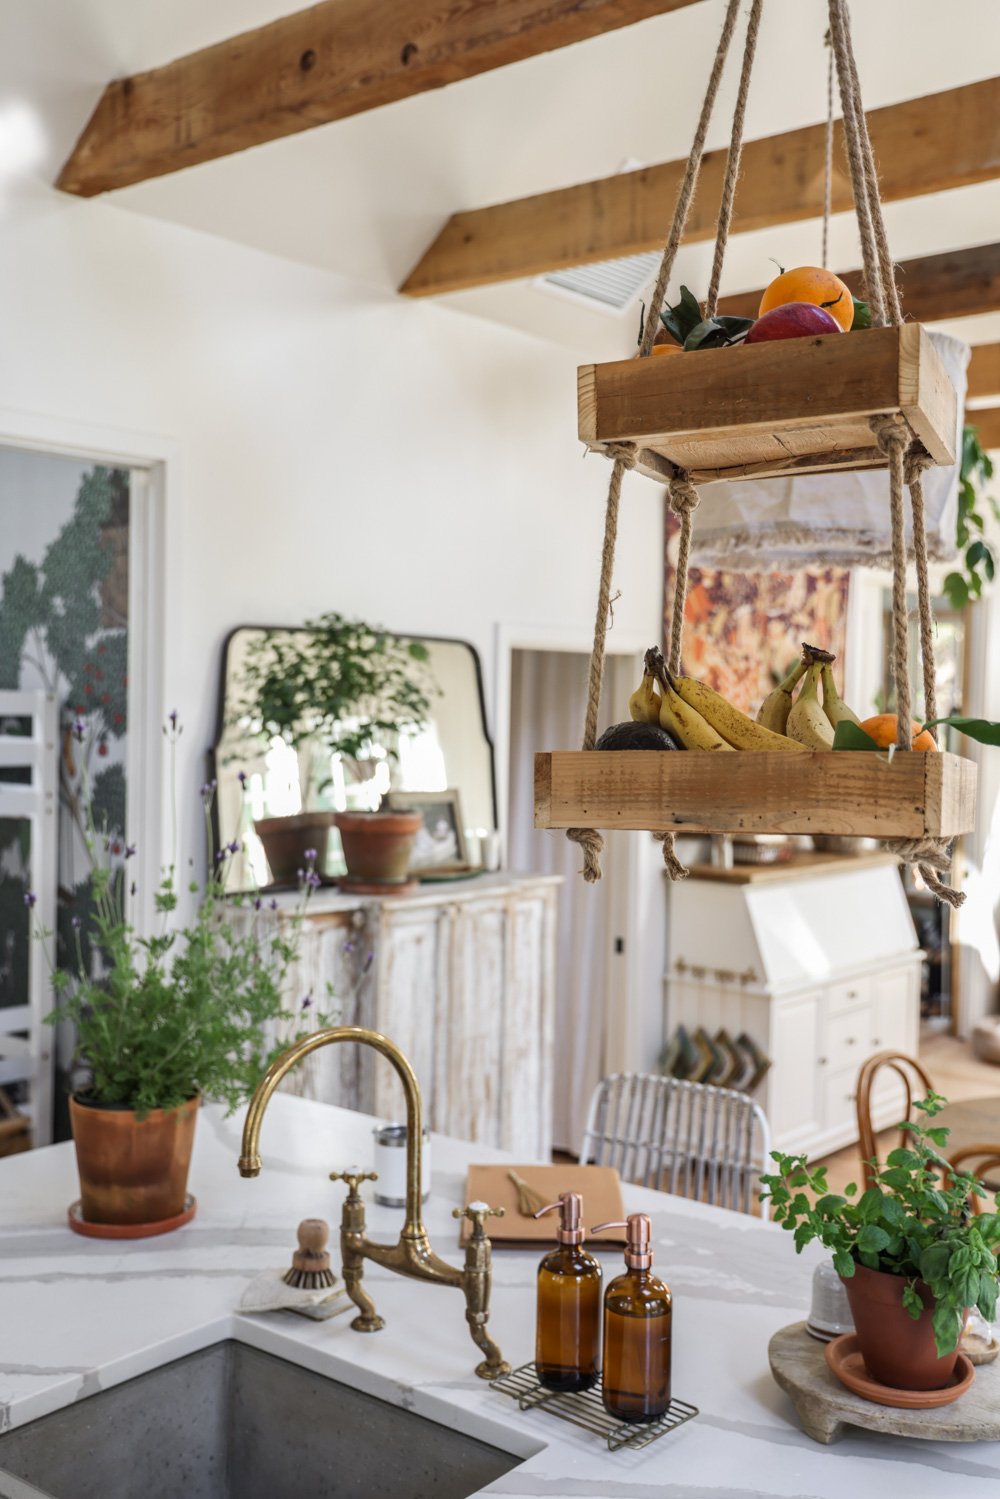
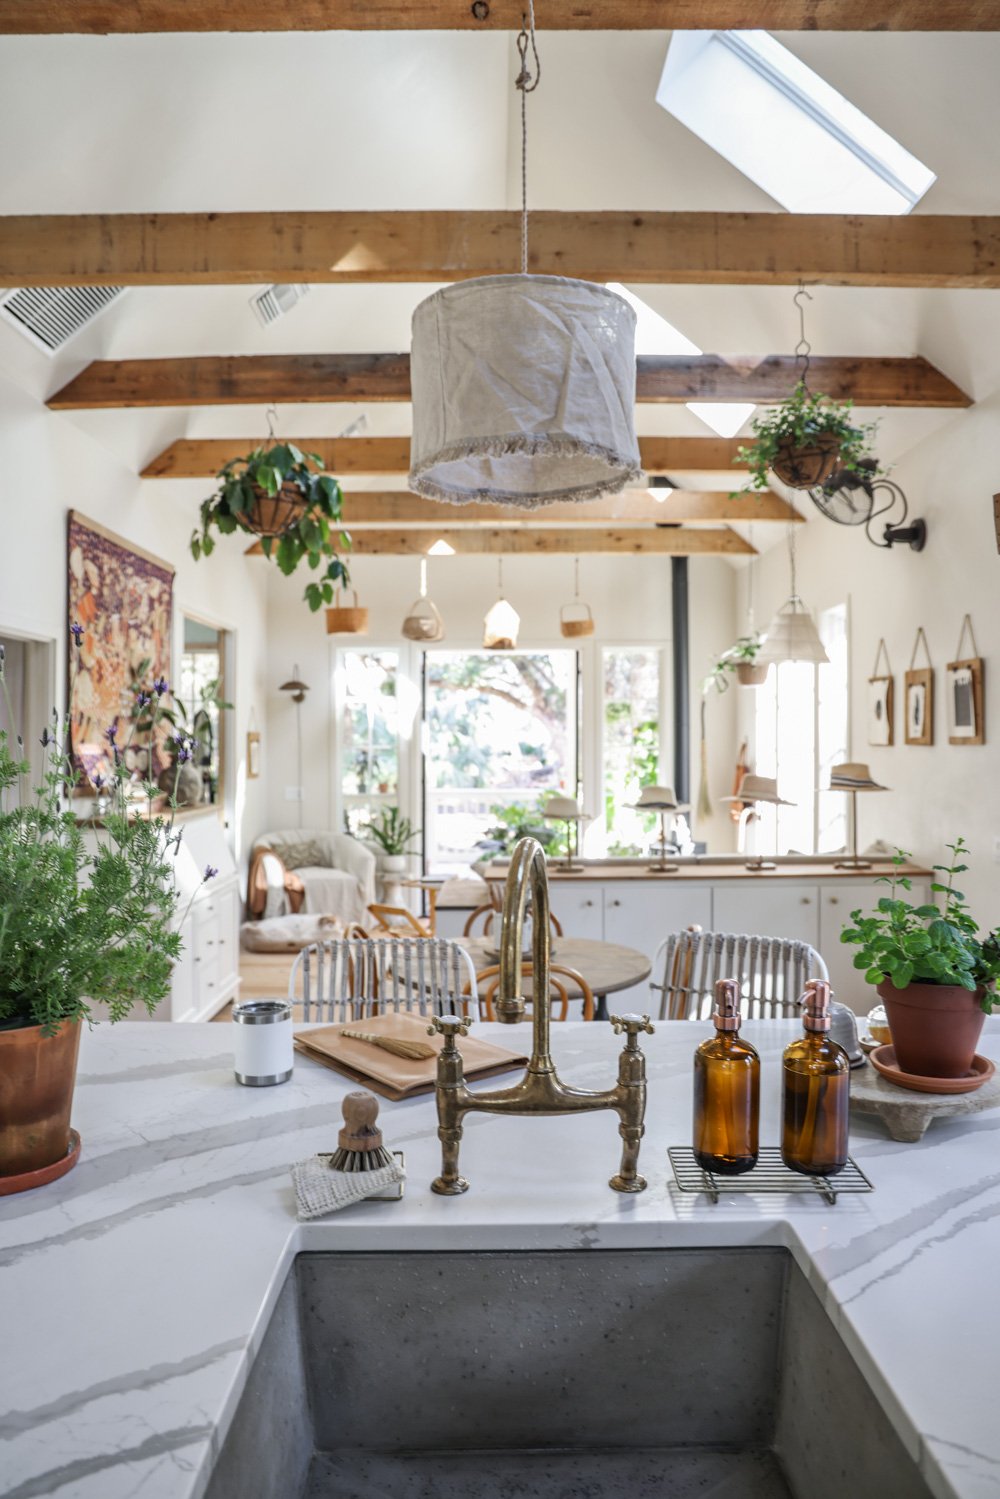
I appreciate how bright and clean the island looks, and that it bounces the sunlight from the abundant skylights and windows to help maximize the look and feel of the room without casting a reflective glare. Thanks to the streamlined island surface and backsplash, we are able to layer our everyday functional decor out in the open without the kitchen appearing cluttered or crowded.

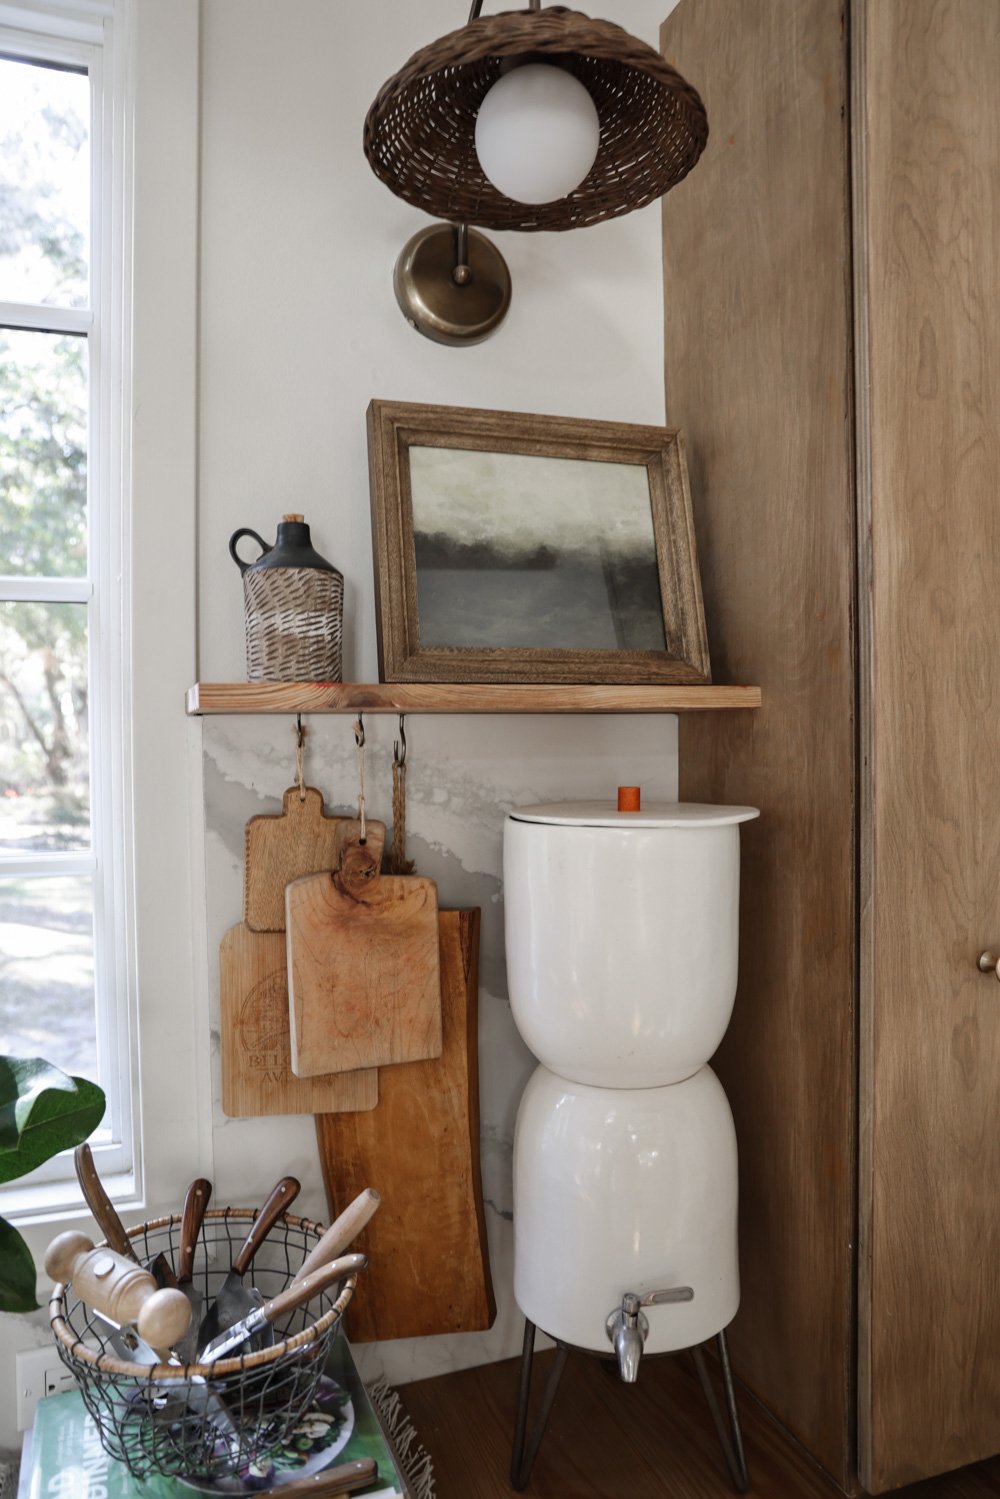
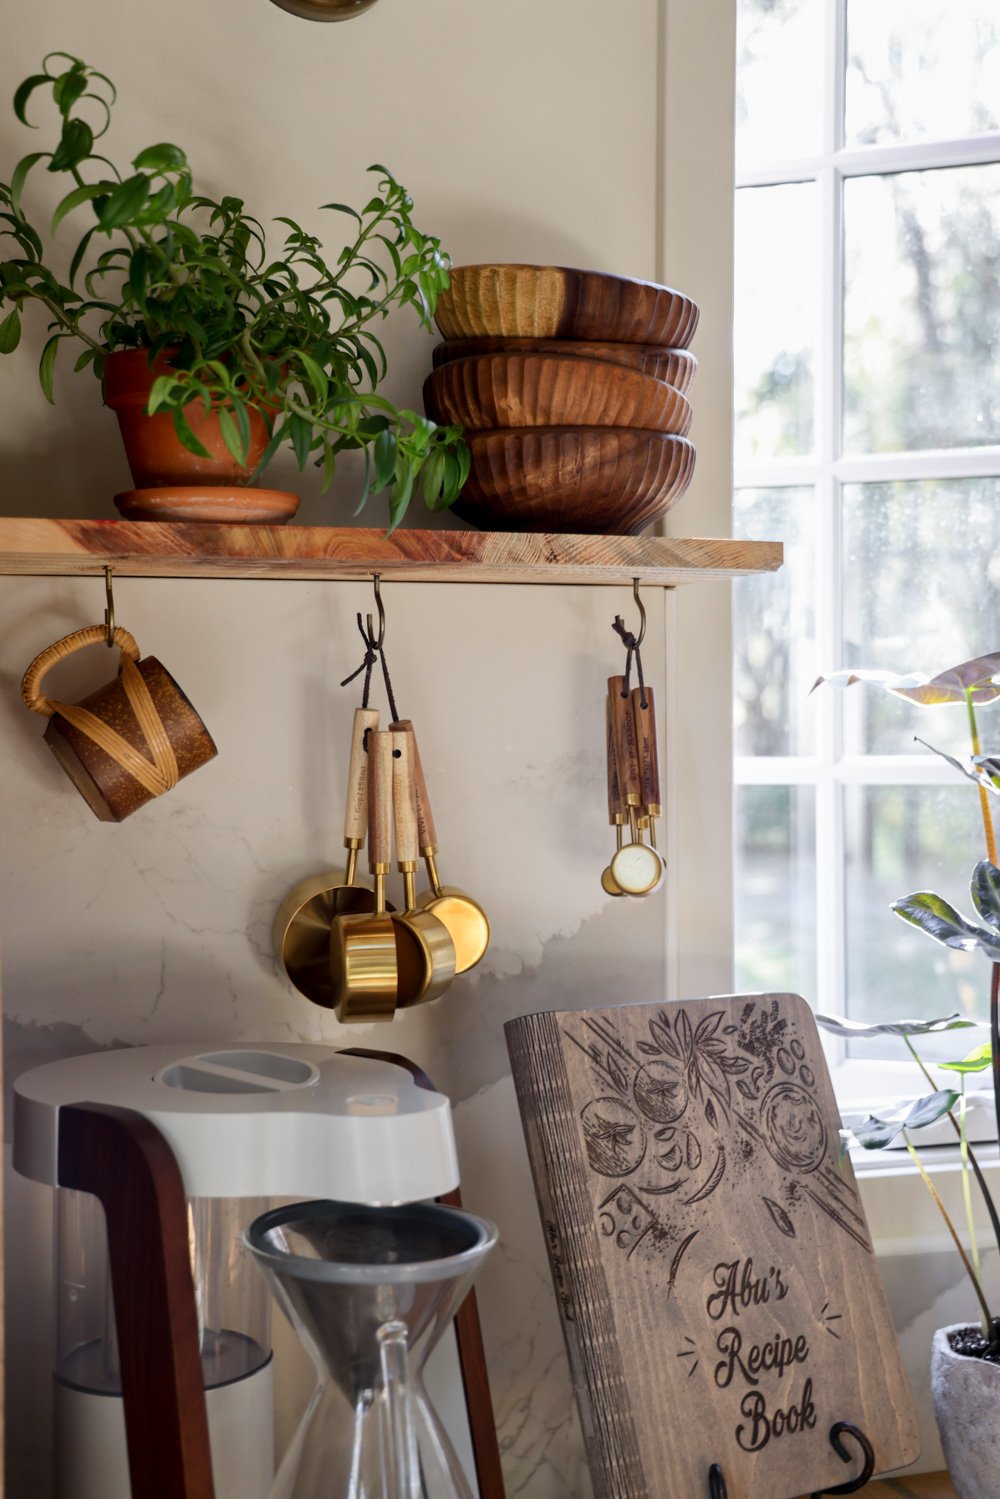
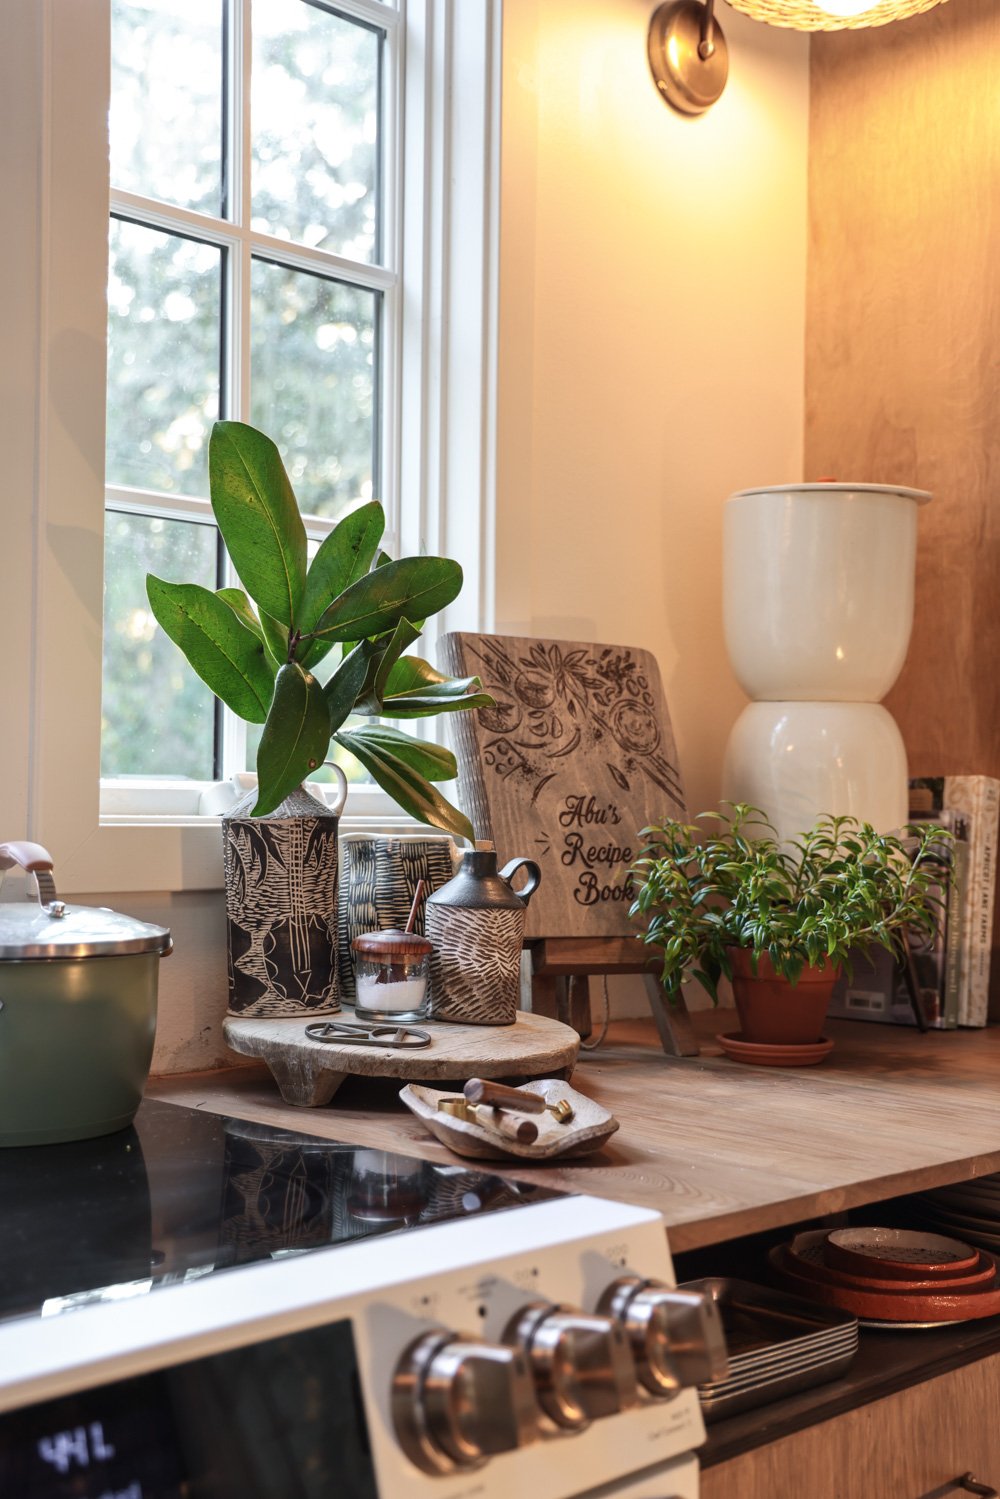
We’ve saved a tremendous amount of drawer and cabinet space by suspending several other essentials from the overhead beams, and from the undersides of two little floating shelves (also made of floorboard scraps).
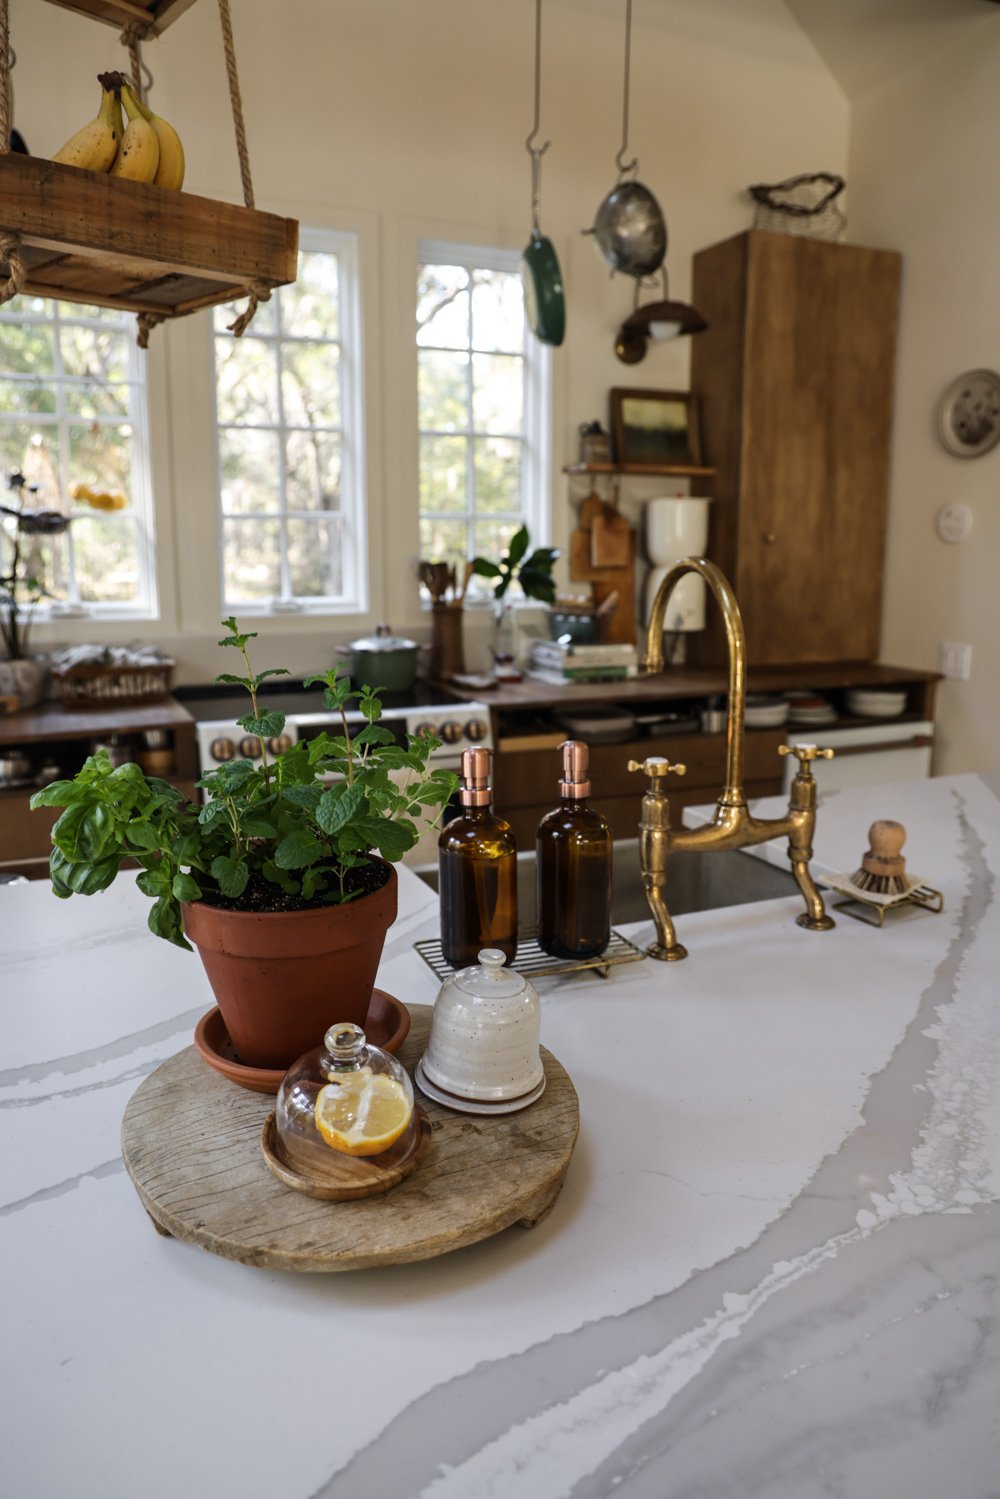
Pots, measuring tools, mugs, linens, fruit, and more are all within arm’s reach, without consuming valuable counter space.
Read more about our kitchen design via a slightly older post here.
Uniting the Design of the Kitchen and Bathroom
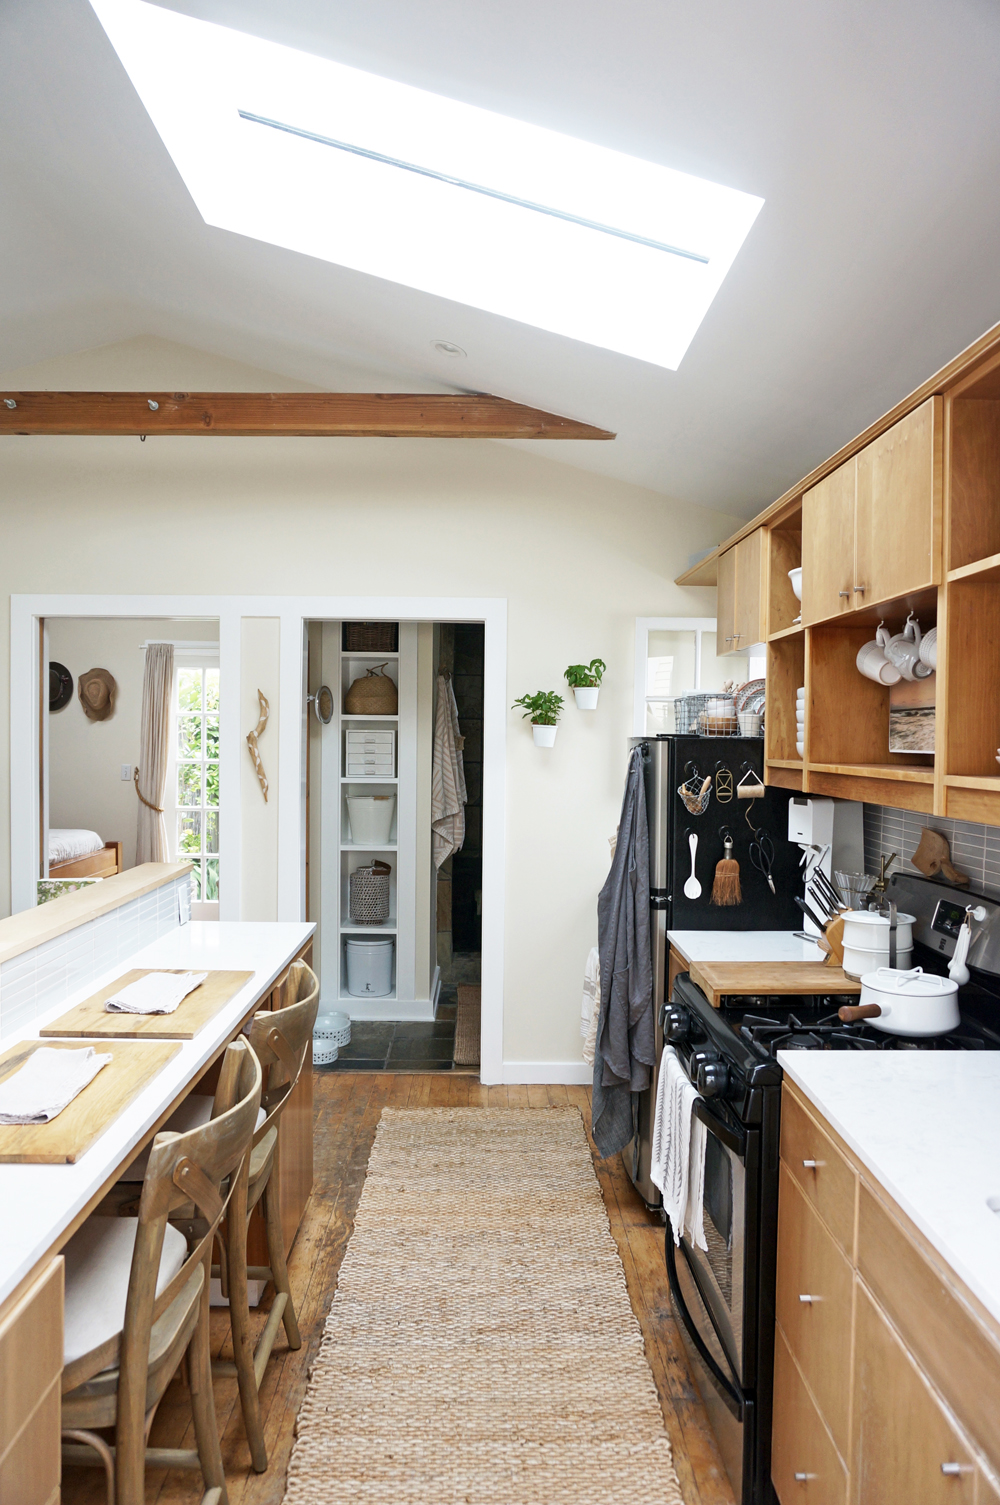
We used the same French floor stones in the kitchen as we did in our compact bathroom / laundry room.
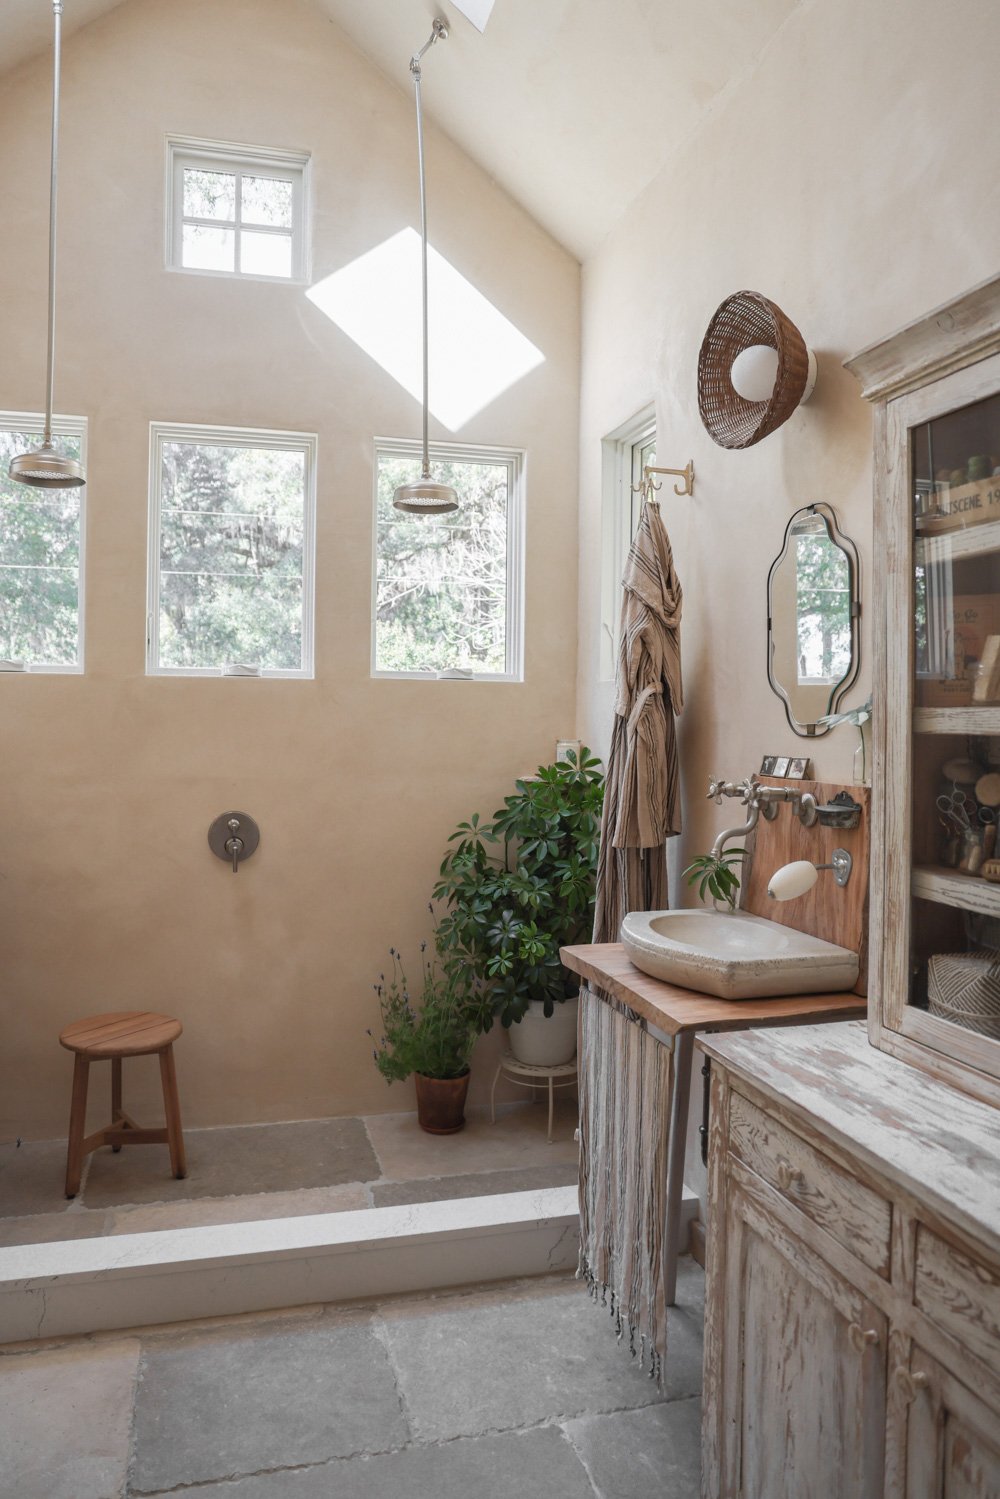
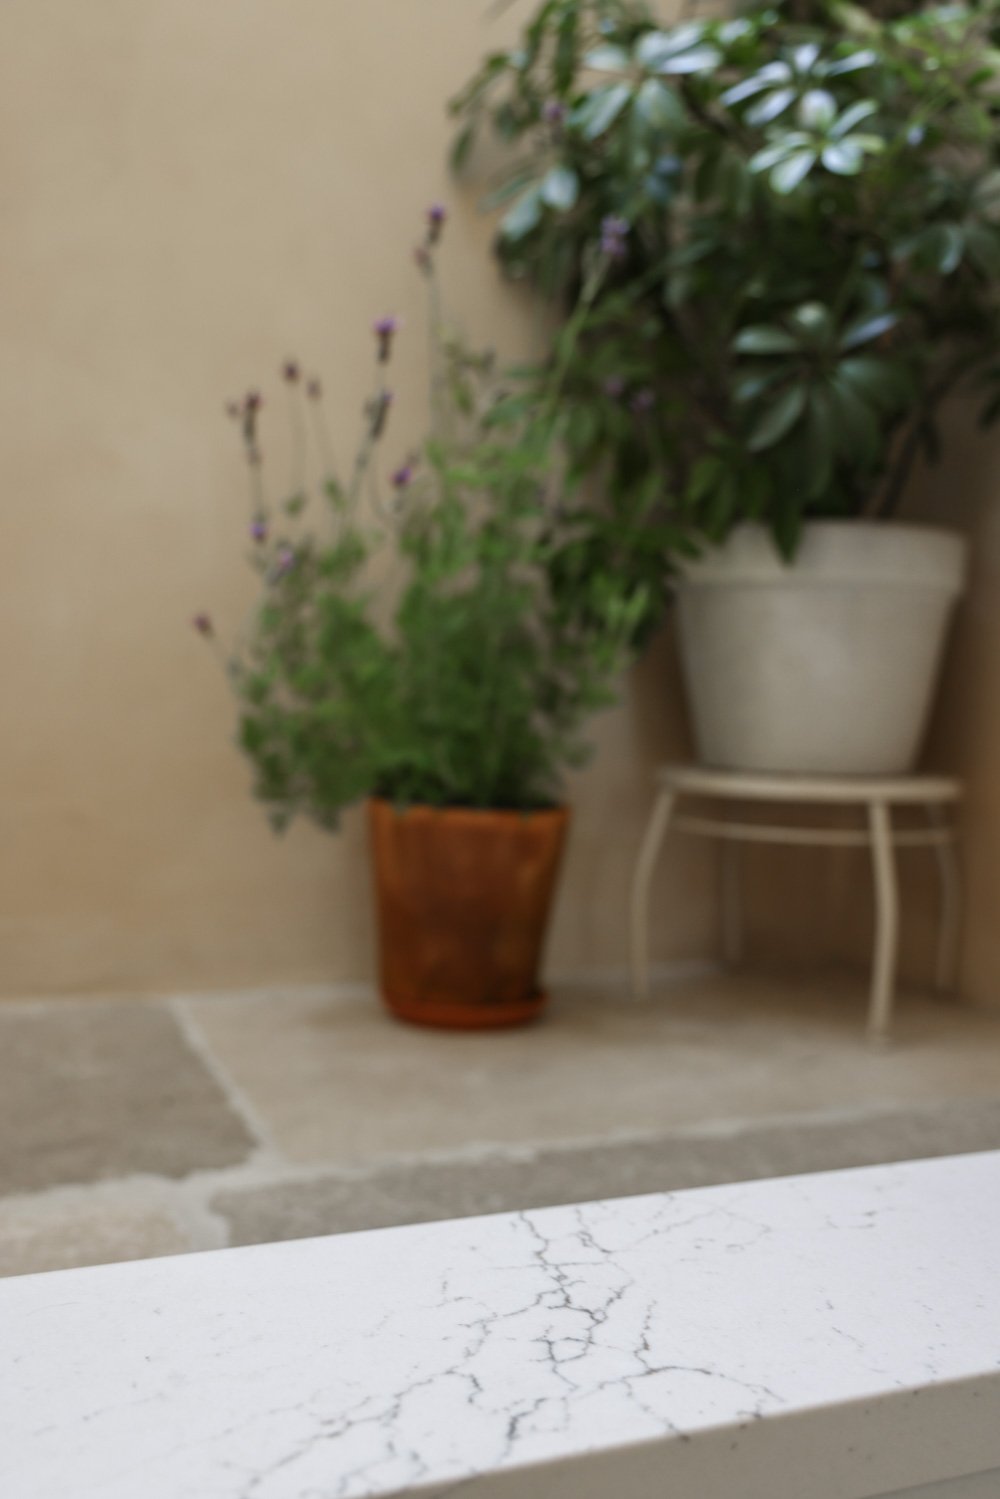
In order to further unite the spaces, we selected another creamy-hued quartz pattern from Cambria for the shower curb in our new bathroom / laundry room.
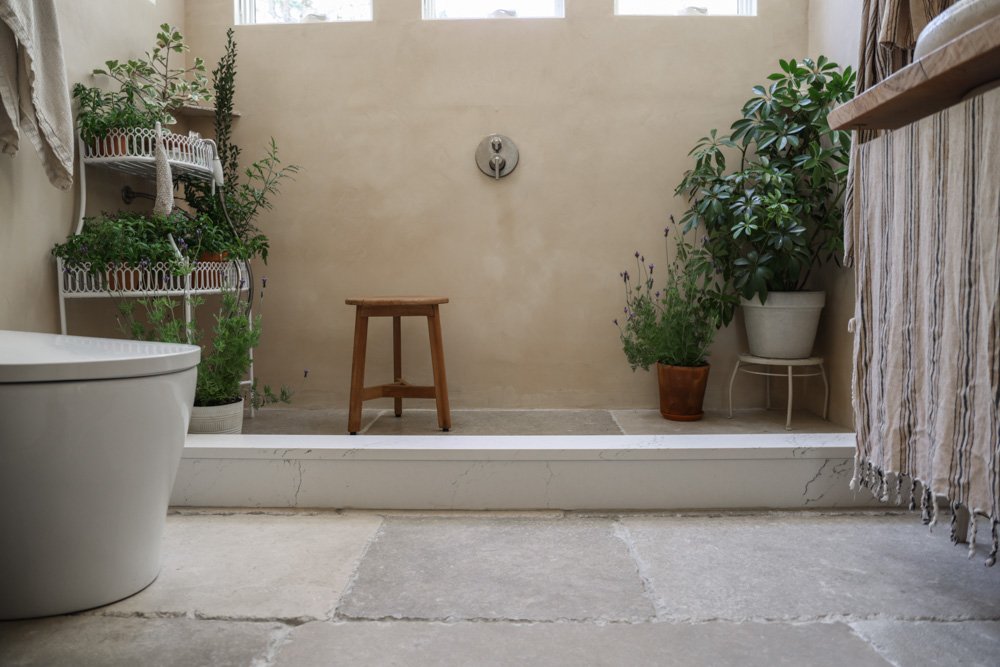
For the curb, we used Colton, which is a warm white with loose and sandy veining that echoes the sand-infused soil of this region.
We are so pleased with how both spaces turned out, both in terms of functionality and appearance. And I delight in the fact that while both spaces are distinct in their own styles, they’re also joined by carefully selected materials and themes that create a cohesive look and story within our little home.

Thank you to Cambria for providing the cottage with the aforementioned quartz. All photos, opinions, and product selections are my own.

Extra Tall Kitchen Counters
Note: The kitchen is still a work in progress, as we await the arrival of our backsplash, shelves, and permanent island countertop.
Our family is tall. I am nearly 6’, Adam is 6’2”, and my father is 6’4”. Since we designed this new cottage from scratch, higher-than-usual surfaces were an option, and became one of the top essentials on our wish list.

(We didn’t overlook the kiddos when deciding this— see one example of our space-savvy features for them here.)

After years spent hunched over lower surfaces, this design feature has been beneficial for our bodies and our workflow.

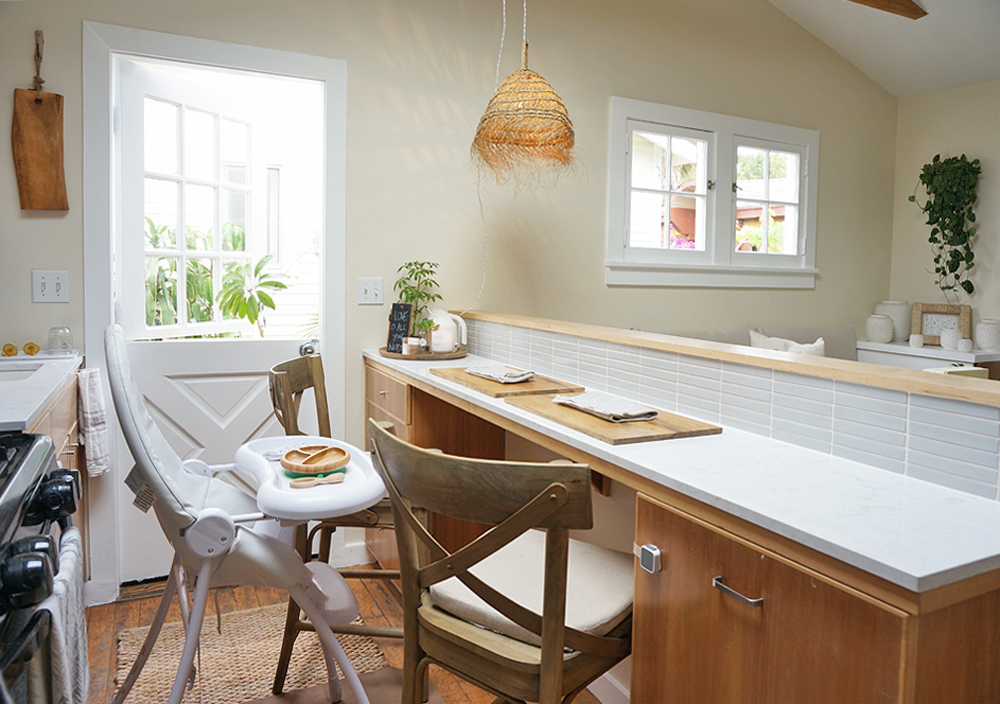
In the kitchen, we designed surfaces that sit at 40.5” high. This meant that we had some atypical space to play with in the lower cabinet area, and that we’d have to get a bit creative when designing around standard appliances.

To start, we have a slightly heightened toe-kick area. I know that zero-recess toe-kicks with seamless plaster frames or flush, decorative trim are in style, but with taller folks come bigger slippers, and we find the carveouts to be practical for our home and bodies.
But the real height is added through the addition of 4” high peek-a-boo storage nestled between the tops of the major appliances and beneath the countertop on the back wall.

On the island, we heightened everything with the help of a pull-out drying surface above the customizable Café Appliances dishwasher, and utility drawer over the appliance-sized pull out rubbish + recycling + compost drawer.
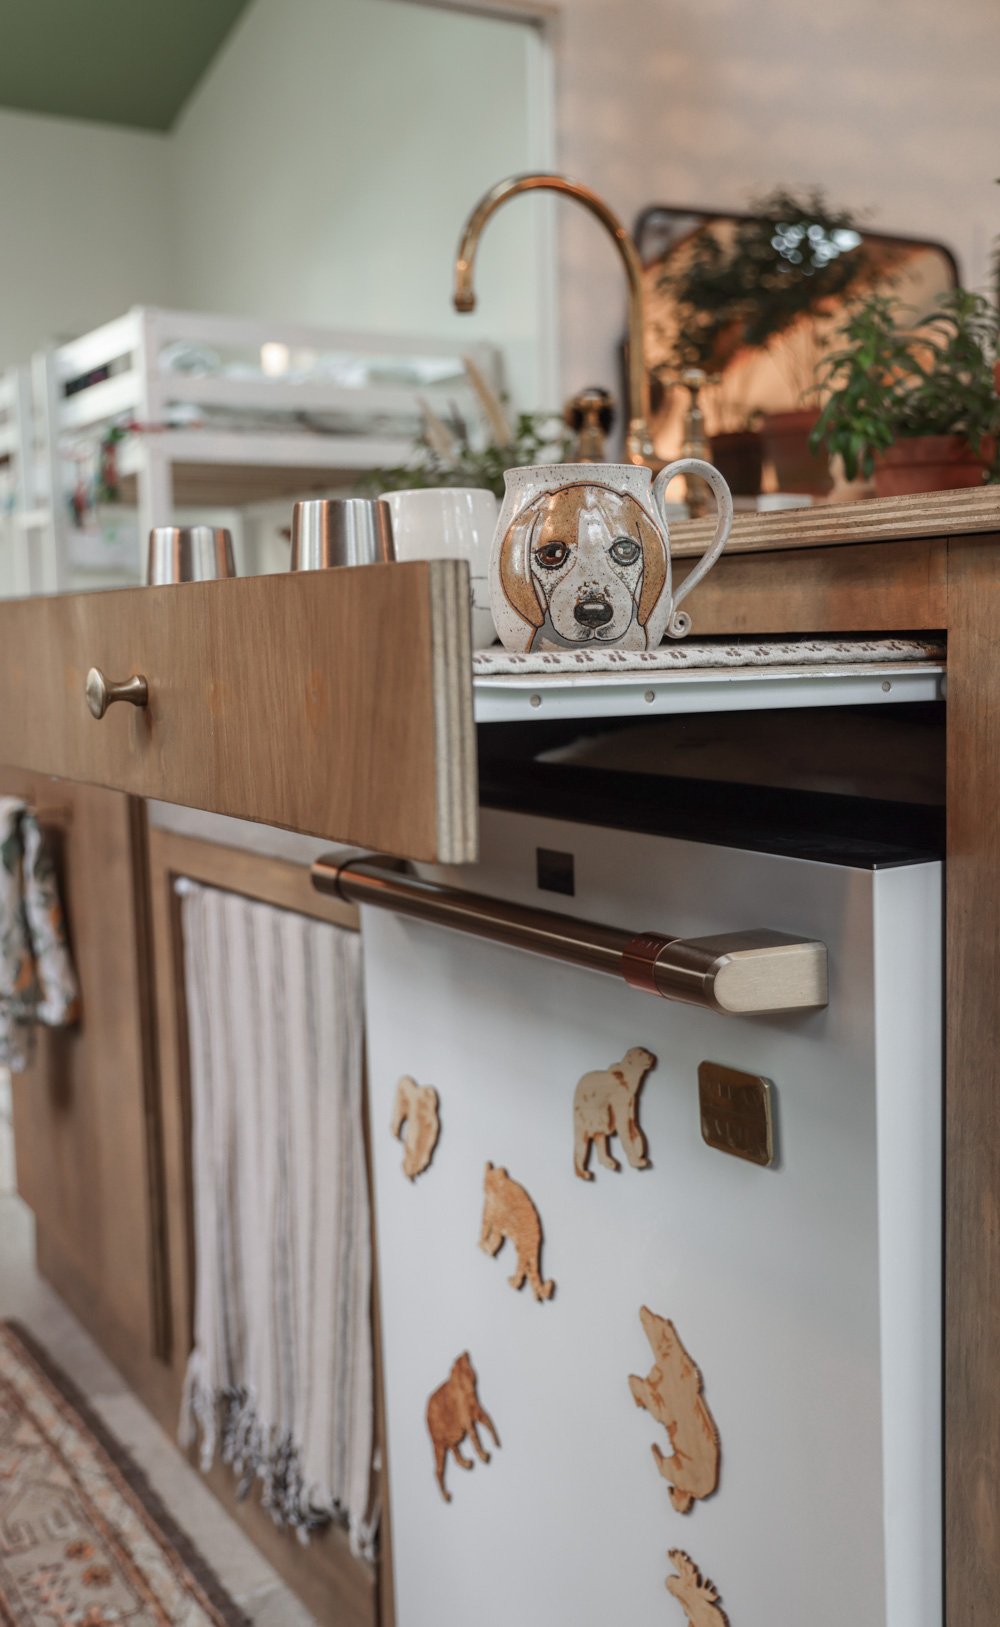


In a compact kitchen (particularly one with kids!), the under-counter storage space has been immensely useful already. Plates, a child-size silverware organizer, bowls, and cutting boards easily slide in and out of the cubby.

And since the recessed space extends to all the way to the back of the kitchen wall, there are even more storage opportunities behind the often-used items, proving concealed homes for items like spare glass bottles, carbonator cartridges, serving platters and more.

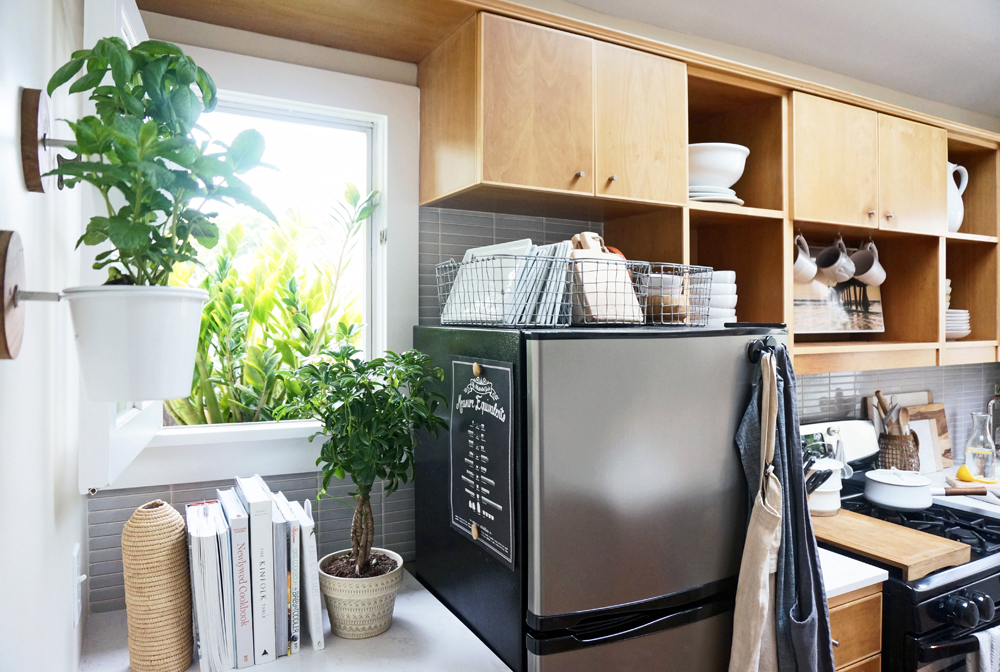
One of the key design elements that allowed us to make this unique storage option so spacious (the only interruption from wall to wall is the range,) was the inclusion of two sub-counter refrigerators, rather than one wide/tall model. A panel-ready fridge was an option we considered, but we preferred to maximize the upper cabinets, using them to hold dry goods, small appliances, and glassware.

The two customizable Café Appliances , drawer-style refrigerators hold everything we need within reach of the kids, and allow us to retrieve food and drink with ease. Each fridge has 2 spacious drawers, and built-in adjustable organization accessories.

(We don’t have a freezer, as we almost never use one and didn’t want to waste the space. Plus we do have access to a freezer in the grandparents’ house next door if need be.)

The beautiful, customizable Café Appliances range sits on a platform that blends with the toe-kick. We could’ve turned that lower support into a drawer, but for optimal safety and support we left it as-is.
Once the backsplash, wall storage and kitchen island are installed we’ll do am updated post and full tour!
Sources of note:
Nontoxic wood stain and sealer: Rove & Dwell
River-recovered pine floorboard back countertops: Goodwin Heartpine
Knobs & pulls, clean / dirty magnet: Connected Goods
Mugs + drying mats + animal magnets + custom sink: Etsy
Pots & pans: Caraway
Coffee maker: Ratio
Water filter: Walter Filter Ceramics

Note: Café Appliances generously gifted our range, refrigerators and dishwasher, which we appreciated hugely — particularly because we decided to leave the major appliances we’d secured for our Venice Canal Cottage there for the next stewards of that space. Product selection and opinions are entirely my own.

The Mini-Kitchen's Mini-Makeover
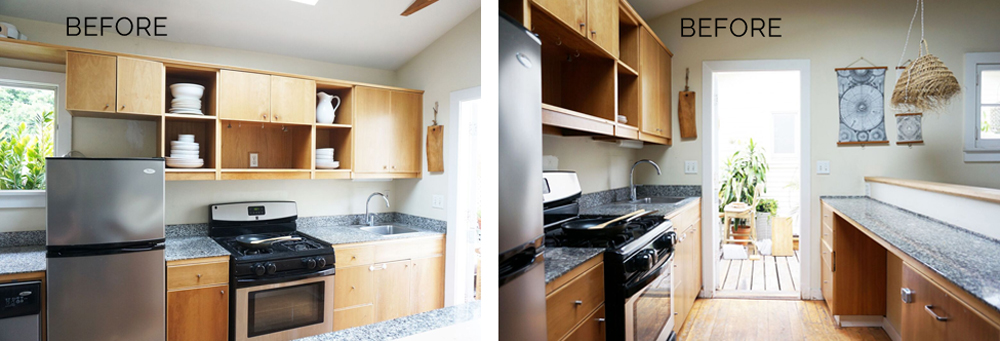
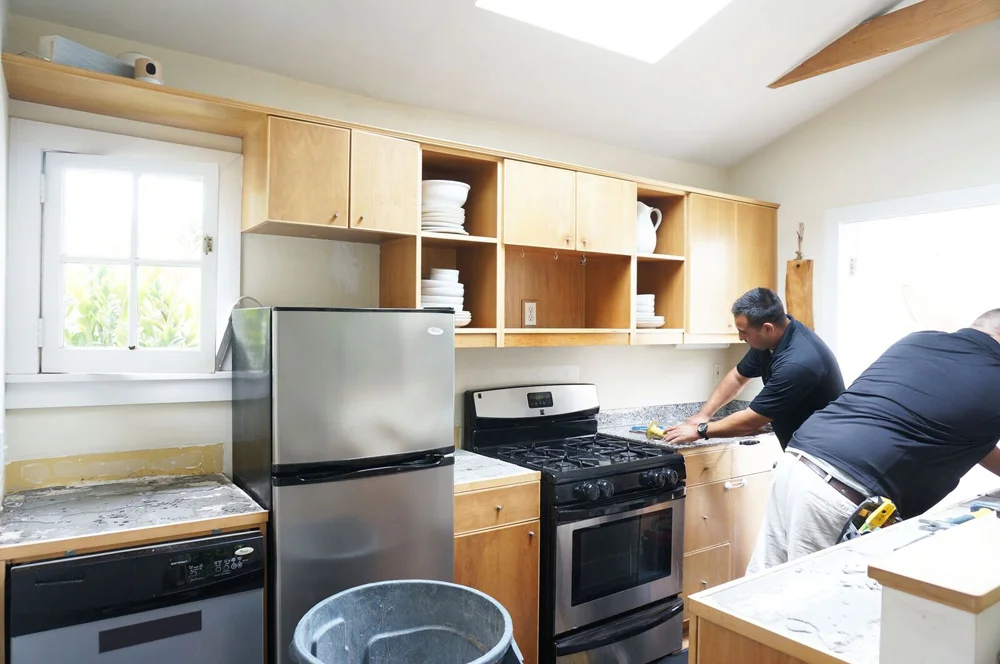
Our little kitchen is adorable, but has needed a makeover for YEARS. The countertops were thin slabs of black, white and grey speckled granite, the backsplash was unfinished, and the walls were patched with paint in mismatching levels of gloss. Seeing as how the Cottage is a major part of our lives and business, why on Earth would I wait so long?
Here's the thing about renovations in a tiny home: you can't just relocate to another part of the house while work is being done. In a small place, there's no where to go to escape the fumes and dust. Add a home-based business, kids, and pets to the mix and there never, ever seems to be a good time to tackle any larger-scale updates and repairs. So I just kept putting it off... and years passed, as they do.
But since West is eating solid foods, we're finding ourselves spending more and more time in the kitchen together... and I started getting actively annoyed by the countertops. I could never see if they were actually clean, and I felt like they were making the space feel darker, smaller and more cramped than it actually is. As I paid more attention to the counters, the conditions of the sink, faucet, and walls all started to stab at my eyeballs, too. I knew I couldn't put it off any longer. Our neighbor agreed to let us stay at his place for 2 days while he was out of town, so we pounced on the opporunity and started planning.
Rather than exploring other kitchens online for inspiration, I pulled materials, textures and colors that inspired me. Then I decided what parts of the kitchen needed immediate attention, as we were operating under a tight timeline, and within a strict budget. Adam and I agreed that the cabinetry and appliances could wait, and that we'd focus instead on the countertops, paint, repairs, backsplash/tiling, and sink.
I was craving bright countertops, but I also wanted something with slight texture. Nothing overly marble-y, nothing speckled, and nothing too heavy in appearance. While thick countertops are lovely and certainly on-trend, we wanted something in between-- not too thin, but not so chunky that they looked out of place in our tiny kitchen. And in order to help increase the light and visual space within the room, we wanted something slightly reflective. We found the PERFECT answer to all of these requirements via Cambria's Torquay countertops. I love the characteristics of Torquay-- it's like sand and marble made a baby together:

The planning / measuring, removal of the old counters, and the installation of the new tops were a breeze. Both visits combined took under 4 hours. I can't believe I waited 6+ years for this update. It's made a HUGE difference in our home, and we LOVE it.
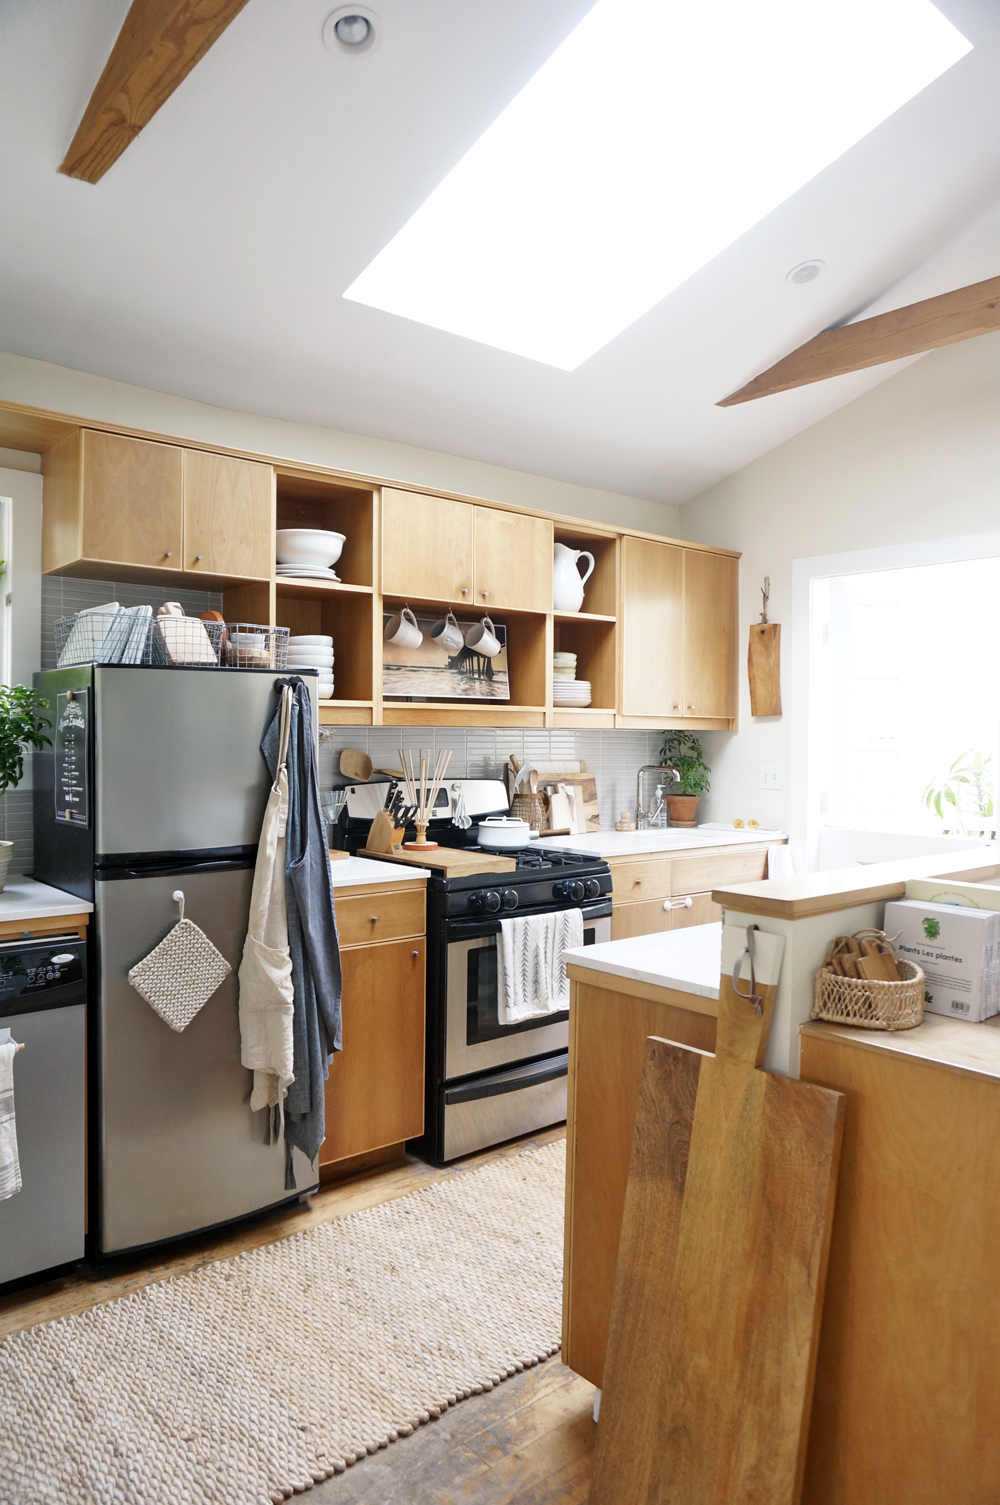

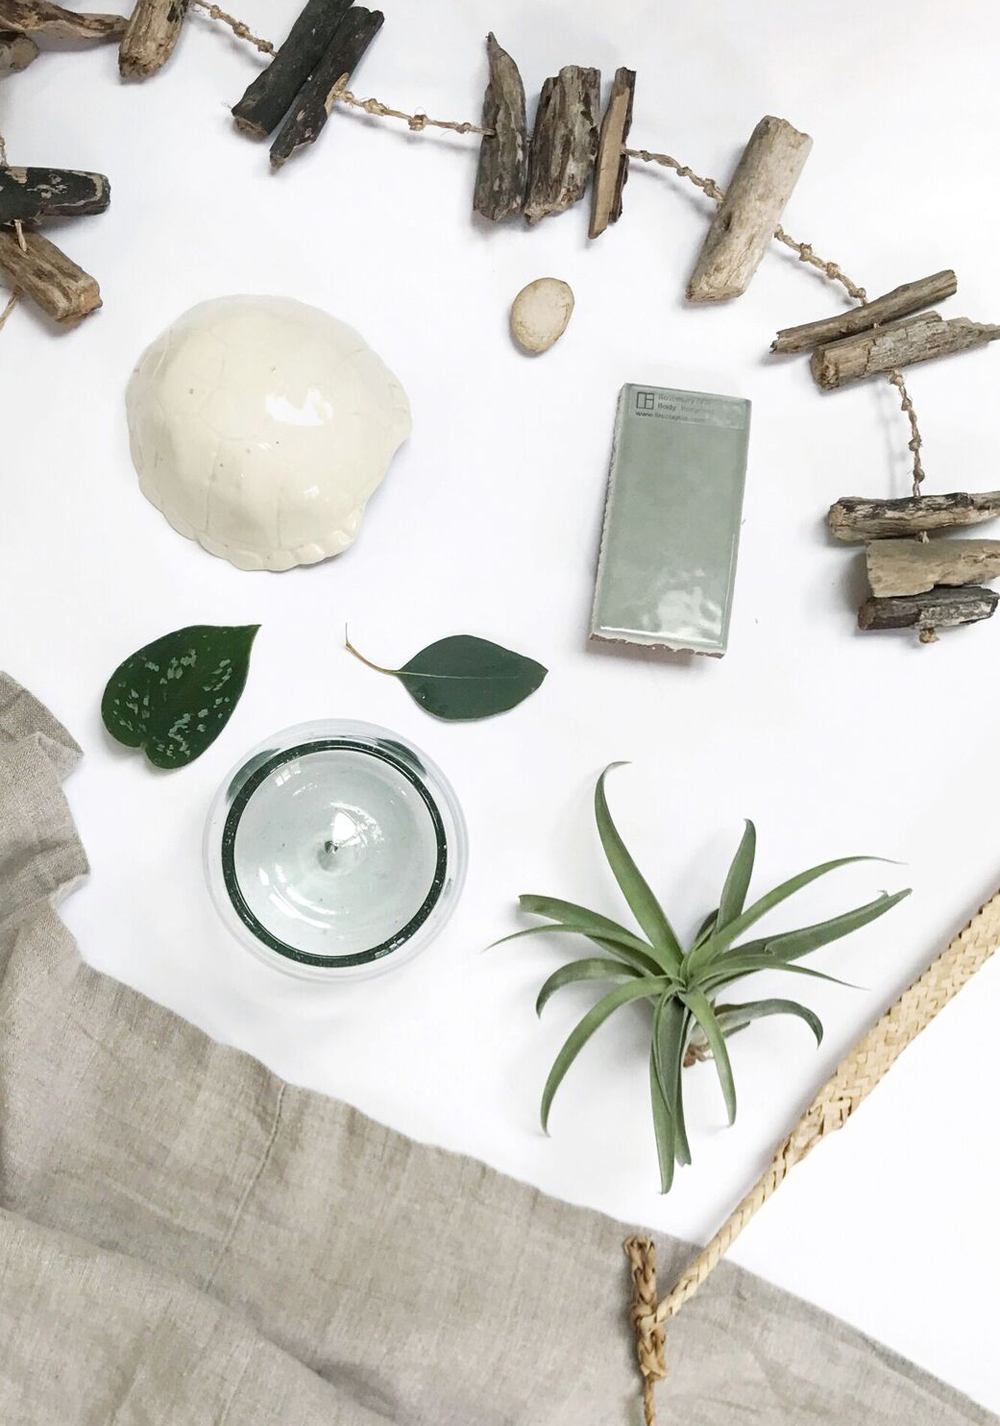
Next up was the tile for the kitchen and breakfast bar counter backsplash. I knew I wanted Fireclay. I think their handmade tiles are just so gorgeous. I initially wanted to use their Picket shape, as it mirrors the fence supporting the grapevines outside. I'd also planned to go with Rosemary, which is a muted yet distinct shade of green.
At this point, I called my incredibly talented friend, former neighbor and tiny house expert Kim Lewis for her input. While I consult on tiny home decor every day, I find that it's handy to get an outside opinion when working on the Cottage, specifically. It helps me get out of my bubble and see things differently. And Kim is the best. She knows me. She knows tiny homes. And she knows design. Kim and I decided that the Picket shape was wonderful, but just too large for this project. But neither one of us wanted a particularly modern shape, and we wanted to steer clear of subway tiling. We opted instead for a 1/6 cut. It's tiny, like our home, and rectangular like all of the built-ins and shapes throughout the house. We also updated our color selection, picking French Linen, which is a light shade of pale grey with a beige undertone. It's a perfect balance between cool and warm notes, and has a semi-reflective sheen to bounce light around our small space:


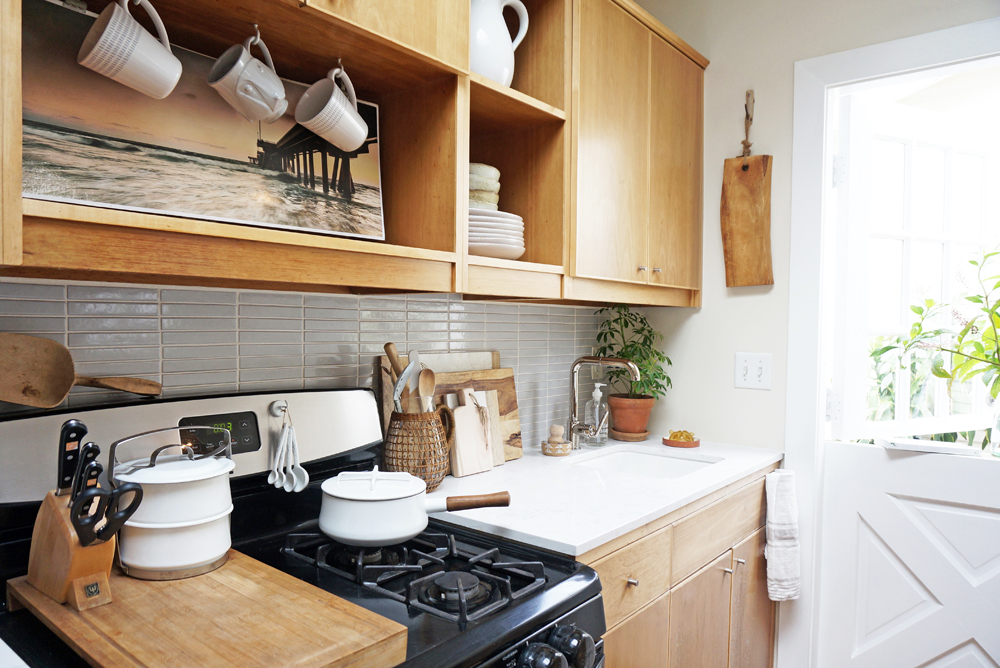
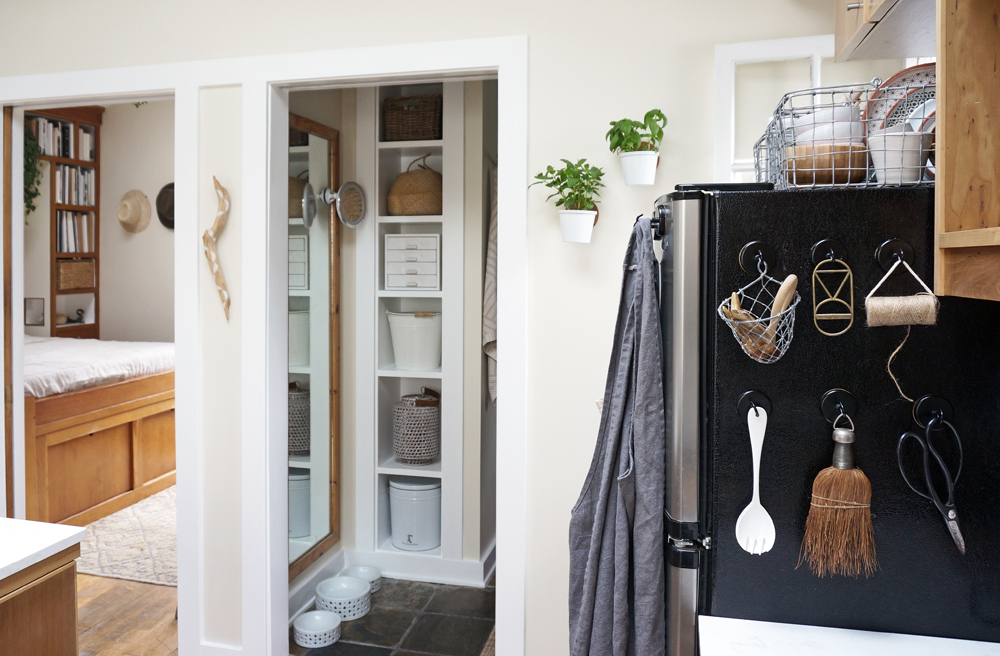
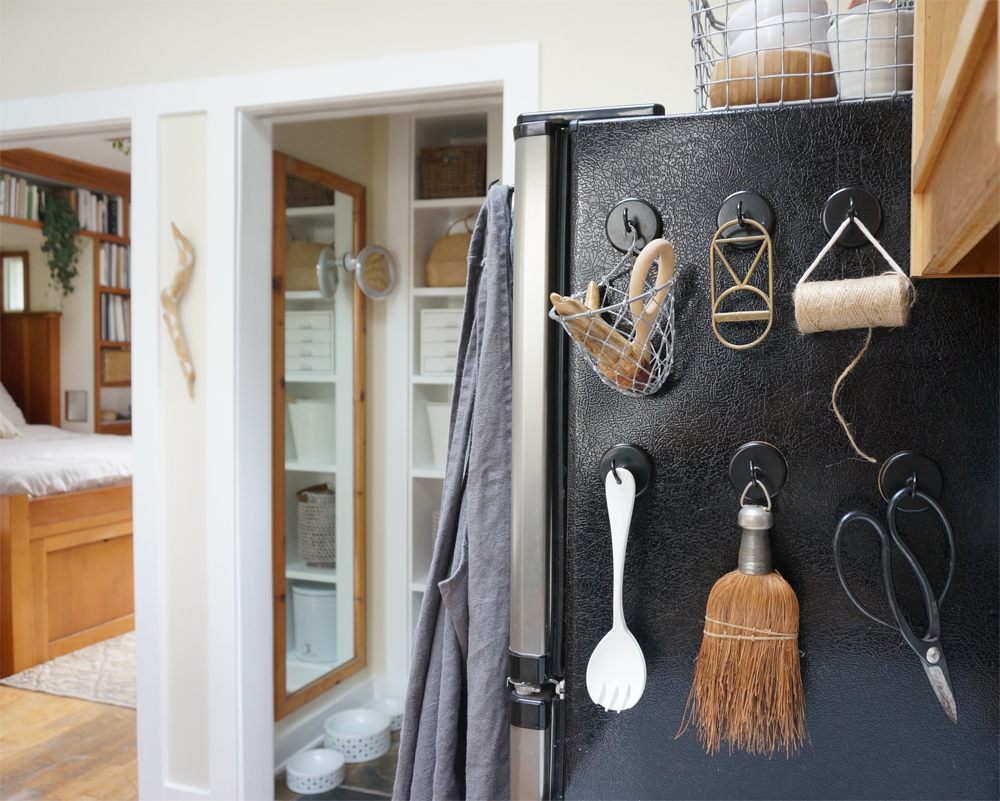
We used to hang smaller kitchen tools and accessories from the backsplash walls, since there was nothing there before. Now, with the tile in place, we moved the accessories to magnetic hooks on the refrigerator, which work just as well, and make the space look more organized and simplified.
With the new backsplash tile and countertops, it seemed silly to leave our cheap old sink and faucet in place. We upgraded to a white undermount Kohler, measuring about 17x18". (We installed it sideways to provide us with wider access, and more counter space for the faucet and soaps. We installed a small Purist pull-out spout faucet in vibrant polished nickel. It measures under a foot tall, so it fits well in our compact kitchen.

The final step was to repaint the kitchen, and repair various damage to the walls that built up over the years. We figured that it was time to repaint the entire interior of the cottage-- including the ceilings. We moved most of our items to the laundry shed and garden for 2 days and nights while the painting was underway. (Luckily the LA weather had our backs, and nothing was damaged in the process.)

We adjusted our wall color ever-so-slightly, and picked a slightly warmer, earthier hue than the previous yellow-tinted version. We used "Muscat Blanc" Everest paint by Dunn Edwards. We selected the Velvet finish, which is easier to clean than Flat-- an essential, given the baby and the pups. We used Flat White on the ceilings, and Semi-Gloss White for the moldings.
We are so happy with our tiny kitchen's new appearance. I'm looking forward to sitting here with my little family for years to come.