
Low Waste & Limited Budget: Upcycled, Removable Kitchen Counter Skirt
Low Waste & Limited Budget Home Decor Project: Upcycled & Removable Kitchen Counter Skirt
I find such joy in making adjustments within our little home (which is also my full-time office) in order to creatively improve our household’s day-to-day routines. But I have zero interest in wasting material resources, spending money or acquiring new items in order to switch things up. Instead, I strive to find ways to work with what we’ve got to make impactful changes. These little endeavors usually involve a bit of repair, customizing, crafting, and/or trial and error. Sometimes things play out perfectly. Other times the project ends up a complete disaster. But either way I delight in trying.

Recently, while shuffling things around the house, we stored some extra produce and cooking ingredients, emergency storm supplies and library books in the built-in cubbies of our kitchen island. I found myself visually overwhelmed by everything, which can happen easily in a smaller space with an open layout. I wished I could conceal the cubbies when desired without making any permanent changes and without buying new goods. Usually I quite like the cubbies, and they’re certainly highly functional. I’m glad they’re there, and that we didn’t opt for cabinets instead, as I appreciate the character and depth the cubbies offer. But every now and then — particularly when I’m working on creative projects for others — my mind and eyes need a reset, or at least a calmer canvas of sorts.

A counter skirt / kitchen island curtain seemed like a simple solution. And our younger beagle-mix rescue helped me bring the concept to life by digging a hole in the bottom of our flat sheet on our bed, leaving me with a lot of leftover linen fabric to repurpose. (She’s a menace, that dog, but we love her just the same.)

With a few Command hooks and a telescoping sash rod (we have two on-hand here because we find them as ever-useful as tension rods and s-hooks), I was able to swiftly install an imperfect but entirely passable counter skirt. No damage, no waste, no bulk — everything can be removed and reused as desired.

These simple Command hooks are only visible when ducking below the counter.
It’s not fussy or flawless, but it’s perfect for our home, priorities and needs, and that’s what matters to us here.

Items used:
Telescoping Sash Rod
Repurposed Flat Sheet (cut and sewn to specs)

Before & After Video: The Cottage in Spring 2022 + Spring 2023
What a difference a year can make! I’m grateful every day for the roof over our heads, for the clean water that comes from our faucets, and for my family’s health. Our friends at The RightWay Foundation, a non-profit with which we’ve worked for years, are working to ensure others have access to such fundamentals, too. RightWay provides safely-located, well-appointed apartments and shared housing for homeless transition-age youth. They supply the security deposit and subsidize half of each month’s rent for one year, while supporting youth in building financial and emotional stability. Click here to donate (any amount!), and become the support that transition-age foster youth need.

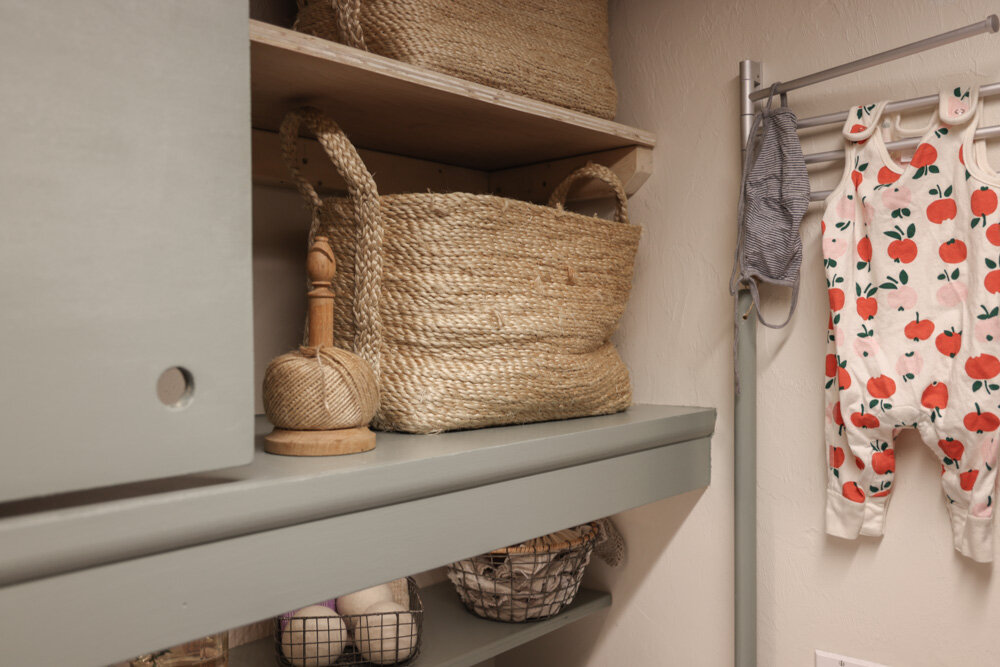
A Compact Thoroughfare Laundry Room Makeover (<$250)
For thirty years, my folks have been meaning to spruce up their tiny, windowless, thoroughfare laundry room. They enter and exit their house through this compact space multiple times per day. Not only has the room been long overrun with household cleaning products and dog gear, but it’s now also packed to the gills with all the typical COVID-era necessities as well.
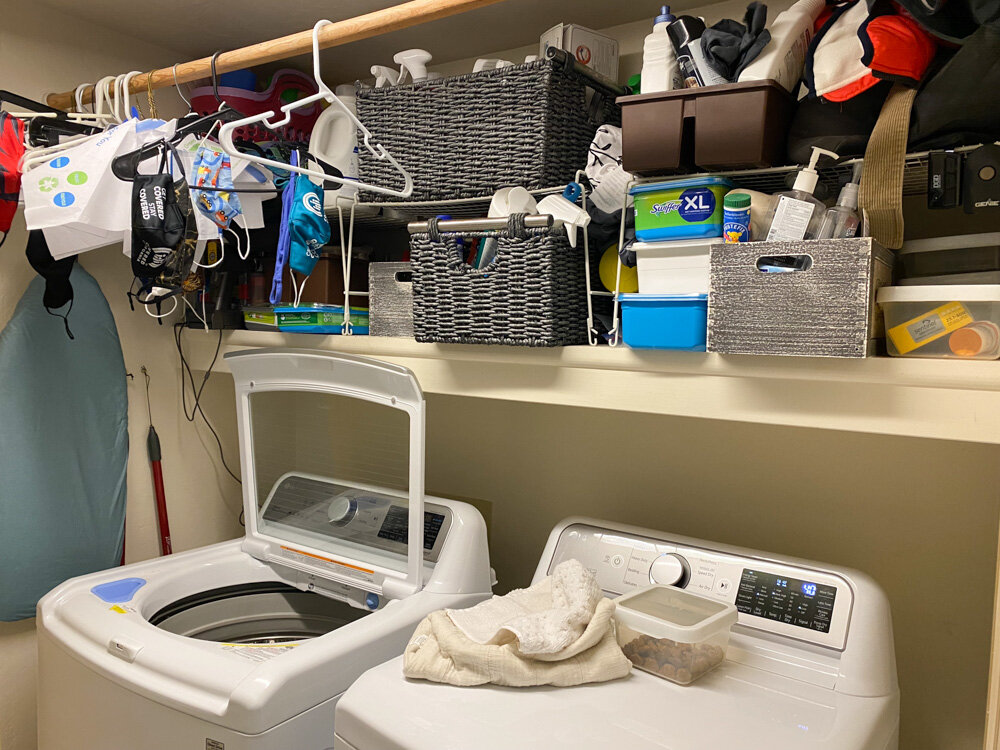
The main issue with this hallway / muck room / laundry bay isn’t its size. It’s that the overflowing supplies are on full display when the interior door to the room is ajar, which it usually is since for one reason or another.
Upon returning from France, I decided it was time to finally tackle this mini-makeover, and make it an area that my parents could keep as-is once completed, or upgrade guilt-free in the years to come. As with most of my projects of this nature, I wanted to work with that we already had on-hand to minimize waste. And since we have large projects underway (such as the restoration of the farmhouse roof and the building of the prairie ADU), I wanted to keep the updates under my budget of $250.
Our modifications were minimal but impactful:
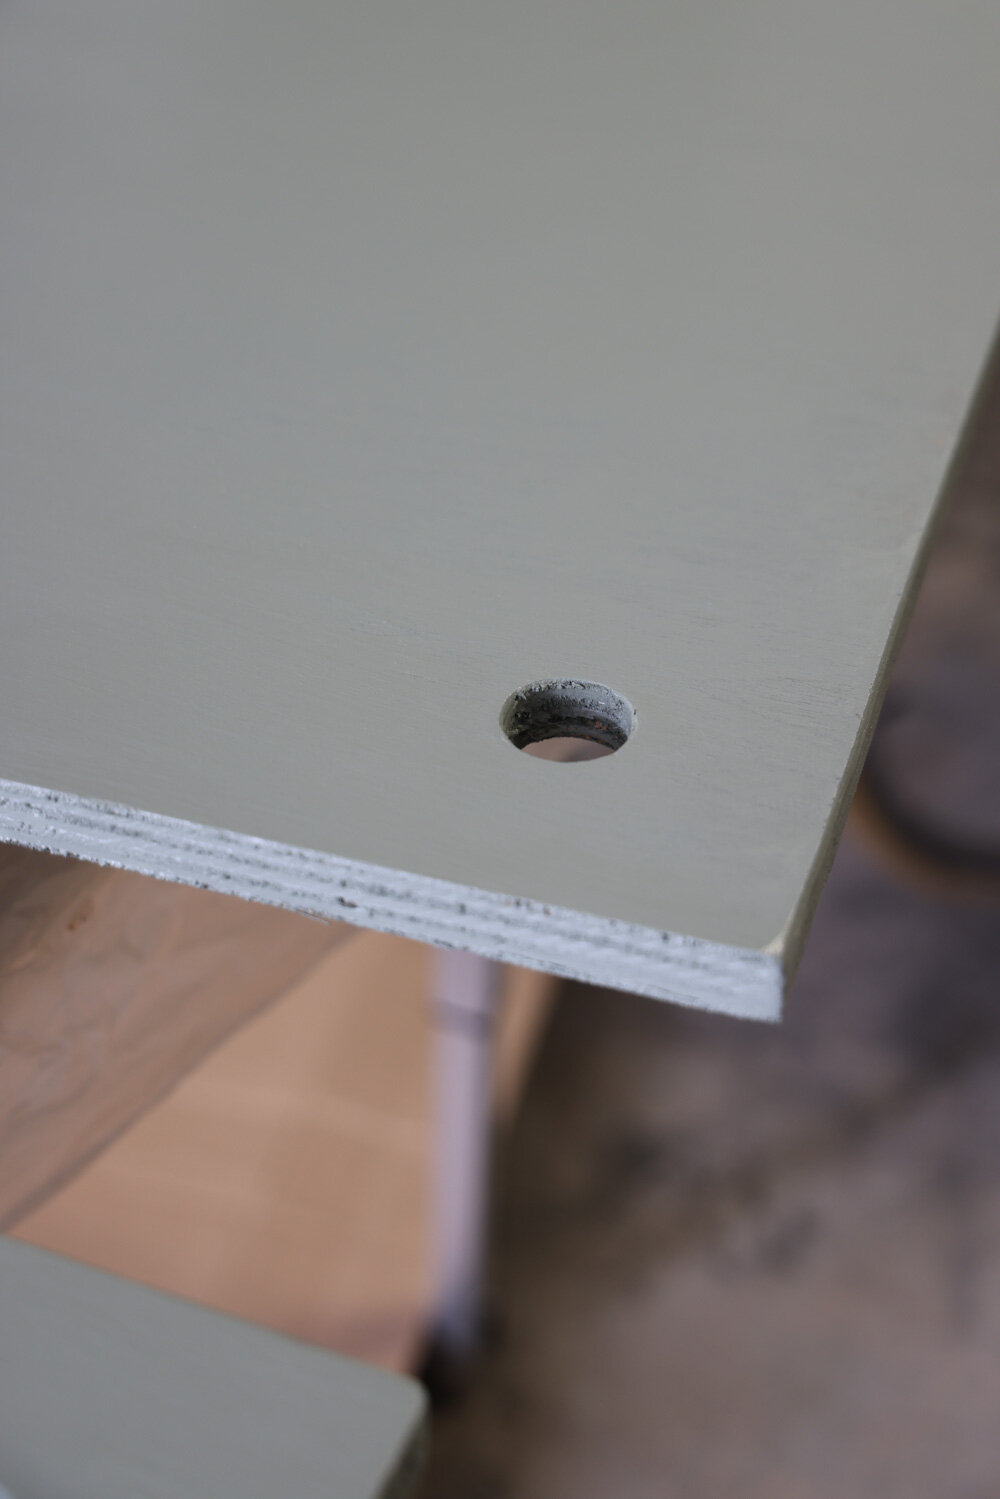
Shelving
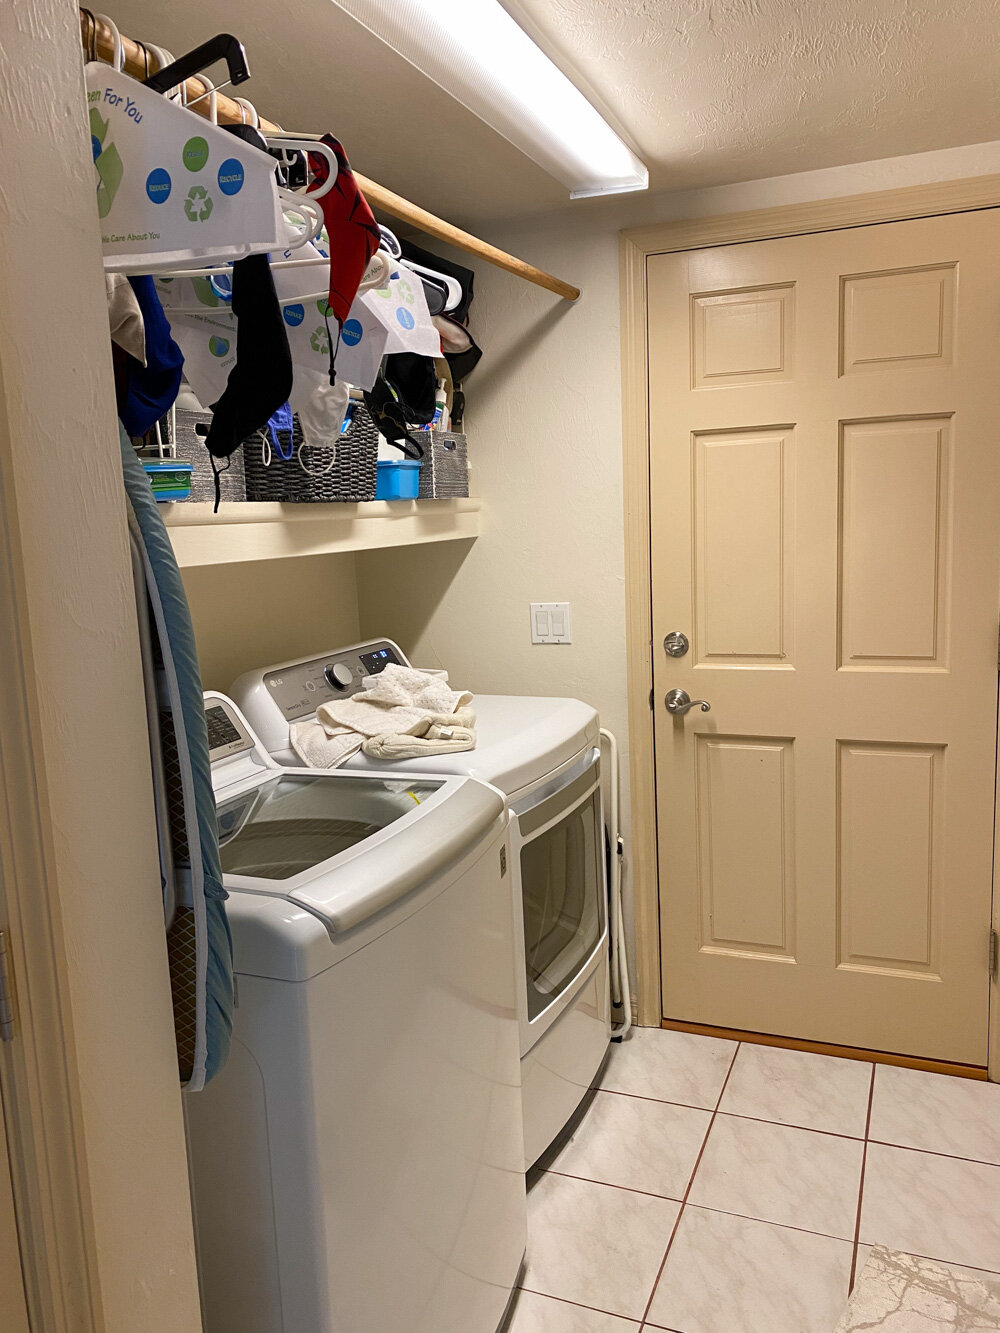
A touch of open shelving in this area is nice for quickly tipping items like masks, leashes and cleaning supplies out of overloaded hands. But having ONLY open storage is what was causing the most visual clutter. So I opted to custom-cut and install simple sliding doors to conceal the contents of the existing shelf, which we divided into 2 levels to maximize vertical space. We also added a new, low profile shelf slightly above the washer and dryer for smaller goods.

Doors
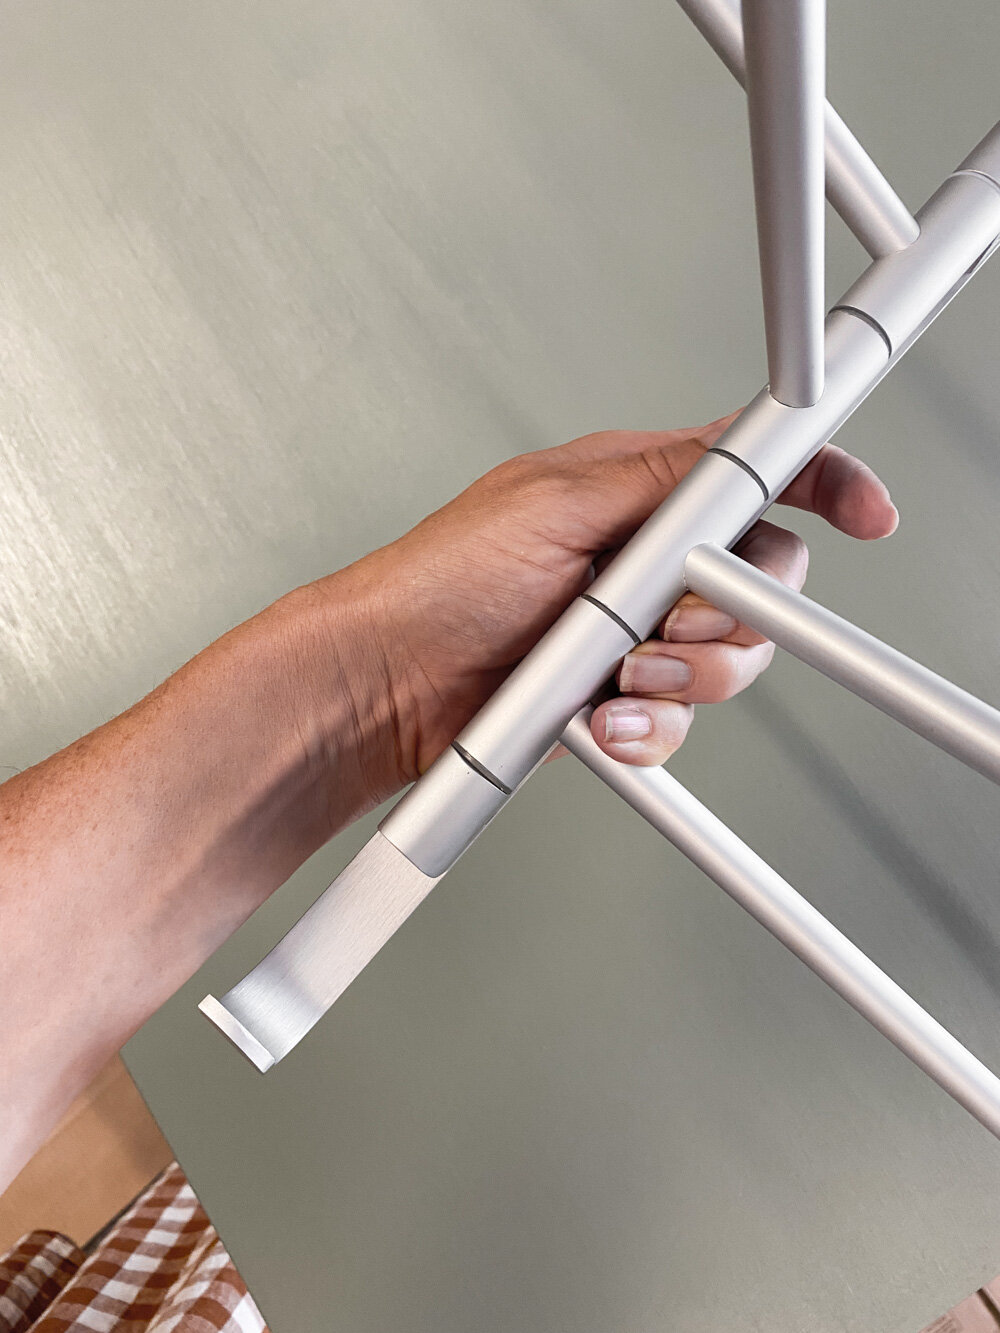
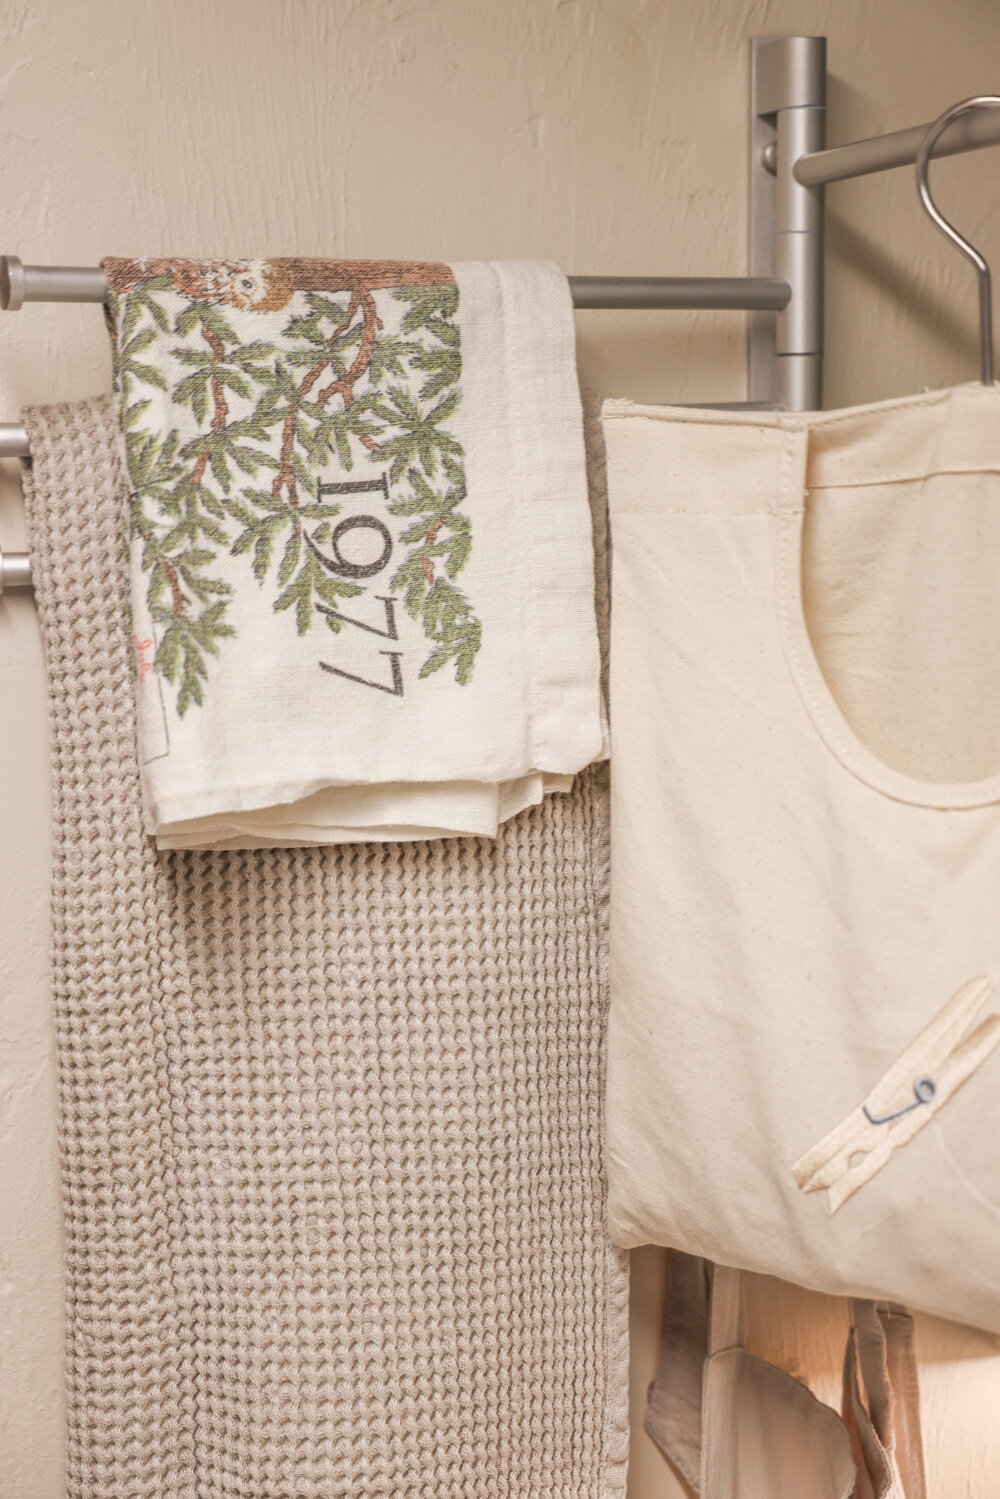
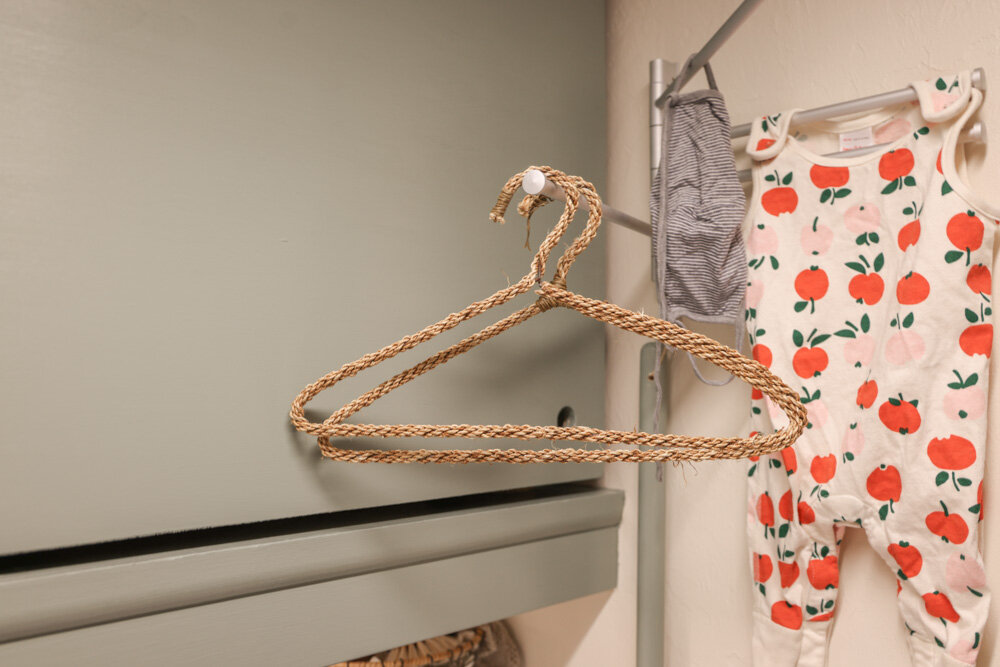
The sliding doors were a space-saving choice, as cabinets would’ve encroached into headspace when opened. We also opted to forgo handles on the doors to further save every bit of space, since the sliding panels overlap and are situated close to the collapsible, swing-arm drying racks I installed in place of the bulky overhead closet-style dowel.
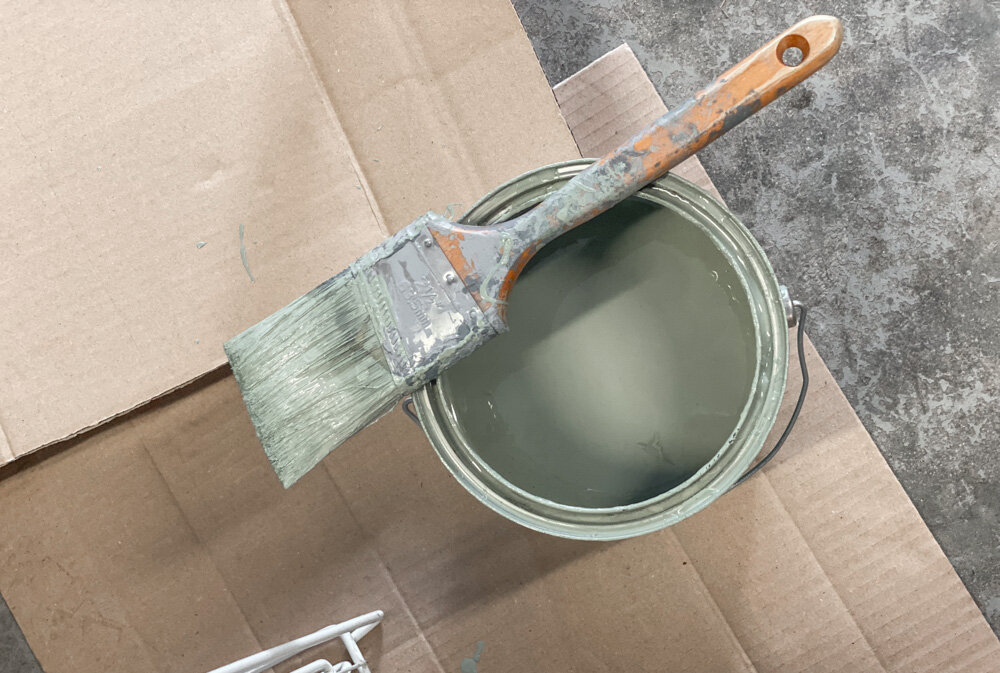
Paint
I used the paint leftover from West’s reading nook makeover (color: Sherwin-Williams Evergreen Fog SW9130) for the doors and shelves. It’s an easy-going, green-grey hue that adds a pop of personality without overcrowding a tight, windowless space such as this one. (Eventually we’ll do an additional coat and paint the interior shelf, as well as touch up the walls nearby, but one thing at a time.)
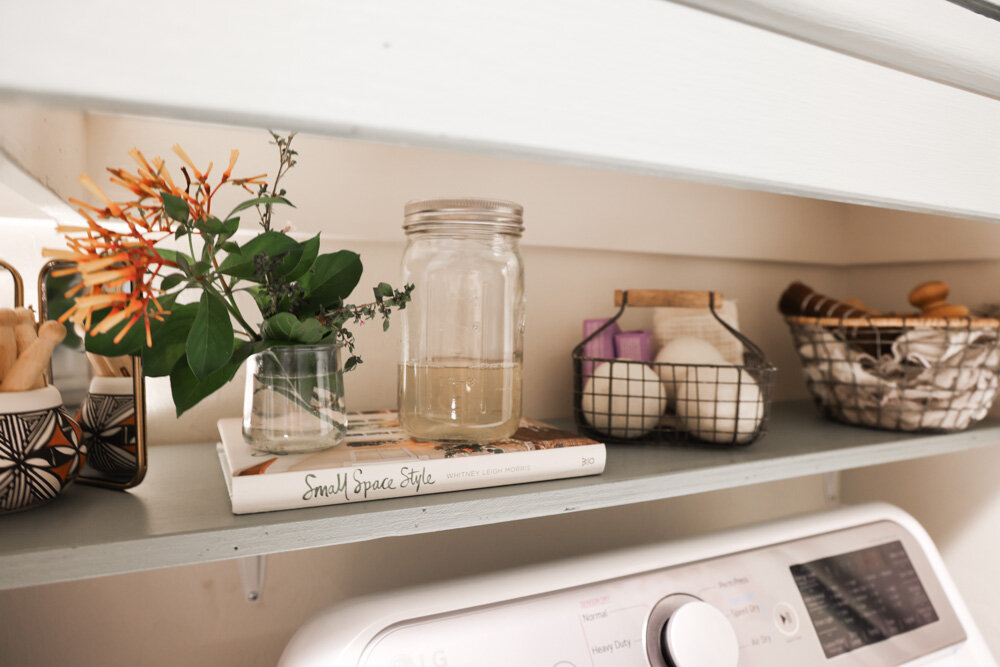
Cleaning Supplies
Over time, as my folks used up their existing supplies, I replaced their disposable dryer sheets with reusable wool dryer balls, their plastic jugs of detergent with refillable glass jars accepted by the local refill station (Life Unplastic), their numerous household cleaning liquids with a bottle of concentrate and refillable spray bottles, and their paper towels with washable cotton rags. Not only do reusable / refillable goods reduce waste and save money over time, but they also free up a remarkable amount of space. Plus they look far nicer in my opinion.


So, while it’s not perfect, it’s loads better. We can now leave the interior door open without wincing when we walk by or pass through. Remember: you don’t necessarily need more space or clever storage solutions. You just need to get a bit creative with the space you’ve got.

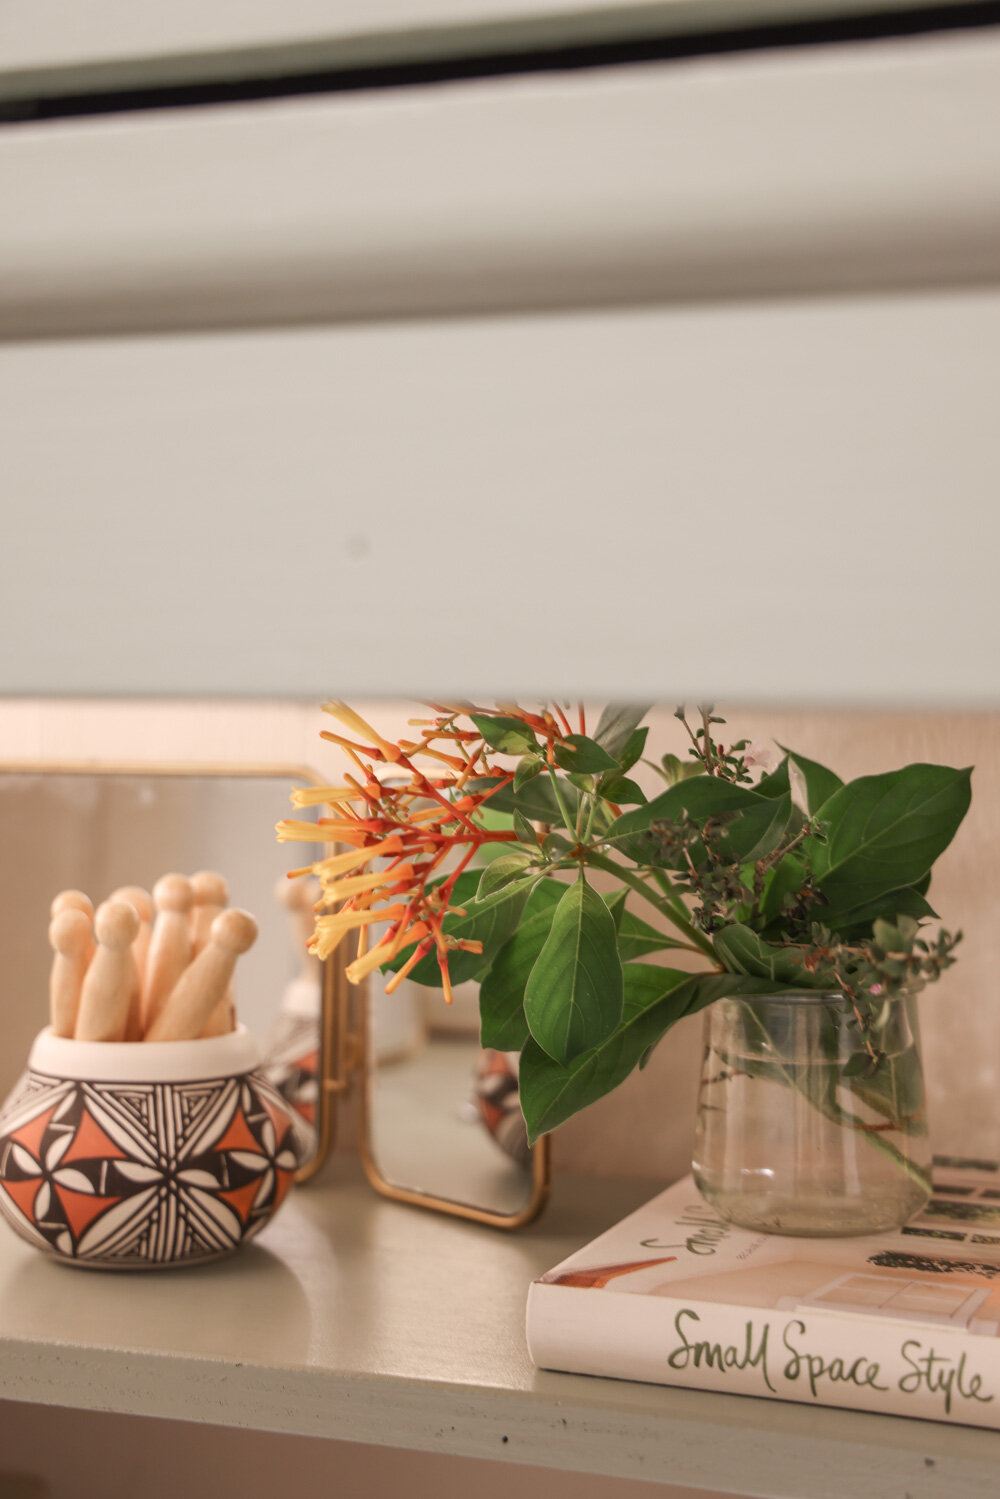
Before + After: A (Temporary) Multitasking Nursery + Bedroom + Playroom
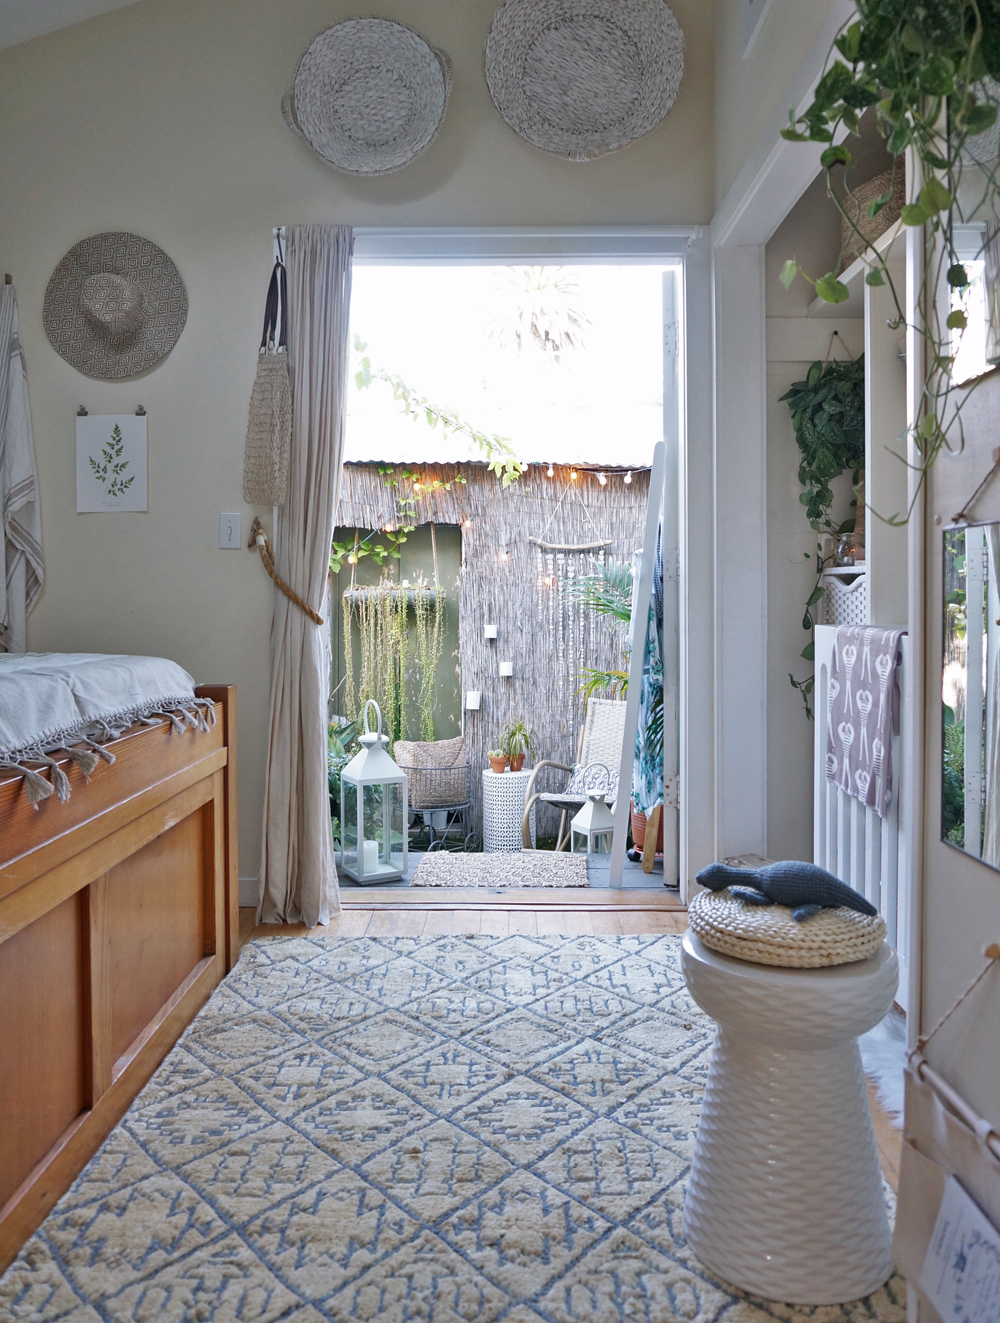
Our second child arrives this month! As such, I figured it was time for us to finally finish the nursery / bedroom / playroom that we’re sharing while we await the construction of our prairie cottage, and the ability to travel to our little French farmhouse. Below are the before + after, along images, along with detailed views and process visuals. (I’ll let the photos do the heavy lifting in this post, as I’m currently wading through a thick cloud of third trimester insomnia and can’t seem to find my words the way I usually do.)


Click here to read about the space, and what we could change vs what we couldn’t.
Click here for the nook makeover, and details regarding how we hid the textured wall.


Below: The quick mockup / mood board I created to help me picture the space:

Beyond the nook, the primary pieces in the space are the rug, compact swivel chair, arched floor mirror, and side table from Lulu & Georgia:
Flexible jute baskets from Will & Atlas:

Below: A space-savvy vintage lamp I found on Etsy, then painted with Adam to better suit the space:


Below: Our favorite, all-in-one, washable cloth diapers by Grovia:

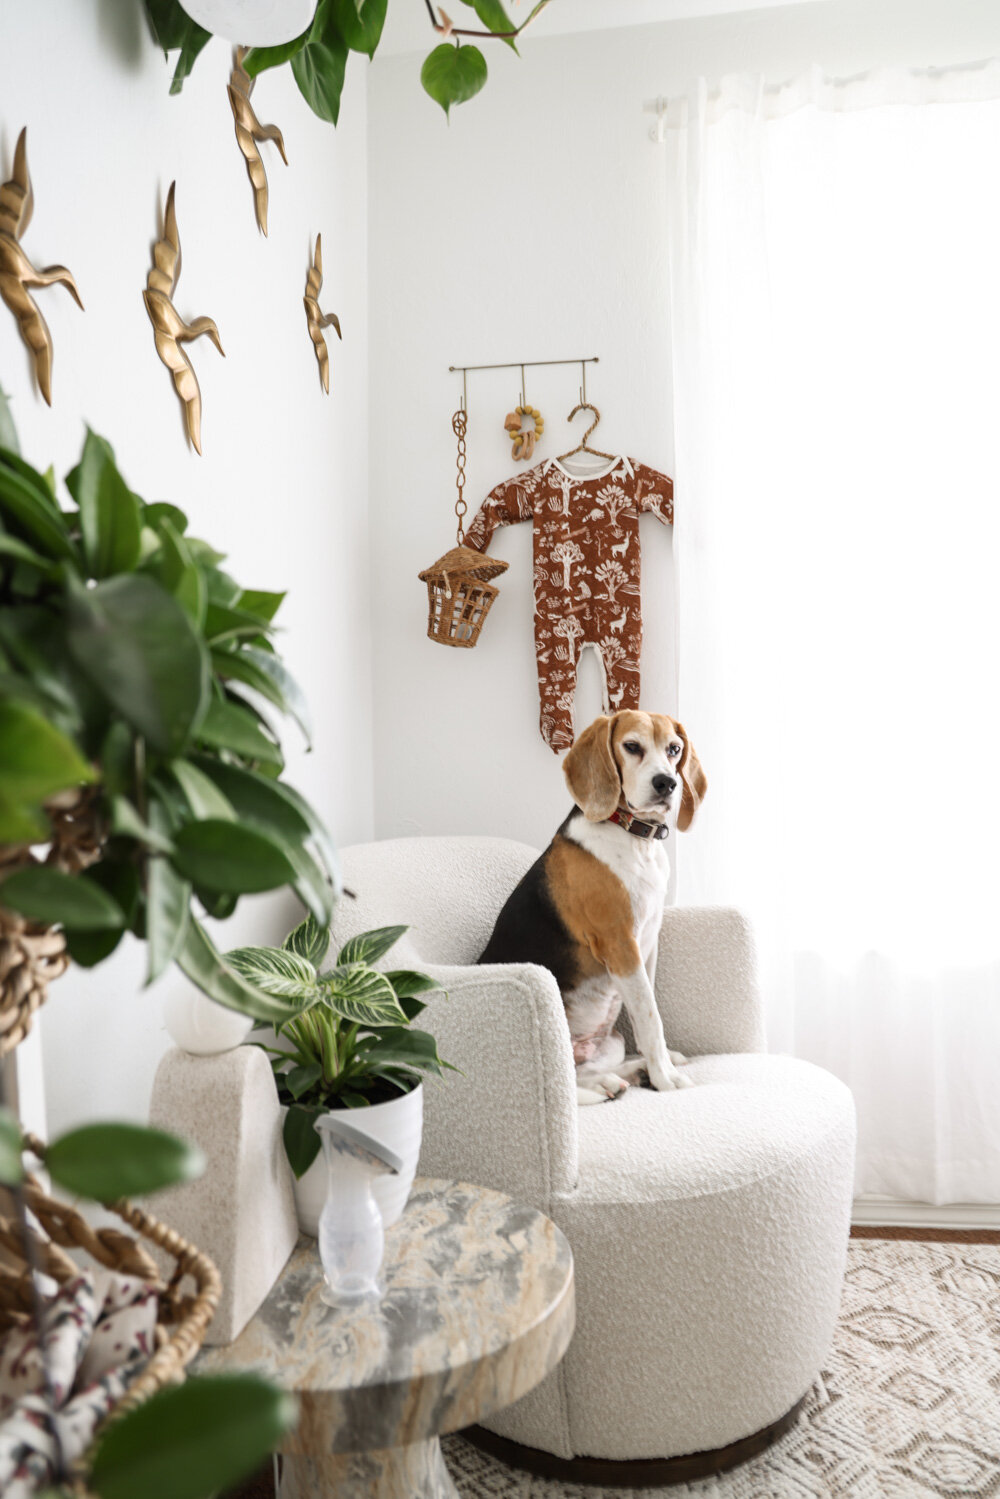
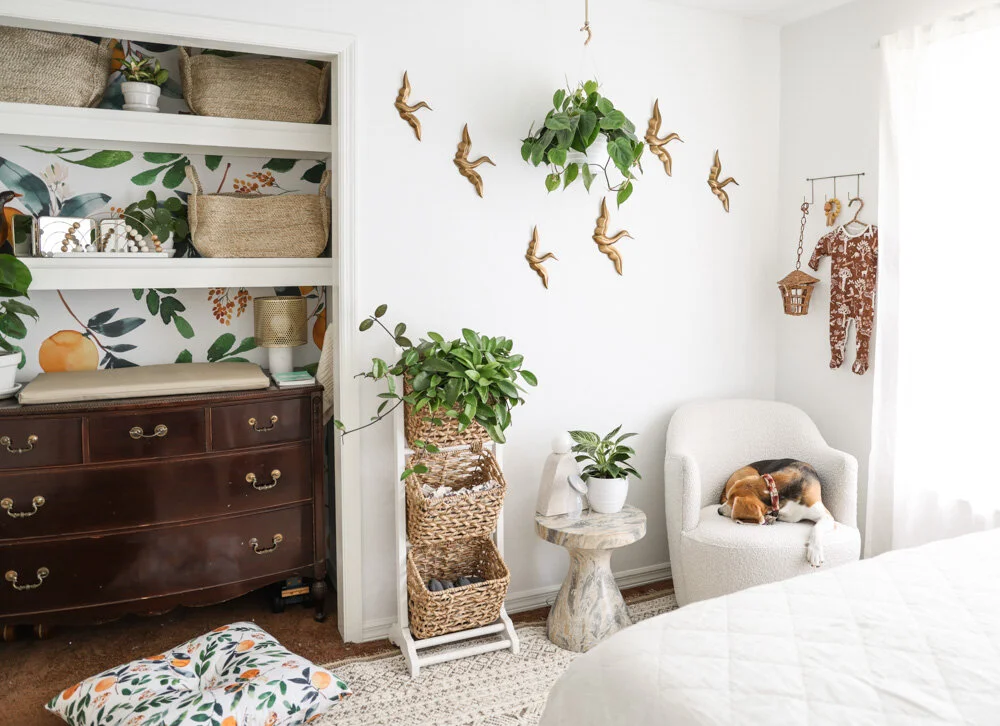
Below: Brass cranes by Justina Blakeney of Jungalow.:

We used several brass details throughout the space in honor of my Grandpa Lou, who ran a scrapyard. and collected brass pieces from the site.

Below: A space-saving, swivel-arm wall rack that we painted white:

Below: A handmade Sandhill Crane figure (via Etsy) floats above the crib.

Below: We chose a convertible mini crib from Bloom that expands in size and adapts in style when outgrown. Click here to read the full post about this piece, which we first assembled at the Cottage.


Below: A vintage wicker, toy lantern dangles from a wall hook from Connected Goods:


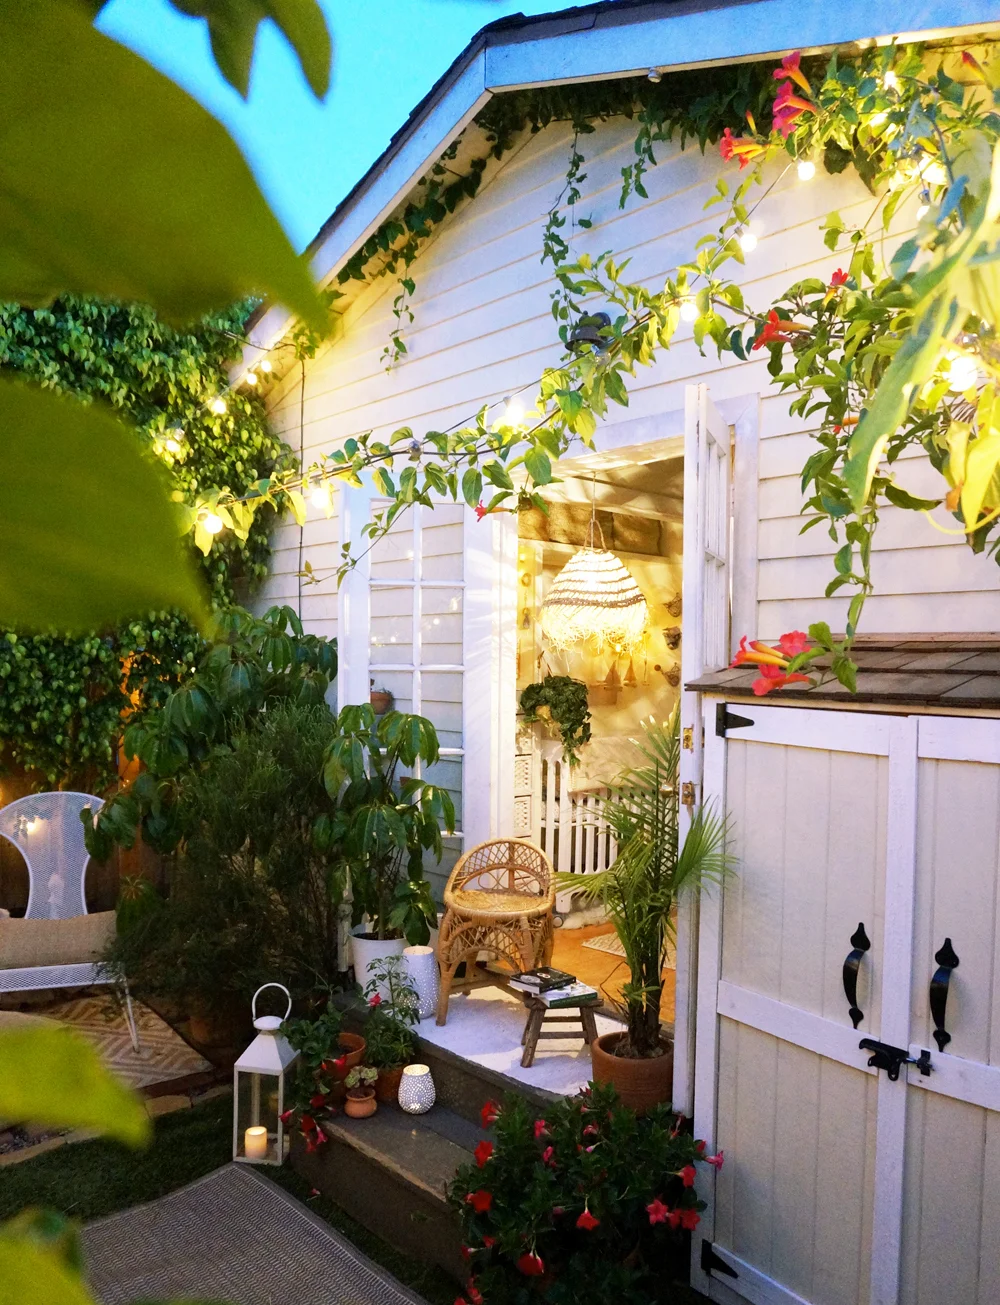
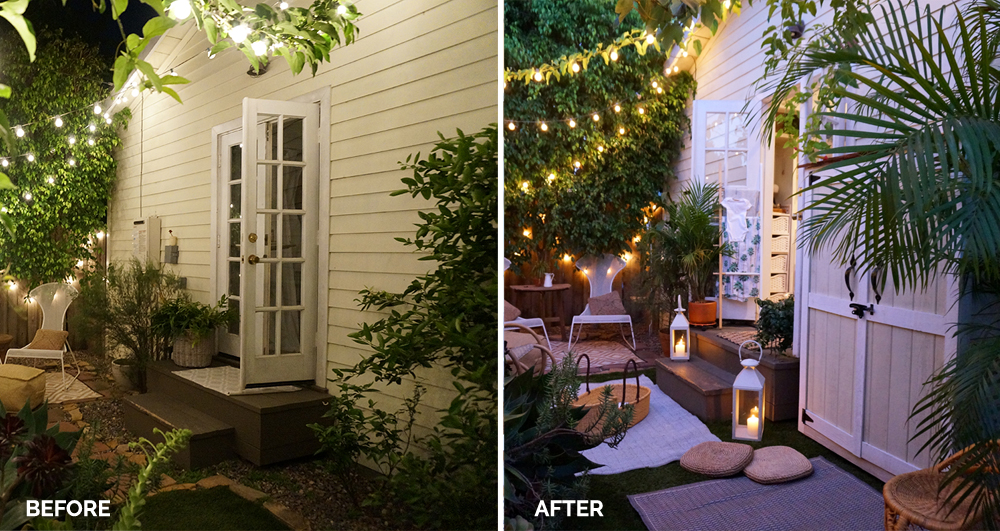
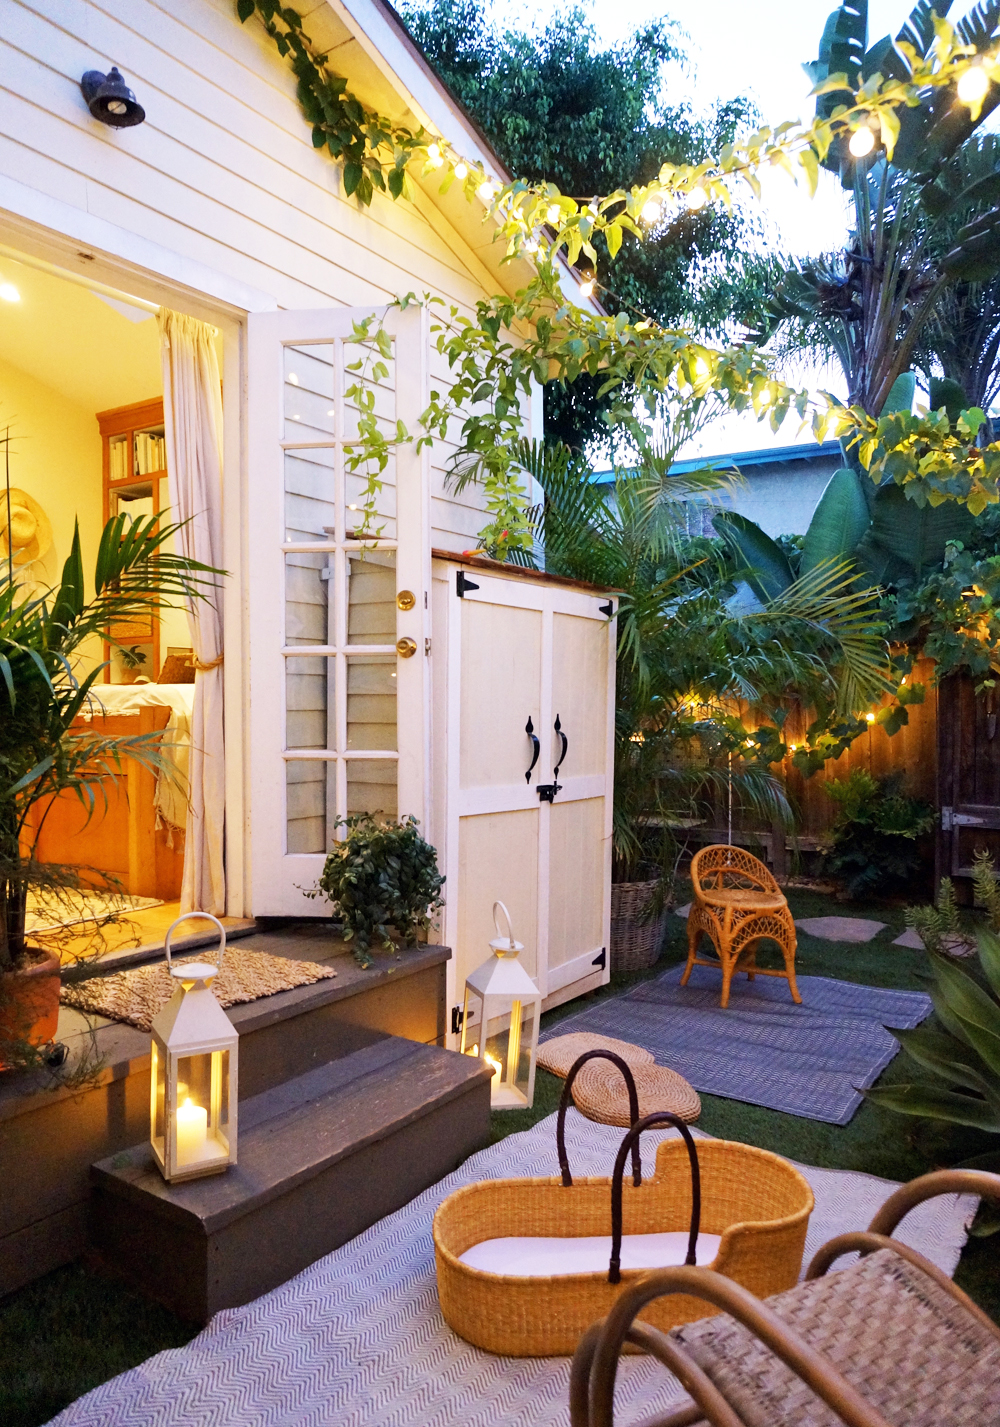
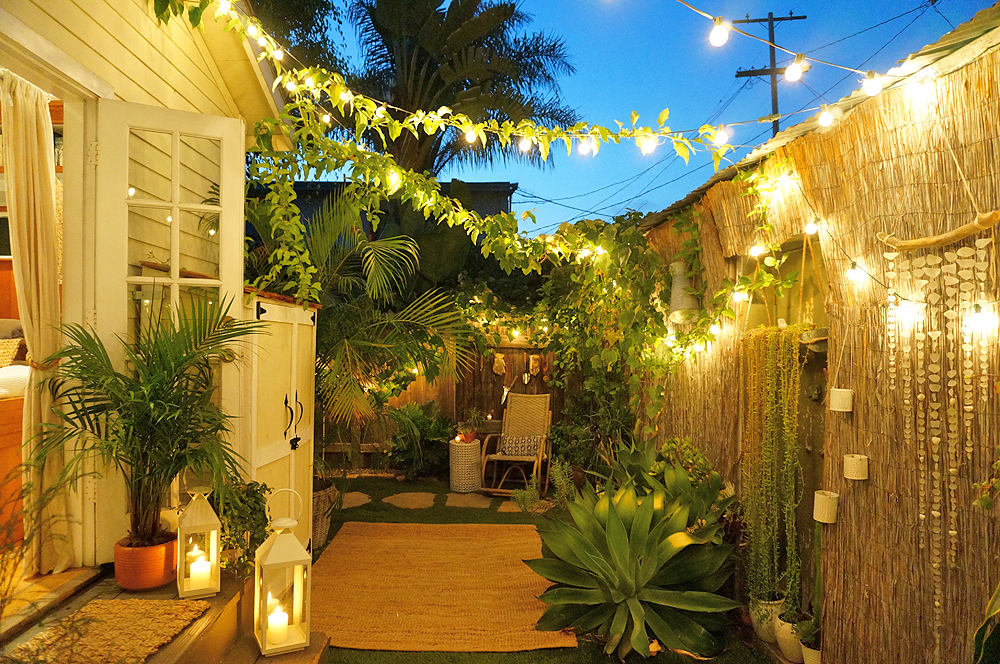
Before + After: The Cottage Back Patio
While sifting through old digital files, I came across these "before" photos of our lil' back patio and garden. I paired them with "after" shots on the right to demonstrate just how much the trees, vines, and potted plants have grown over the past 7 years!
Update (2/28) - I received so many inquiries about the types of greenery and materials used that I've updated the text below with that information throughout the post. Thanks for the great messages, folks!✌

This spot has served many purposes for us. It's been a play space, a dining room, a nursing corner, a screening room, a lounge, an office, and even housed our wardrobe-shed for over a year. We use the back stoop for some of West's baths, story time, and more.

The overflowing, large-leafed vines are from a single, massive grapevine. These tendrils originate in our neighbor's yard beyond the wood fence, and between the months of April through September they're lush and abundant. They produce beautiful, sweet, concord grapes that our neighbor makes into jam and sorbet.

The long vines that stretch from the perimeter of the property to the top of the Cottage via the string lights are Distictis Buccinatoria, or Red Trumpet Vines. This single plant is rooted in the corner of our property, and was only about 4'-tall when we moved in. Now the trunk is thicker and about 6' tall, while the vines themselves span dozens of feet, back and forth over the garden. These vines are fast growing, resilient, quick to wrap around anything, and produce bright red flowers (with yellow backs) that attract hummingbirds, and make the perfect home for their little nests.

The three ficus trees in the back were on the property when we moved in. We've trained them to grow up and fill inward, to provide us with more privacy and a wilder look.
By the back stoop, we added a customized shed, which once contained our wardrobe. (Now it holds a collapsible wagon and West's fold-up stroller.) An empty wine barrel sits across from it, and was once filled with dirt and dying lavender. Now, it's exploding with a variety of succulents, which my mom and I clipped from around the neighborhood and planted in fresh soil when she was visiting about 6 years ago. I've never changed the soil, and I only water the barrel infrequently. It's growing gorgeously without my interference.
I have 2 potted ZZ Plants, which look fake because the branches are so strong and the leaves are extremely shiny. In my limited experience, they grow quickly outdoors, and can withstand times of downpour or drought. Mandevilla also works well to fill in and beautify gaps around the yard, as it produces bright blooms and grows both wide and tall, depending on the container.
I also have a few tall, potted Corynocarpus Trees from Rolling Greens, and I move those around the property whenever needed. They grow tall and produce numerous leaves, without taking up extra inches around the base, which is helpful on a stoop or in a tight garden.
As for the grass, it's unfortunately artificial. I can't wait to remove and replace it with something natural-- I don't love the idea of West playing around on these types of manufactured materials. Years ago we had real and thriving grass, but we let it die in the California Drought. After a year of debate, Adam and I installed this thick, tall, artificial grass for our wedding. It's something neither one of us ever thought we'd do, as we're both from rain-soaked Florida. Although I still have a really tough time with the concept of faux grass, I do love seeing green rather than dirt or rocks. Other than the grass, everything else is living.

Above: Our friends gathered here for Adam's most recent birthday. We had a Cuban Food Truck pull up to the back fence to serve sandwiches, and we stationed the bar up in the front garden.

Above: Storytime set-up for baby West.

Above: At-home date night with Adam.
Small spaces such as this can be so versatile, and they're relatively easy to makeover or adapt, since they're so compact. I love this spot on the property, and look forward to seeing how it evolves from here!

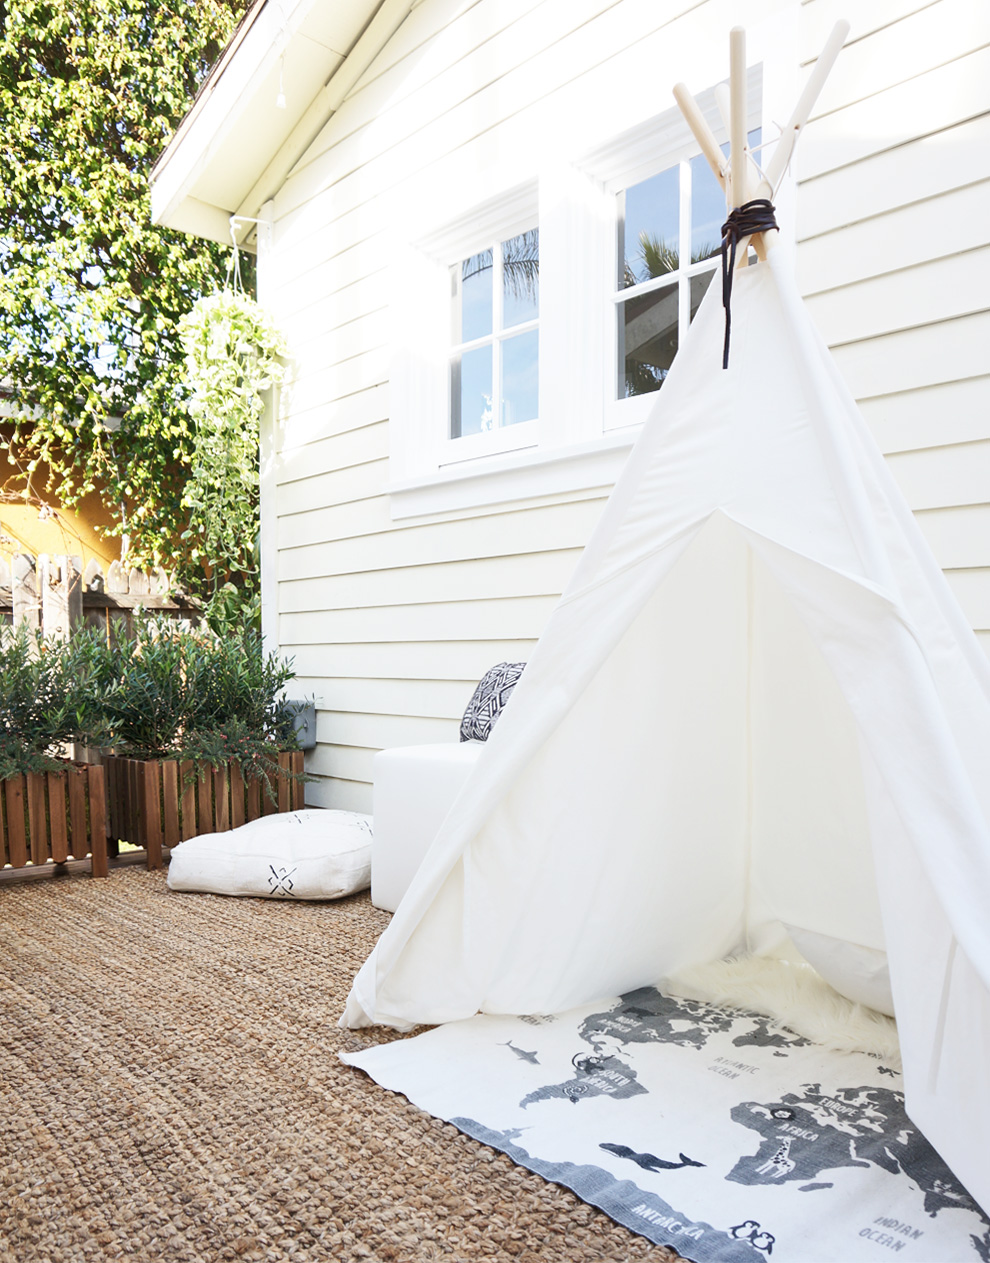
Creating a Divider with Greenery
When we acquired the front tiny house, we knew we needed to modify our porch to suit our updated living situation. The porch, which is 8’ wide and nestled between the two craftsman cottages, was formerly outfitted with an outdoor couch and a folding dining set. We loved it, but we found ourselves using the pieces less and less.

"BEFORE" - The porch between the cottages shortly after we moved in.

"AFTER" - The porch between the cottages. We had it set up this way for years in order to accommodate dinner guests or host happy hours.

"AFTER" ... again! The porch updated for West and his friends, as well as all the parents.
We host guests for meals very infrequently these days, whereas we spend more and more time here with West in lieu of sending him to daycare. Additionally, a fair number of our friends had children around the same year we had West, so our social gatherings now involve bringing several children (about 5-8 toddlers per event) together at once. So Adam and I decided that it was time to turn the couch into dual-purpose storage / lounge seating, collapse the dining table, and convert the resulting square footage into a play space.
A full blog post on the transformation is coming soon, but I wanted to tune in to one particular obstacle with which we needed to deal during the conversion. How would we keep the end of the porch (which drops about 1’ down to the stone garden pavers below) safe for the newly-toddling kiddos?
We borrowed a plastic baby gate from a friend to test out, but it was too flimsy for West. We then tried a temporary, metal garden gate. Unfortunately it was pretty ugly, and it felt like a barricade. We didn’t want to discourage the kids from entering the garden— we just didn’t want them falling dangerously backwards into it on accident.
I found three perfectly-shaped, compact, outdoor planters at Ikea (there were some great runners-up at CB2, too,) and I asked the skilled team at Rolling Greens to help me find friendly, space-dividing plants to add height, weight, beauty, and life to the troughs.

I love any excuse to visit Rolling Greens in Culver City.
Rolling Greens lined the planter boxes with plastic to keep the soil from falling out the slats, and then surrounded that wrap with moss to beautify the exposed segments. They then filled the boxes with little Olive Tree plants. They added a pop of color on the parameters with a touch of secondary greenery, then topped it all off with bark, and voila!

Now we have low space-dividers to trim the edge of the porch. The boxes are too heavy for the kids to push over, but light enough for us to shuffle around when needed. Adults and the pups can step between the planters, but now the kids won't go tumbling or bolting off the side of the porch!


We absolutely love our new, living porch barrier. Thank you, Rolling Greens!

Tiny House Closet Nursery - The Baby’s Bay
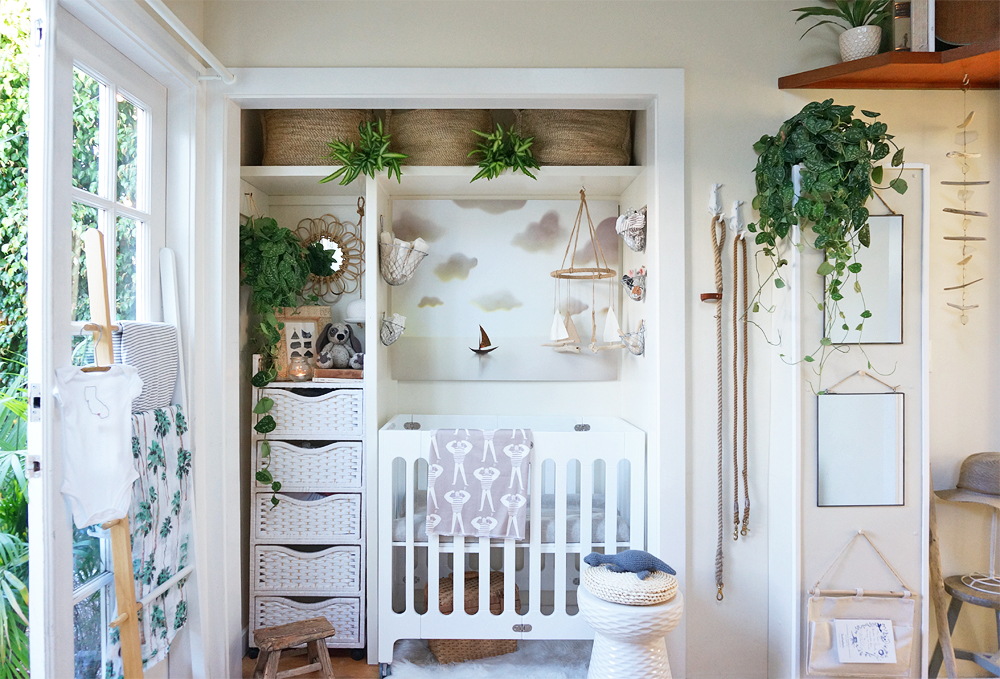
When selecting a dedicated area for our son’s nursery, we did what many small-space dwellers do and opted to convert our closet into his little room. I didn’t intend to have a “theme” for the space, but it happened on its own over time. The colors, textures and prints I selected were sandy and neutral, and the artwork I loved most reminded us of our lives here along the ocean. Before I knew it, we had a subdued coastal vibe going on. As such, I started referring to the little alcove as "The Baby’s Bay."
There were some basic updates that needed to happen before we could safely and practically convert the closet into the Bay. Thankfully they were all simple:
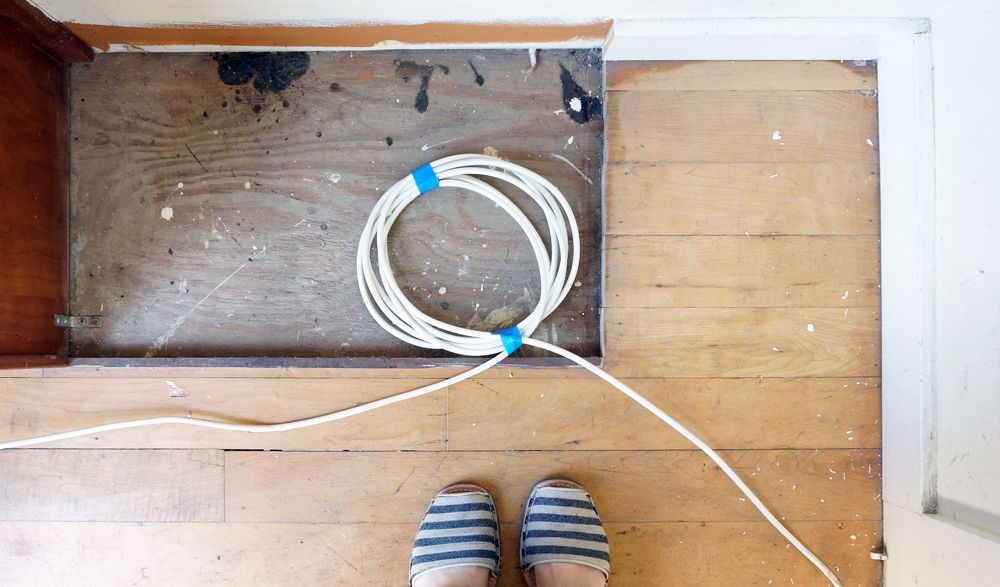
1. Deconstruct the built-in shoe rack, and fill in the gaps left behind after its removal. We hired a local handyman to do this. He ripped out the built-in shoe shelf, and then used a mix of old and new materials to fill in the gap in the floor where the shelf previously stood. Meanwhile, I visited The Home Depot to pick a trim that matched the rest of the closet, and had it cut to fill in the gap in the molding left over from the shoe rack removal:

2. Remove the internet cable cord, which was fastened to the molding on the perimeter of the closet. Our internet provider sent a technician to help us with this process. He removed the ugly cords that sat inside for years, and relocated them to the crawl space under the cottage.
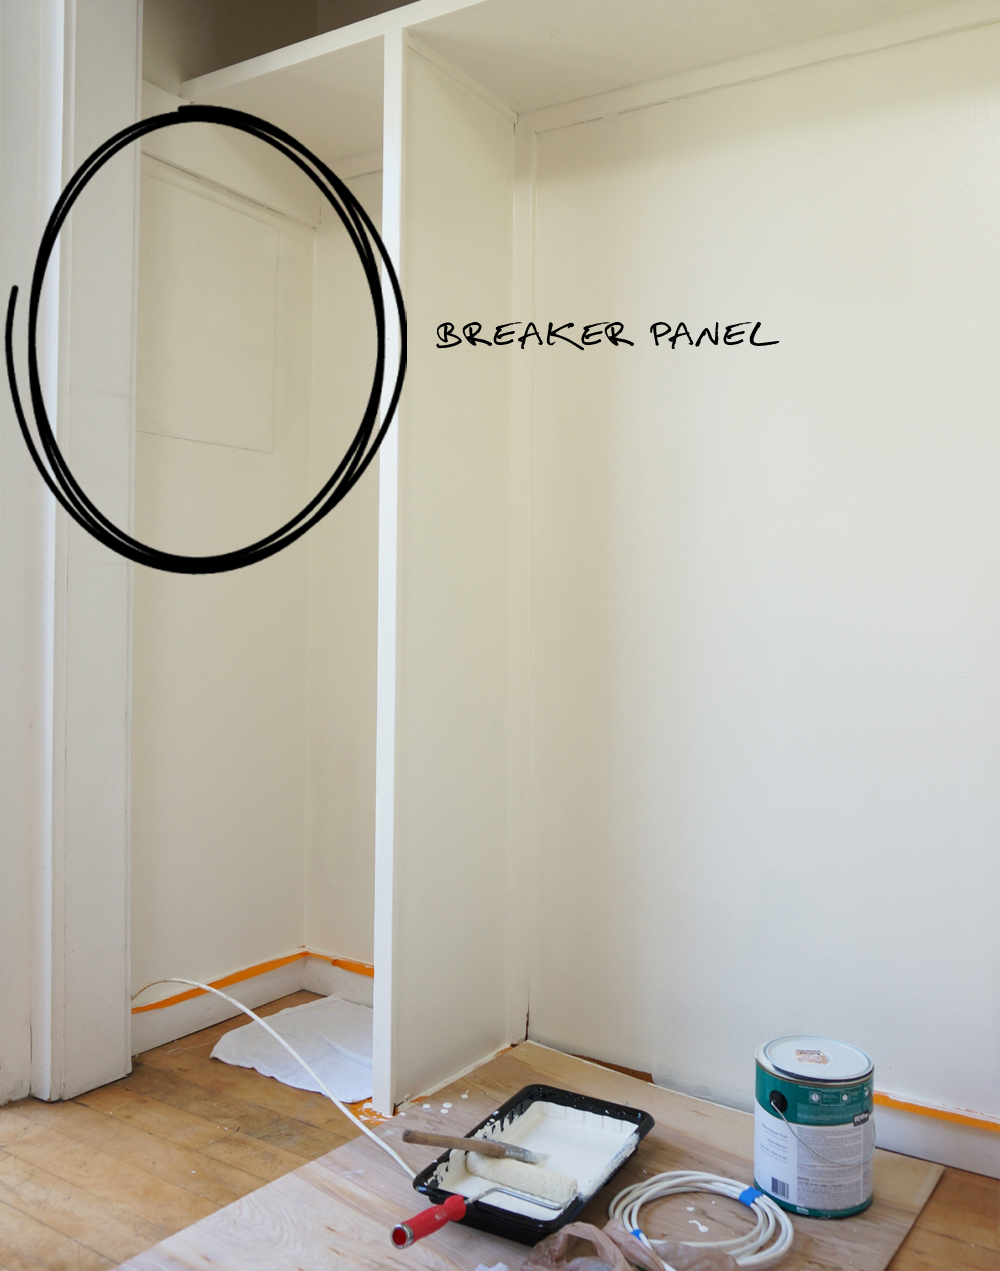
3. Cover the breaker panel, while still leaving it accessible: There’s a standard grey electrical panel on one side of the closet. We need to maintain easy access to the door, but I wanted to cover it up for the nursery. I used a magnetic sheeting overlay to mask the hardware, and painted it to match the color of the wall:
4. Remove the heater control panel box, closet dowels, and miscellaneous hardware. We had an electrician help us with all necessary wiring modifications. Beyond that, it was a simple matter of applying spackle and wood-filler where necessary before repainting everything.
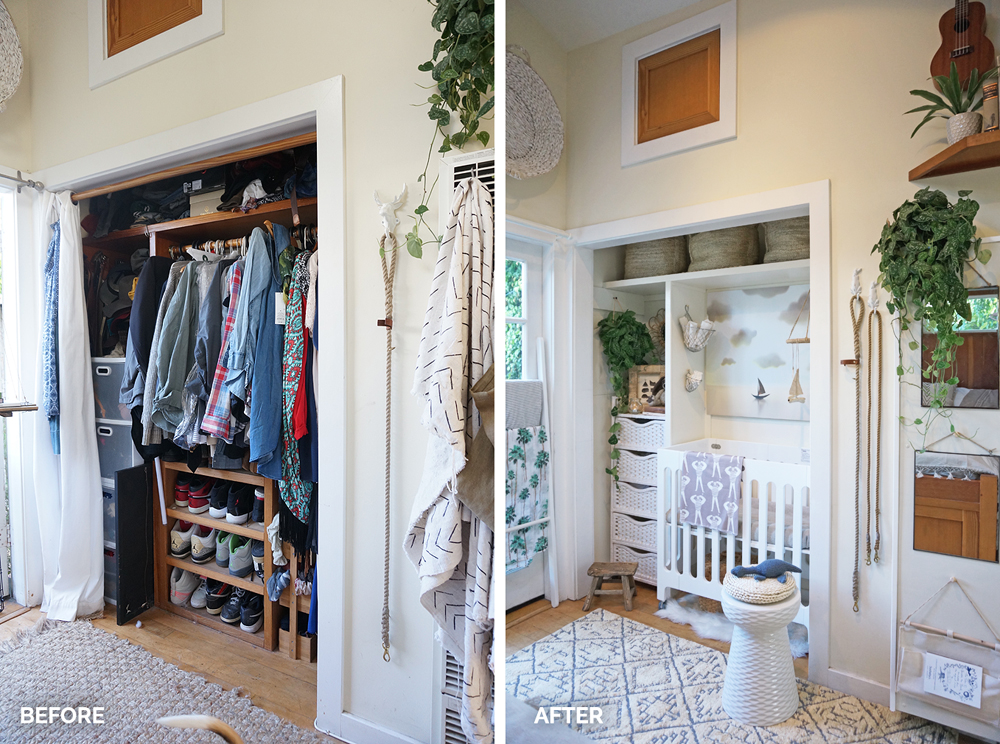
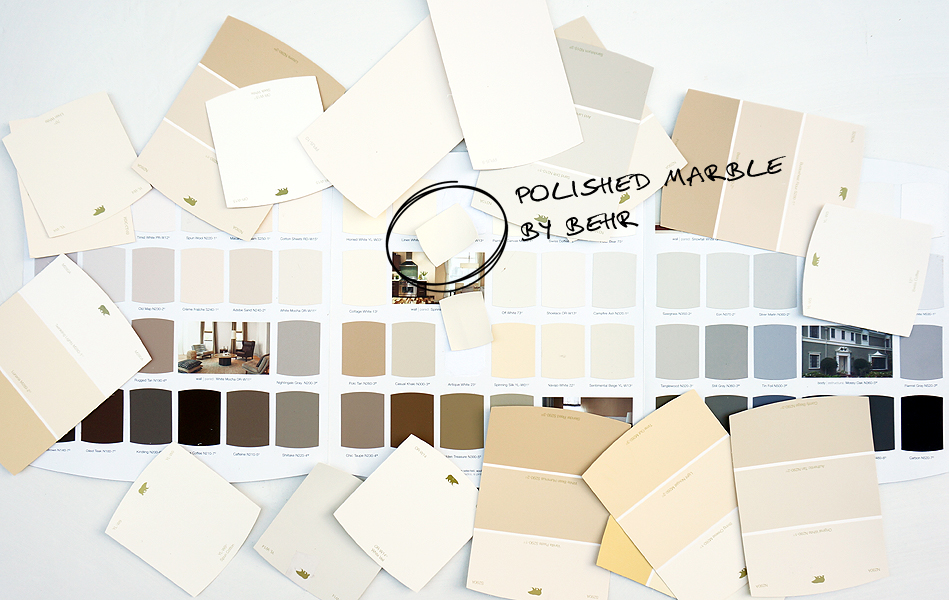
5. Leave the remaining built-ins (a high, closet-wide horizontal shelf and vertical divider) in place to help protect the baby from items that could displace during an earthquake, but better-blend those walls into the overall space. We always planned to leave the remaining built-ins within the closet for safety, and aimed to work with them when outfitting the space. But the dark wood lines drew attention to the dividers, and made the alcove feel even smaller than it is. So we chose a paint color that’s a few shades lighter than our bedroom walls to brighten up the previously shadowy Bay. I selected “Polished Marble” by Behr. I love how it appears to blend with the rest of the room, even though it’s actually quite a bit whiter:
Once we had this new, blank canvas, I could finally visualize the nursery. I found a little white garden stool from The Home Depot’s décor brand, Home Decorator’s Collection. I placed it by the crib, and I sat there rearranging and restyling the room in my mind for hours. The space then came together easily, despite its size.
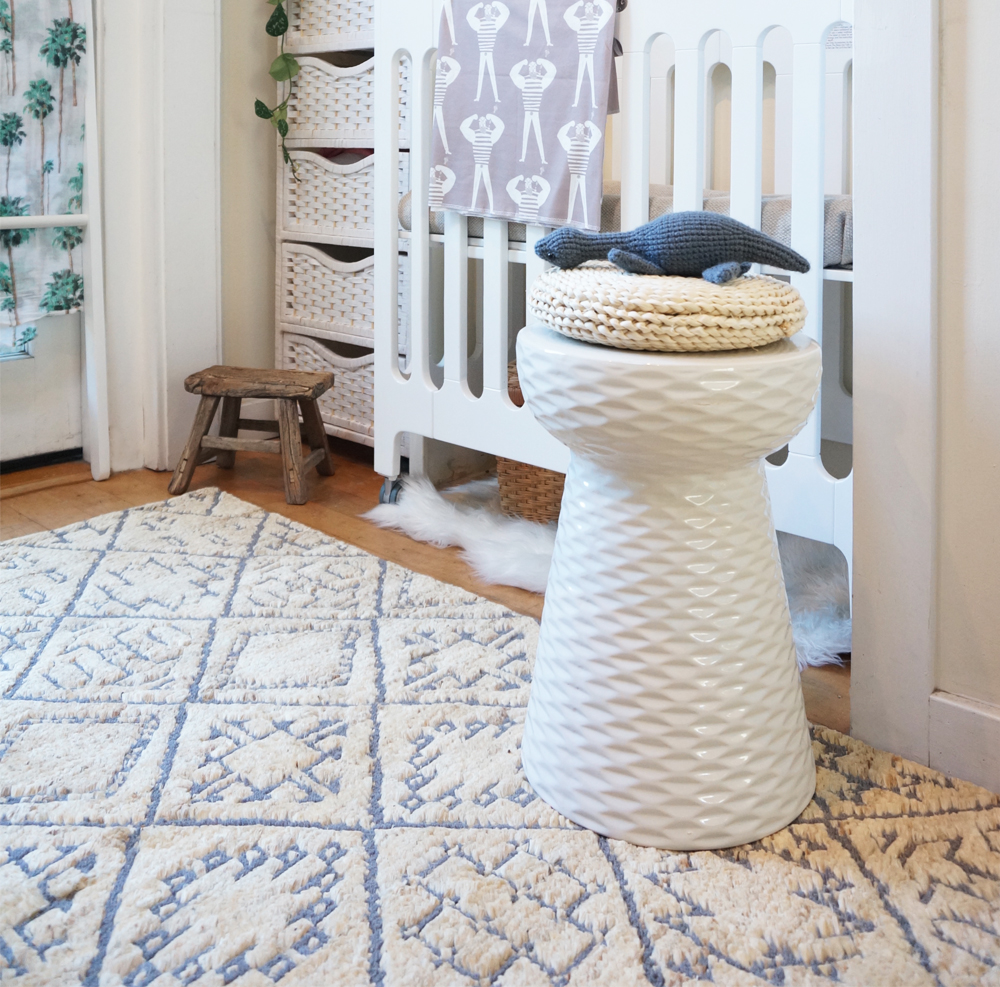
Before we updated the closet, I used to obsessively close our curtains to avoid seeing the overflowing contents behind them. Now the closet is a bright, airy, and happy component of the Cottage. It feels as though it should’ve always been outfitted this way.
You don’t need to start from scratch to transform your existing square-footage into a space that better suits your evolving needs. With a bit of creativity and paint, you can turn a box into a Bay. You don't need to live large to live beautifully!
I acknowledge that The Home Depot is partnering with me to participate in this nursery makeover project. As a part of the project, I am receiving compensation in the form of products for the purpose of promoting The Home Depot. All expressed opinions and experiences on this blog are my own, and are written in my own words. My post complies with the WOMMA Ethics Code and applicable Federal Trade Commission guidelines.

Tiny House Closet Nursery - The Garden Shed Wardrobe
When Adam and I decided to have a child, we knew we wanted to stay here in our tiny home. As we already share the space with our two dogs and my small business, we knew it would be a challenge to add a nursery to the mix, but we were so excited to make it work. Given our budget, we basically had two choices when tackling the nursery project in our tiny house:
Leave nearly everything as-is, downsize our belongings in existing storage spaces to make room for baby care necessities, and rely solely on mobile/rolling nursery components.
Create a dedicated nursery within an existing space by downsizing and relocating our other belongings from that area.
We went with option two, because thanks to the sunny, dry SoCal climate, we knew we could get creative with indoor/outdoor lifestyle and storage solutions. (If we lived somewhere that gets a a fair amount of rain or any snow, we would've stuck with option one.) We decided to convert our bedroom closet into the nursery, by downsizing and relocating part of our wardrobe to a 2'x4' cedar garden shed from The Home Depot.
It's important to note that it VERY RARELY rains in Los Angeles, and the weather usually hovers somewhere around the 50°s to the 70°s. As such, our patio furniture stays outside and uncovered year-round, while select garden decor and accessories come indoors in the unusual event of rain. We've been using our outdoor spaces in this manner for over 5 years now, which gave us the confidence that we could pull off an unusual outdoor closet solution. Here’s how we did it.
DOWNSIZING
While storage solutions are obviously important in homes of all sizes, the clearest path to living simply is to not own too many things. While we extended our usable storage space at the Cottage via our new 2x4’ shed, Adam and I were able to make the wardrobe relocation project work by getting rid of nearly 1/2 of our clothing. Giving away belongings is second nature to us now, but it definitely took some practice at the beginning. For those of you struggling to let go with your unnecessary belongings, I recommend exploring The Life-Changing Magic of Tidying Up by Marie Kondo. (Try reading the digital version rather than the print edition and VOILA! You’re already on the path to reducing your physical possessions!)
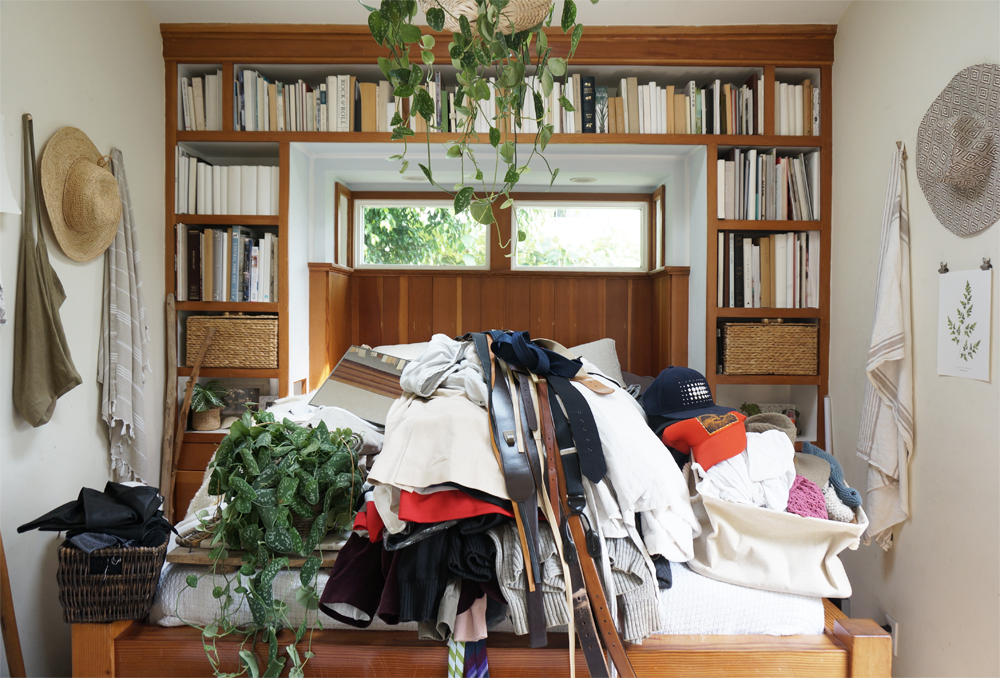
We removed everything from our shared closet, and created four piles:
The Giveaway Stack - I keep a folding bin from The Home Depot’s décor brand, Home Decorator’s Collection, in the laundry unit we share with our neighbor. Adam and I place our donation items in the bin weekly, and then drop its contents off at Goodwill and/or our local community housing organization about twice a month. We filled this bin (along with several other bags,) when cleaning out our closet for the nursery. I found that the start of my third trimester was the ideal time to tackle this undertaking. I hadn’t been able to wear my “regular” clothes for months due to the baby bump. It was therefore fairly easy to assess what I missed and needed, vs what I did not.
Infrequently Used but Useful Clothing - We put our winter/travel coats, scarves and other such infrequently used but handy clothing in two plastic, lidded storage bins. (The bins are now stowed at the bottom of the shed, beneath our hanging clothes.)
Weekly Wear to Hang - I had about 18”w of hanging clothes (dresses, tunics, etc) that needed to remain on hangers. We suspended those in a cedar wardrobe from Home Decorator’s Collection within the new shed, alongside Adam’s work shirts and sweaters. (Photo below.)
Daily Wear to Fold - I eliminated everything I didn’t need, and fit all of my daily casual dresses, tops and pants into one of the two trundle-drawers built into our bed. (Photo below.) The neighboring trundle was, and still is, our hamper. Adam bested me by downsizing his clothes even further— he managed to find a home of the rest of his pieces in the drawers that are part of the bed frame, beneath the bookshelves on his side of the bed.
We now keep all of our shoes in the built-in cubbies beneath the couch. (Photo below.) Socks, swimwear and underwear fit into the drawers that are part of the bed frame, beneath the bookshelves on my side of the bed


The fun (yet tricky) part of this project was finding a shed that was juuuuuust riiiiight for our little garden. We didn’t want to build on to the house— we just needed a simple shelter that was about 2’ deep by 4’ wide by 6’ high. Luckily we found this shed from The Home Depot, which was the perfect size for our needs:
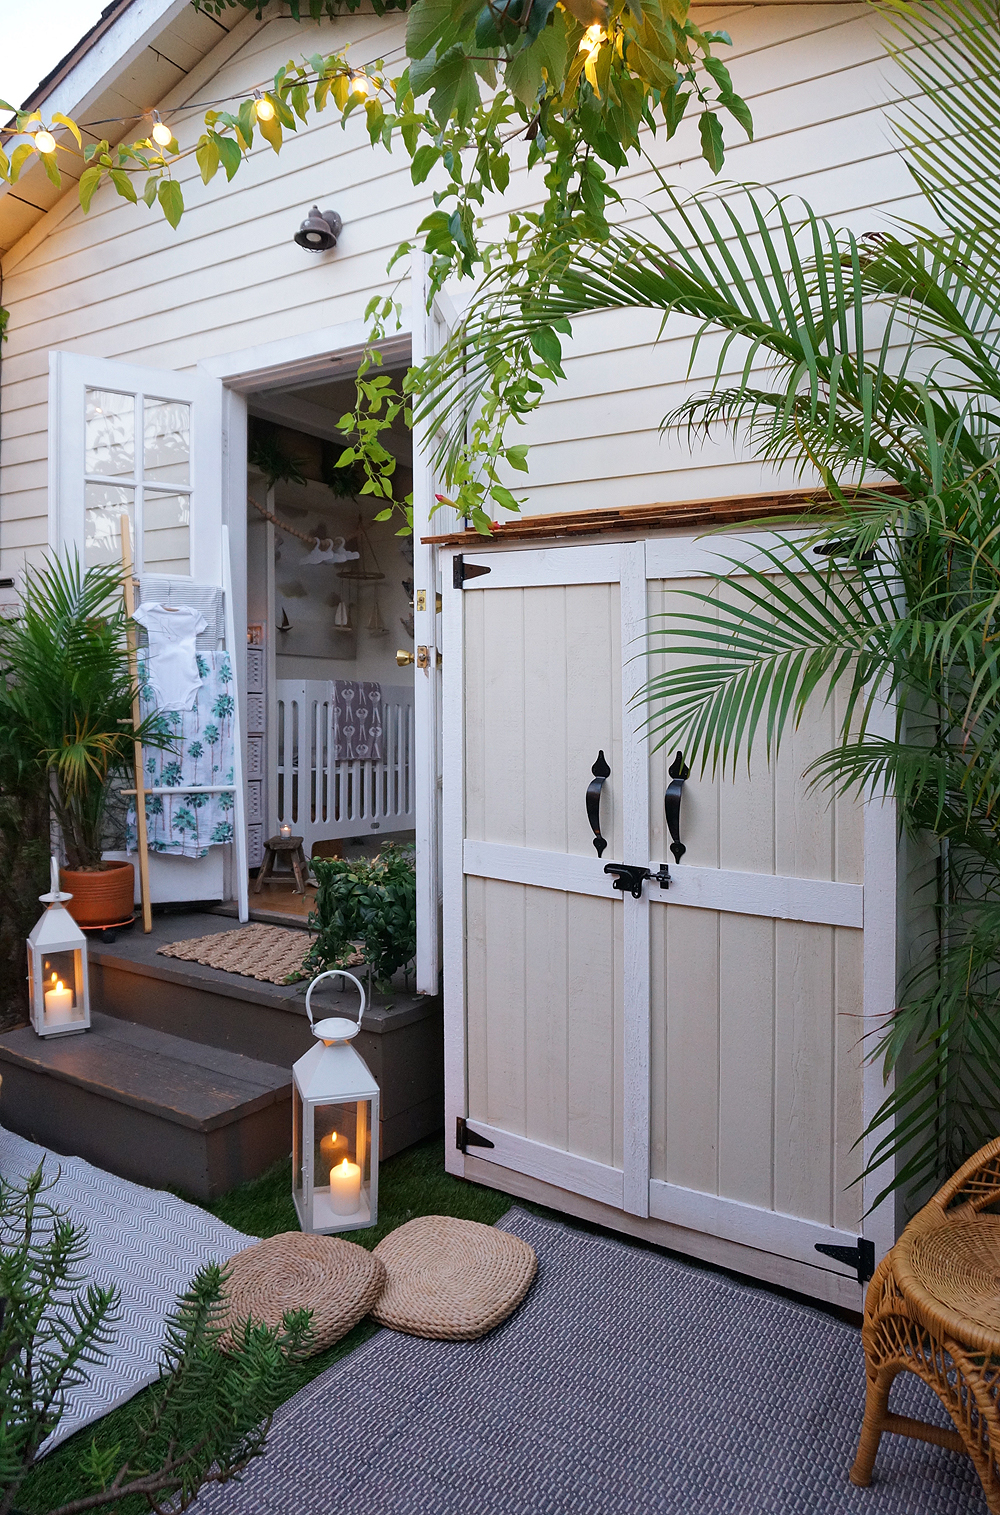
We carefully weather-proofed the shed’s seams, and painted the exterior to match the Cottage with contrasting Behr Paint colors on the panels and trim. Next, we installed a custom-cut dowel rod for our hangers, and selected this cedar wardrobe in which to stash our hanging “weekly wear.” Lastly, we secured the shed to the side of the house for safety, in case of earthquakes.


The entire process took about a day, from unpacking the shed at the start, to hanging up our belts and hats at the finish. We added some accessories— such as this outdoor rug— to make this part of the garden feel more like a room, and to tie it into the nursery’s outdoor lounge area.
The shed is only five steps from the bedroom closet, so it’s no inconvenience. Adam and I joke that our clothes are probably actually better protected now that they’re living outside in a sealed shed and garment bag, seeing as how we keep our house wide open 10 months out of the year. Our clothes have pretty much been living an indoor/outdoor lifestyle for 5 years anyway!
I acknowledge that The Home Depot is partnering with me to participate in this nursery makeover project. As a part of the project, I am receiving compensation in the form of products for the purpose of promoting The Home Depot. All expressed opinions and experiences on this blog are my own, and are written in my own words. My post complies with the WOMMA Ethics Code and applicable Federal Trade Commission guidelines.

Apartment Therapy: Design Evolution
Thank you, Apartment Therapy, for featuring our tiny porch today! It was a delightful surprise to see a few of our looks from over the years on your site.

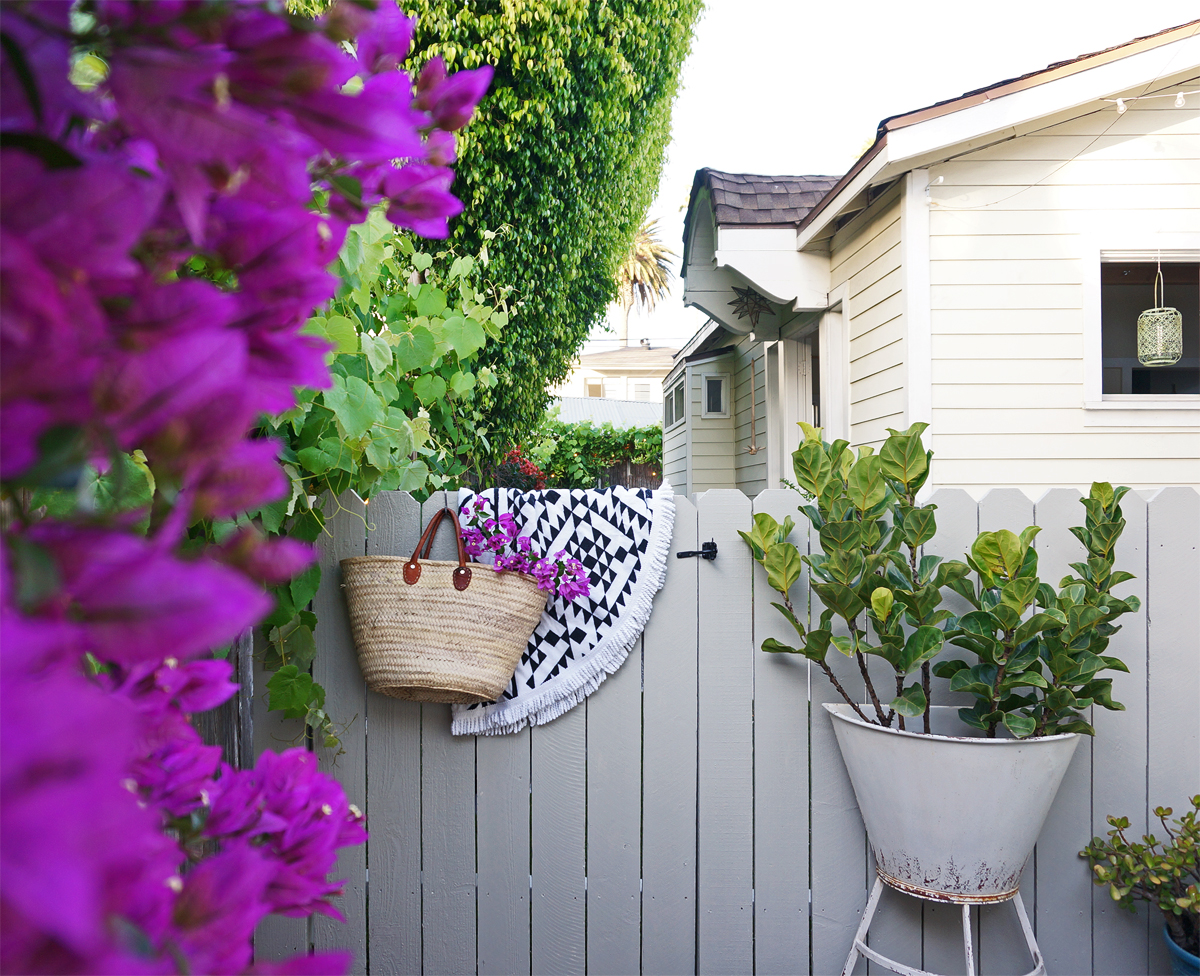
Cottage Fence Makeover with TaskRabbit
A few months ago, we replaced our low fence at the cottage with a higher design. We didn't want to get rid of the old set-up, but the pups kept leaping over the gate, which became problematic for numerous reasons. We opted for a higher design to help keep #StubsandSoph safe.
Before:
(We loved this lil' old gate and bougainvillea, but they unfortunately had to be removed for safety reasons.)


After:
(Our new, taller fence. Finished & painted by TaskRabbit, primer & paint by Dunn Edwards.)
The fence was unfinished for months. I got pregnant around the same time I'd planned to paint, and my doctor advised against me tackling the task myself. But with the cottage wedding drawing nearer (we're only three weeks away), it needed to get done.


Sophee REALLY loved the brushes, but we had a feeling she'd make a lousy painter, so we hired a professional named Andrew from TaskRabbit.

It took Andrew about four hours to complete the job. First he had to sand down the rough and splintered sections of the fence, and then apply the primer. After the primer dried, he added the paint, and then replaced the hardware on the fence and gate. He was even mindful to avoid the grape leaves and budding concord clusters, which I really appreciated:

I chose "Play on Gray" paint from Dunn Edwards because I wanted a hue that worked with the cottages, without being SO white that it clashed against the old wooden fence beneath the grapevine. Andrew really did a wonderful job, and we're thrilled with how everything turned out. It's amazing what a difference the fence color makes for the overall appearance and feel of the garden.
I'm looking forward to using TaskRabbit again soon, as they're helping me do some extensive prep-work and day-of jobs for the cottage wedding... but more on that later! For now, it's time to relax in the improved garden with Adam and the pups.
