
Tiny House Closet Nursery - The Details
My favorite part of putting together the nursery was finding all the little, practical details to use in the space while our son is an infant. My main shopping resource was ETSY, but I discovered incredible products (both new and vintage) from a variety of other makers and vendors as well.

CRIB | The first piece we picked was the crib. We needed a VERY specific size, and this Alma Bloom Mini Crib (on wheels, which is a feature we love and use frequently here,) ended up being absolutely perfect. The crib's platform height is adjustable, and the entire thing is easily collapsable. We couldn't have dreamed up a better design for the baby's Bay.
CLOTHING STORAGE | Next we needed a vertical storage solution for the remaining cubby (to the left of the crib). And again, it had to be a super-specific size. I found a lightweight, simple set of rolling drawers on Amazon. They're well-suited to the space, and we're thrilled with the piece's functionality.
LARGE ITEM STORAGE | The last major element of the Bay to consider was the top shelf. We needed durable storage containers that were roomy enough to hold several items, but we also needed them to be small and soft enough to slide onto and off of the top ledge. (We also had to ensure that whatever we selected would remain secure during an earthquake.) I found three gorgeous jute baskets from The Dharma Door (USA), and not only are they ideal in terms of use, but they're completely beautiful:
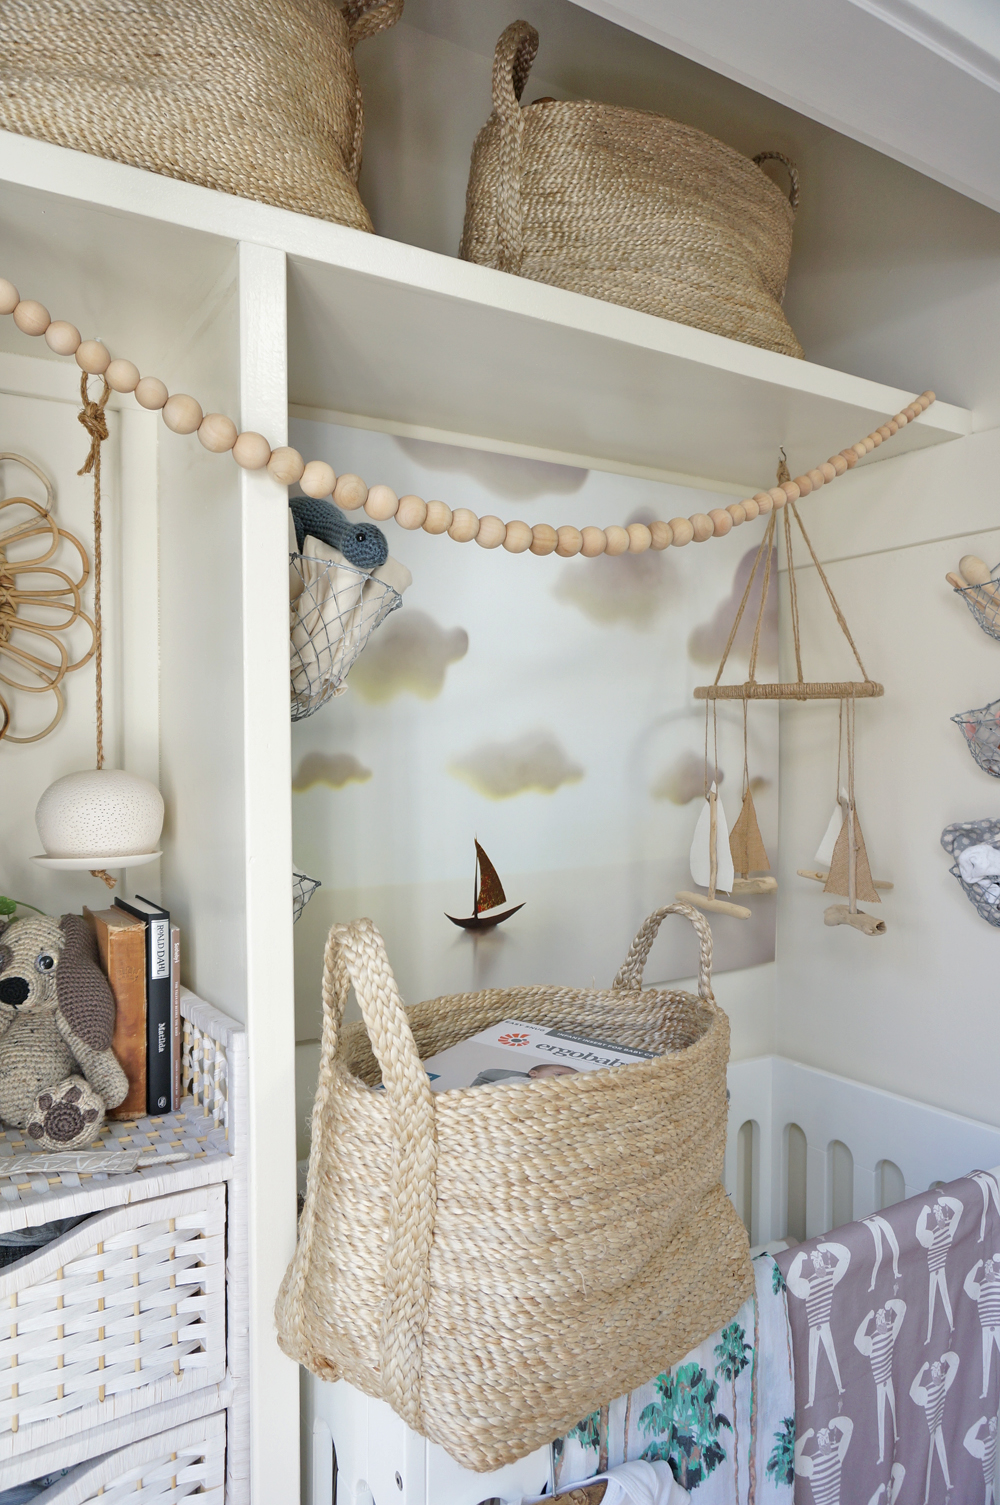
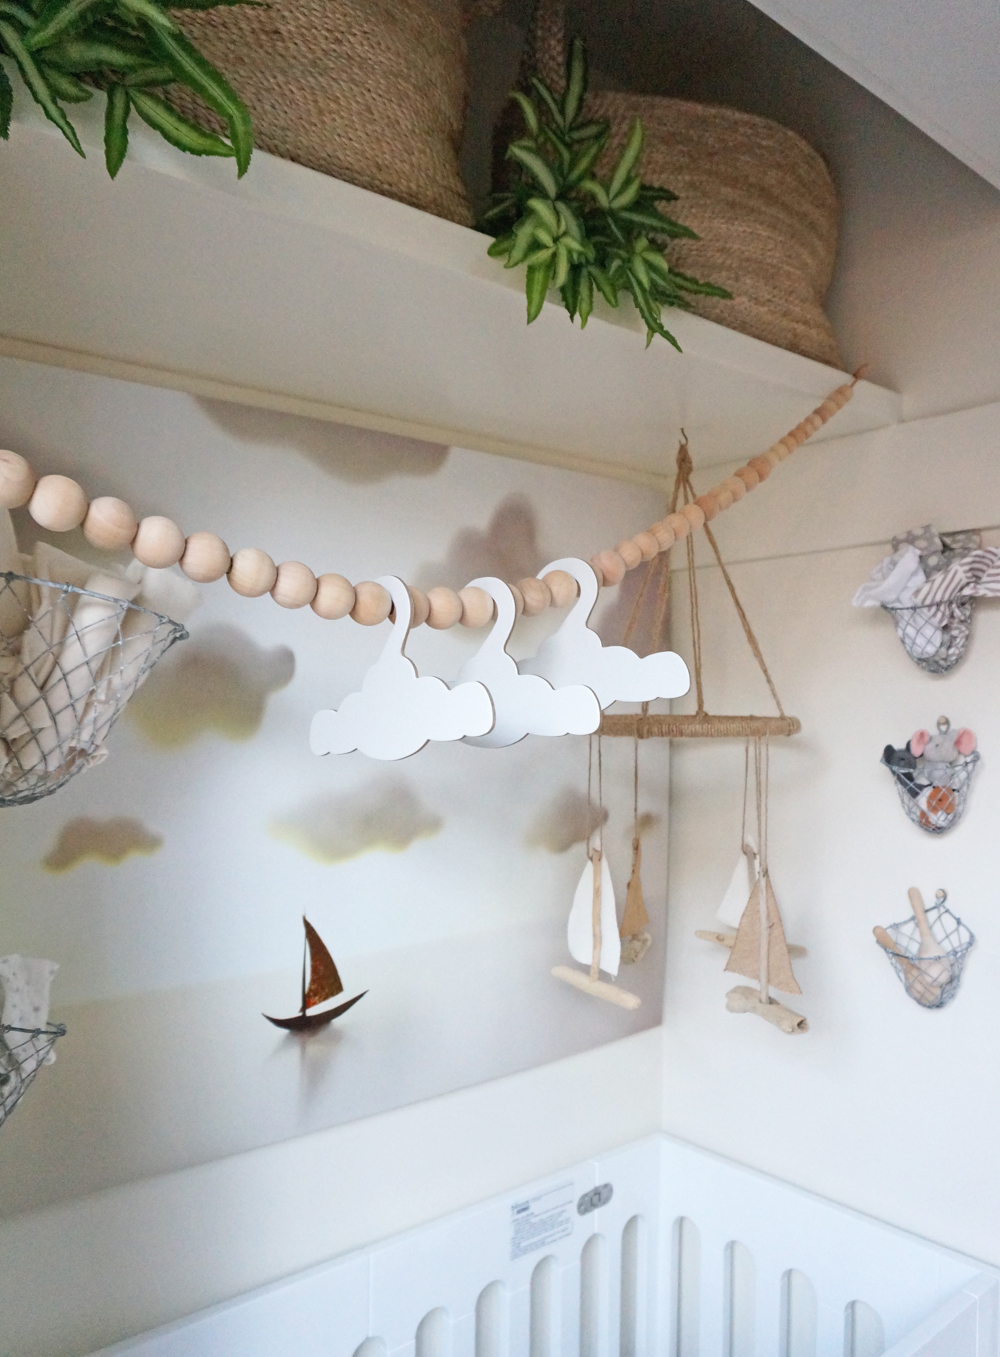
OPTIONAL CLOTHING RACK | We removed the dowel rods from the closet, as we don't intend to hang the baby's clothing in the space. However, in case we do need a place to hang items from time to time, I found a wooden bead garland (to act as a clothing line) via ETSY that I shortened to fit our needs, and then secured to the inner lip of the Bay's top shelf. I can pull the strand out whenever we need to hang something up, and then tuck the strand away again when it's not in use:
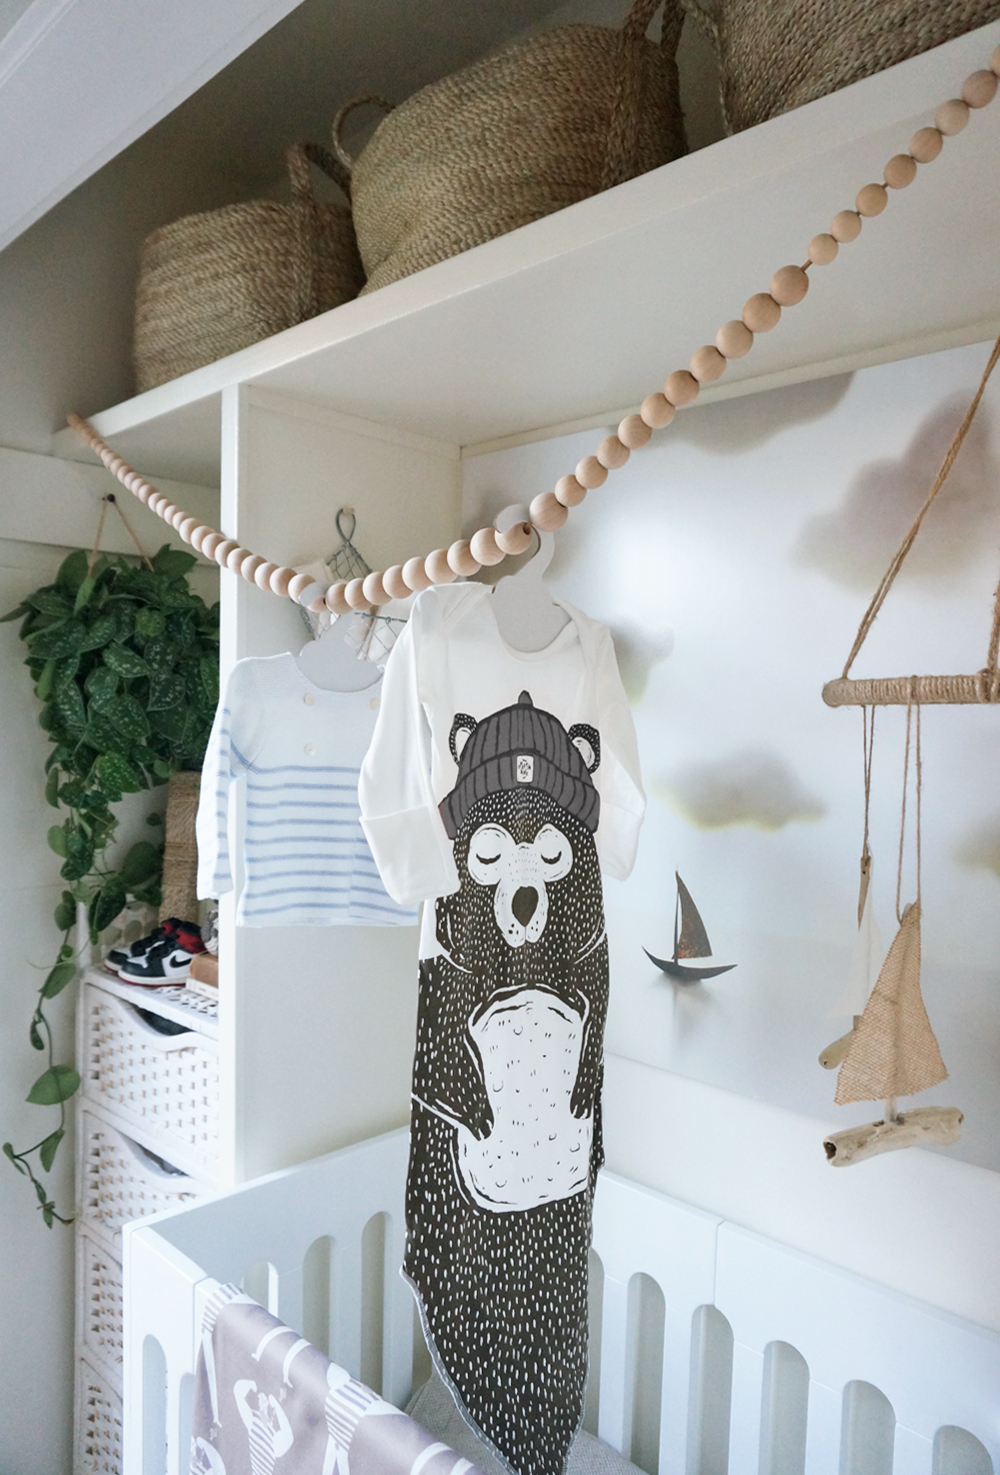
As such, we also needed some small, light hangers. I opted for these adorable cardboard clouds from Little Dundi, as we can recycle them once they're no longer needed:
ARTWORK | Then came the artwork! I wanted the nursery to have dedicated imagery, but for the pieces to compliment the other art within our bedroom. I also toyed with the idea of dark accent walls and/or wallpaper for the Bay. In the end, however, the bright, clean walls decorated simply with the art won me over. (Plus, we want the Bay to be easy to adapt, so it can evolve as our son grows.) I chose the following pieces for the Bay and the bedroom, and kept the possibility of earthquakes in mind when choosing how and where to display them:






Sources:
1. "They Delayed the Workings of the Day..." by Elly MacKay as "Theater Clouds" on ETSY (Link)
2. "Legends" book cover (Vintage)
3. "Homestead" by my friend Gregory Beauchamp as "Beauchamping" on Instagram and ETSY (Link)
4. "Peace Leaves" pen + ink by Britt Fabello as "Sea of Atlas" on Instagram and ETSY (Link)
5. Medium, vintage-reproduction nautical map of the "Reefs of Florida" from Archive Print Co on Instagram and ETSY (Link)
6. Large, vintage-reproduction nautical map of "Old Santa Monica" from Archive Print Co on Instagram and ETSY (Link)
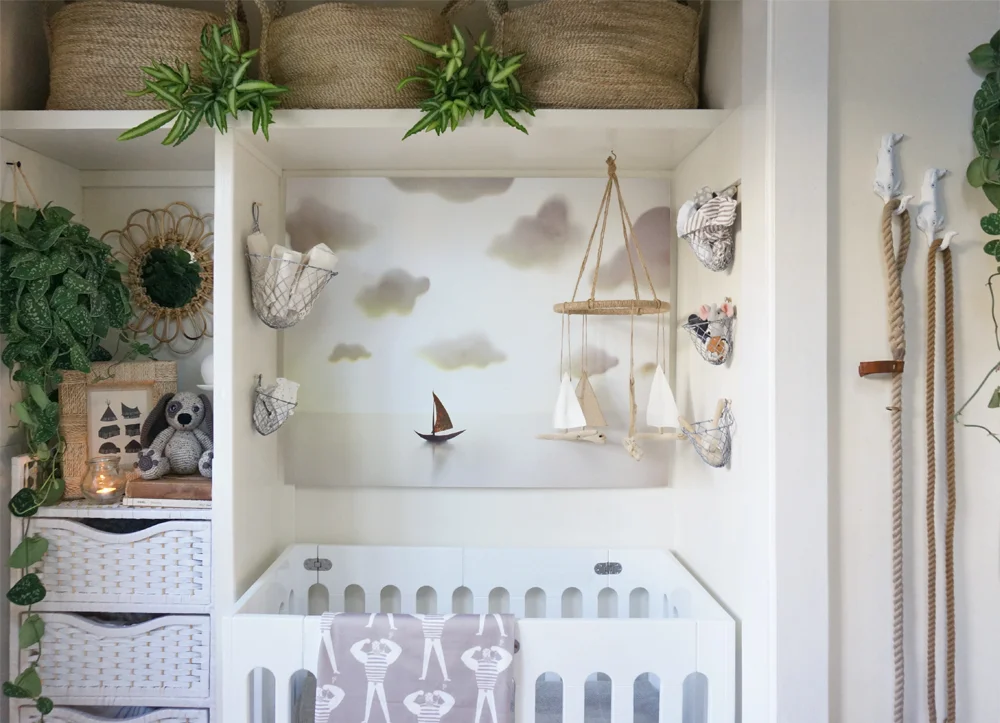
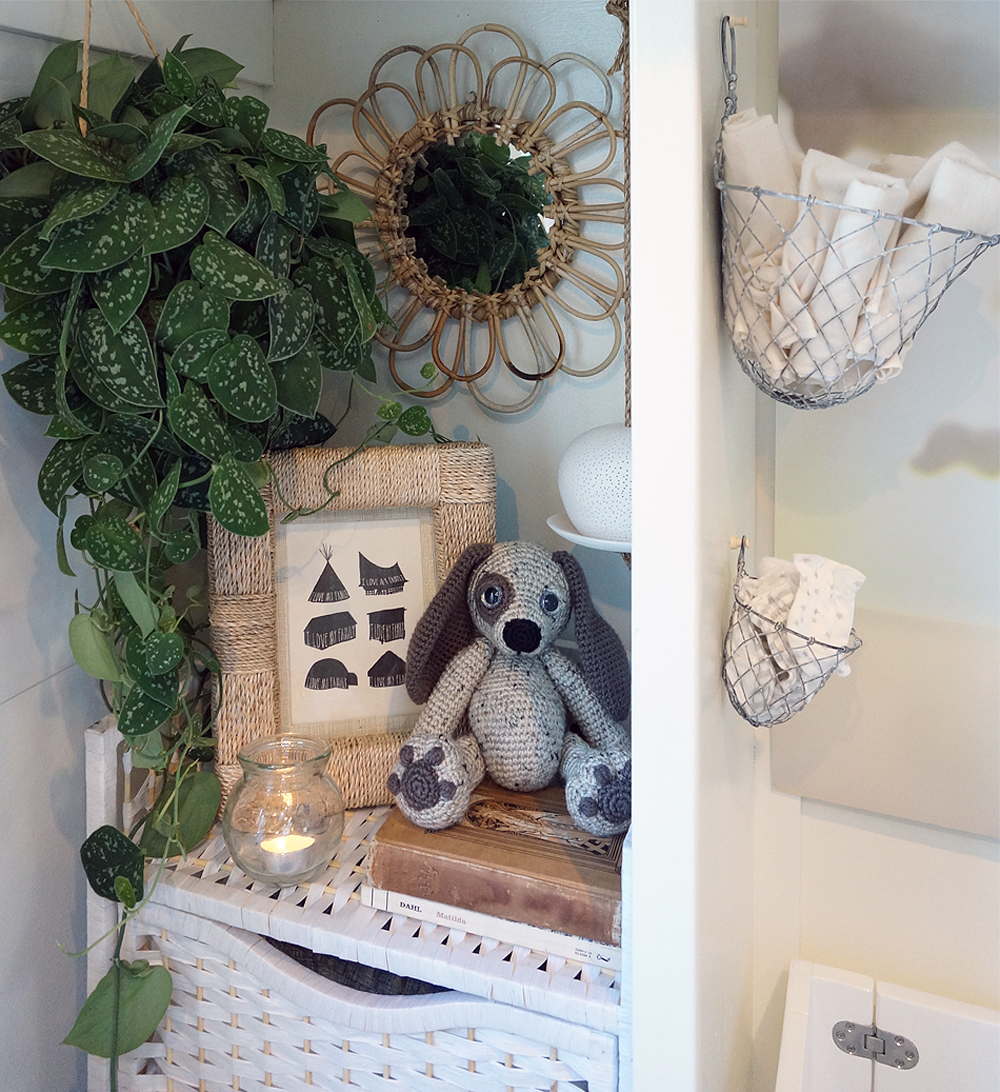
(Also pictured: Handmade beagle plush toy by ADToys via ETSY)

FUNCTIONAL ACCESSORIES
Next on the to-do list was the delightful task of selecting functional accessories to help us easily access and stash various necessities.
I selected these lightweight Otis Wire Wall Baskets that I found on Domino to help hold miscellaneous cloths, tiny clothing, and toys. (As our son grows and begins to be able to reach these baskets, we'll relocate them.)
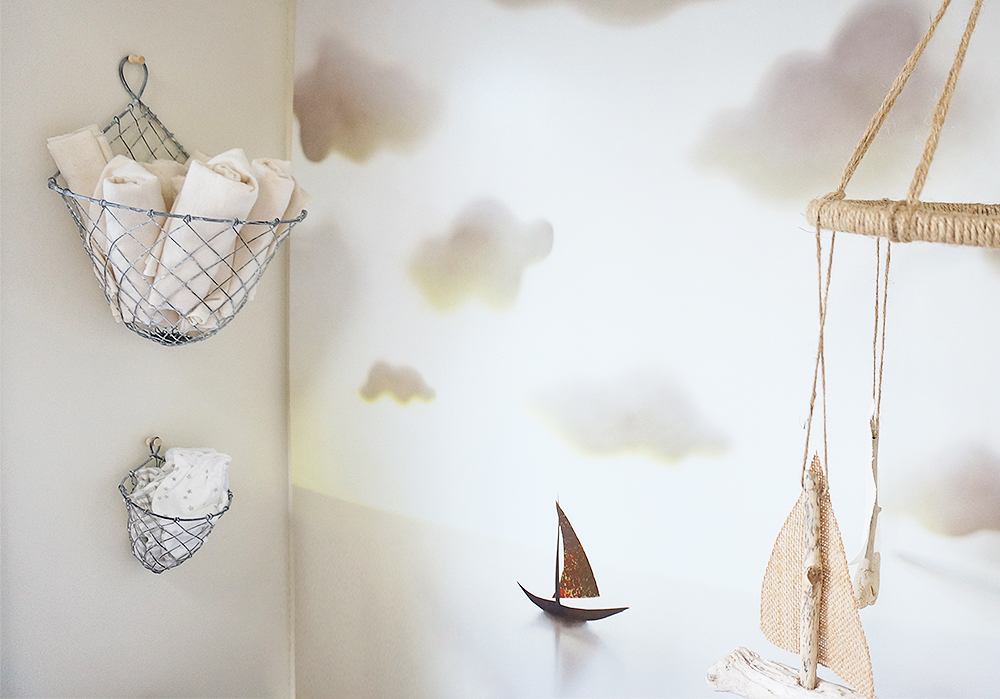
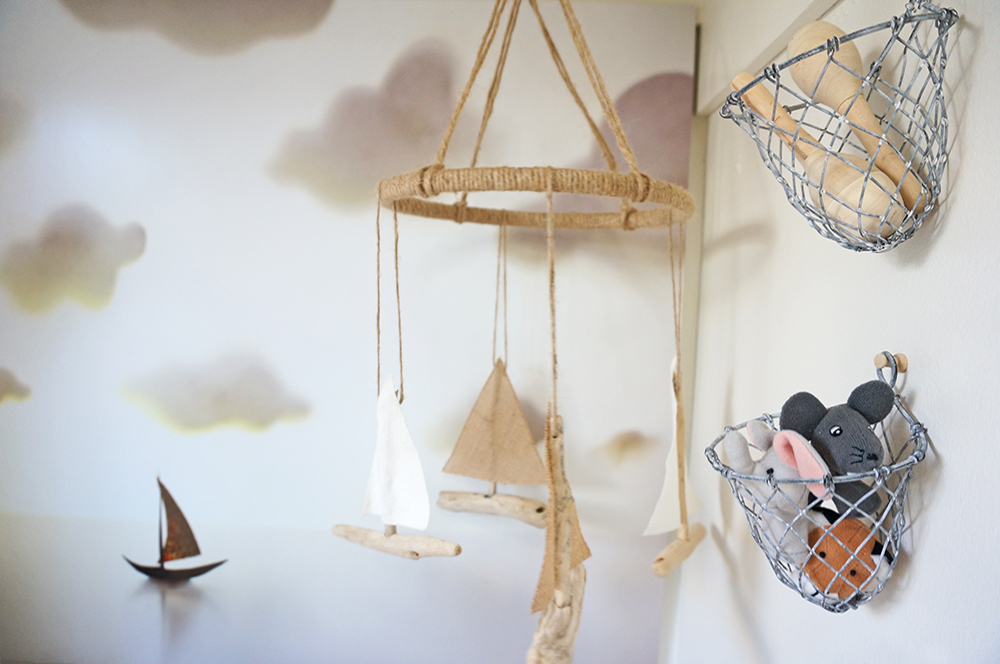
(Also pictured: Small driftwood, burlap and hemp baby mobile-- another ETSY find, via Wiggly William.
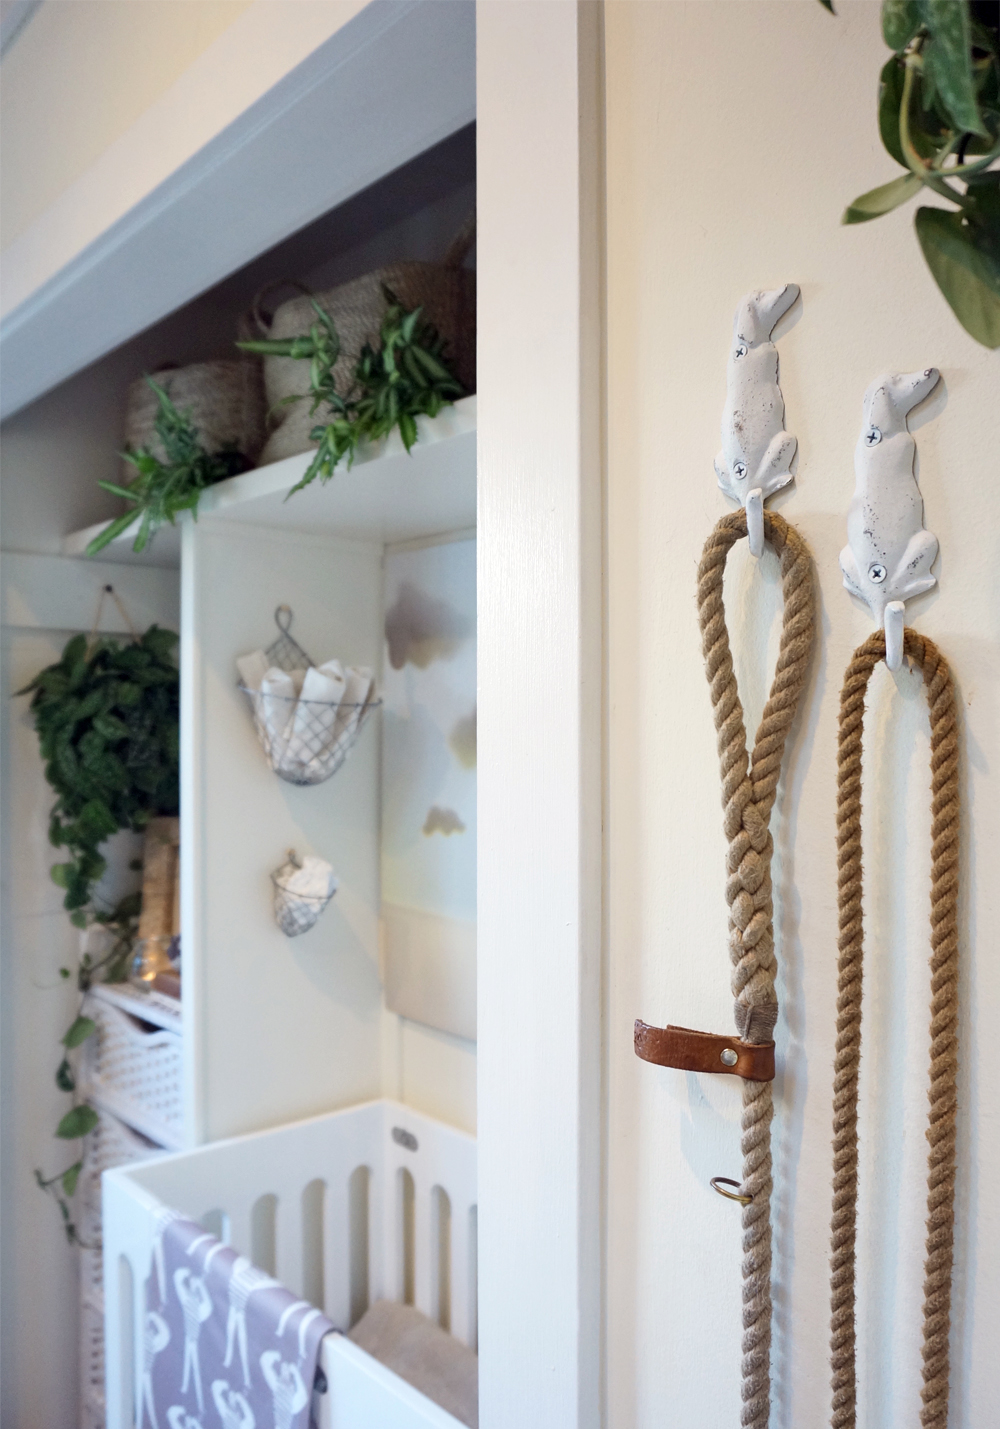
I wanted new hardware to hold Stanlee's and Sophee's leashes next to the Bay. This pair of hound hooks (also from ETSY) were spot on, and blend well with the decor when paired with the nautical rope leashes by Resq Co:
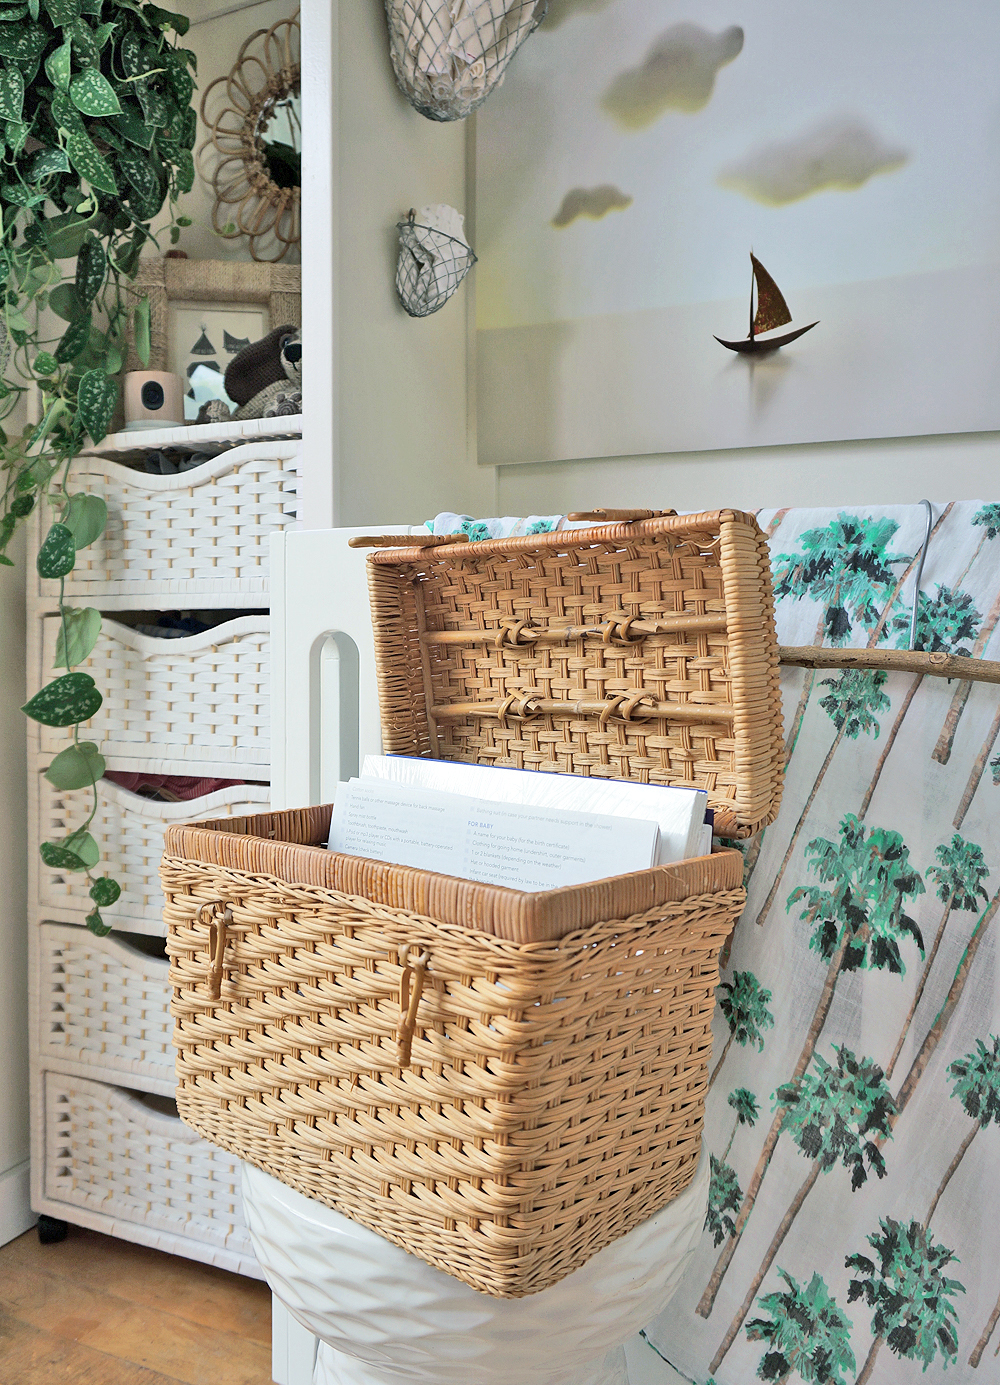
We needed to find a place to stash my prenatal and postpartum paperwork, as well as the baby's ultrasounds and future health records. Rather than opting for another "storage solution" I wanted to find a pretty lil' something that could be left out in the open like an art objet. I stumbled upon a vintage picnic basket at Tower 20 (by Tim Clarke Design) in Santa Monica, and repurposed it into a medical files box:
I then decorated the nearby heater cover with lightweight mirrors to help brighten and enlarge the appearance of the space:
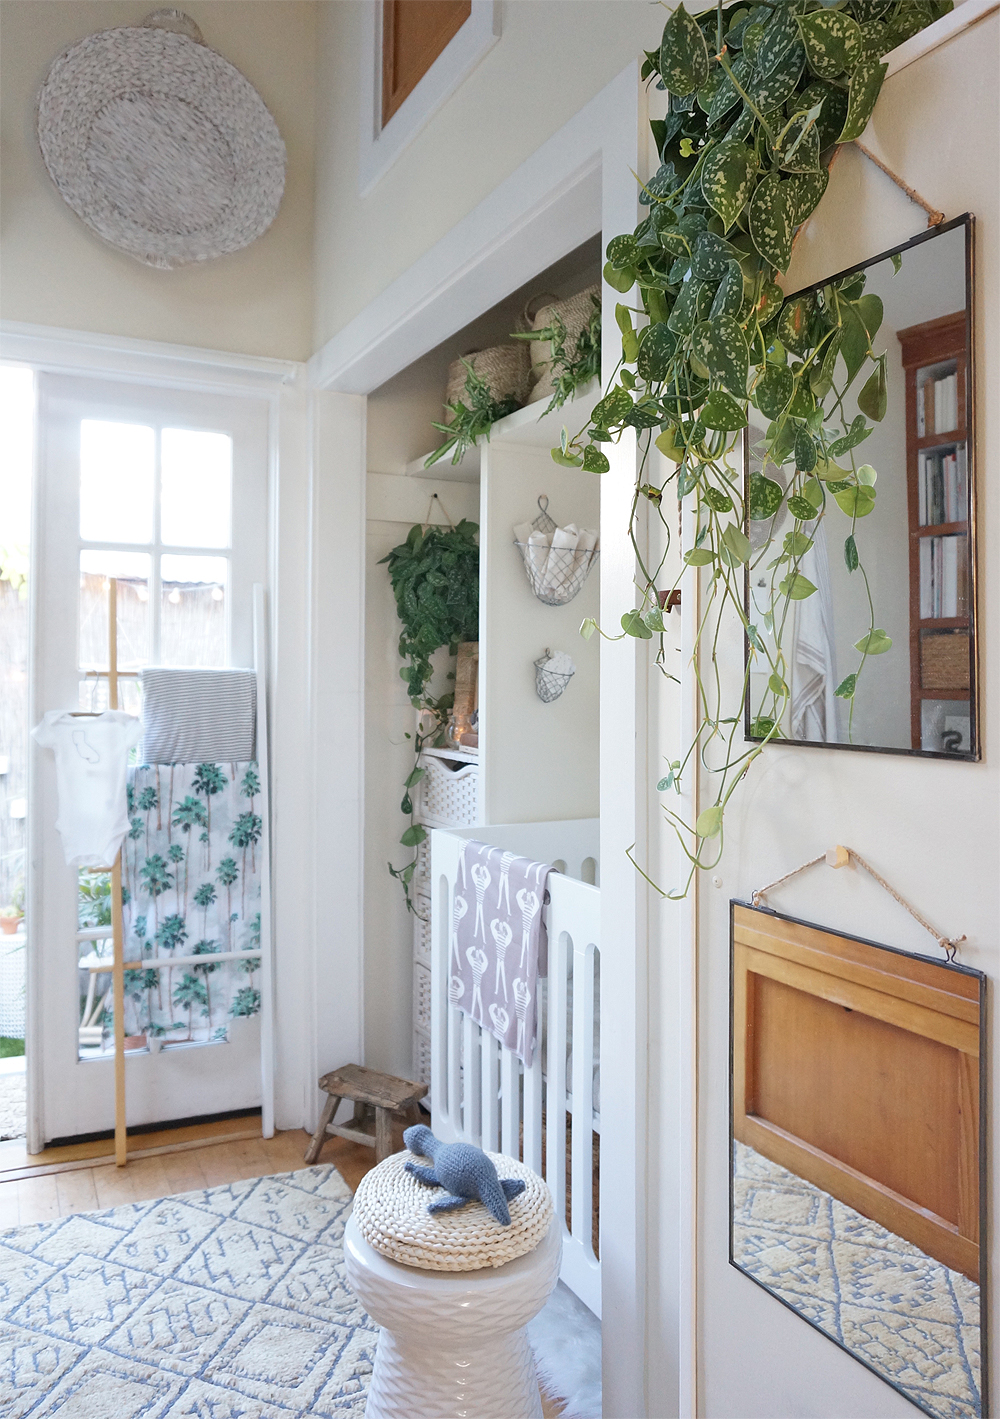
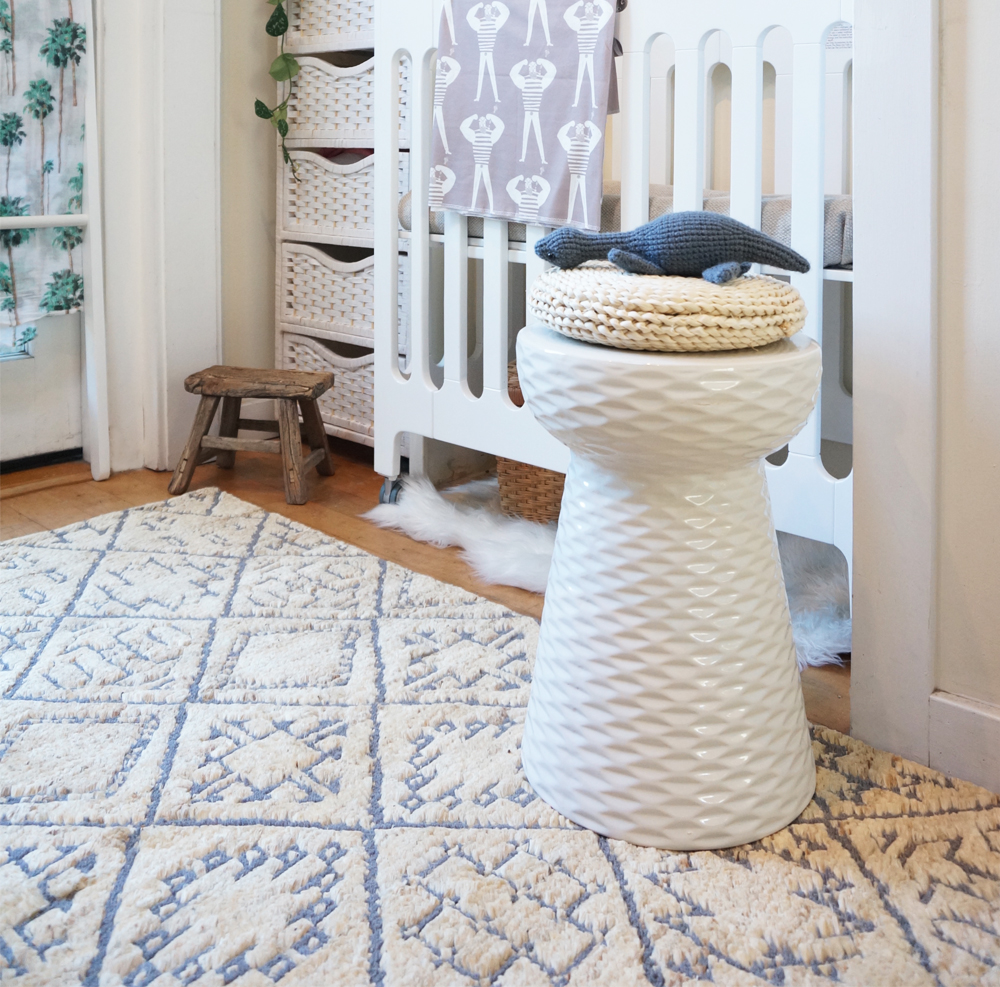
(Also pictured: Handmade Loch Ness monster plush toy by MEVVSAN from etsy // Small wooden stool (vintage) // 2-toned Umbra hub ladder // Daphne white garden stool from home decorators collection // Sailor swaddle by Woolf with me)
We also needed a new, cozy rug to sit on while spending time with the baby. I found the Sahara Rug in Sand via Loloi Rugs, and it's my new favorite item in the bedroom:
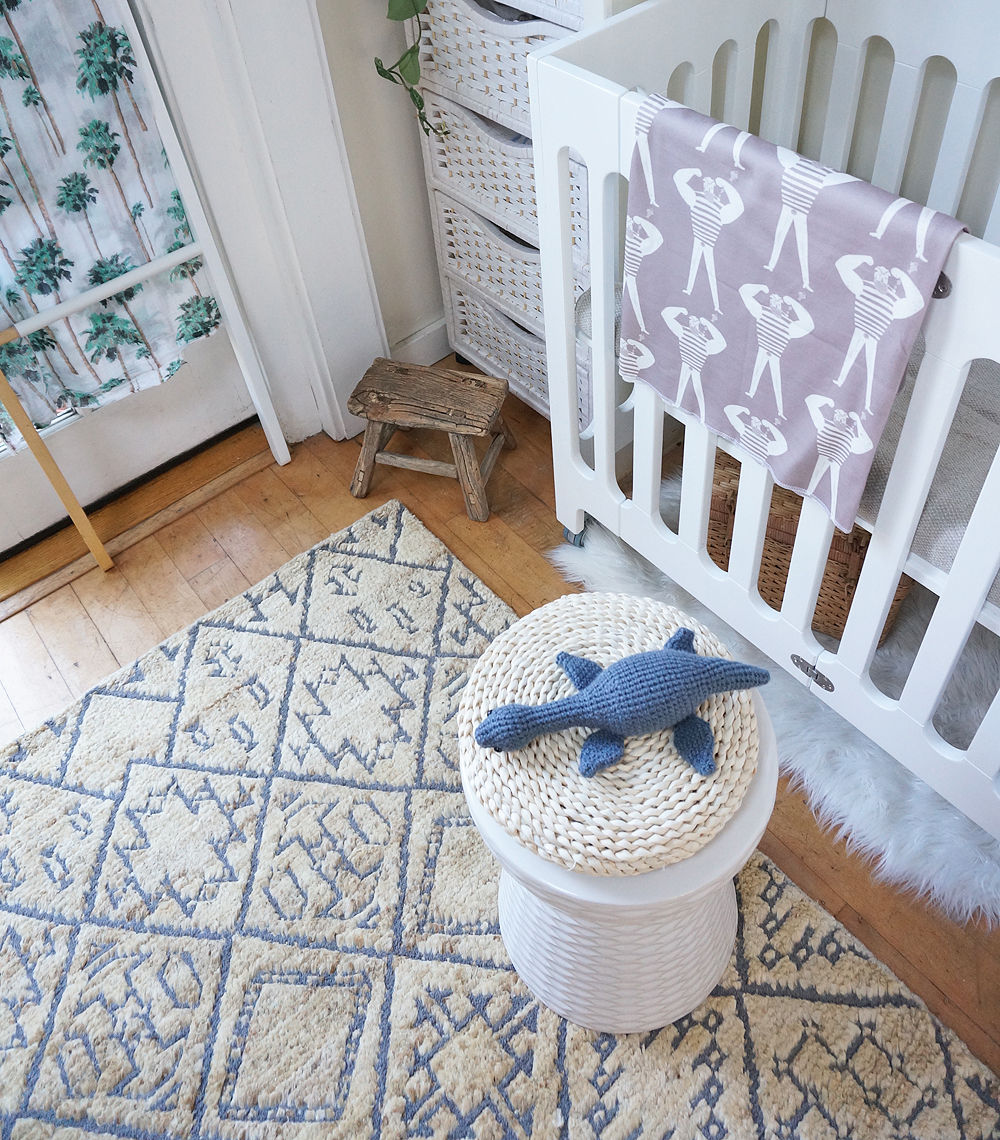
(Also pictured: Handmade Loch Ness monster plush toy by MEVVSAN from etsy // Small wooden stool (vintage) // Daphne white garden stool from home decorators collection // Sailor swaddle by Woolf with me)
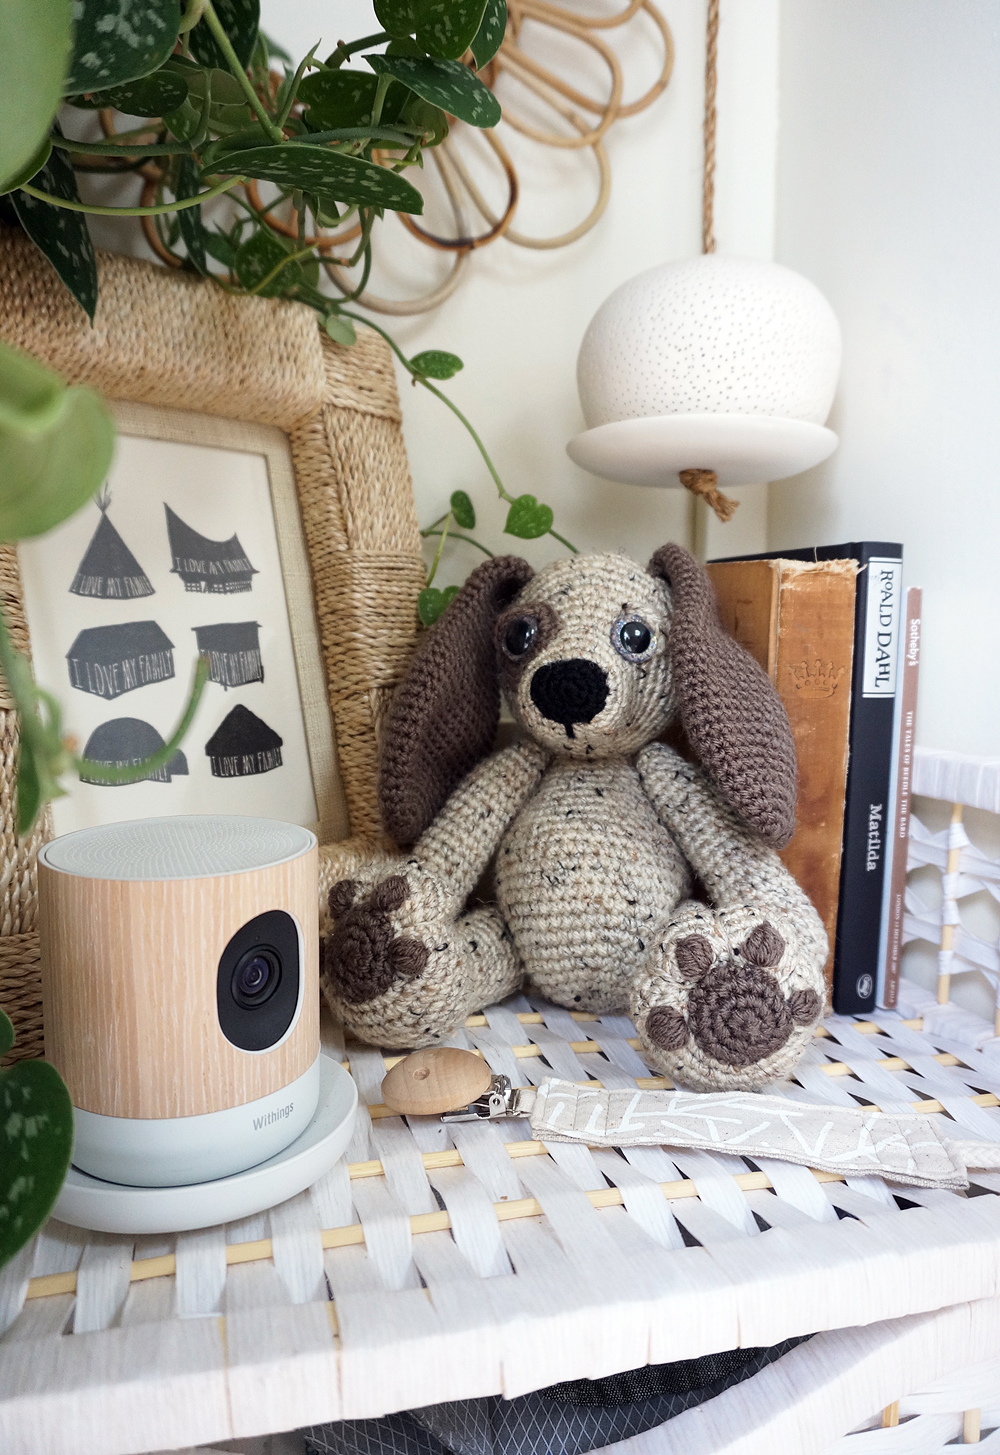
Another item on the checklist was a baby monitor. But we also wanted something that could act as a general security and pet cam when we're out of the house. We love the look of this Withings "Home" camera, and that it has several audio features that we can control with our iPhones. (We've started using it already to speak to the pups when we're out, which is always entertaining.) We'll have to find the perfect place for it once the baby arrives!
CHANGING AND BATHING TABLE (+ ACCESSORIES)
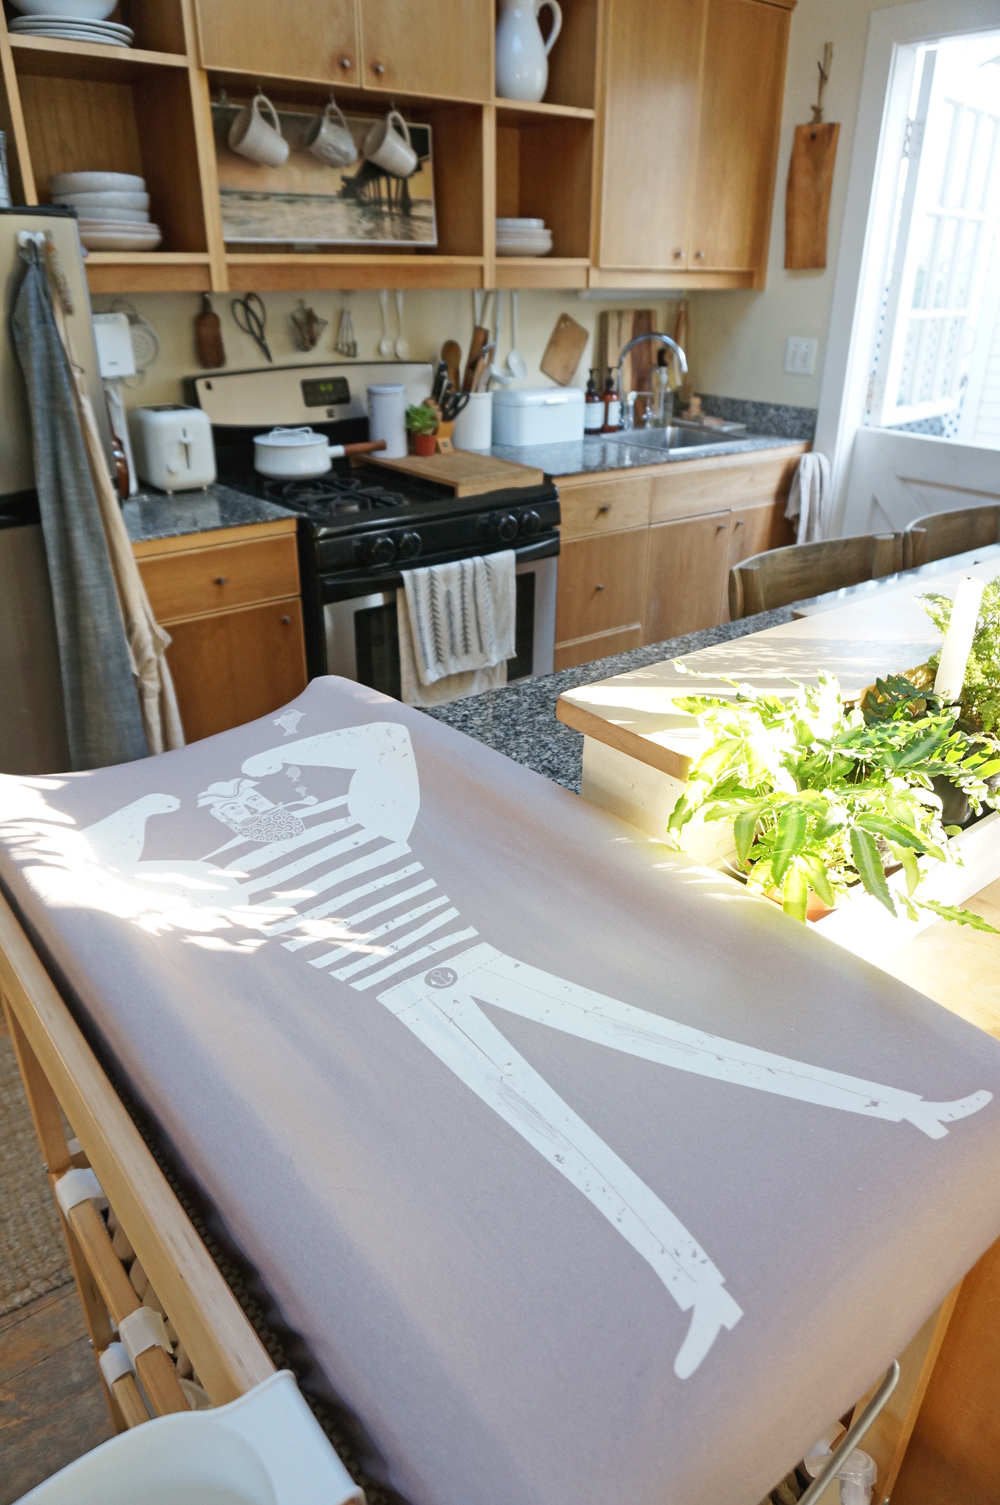
Last but definitely not least, we needed to find a changing table and baby bathing solution. While we could've used any place in the house for changing diapers, we wanted something dedicated and mobile. I am nearly 6' tall, and Adam is even taller, so the idea of bending over a low surface for changing and bathing was completely unappealing to us. Meanwhile, our sinks (bathroom and kitchen) are too small and not properly designed for baby bathing. We don't have room for a changing table AND a bathing solution, but luckily we found a rolling combo piece.
... and no, we aren't keeping the combo table outside-- it's just easier to photograph out of the house! It will be a mobile piece within the Cottage.
How cute is this greige sailor changing pad cover by Woolf With Me?!
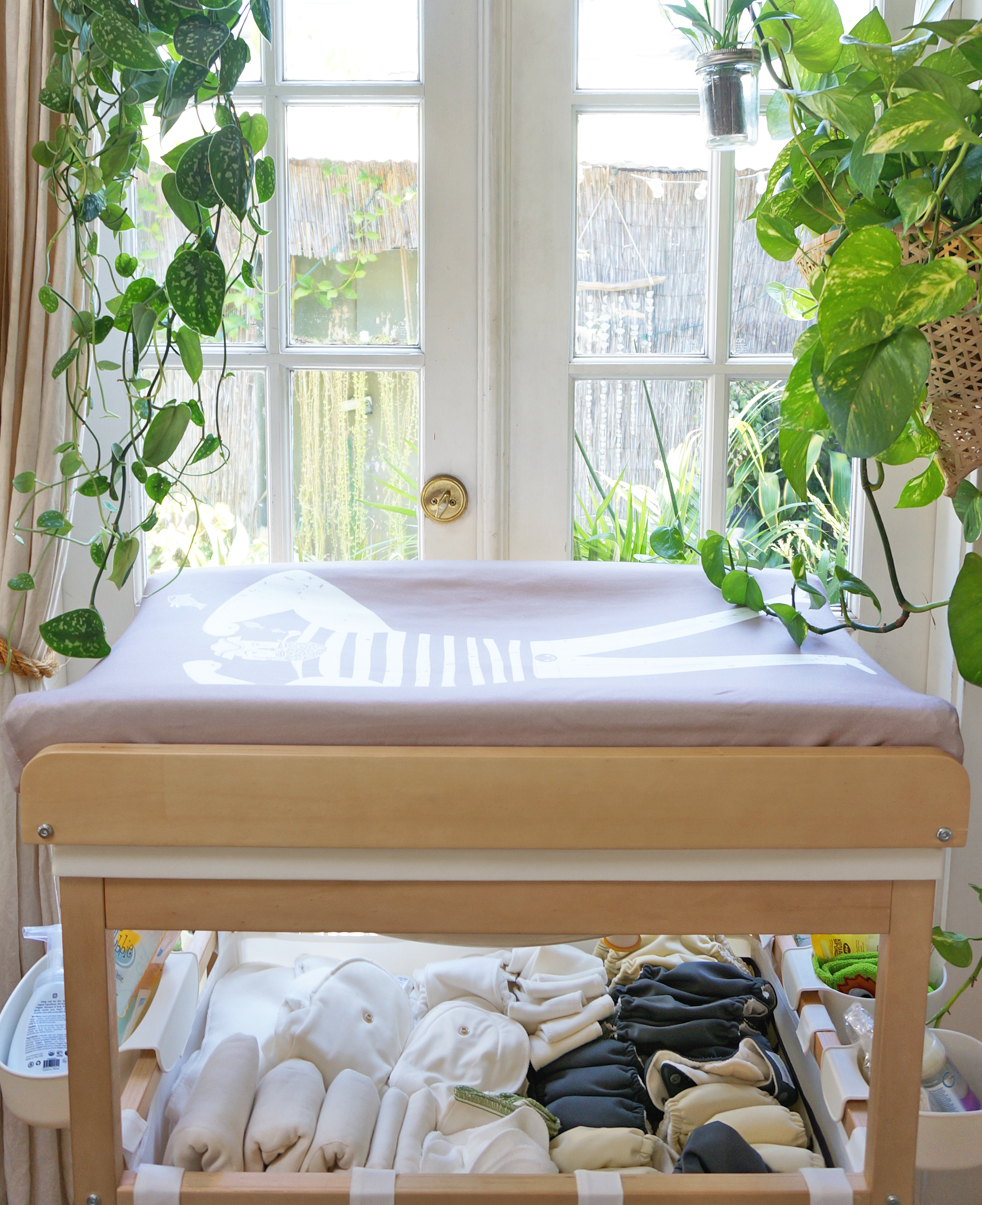
We've already stocked up the cart with multiple diapering systems from GroVia. (We've used them on our nephews who are here frequently, and they've worked wonderfully.)
When we're on the go, we'll use this handmade changing mat from Fawn + Cub. (I bought this a year before we decided to get pregnant. Crazy, I know, but I just loved it so much.)

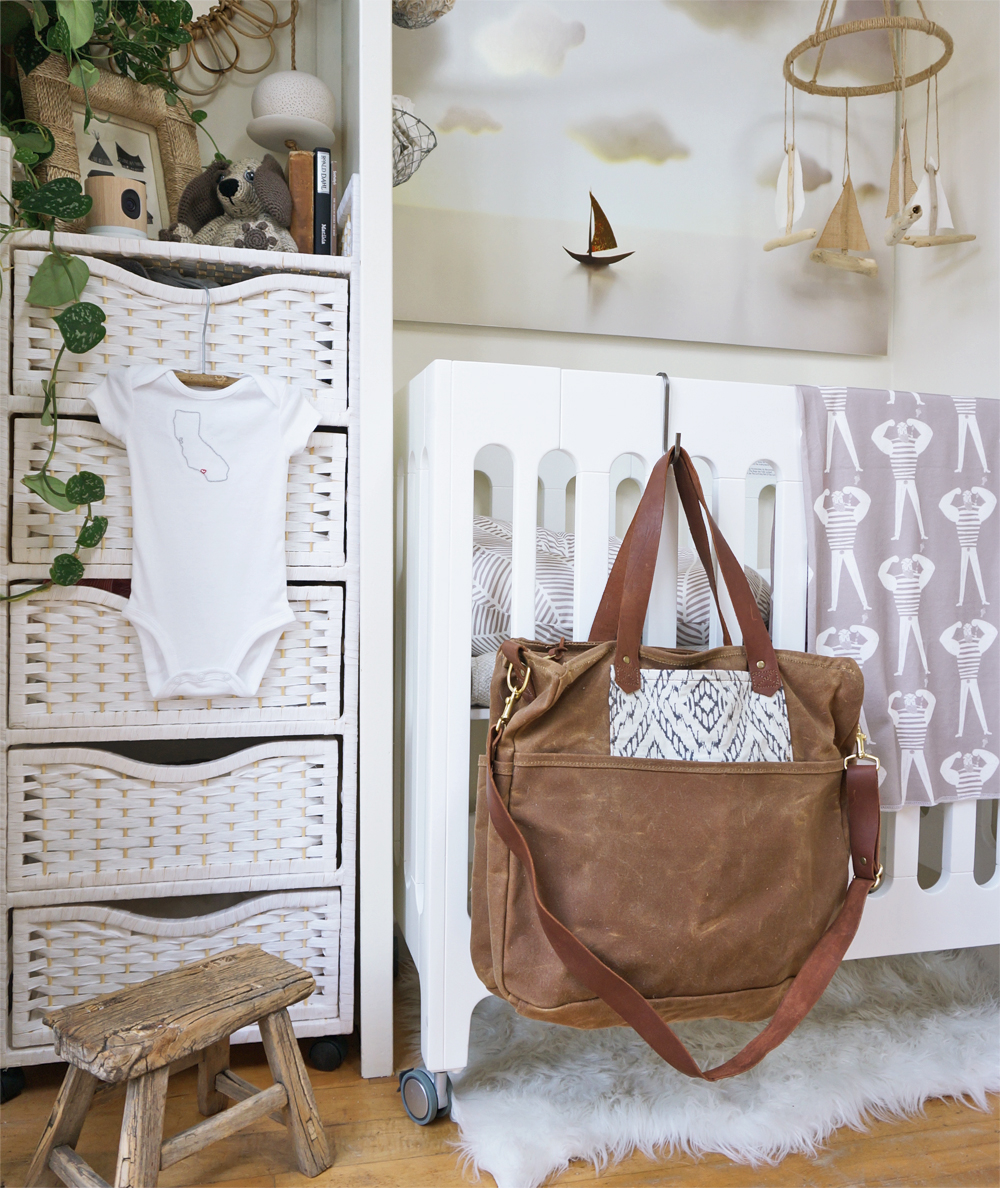
Our diaper tote is also made by an ETSY vendor-- a married couple who run a shop named Kith and Kin. Adam and I love how this unisex bag is both durable and beautifully designed:
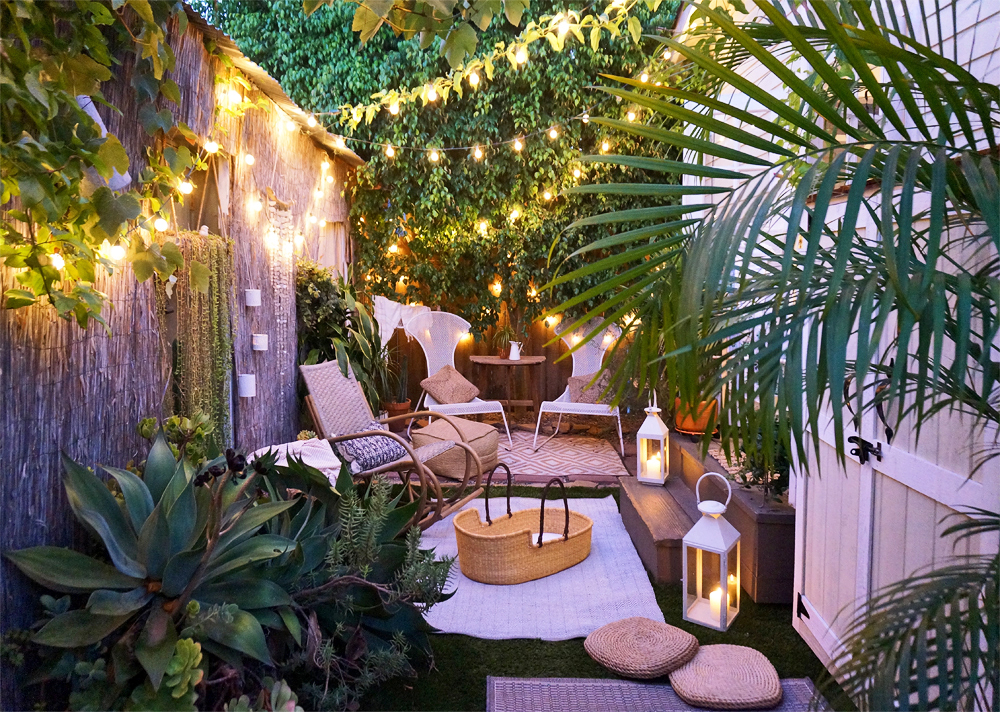
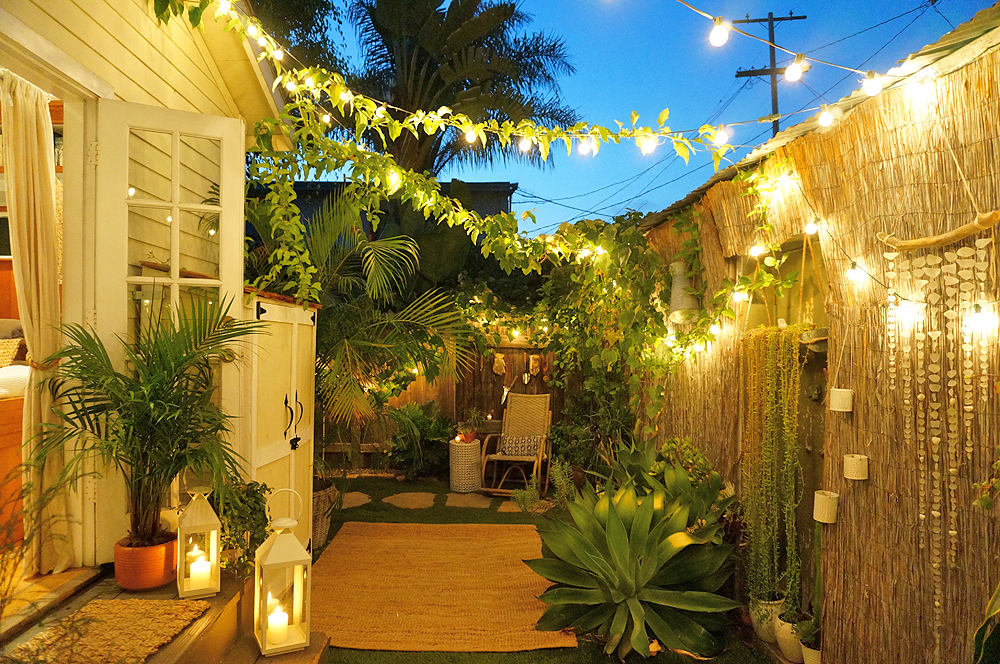
LOUNGING | We don't have the room for a glider inside, so we placed a wicker rocking chair from Joss & Main in the garden just off the bedroom/nursery stoop. We dressed up the space with outdoor rugs, throws, lanterns, and a 5' handmade mobile by Sea & Glass. If the baby isn't in our arms while we're enjoying the garden, he'll be in this gorgeous Moses Basket from Plum + Sparrow:
WHEW. Now I think the only thing we still need is... THE BABY. Hurry up, October! We are can't wait to meet our son and introduce him into this loving, little world of ours.

Tiny House Closet Nursery - The Baby’s Bay
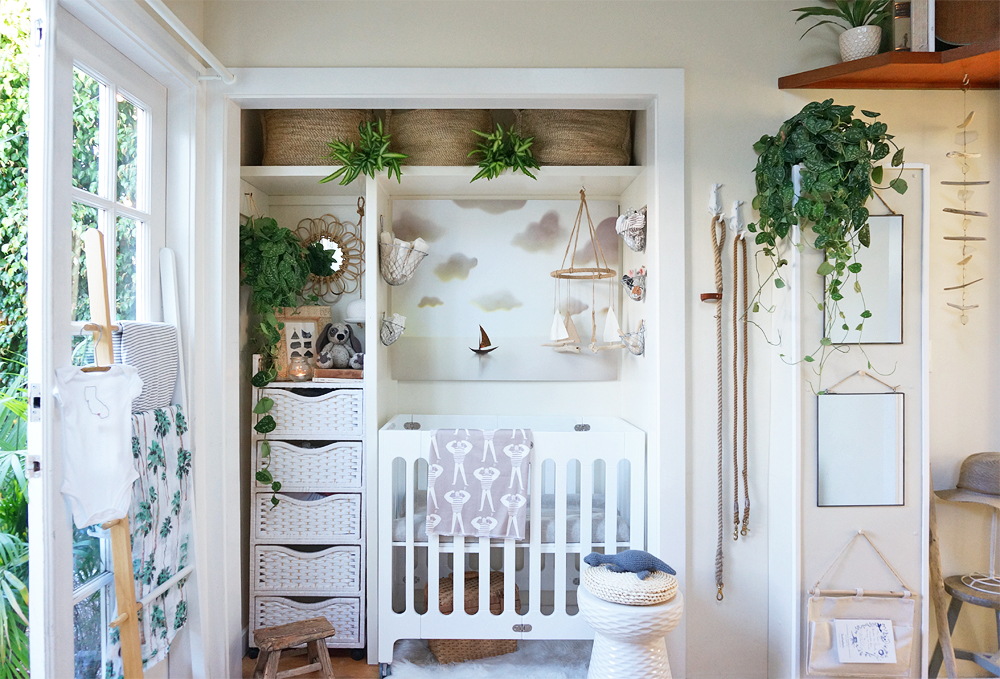
When selecting a dedicated area for our son’s nursery, we did what many small-space dwellers do and opted to convert our closet into his little room. I didn’t intend to have a “theme” for the space, but it happened on its own over time. The colors, textures and prints I selected were sandy and neutral, and the artwork I loved most reminded us of our lives here along the ocean. Before I knew it, we had a subdued coastal vibe going on. As such, I started referring to the little alcove as "The Baby’s Bay."
There were some basic updates that needed to happen before we could safely and practically convert the closet into the Bay. Thankfully they were all simple:
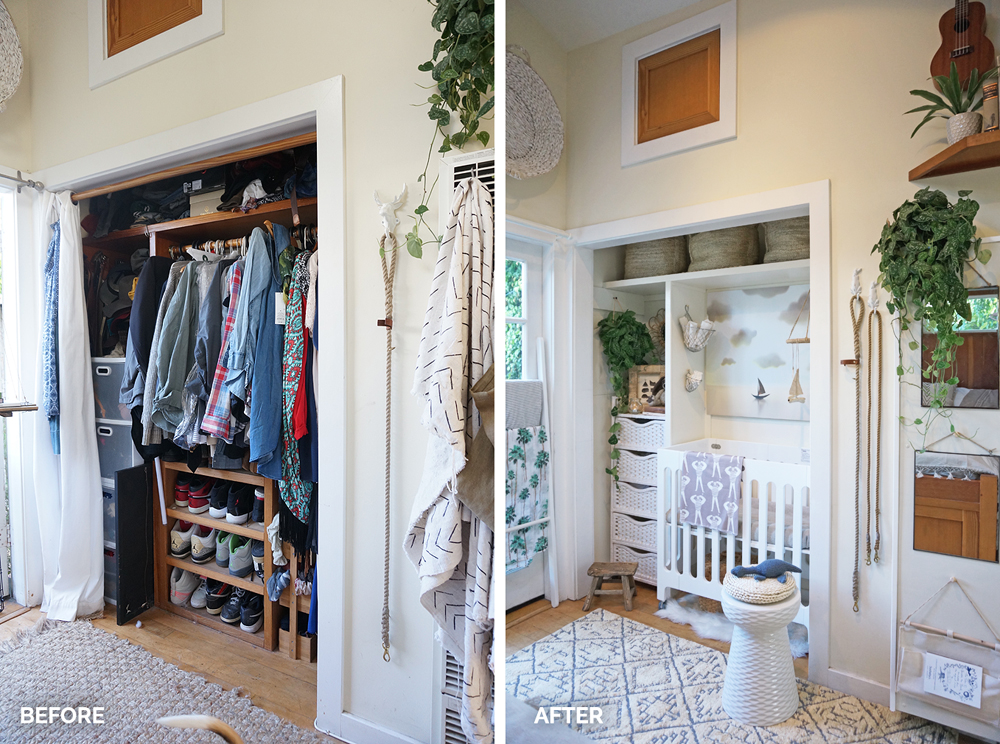
1. Deconstruct the built-in shoe rack, and fill in the gaps left behind after its removal. We hired a local handyman to do this. He ripped out the built-in shoe shelf, and then used a mix of old and new materials to fill in the gap in the floor where the shelf previously stood. Meanwhile, I visited The Home Depot to pick a trim that matched the rest of the closet, and had it cut to fill in the gap in the molding left over from the shoe rack removal:

2. Remove the internet cable cord, which was fastened to the molding on the perimeter of the closet. Our internet provider sent a technician to help us with this process. He removed the ugly cords that sat inside for years, and relocated them to the crawl space under the cottage.
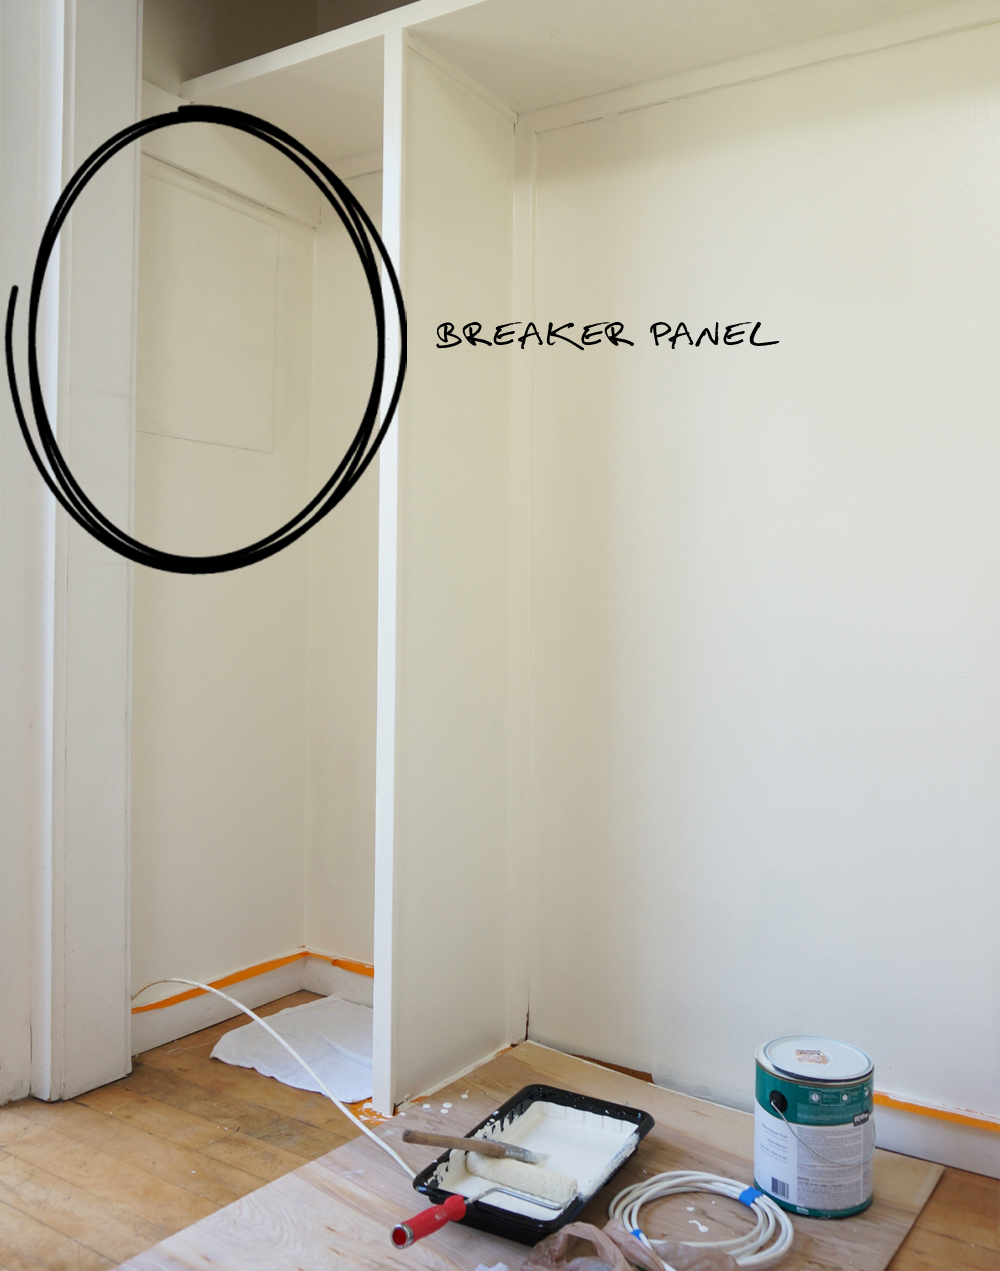
3. Cover the breaker panel, while still leaving it accessible: There’s a standard grey electrical panel on one side of the closet. We need to maintain easy access to the door, but I wanted to cover it up for the nursery. I used a magnetic sheeting overlay to mask the hardware, and painted it to match the color of the wall:
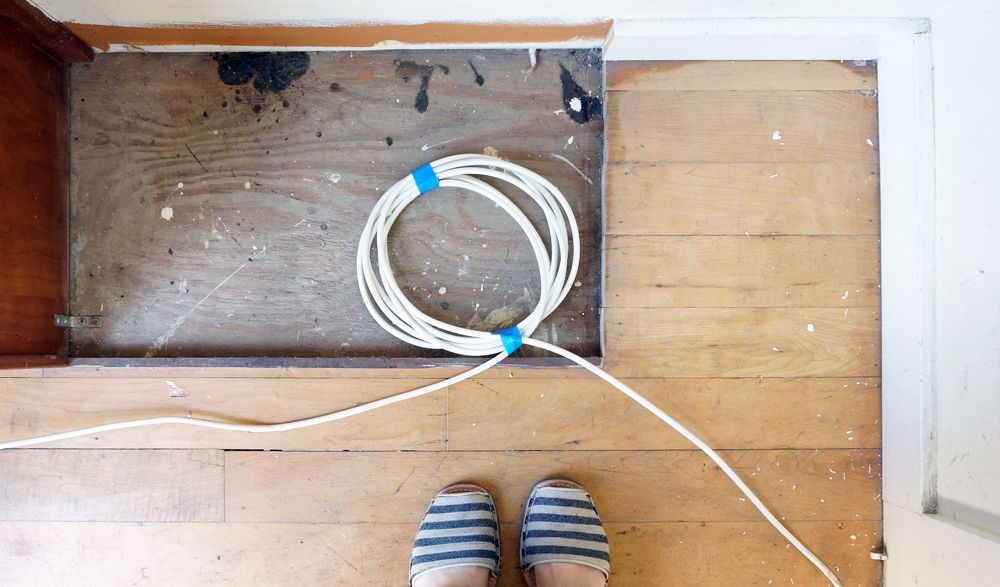
4. Remove the heater control panel box, closet dowels, and miscellaneous hardware. We had an electrician help us with all necessary wiring modifications. Beyond that, it was a simple matter of applying spackle and wood-filler where necessary before repainting everything.
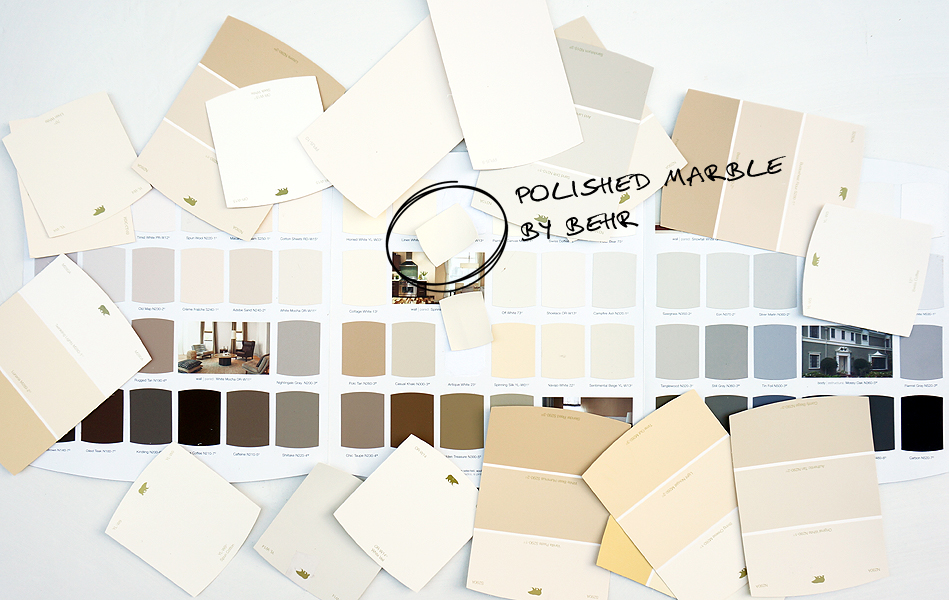
5. Leave the remaining built-ins (a high, closet-wide horizontal shelf and vertical divider) in place to help protect the baby from items that could displace during an earthquake, but better-blend those walls into the overall space. We always planned to leave the remaining built-ins within the closet for safety, and aimed to work with them when outfitting the space. But the dark wood lines drew attention to the dividers, and made the alcove feel even smaller than it is. So we chose a paint color that’s a few shades lighter than our bedroom walls to brighten up the previously shadowy Bay. I selected “Polished Marble” by Behr. I love how it appears to blend with the rest of the room, even though it’s actually quite a bit whiter:
Once we had this new, blank canvas, I could finally visualize the nursery. I found a little white garden stool from The Home Depot’s décor brand, Home Decorator’s Collection. I placed it by the crib, and I sat there rearranging and restyling the room in my mind for hours. The space then came together easily, despite its size.
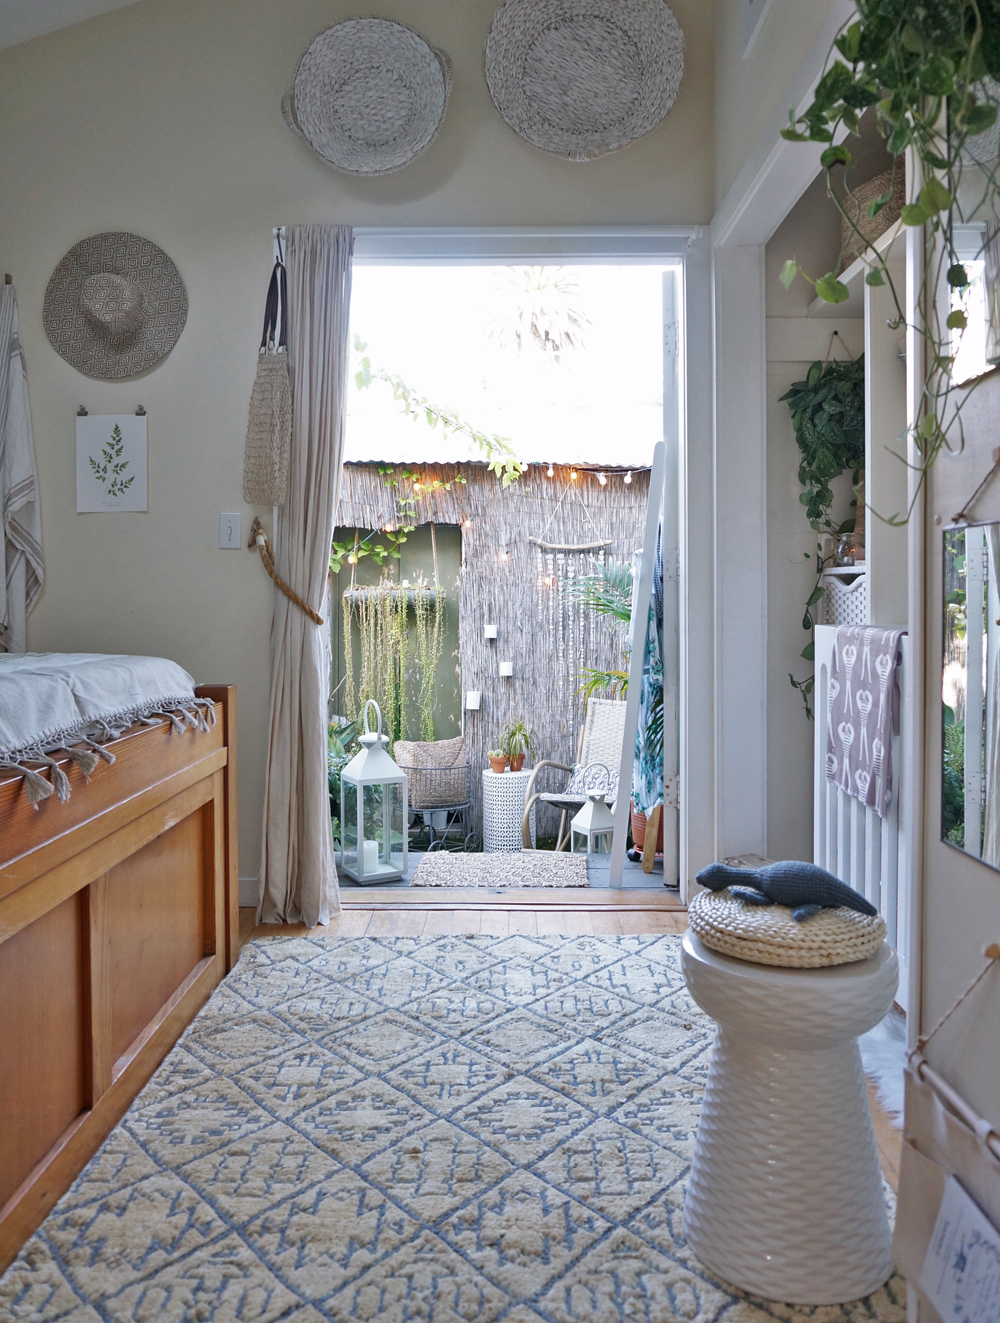
Before we updated the closet, I used to obsessively close our curtains to avoid seeing the overflowing contents behind them. Now the closet is a bright, airy, and happy component of the Cottage. It feels as though it should’ve always been outfitted this way.
You don’t need to start from scratch to transform your existing square-footage into a space that better suits your evolving needs. With a bit of creativity and paint, you can turn a box into a Bay. You don't need to live large to live beautifully!
I acknowledge that The Home Depot is partnering with me to participate in this nursery makeover project. As a part of the project, I am receiving compensation in the form of products for the purpose of promoting The Home Depot. All expressed opinions and experiences on this blog are my own, and are written in my own words. My post complies with the WOMMA Ethics Code and applicable Federal Trade Commission guidelines.
Tiny House Closet Nursery - The Garden Shed Wardrobe
When Adam and I decided to have a child, we knew we wanted to stay here in our tiny home. As we already share the space with our two dogs and my small business, we knew it would be a challenge to add a nursery to the mix, but we were so excited to make it work. Given our budget, we basically had two choices when tackling the nursery project in our tiny house:
Leave nearly everything as-is, downsize our belongings in existing storage spaces to make room for baby care necessities, and rely solely on mobile/rolling nursery components.
Create a dedicated nursery within an existing space by downsizing and relocating our other belongings from that area.
We went with option two, because thanks to the sunny, dry SoCal climate, we knew we could get creative with indoor/outdoor lifestyle and storage solutions. (If we lived somewhere that gets a a fair amount of rain or any snow, we would've stuck with option one.) We decided to convert our bedroom closet into the nursery, by downsizing and relocating part of our wardrobe to a 2'x4' cedar garden shed from The Home Depot.
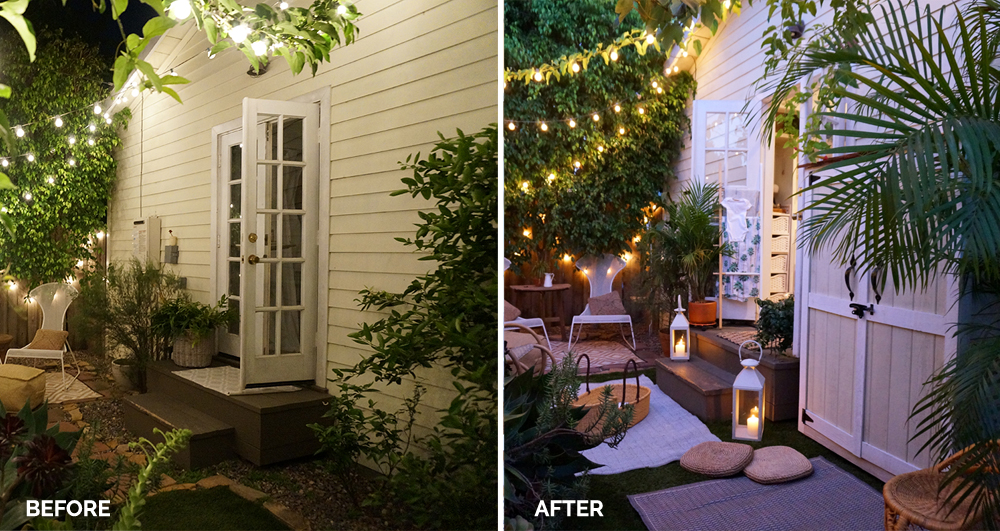
It's important to note that it VERY RARELY rains in Los Angeles, and the weather usually hovers somewhere around the 50°s to the 70°s. As such, our patio furniture stays outside and uncovered year-round, while select garden decor and accessories come indoors in the unusual event of rain. We've been using our outdoor spaces in this manner for over 5 years now, which gave us the confidence that we could pull off an unusual outdoor closet solution. Here’s how we did it.
DOWNSIZING
While storage solutions are obviously important in homes of all sizes, the clearest path to living simply is to not own too many things. While we extended our usable storage space at the Cottage via our new 2x4’ shed, Adam and I were able to make the wardrobe relocation project work by getting rid of nearly 1/2 of our clothing. Giving away belongings is second nature to us now, but it definitely took some practice at the beginning. For those of you struggling to let go with your unnecessary belongings, I recommend exploring The Life-Changing Magic of Tidying Up by Marie Kondo. (Try reading the digital version rather than the print edition and VOILA! You’re already on the path to reducing your physical possessions!)
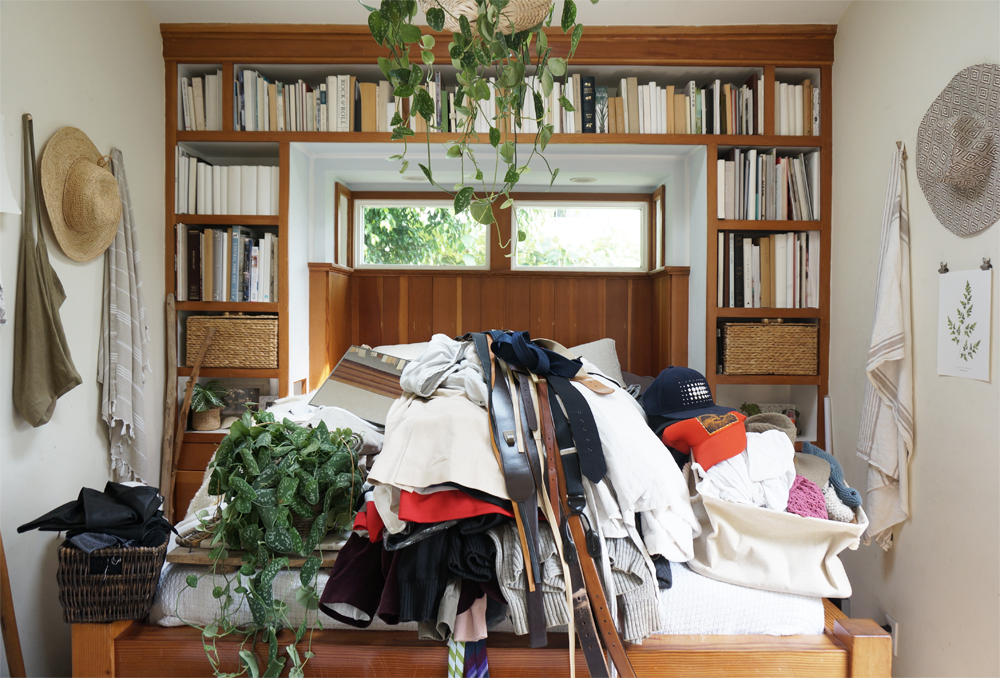
We removed everything from our shared closet, and created four piles:
The Giveaway Stack - I keep a folding bin from The Home Depot’s décor brand, Home Decorator’s Collection, in the laundry unit we share with our neighbor. Adam and I place our donation items in the bin weekly, and then drop its contents off at Goodwill and/or our local community housing organization about twice a month. We filled this bin (along with several other bags,) when cleaning out our closet for the nursery. I found that the start of my third trimester was the ideal time to tackle this undertaking. I hadn’t been able to wear my “regular” clothes for months due to the baby bump. It was therefore fairly easy to assess what I missed and needed, vs what I did not.
Infrequently Used but Useful Clothing - We put our winter/travel coats, scarves and other such infrequently used but handy clothing in two plastic, lidded storage bins. (The bins are now stowed at the bottom of the shed, beneath our hanging clothes.)
Weekly Wear to Hang - I had about 18”w of hanging clothes (dresses, tunics, etc) that needed to remain on hangers. We suspended those in a cedar wardrobe from Home Decorator’s Collection within the new shed, alongside Adam’s work shirts and sweaters. (Photo below.)
Daily Wear to Fold - I eliminated everything I didn’t need, and fit all of my daily casual dresses, tops and pants into one of the two trundle-drawers built into our bed. (Photo below.) The neighboring trundle was, and still is, our hamper. Adam bested me by downsizing his clothes even further— he managed to find a home of the rest of his pieces in the drawers that are part of the bed frame, beneath the bookshelves on his side of the bed.
We now keep all of our shoes in the built-in cubbies beneath the couch. (Photo below.) Socks, swimwear and underwear fit into the drawers that are part of the bed frame, beneath the bookshelves on my side of the bed


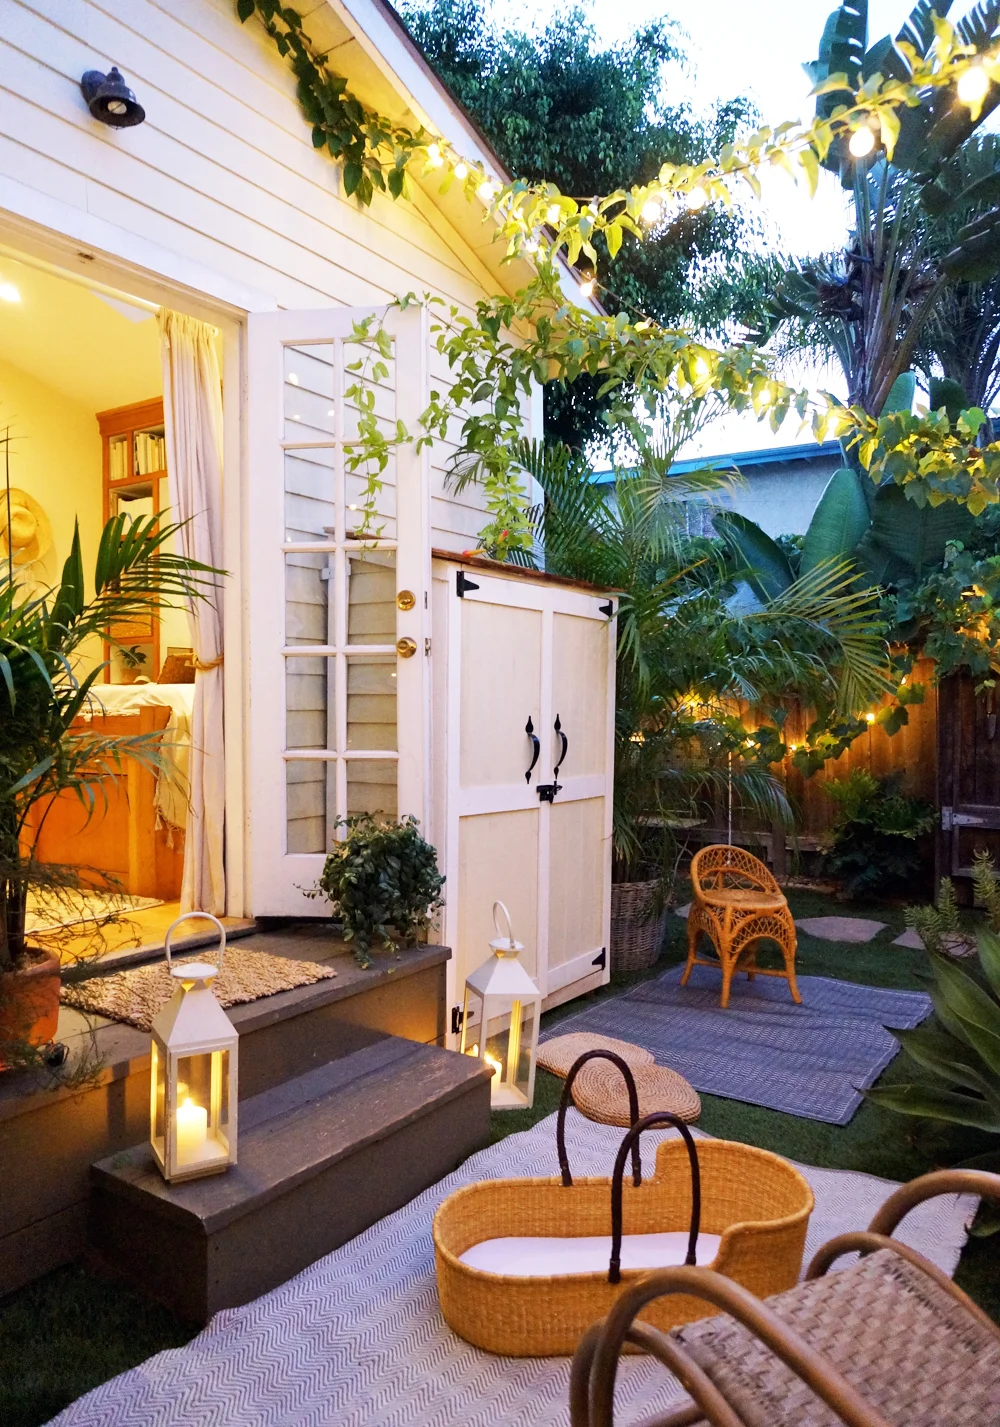
The fun (yet tricky) part of this project was finding a shed that was juuuuuust riiiiight for our little garden. We didn’t want to build on to the house— we just needed a simple shelter that was about 2’ deep by 4’ wide by 6’ high. Luckily we found this shed from The Home Depot, which was the perfect size for our needs:
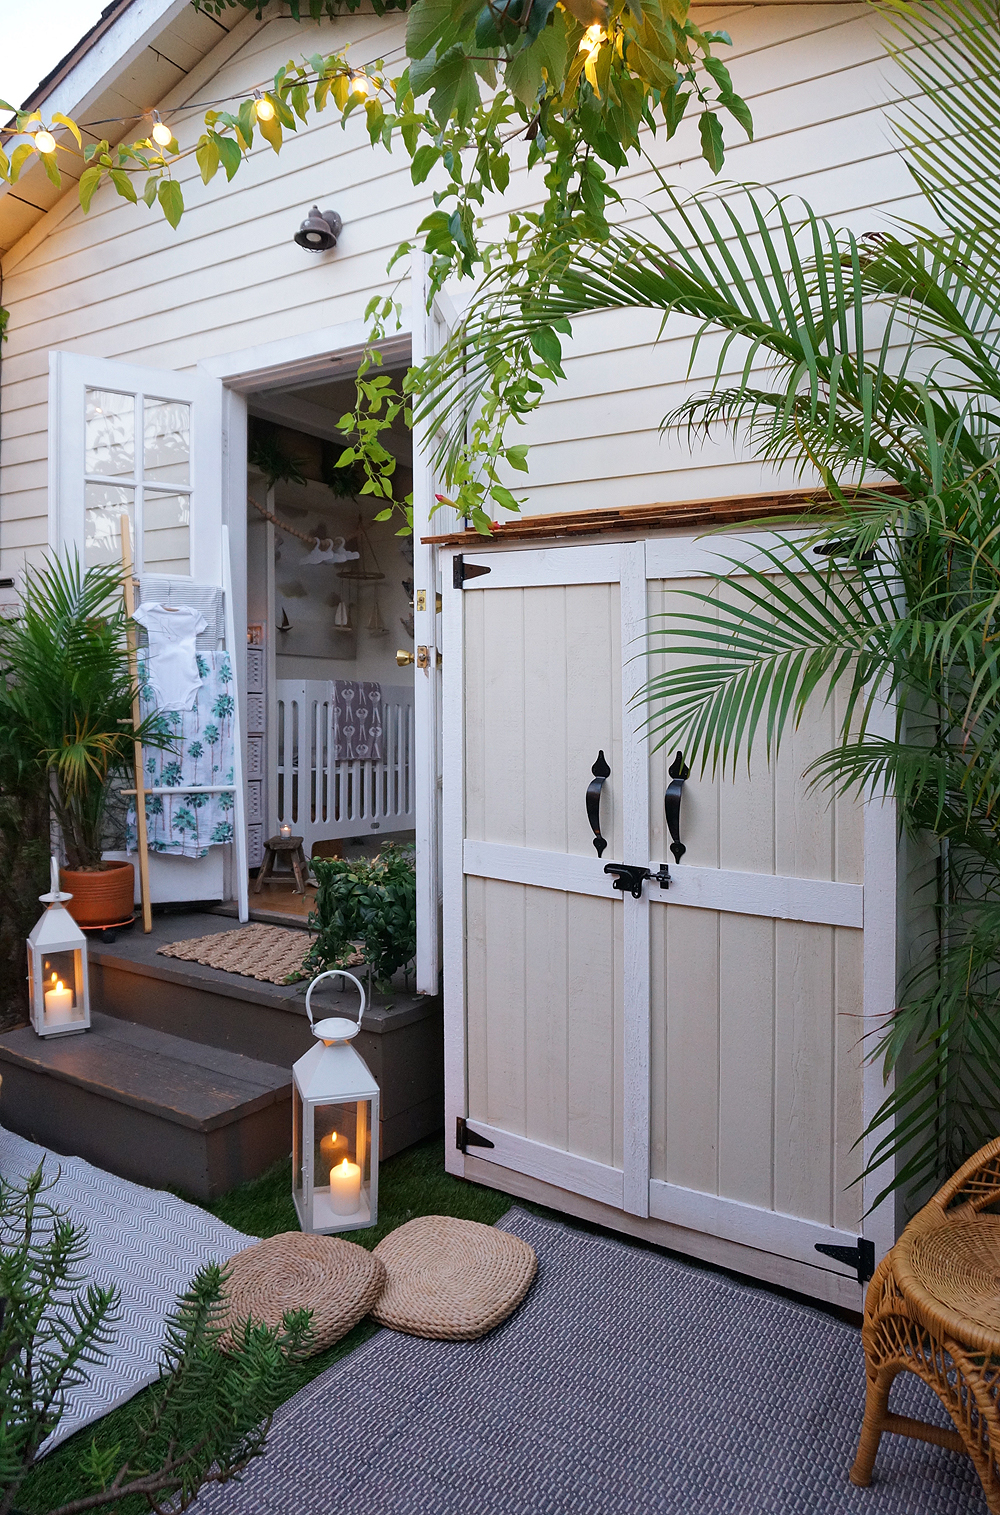
We carefully weather-proofed the shed’s seams, and painted the exterior to match the Cottage with contrasting Behr Paint colors on the panels and trim. Next, we installed a custom-cut dowel rod for our hangers, and selected this cedar wardrobe in which to stash our hanging “weekly wear.” Lastly, we secured the shed to the side of the house for safety, in case of earthquakes.


The entire process took about a day, from unpacking the shed at the start, to hanging up our belts and hats at the finish. We added some accessories— such as this outdoor rug— to make this part of the garden feel more like a room, and to tie it into the nursery’s outdoor lounge area.
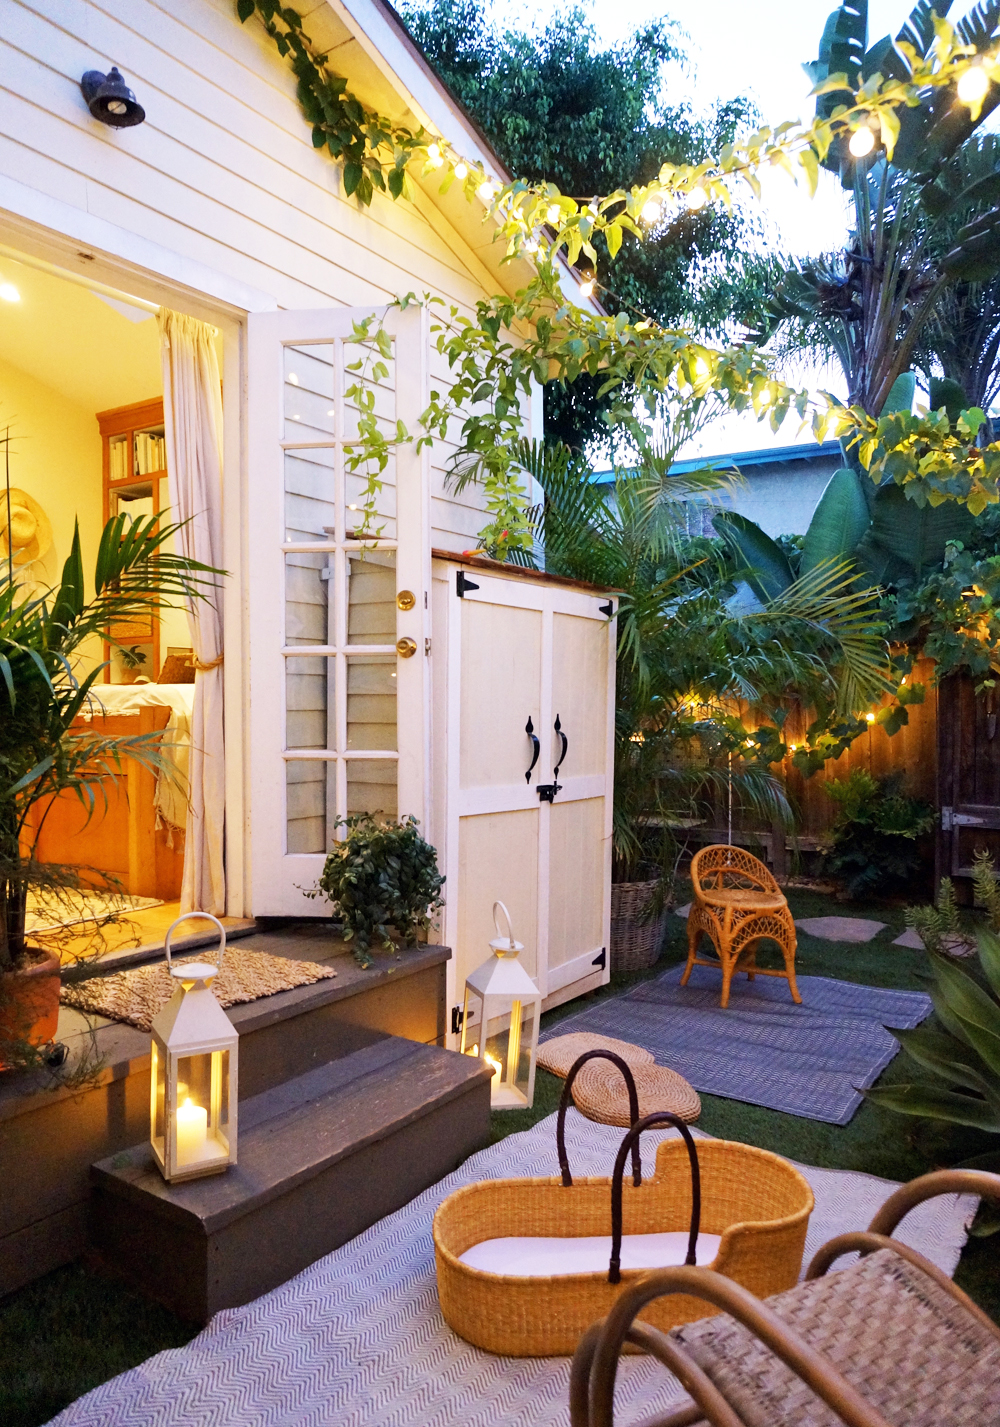
The shed is only five steps from the bedroom closet, so it’s no inconvenience. Adam and I joke that our clothes are probably actually better protected now that they’re living outside in a sealed shed and garment bag, seeing as how we keep our house wide open 10 months out of the year. Our clothes have pretty much been living an indoor/outdoor lifestyle for 5 years anyway!
I acknowledge that The Home Depot is partnering with me to participate in this nursery makeover project. As a part of the project, I am receiving compensation in the form of products for the purpose of promoting The Home Depot. All expressed opinions and experiences on this blog are my own, and are written in my own words. My post complies with the WOMMA Ethics Code and applicable Federal Trade Commission guidelines.