Create the Look: A Small, Sustainable, Multipurpose Corner

Sharing tips regarding interiors feels pretty ridiculous at this moment in time, but I think there is something important to it.

There are so many ways to approach our homes mindfully. We can make the most of our interiors by being deliberate about what we acquire, curiously exploring items we can reuse and repurpose, and getting creative with the space we have. Embracing smaller spaces, repurposing, choosing local, handmade and/or used goods, and sharing resources are all ways to look out for each other and out one shared home.

While used finds like the ones pictured here in our home and those curated below are such gems, there are plenty out there. Remember that homes have only ballooned in square-footage within more recent years, and that newly manufactured “apartment” furnishings are by no means novel concepts. There are so many clever designs that have long been circulating out there - let’s find and use them.
Please note that I sometimes earn a small commission from sales of secondhand pieces.

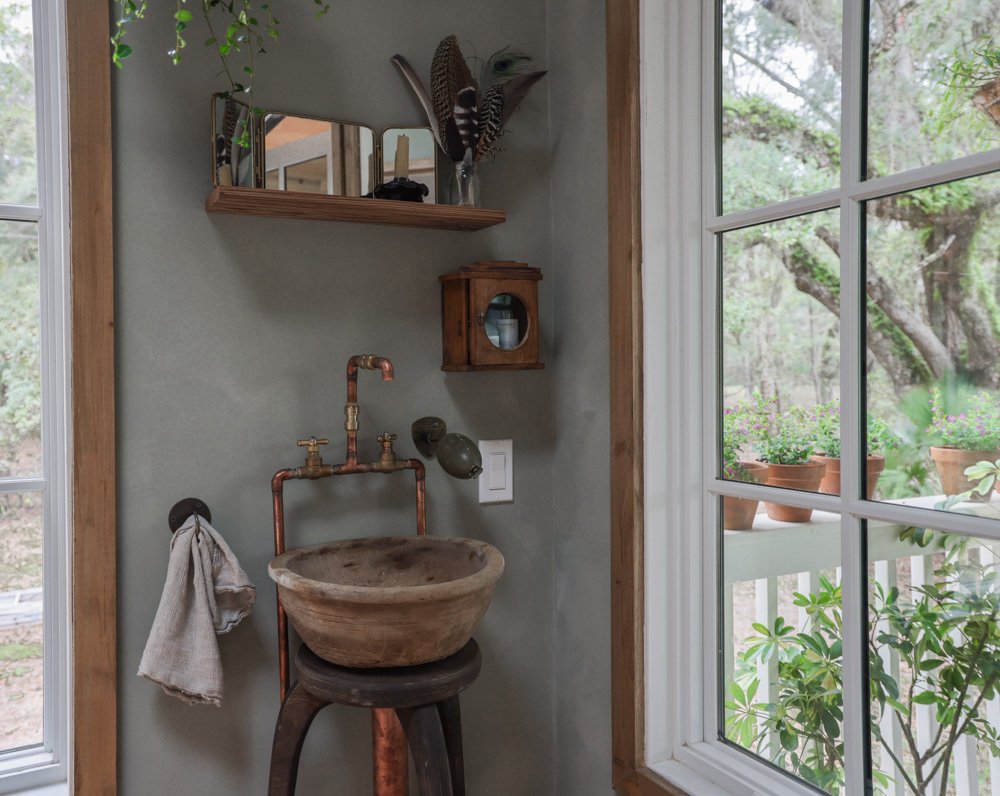
The Upcycled Bedroom Sink
One of the small but mighty features I was most excited to include in the design of our new cottage is the sink in our primary bedroom.
Our ~900 sqft home has one bathroom for the four of us, which we believe is enough since the kids’ grandparents’ home, which has multiple bathrooms, is a lovely one-minute stroll away. Plus, a key concept behind this “ADU” cottage and our French Farmhouse is to live with less stuff by sharing more resources.

One of my clients overseas has a sink in her bedroom, and it’s a design feature I enjoyed often when staying at her home. I found the opportunity to keep select self-care routines within the intimate cocoon of the bedroom to be beneficial in terms of both logistics and mental wellbeing.

I personally don’t function well when I’m rushed, and having (wonderful) children tugging on my clothes while I attempt to capture two minutes for myself at the bathroom sink to be stressful, but not reason enough to add a costly and largely unnecessary second bathroom.

Per usual, our aim behind the design of this sink was to use up as many existing items as possible, rather than sourcing newly-manufactured goods. However, I do intend to acquire a decorative switch plate cover and electrical outlet plate via Buster & Punch, as those standard white plastic ones make me cringe.
The sink is an antique, wooden French bowl (via Elsie Green). It’s coated / waterproofed inside with Rove & Dwell finish coat.
Much of the copper piping was salvaged from local, small business that was modernizing their interior.
The pedestal is a handmade plant stand I found on Etsy,
The mini cabinet was a second-hand find.
The ledge is a spare, river-recovered pine floorboard from The Goodwin Company.
The hooks and folding mirror were leftover from a previous project.
Clay candleholder is vintage via SSS Atelier.
Lime paint in “Cobblestone” by Color Atelier.
Vintage-style rotating soap holder via Vivi et Margot.

Our friend Danny helped us bring this to life, and we’re thrilled with how it turned out. It’s one-of-a-kind, meaningful, and ever-useful.

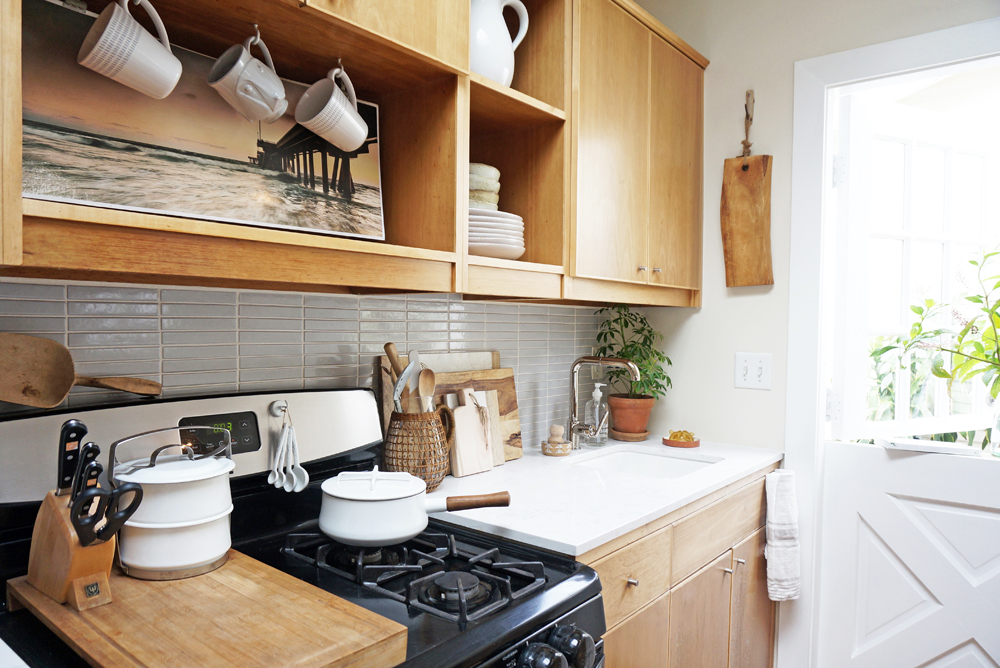
The Mini-Kitchen's Mini-Makeover
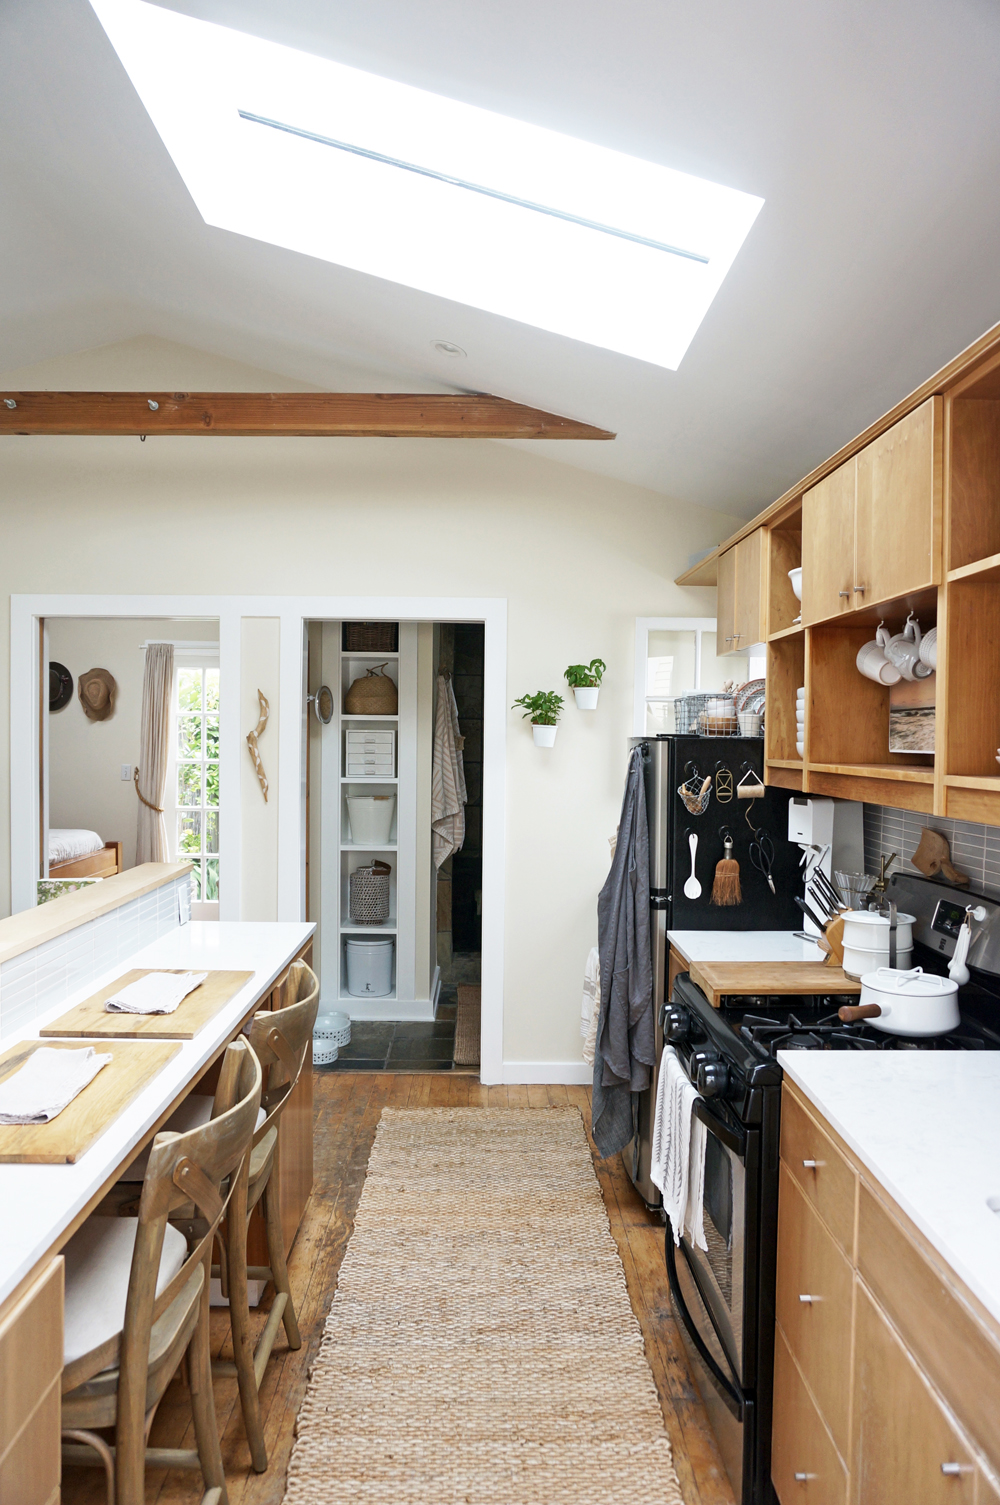
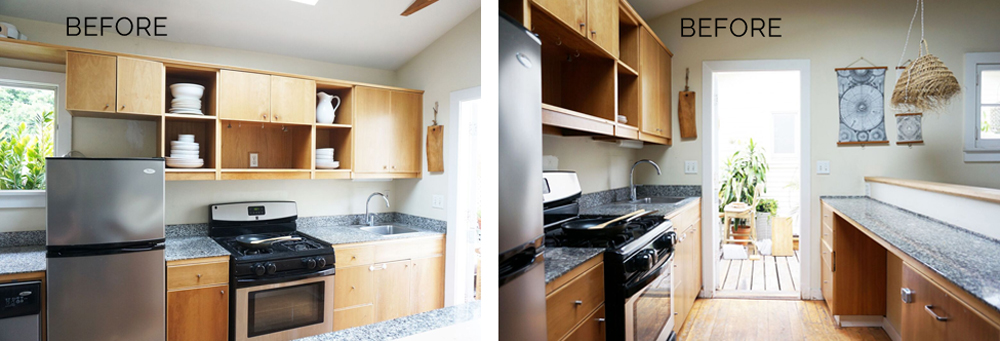
Our little kitchen is adorable, but has needed a makeover for YEARS. The countertops were thin slabs of black, white and grey speckled granite, the backsplash was unfinished, and the walls were patched with paint in mismatching levels of gloss. Seeing as how the Cottage is a major part of our lives and business, why on Earth would I wait so long?
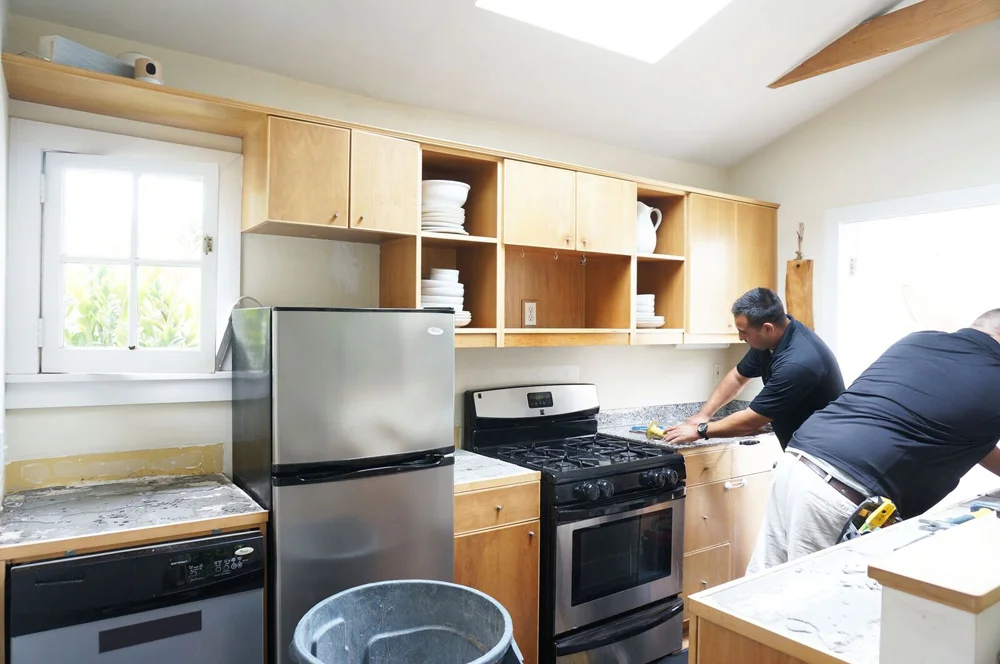
Here's the thing about renovations in a tiny home: you can't just relocate to another part of the house while work is being done. In a small place, there's no where to go to escape the fumes and dust. Add a home-based business, kids, and pets to the mix and there never, ever seems to be a good time to tackle any larger-scale updates and repairs. So I just kept putting it off... and years passed, as they do.
But since West is eating solid foods, we're finding ourselves spending more and more time in the kitchen together... and I started getting actively annoyed by the countertops. I could never see if they were actually clean, and I felt like they were making the space feel darker, smaller and more cramped than it actually is. As I paid more attention to the counters, the conditions of the sink, faucet, and walls all started to stab at my eyeballs, too. I knew I couldn't put it off any longer. Our neighbor agreed to let us stay at his place for 2 days while he was out of town, so we pounced on the opporunity and started planning.
Rather than exploring other kitchens online for inspiration, I pulled materials, textures and colors that inspired me. Then I decided what parts of the kitchen needed immediate attention, as we were operating under a tight timeline, and within a strict budget. Adam and I agreed that the cabinetry and appliances could wait, and that we'd focus instead on the countertops, paint, repairs, backsplash/tiling, and sink.
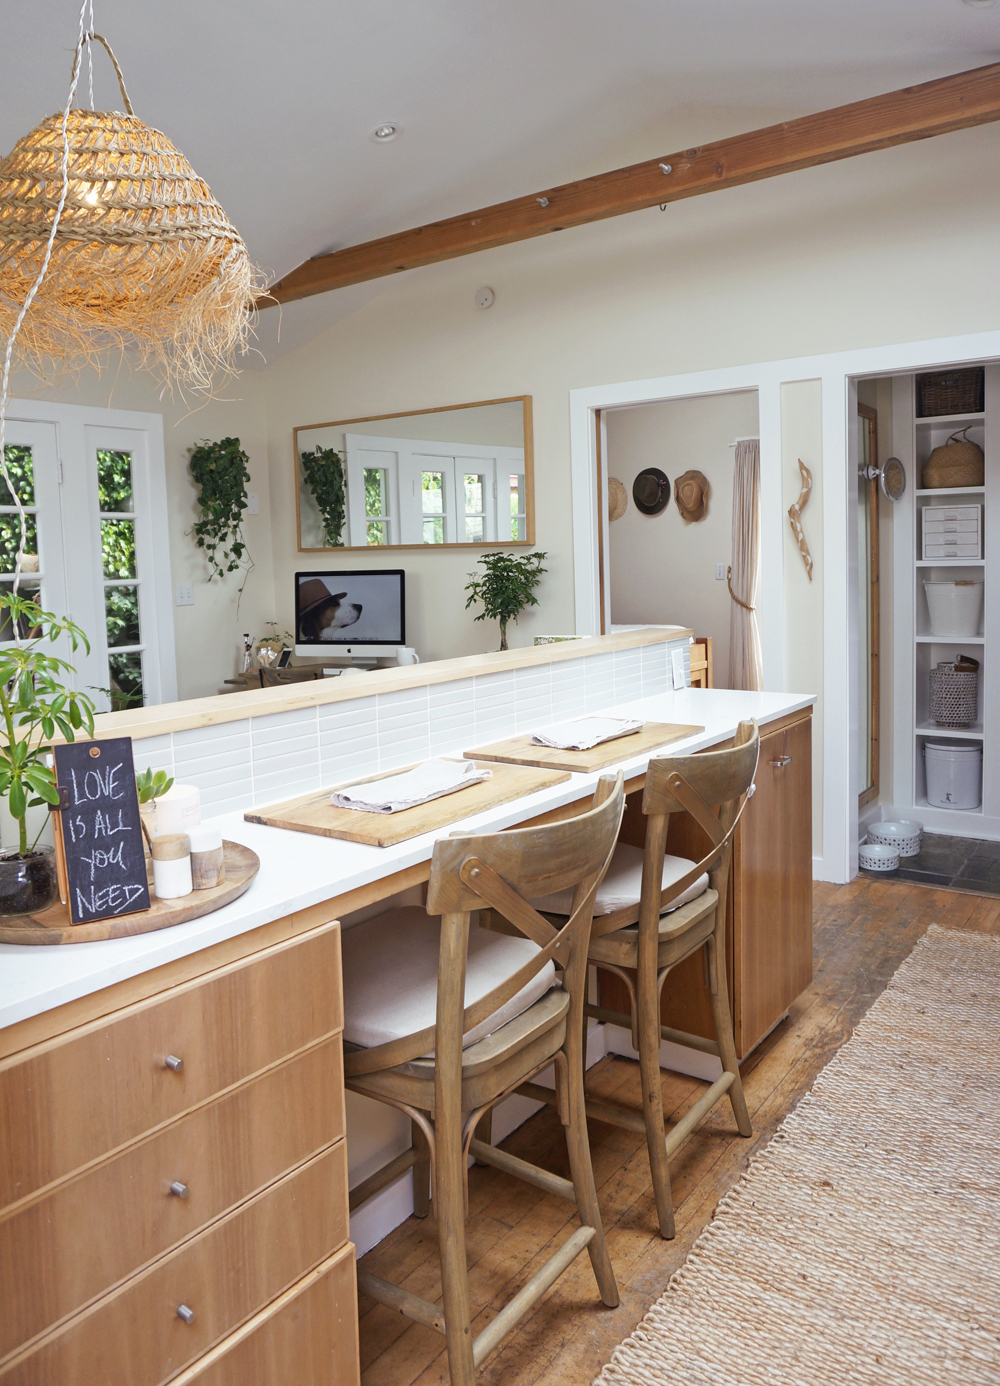
I was craving bright countertops, but I also wanted something with slight texture. Nothing overly marble-y, nothing speckled, and nothing too heavy in appearance. While thick countertops are lovely and certainly on-trend, we wanted something in between-- not too thin, but not so chunky that they looked out of place in our tiny kitchen. And in order to help increase the light and visual space within the room, we wanted something slightly reflective. We found the PERFECT answer to all of these requirements via Cambria's Torquay countertops. I love the characteristics of Torquay-- it's like sand and marble made a baby together:

The planning / measuring, removal of the old counters, and the installation of the new tops were a breeze. Both visits combined took under 4 hours. I can't believe I waited 6+ years for this update. It's made a HUGE difference in our home, and we LOVE it.

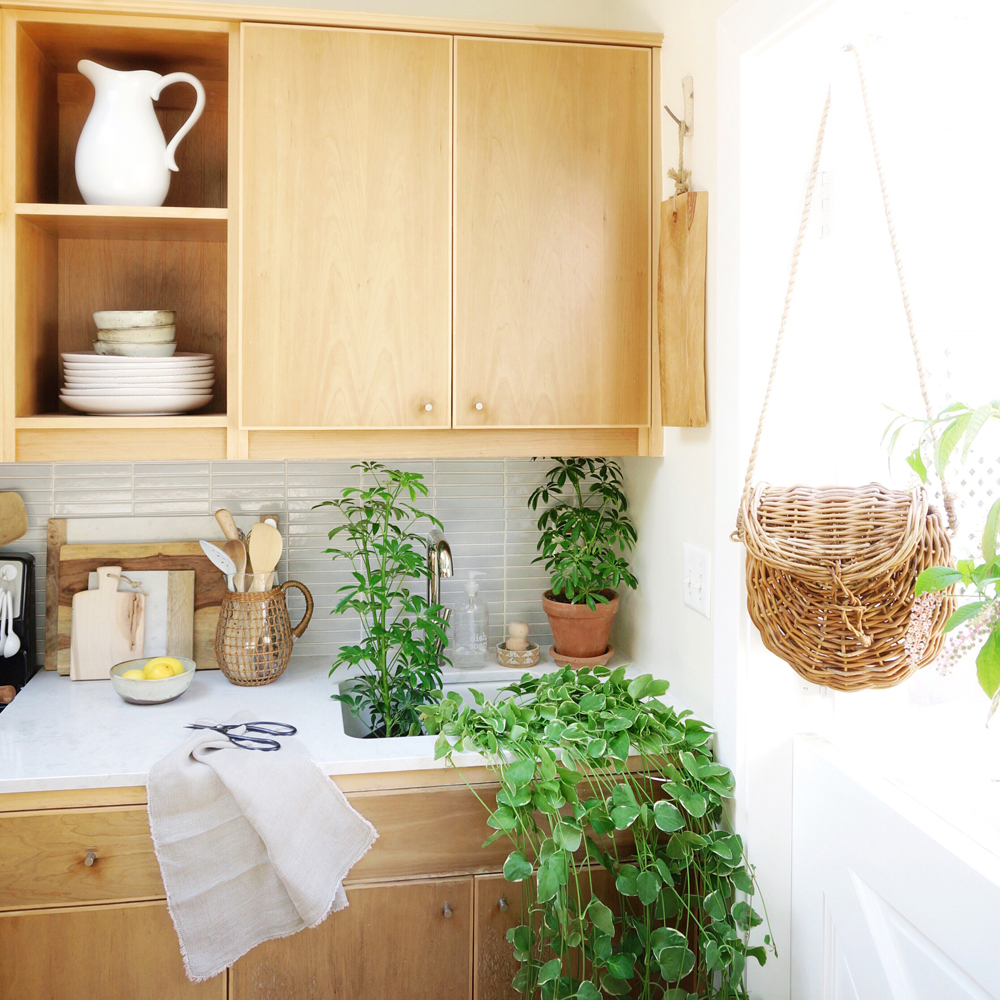
Next up was the tile for the kitchen and breakfast bar counter backsplash. I knew I wanted Fireclay. I think their handmade tiles are just so gorgeous. I initially wanted to use their Picket shape, as it mirrors the fence supporting the grapevines outside. I'd also planned to go with Rosemary, which is a muted yet distinct shade of green.
At this point, I called my incredibly talented friend, former neighbor and tiny house expert Kim Lewis for her input. While I consult on tiny home decor every day, I find that it's handy to get an outside opinion when working on the Cottage, specifically. It helps me get out of my bubble and see things differently. And Kim is the best. She knows me. She knows tiny homes. And she knows design. Kim and I decided that the Picket shape was wonderful, but just too large for this project. But neither one of us wanted a particularly modern shape, and we wanted to steer clear of subway tiling. We opted instead for a 1/6 cut. It's tiny, like our home, and rectangular like all of the built-ins and shapes throughout the house. We also updated our color selection, picking French Linen, which is a light shade of pale grey with a beige undertone. It's a perfect balance between cool and warm notes, and has a semi-reflective sheen to bounce light around our small space:


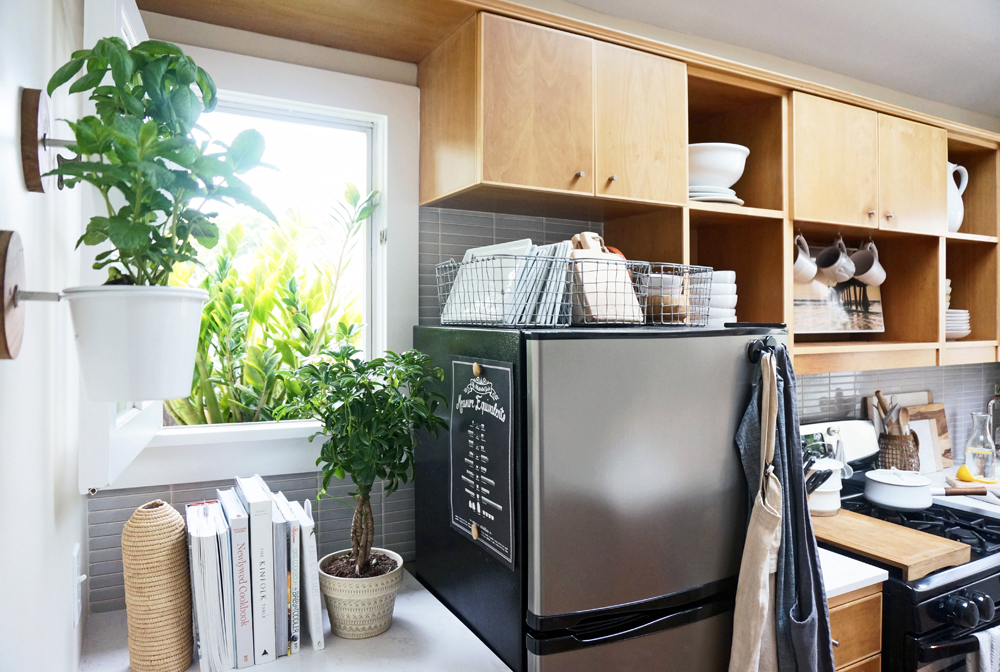
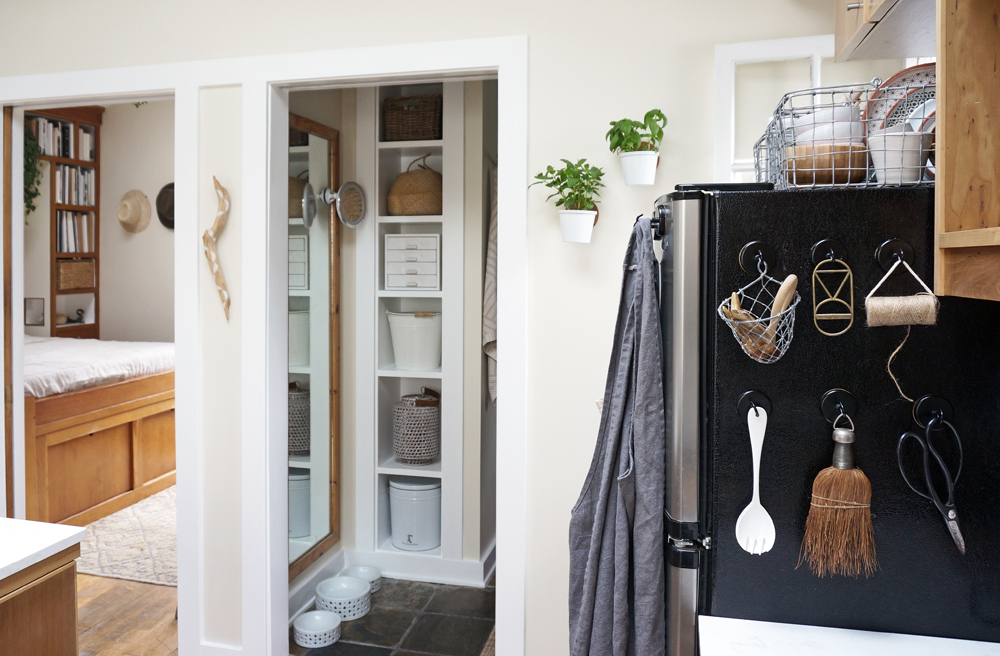
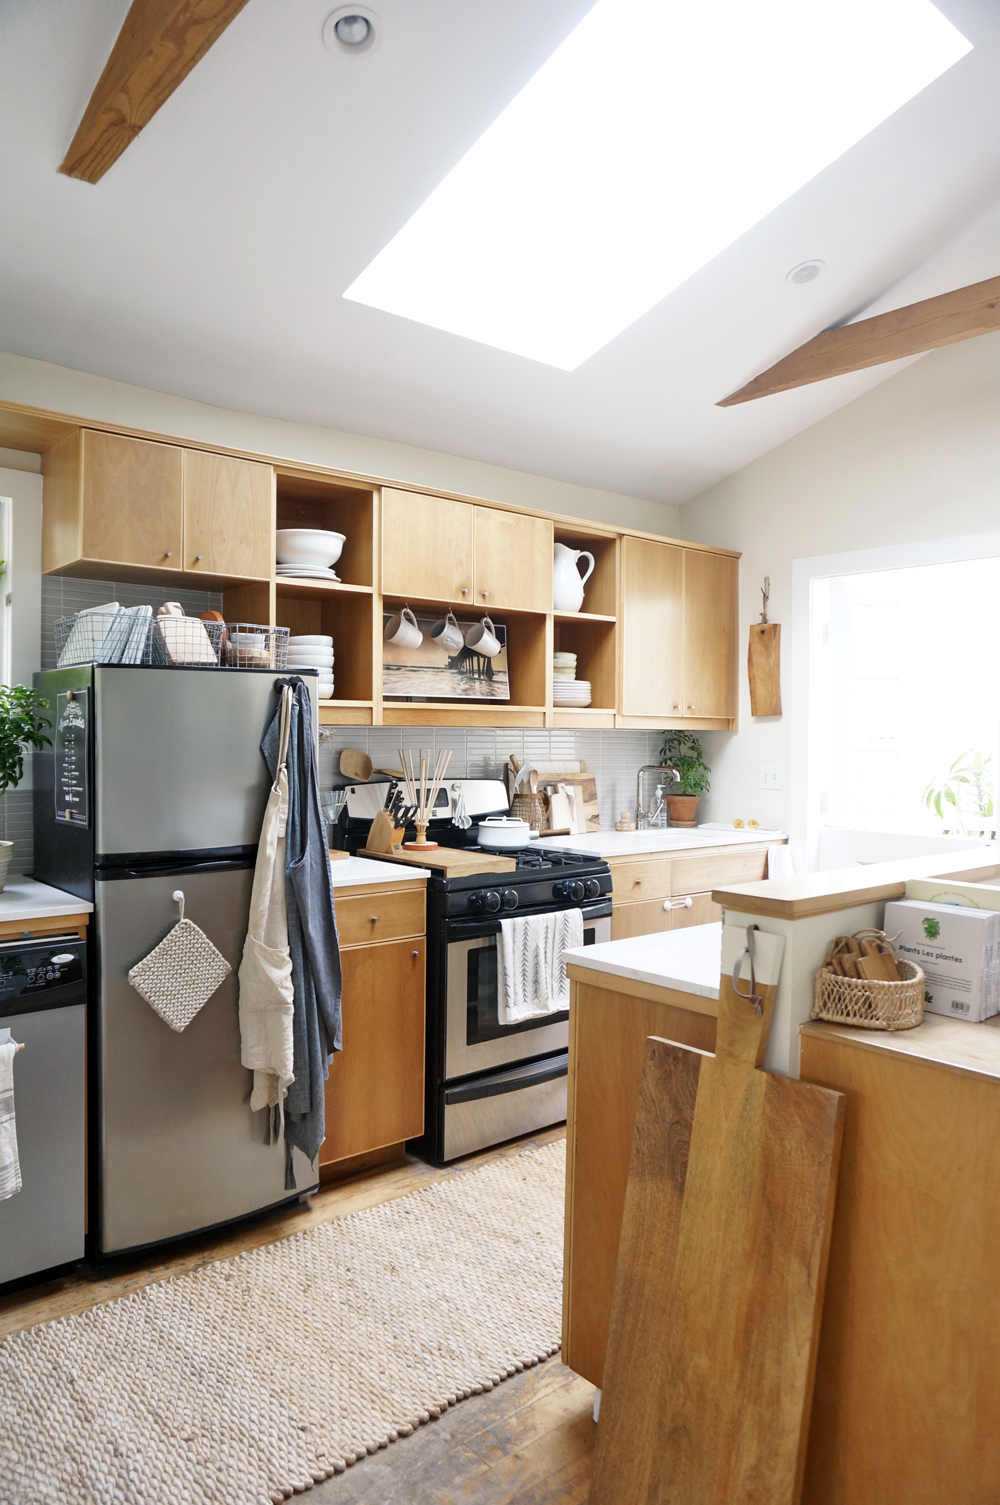
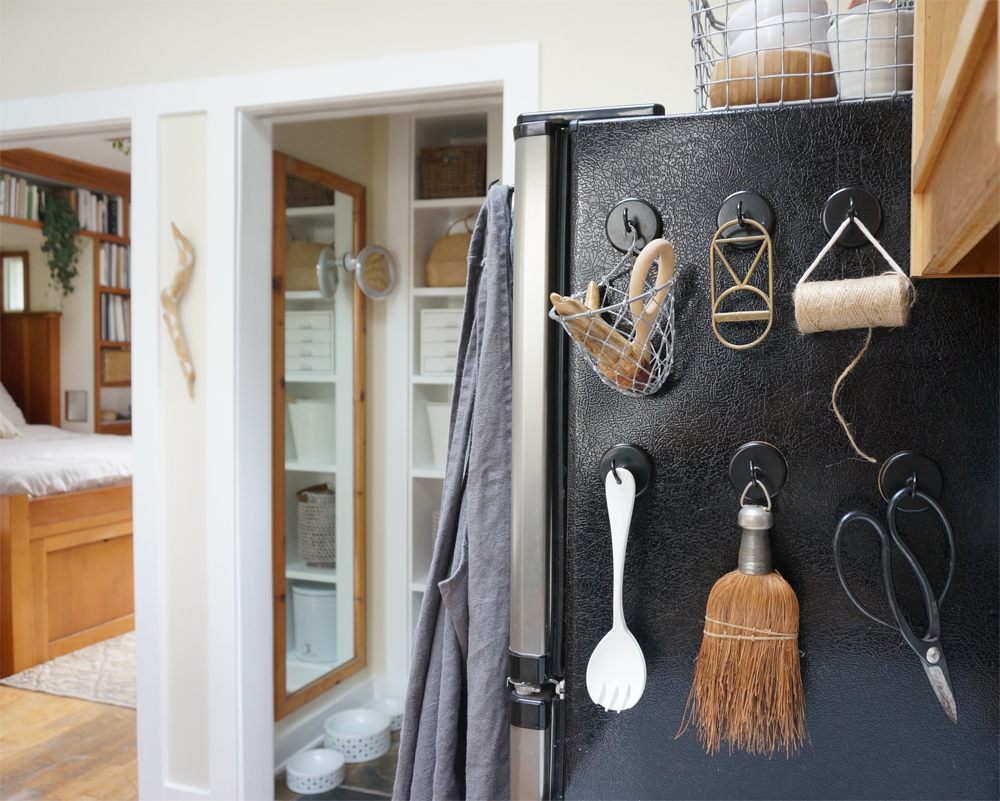
We used to hang smaller kitchen tools and accessories from the backsplash walls, since there was nothing there before. Now, with the tile in place, we moved the accessories to magnetic hooks on the refrigerator, which work just as well, and make the space look more organized and simplified.
With the new backsplash tile and countertops, it seemed silly to leave our cheap old sink and faucet in place. We upgraded to a white undermount Kohler, measuring about 17x18". (We installed it sideways to provide us with wider access, and more counter space for the faucet and soaps. We installed a small Purist pull-out spout faucet in vibrant polished nickel. It measures under a foot tall, so it fits well in our compact kitchen.

The final step was to repaint the kitchen, and repair various damage to the walls that built up over the years. We figured that it was time to repaint the entire interior of the cottage-- including the ceilings. We moved most of our items to the laundry shed and garden for 2 days and nights while the painting was underway. (Luckily the LA weather had our backs, and nothing was damaged in the process.)

We adjusted our wall color ever-so-slightly, and picked a slightly warmer, earthier hue than the previous yellow-tinted version. We used "Muscat Blanc" Everest paint by Dunn Edwards. We selected the Velvet finish, which is easier to clean than Flat-- an essential, given the baby and the pups. We used Flat White on the ceilings, and Semi-Gloss White for the moldings.
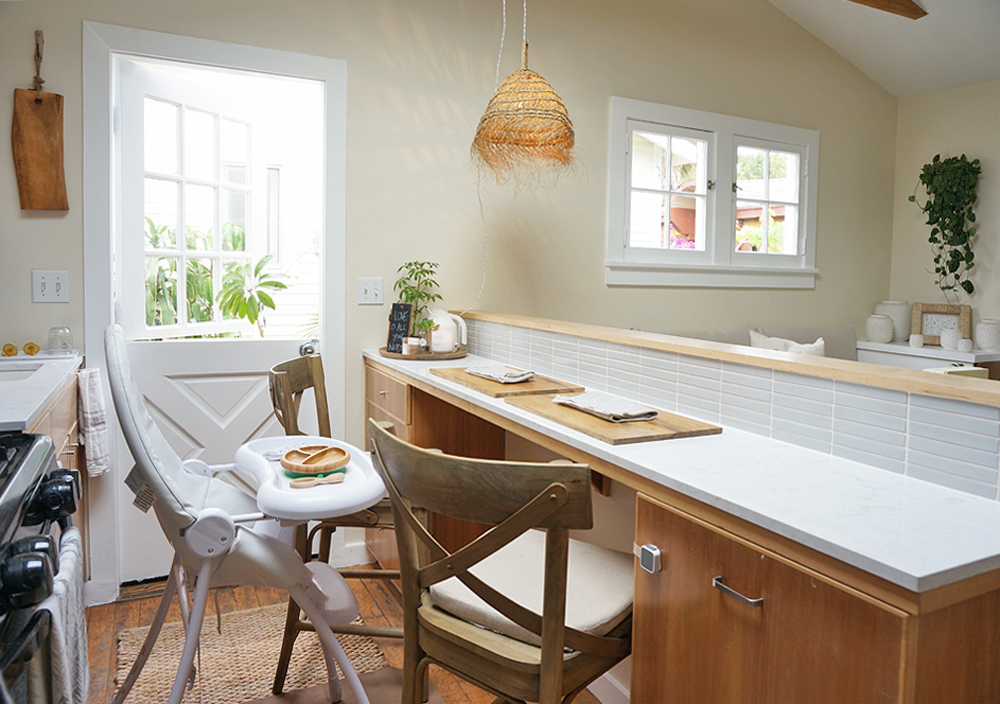
We are so happy with our tiny kitchen's new appearance. I'm looking forward to sitting here with my little family for years to come.