Before + After: Styling a Small Stoop for Versatile Daily Use
I’ve been missing spring, despite the fact that it’s all around us here.
In the blocks surrounding our home, Jasmine plants are dripping over fences and climbing up light posts, ducks are pairing off and tending to their eggs along the canals, and a myriad of pollinators are touching down into bursting gardens.

But, since we we’re on our 9th week of strict social distancing here at our <400 sqft home, we’re experiencing this season from the narrowed scope of our tiny lot here in Venice.

Thanks to steep reduction of auto transport in this time, we can hear birds flying over our cottage, the waves crashing on the beach, and the sea lions barking in the marina. Through our skylights and on our shared porch, we can feel the light changing as the sun beams down on us longer and with increased intensity.

In order to best enjoy it all from this sliver of land, we’ve been making the absolute most of our outdoor spaces— now more than ever before.

Four years ago this month, Adam and I were married on our tiny front stoop. We said our vows under the pendant lamp (that we forgot to turn on,) while our friends and families stood around us, both inside the house and out.

Our home wedding, 2016
Since then, we renovated our outdoor spaces and poured sweat and love into our garden and porch. But over the course of those larger projects, our little stoop itself and the surrounding yard/pathway suffered some neglect.

As this part of our home sees some of the highest traffic, we felt it was time to give it a good scrub, some fresh paint (an imperfect match, as we worked with what we have on-hand to avoid an unnecessary trip to the hardware store), and a deeper appreciation of how our family seems to have limitless experiences in this limited space.

We paid close attention to how we used the stoop and side yard within a 24 hour stretch. Within a day it was a place to:
Read books with our son
Dry laundry (both via a makeshift clothesline and a collapsible vintage rack)
Take on/off our shoes (and masks) for our quick dog walks
Tend to our container and vertical gardens
Pluck mint to drop into our mason jars and share glasses of water in the sun
Check in on the fairies and add to their garden
Chat with our neighbors across the fence
Play with the pups
Blow bubbles
Watch a few episodes of Sarah & Duck via the projector

When we first moved in, we were gifted two lovely, low + wide terra-cotta planters with boxwoods, which sat on either side of the stoop. They were simple and pretty, but they consumed valuable inches that, with a bit of creativity, could be used to enhance everyday life.

Since then I’ve styled this area to be practical, versatile and suitable for our lifestyle and climate. (Those planters are still being put to excellent use 9 years later… just not right here.)

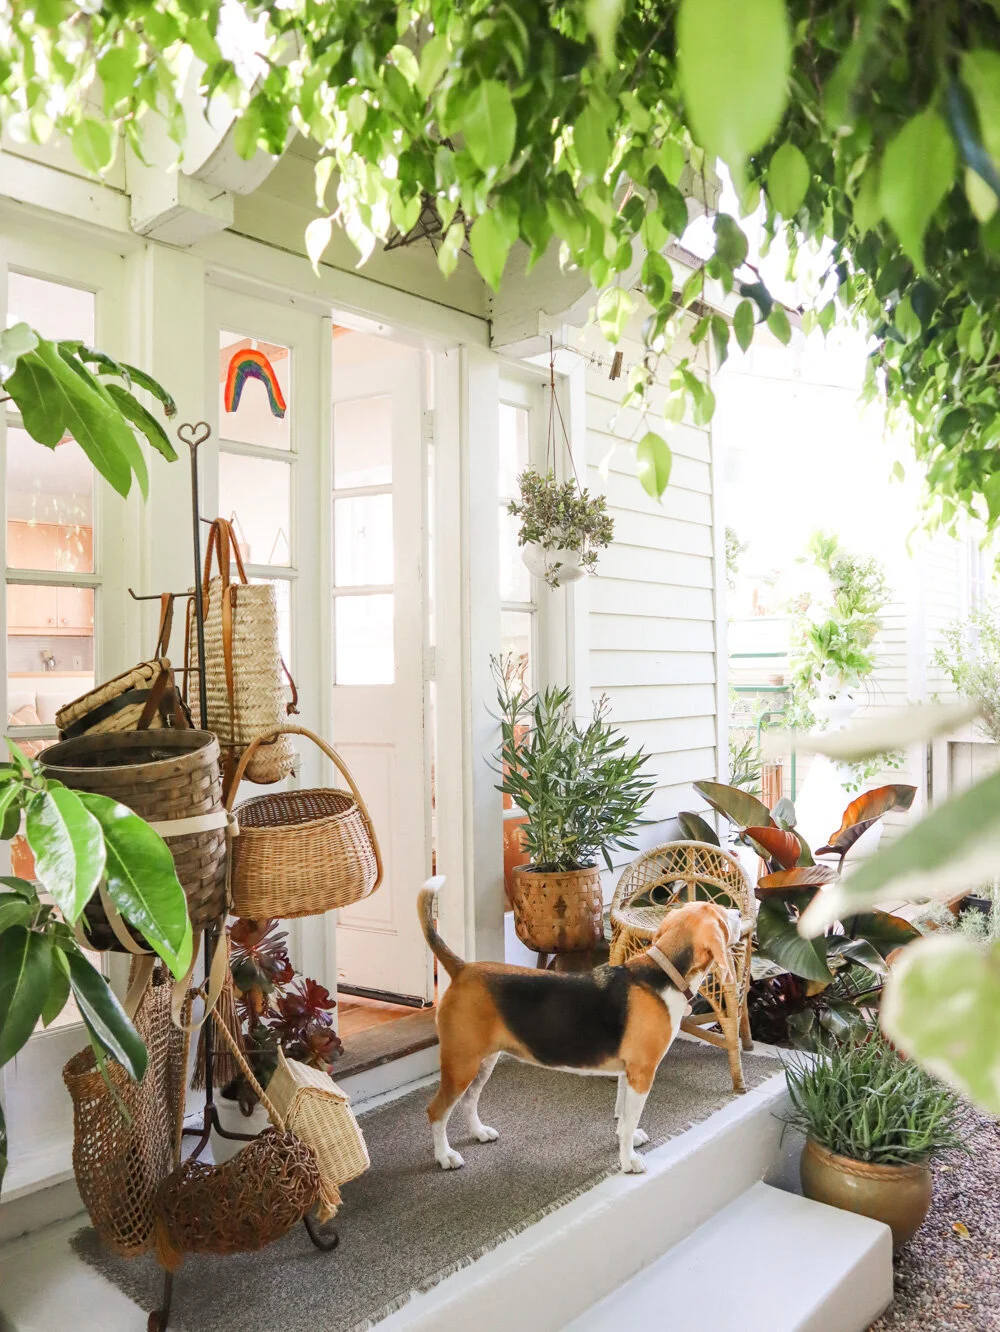
Instead, I’ve filled our welcome area with smaller plants— one on a pedestal and one suspended from above— to save space without losing the impact of greenery.
I decided to forgo the traditional doormat, and opted to use a squat runner-style outdoor area rug instead. This expands the stoop visually, and makes it feel more like a miniature room than a step.

On one side of the doorway, a low vintage chair creates the perfect petite perch for putting on / taking off shoes, sorting mail, corralling toys neglected throughout the garden, and gathering leashes.

On the other side, a vertical rack holds a hand broom, our sun hats, and baskets that we once used daily on our trips to the library, local bakeries and farmers markets.

Now, as we shelter-in-place during the pandemic, the baskets are being put to use in various playful ways throughout our home and garden, and contain a few odds and ends as makeshift storage containers.

A ceramic dog bowl tops it all off, as this is where the dogs rehydrate after barking loudly when the mail gets dropped off, or after our (sadly abbreviated) walks.

A small stoop can be magicked into something so much greater with the help of a few key accessories.
For example:
Hanging tiered troughs from either side could enhance privacy while offering valuable space for a vertical garden.
Slim rolling carts can organize most-used shoes and reusable bags + to-go containers.
A compact storage bench can house necessities and double as a reading spot with the help of a cushion and a throw pillow.
With clever hardware and a bit of handiwork, wall and overhang hooks can hold everything from collapsible strollers to umbrellas to bikes.

Above: Lighting a non-toxic, bee-safe mosquito repellent stick in preparation for an outdoor movie night during sunset.
It’s not just about creating more space. (If we wanted more space, we’d explore finding a bigger home.) Instead, it’s about using what we have to the fullest, and finding creative ways to enjoy the same handful of inches in an endless permutation of ways as the years go by.

We don’t take any corner for granted. Each bit of space is either used in movement, or to grow something green to aid in cleaning our air, providing bugs with a place to live, and giving soil (and compost from our tumbler) a place to thrive and regenerate.

I never realized just how important soil is for our overall wellness until recent years. The way it impacts the food we eat and the fabrics we put on our bodies is hugely important to our human and planetary health. Our bodies absorb not just what we ingest and apply, but also traces of what we wear.

Throughout the imagery in this post, the three of us are mainly wearing Pact fair trade clothing, made with organic cotton + linen that not only feels good on the skin, but is good to the skin.

Pact uses no toxic chemicals nor toxic dyes in their clothing, and they practice organic cotton farming, which saves vast amounts of water compared to modern conventional cotton farming.

Another reason to transition to a wardrobe comprised of natural, organic fibers it to prevent microplastics from seeping into our waterways with every wash. Synthetic fibers like polyester, nylon and rayon (among others) are plastic that we’re unwittingly draping on our largest organ, and then flushing into our water systems.

Pact offsets the carbon footprint of their shipments, and uses biodegradable, recyclable and compostable packaging. They also partner with local non-profits to whom they can donate your used clothing if you’d like to ship any garments (Pact or otherwise) to them via a pre-paid shipping label provided by Pact. But before doing this, please keep in mind that the majority of donations (in general) end up in landfills. So I say buy less, buy better, repair more, and wear your comfy sustainably + ethically made clothes until the end…
…and then turn them into endlessly reusable cloths for polishing up that beautiful small stoop of yours.

This post about creating and enjoying a small, versatile outdoor space, was sponsored by Pact. (Thank you to Pact and the readers of my blog for keeping our small business going, and our home’s twinkle lights glowing.) As always, all photos and words are my own, and any imagery featuring my child and/or pups was taken as they interacted in their own natural ways.
Clothing pictured:
Drying line undergarments: Lace Hipster + Smooth Cup Bralette
Whitney’s painting shirt: Featherweight V-Neck Tee
Adam’s painting shorts: Essential Sweatshort
Whitney’s dresses: Trapeze Tank Dress
Adam’s afternoon garments: Garment-Dyed Henley + Woven Roll Up Pant
West’s shorts: Softie Shorts
West’s t-shirt: Everybody’s Friend Tee
West’s pants: Classing Leggings

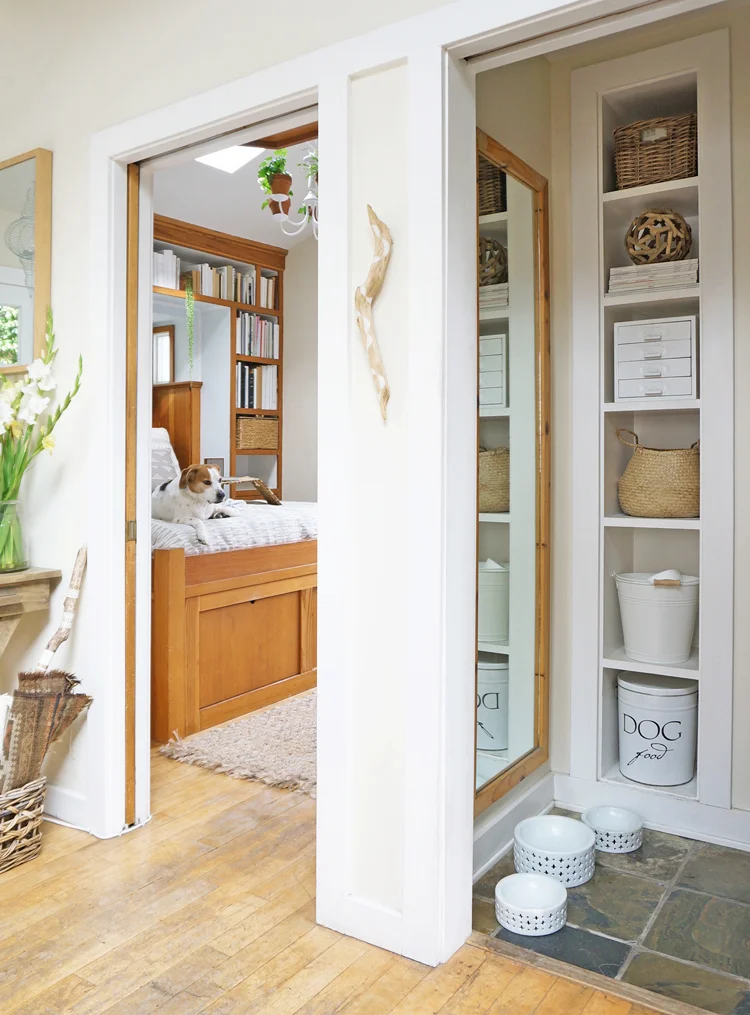
Tiny House Closet Nursery - The Baby’s Bay
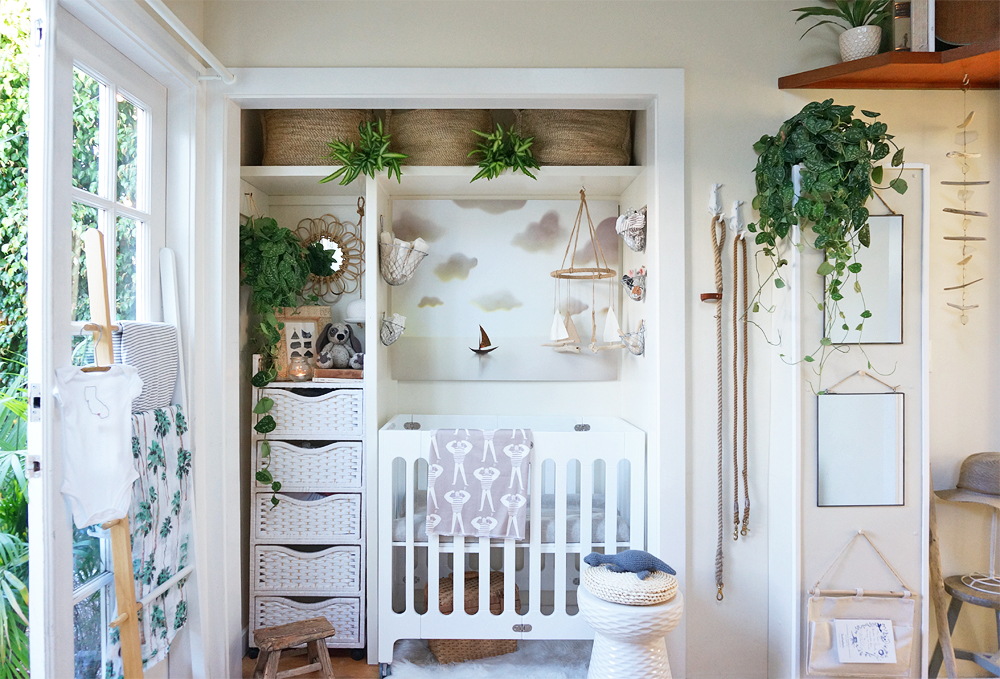
When selecting a dedicated area for our son’s nursery, we did what many small-space dwellers do and opted to convert our closet into his little room. I didn’t intend to have a “theme” for the space, but it happened on its own over time. The colors, textures and prints I selected were sandy and neutral, and the artwork I loved most reminded us of our lives here along the ocean. Before I knew it, we had a subdued coastal vibe going on. As such, I started referring to the little alcove as "The Baby’s Bay."
There were some basic updates that needed to happen before we could safely and practically convert the closet into the Bay. Thankfully they were all simple:
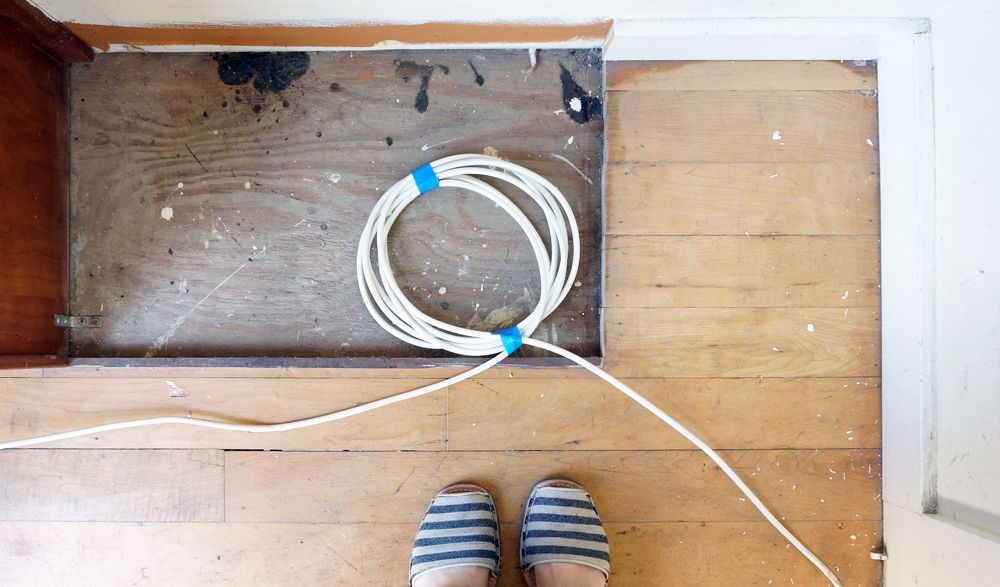
1. Deconstruct the built-in shoe rack, and fill in the gaps left behind after its removal. We hired a local handyman to do this. He ripped out the built-in shoe shelf, and then used a mix of old and new materials to fill in the gap in the floor where the shelf previously stood. Meanwhile, I visited The Home Depot to pick a trim that matched the rest of the closet, and had it cut to fill in the gap in the molding left over from the shoe rack removal:

2. Remove the internet cable cord, which was fastened to the molding on the perimeter of the closet. Our internet provider sent a technician to help us with this process. He removed the ugly cords that sat inside for years, and relocated them to the crawl space under the cottage.
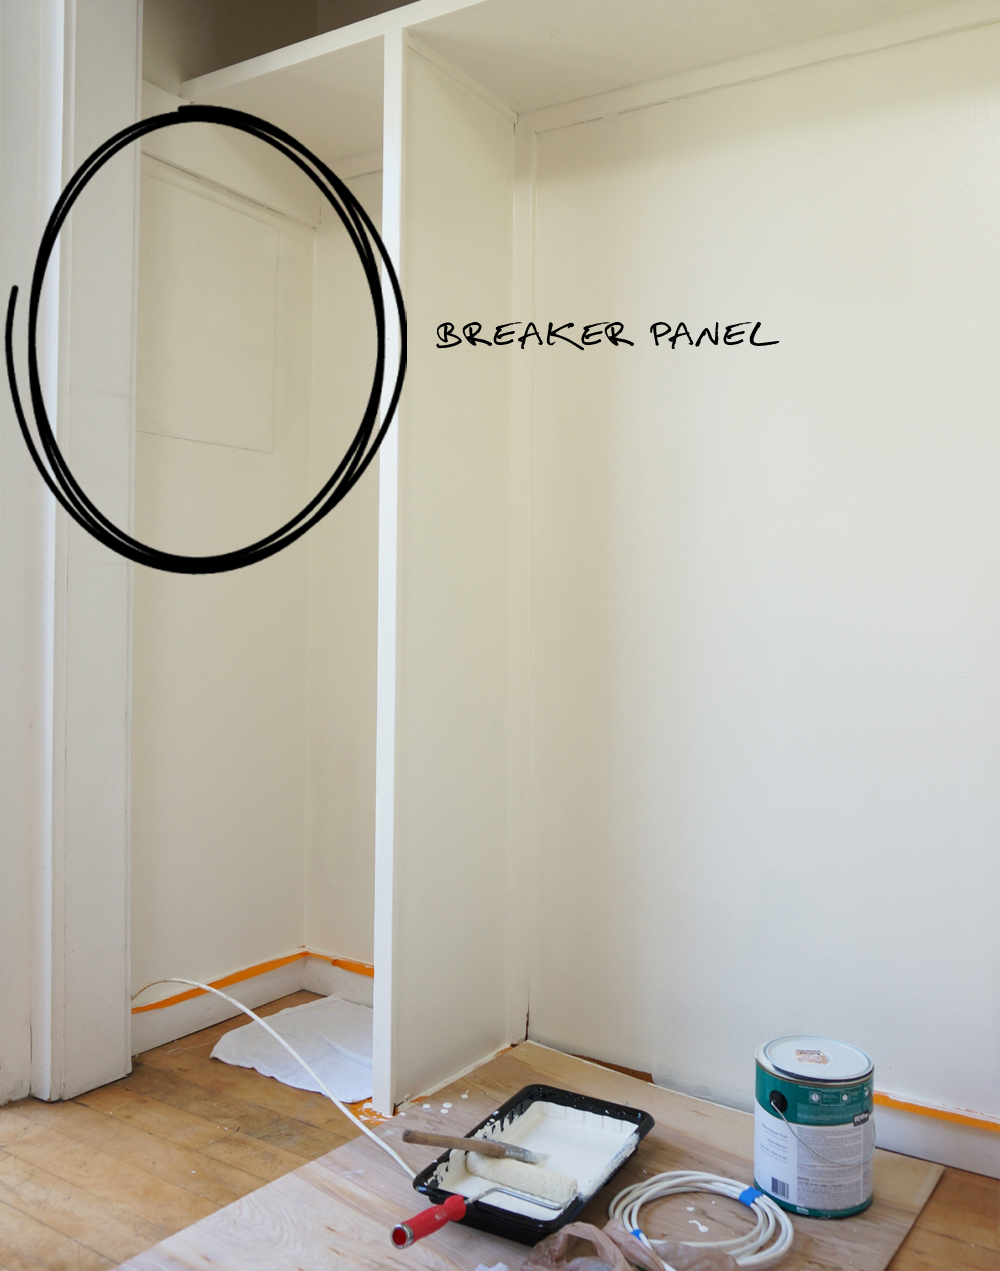
3. Cover the breaker panel, while still leaving it accessible: There’s a standard grey electrical panel on one side of the closet. We need to maintain easy access to the door, but I wanted to cover it up for the nursery. I used a magnetic sheeting overlay to mask the hardware, and painted it to match the color of the wall:
4. Remove the heater control panel box, closet dowels, and miscellaneous hardware. We had an electrician help us with all necessary wiring modifications. Beyond that, it was a simple matter of applying spackle and wood-filler where necessary before repainting everything.
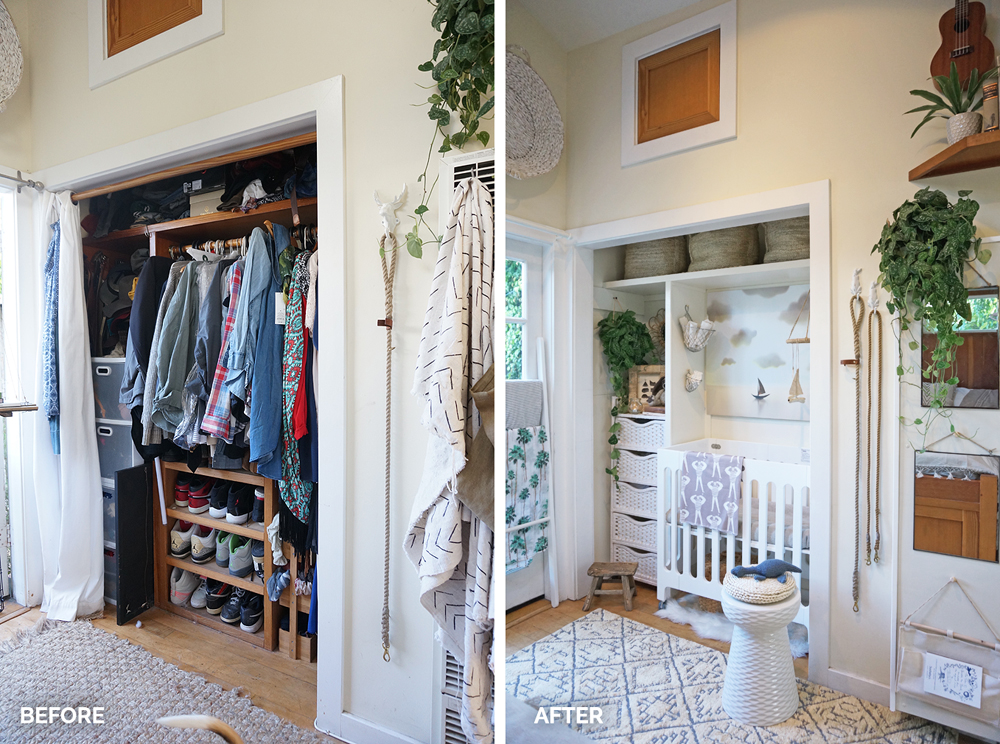
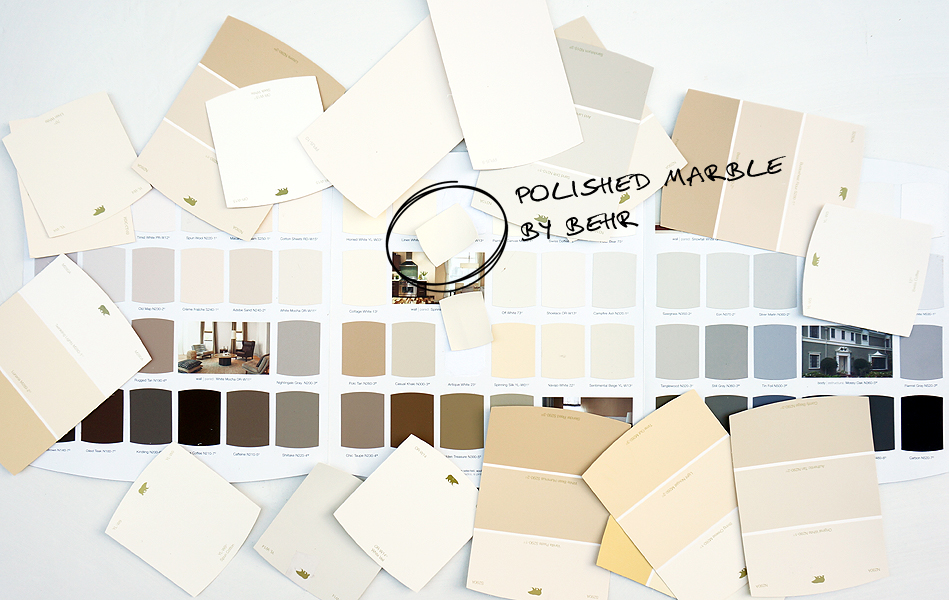
5. Leave the remaining built-ins (a high, closet-wide horizontal shelf and vertical divider) in place to help protect the baby from items that could displace during an earthquake, but better-blend those walls into the overall space. We always planned to leave the remaining built-ins within the closet for safety, and aimed to work with them when outfitting the space. But the dark wood lines drew attention to the dividers, and made the alcove feel even smaller than it is. So we chose a paint color that’s a few shades lighter than our bedroom walls to brighten up the previously shadowy Bay. I selected “Polished Marble” by Behr. I love how it appears to blend with the rest of the room, even though it’s actually quite a bit whiter:
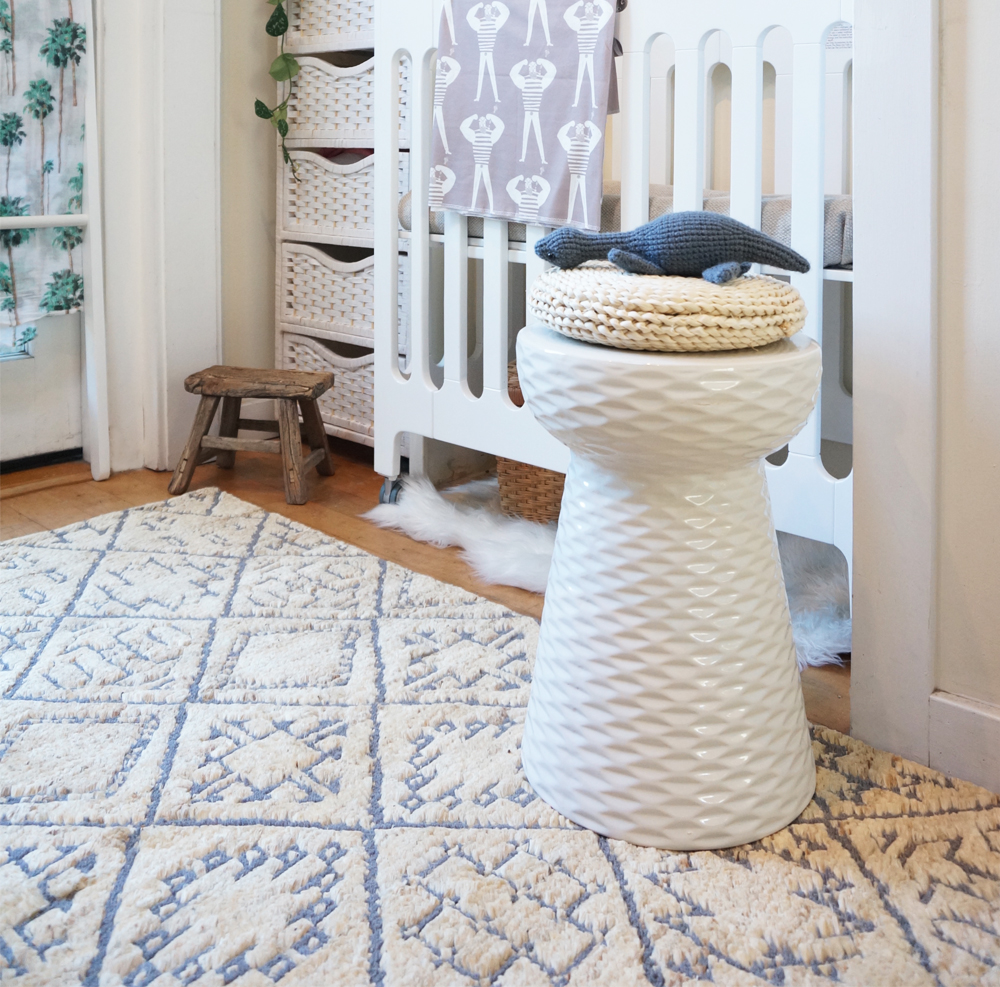
Once we had this new, blank canvas, I could finally visualize the nursery. I found a little white garden stool from The Home Depot’s décor brand, Home Decorator’s Collection. I placed it by the crib, and I sat there rearranging and restyling the room in my mind for hours. The space then came together easily, despite its size.
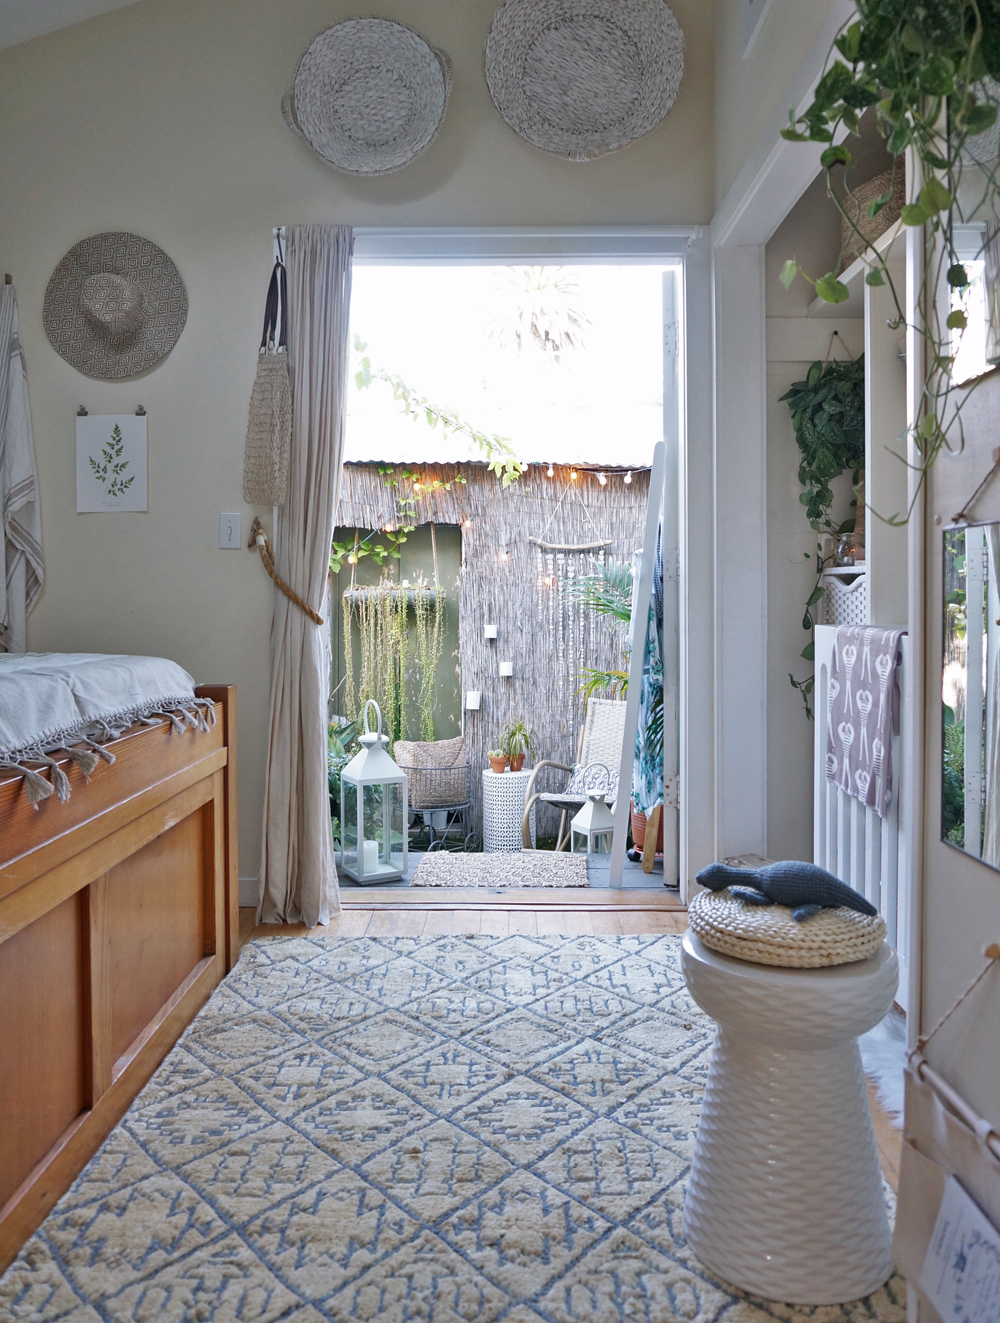
Before we updated the closet, I used to obsessively close our curtains to avoid seeing the overflowing contents behind them. Now the closet is a bright, airy, and happy component of the Cottage. It feels as though it should’ve always been outfitted this way.
You don’t need to start from scratch to transform your existing square-footage into a space that better suits your evolving needs. With a bit of creativity and paint, you can turn a box into a Bay. You don't need to live large to live beautifully!
I acknowledge that The Home Depot is partnering with me to participate in this nursery makeover project. As a part of the project, I am receiving compensation in the form of products for the purpose of promoting The Home Depot. All expressed opinions and experiences on this blog are my own, and are written in my own words. My post complies with the WOMMA Ethics Code and applicable Federal Trade Commission guidelines.
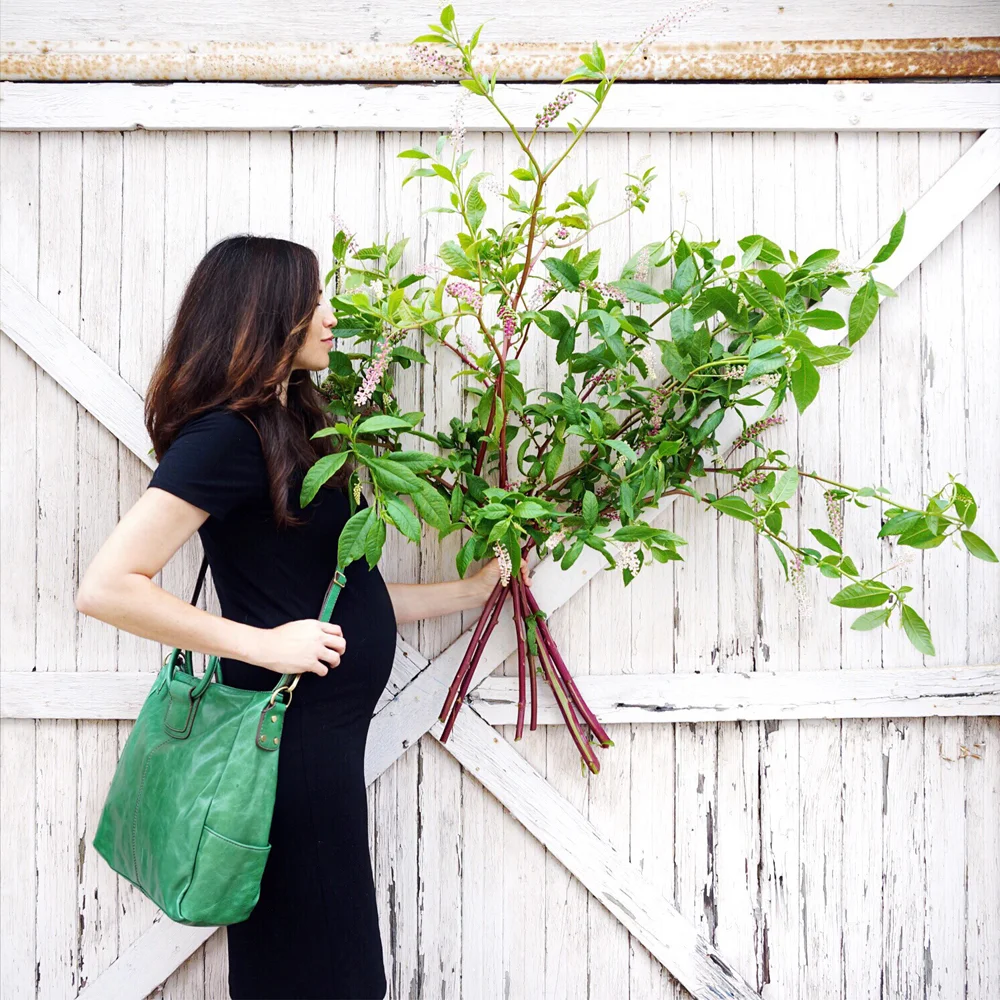
Small Spaces + Pregnancy (Week 26)
This weekend marks the 26th week of my pregnancy! We've made numerous behind-the-scenes changes around here in preparation for our baby boy's arrival in October. Thus far it's been a lot of simplifying and decluttering. We will tackle the majority of the nursery makeover in August and September, and I'll be sure to share photos, tips and resources when that time comes.
But before we consider the more pin-worthy projects (such as wallpaper, specialty cribs and multi-functional nursery goods,) we should address an obvious obstacle when it comes to small spaces and pregnancy: how do you handle the inevitable wardrobe transformation when you barely have any closet space to begin with? As your belly balloons outward, where do you keep the newly acquired maternity and/or pregnancy-friendly clothing and personal care items?
First, it's important to start with the fundamentals of downsizing. Nobody likes to hear the following, but I've found that these are truly the two handiest tricks when it comes to dealing with clutter and storage, regardless of your square-footage:
1. JUST GET RID OF IT. This is the single best tip for living well in a small space. You don't need to devise clever storage solutions when you don't have much crap to store in the first place.
2. ONLY BUY WHAT YOU REALLY NEED. Controlling what you bring into your home is the best way to avoid accumulating clutter.
So! What do you NEED when it comes to maternity clothing? My jeans stopped fitting midway through my first trimester, yet these are the only new items I've truly needed in order to dress comfortably every day thus far:
1. Storq Basics Bundle
I layer the items from this beautiful, simple Storq pack with my "normal" clothes for daytime outfits and evening wear. There are 4 products in this pouch (which itself is so easy to store-- photo below). I love that the pieces in this bundle create a simple foundation for endless maternity outfit possibilities when paired with your usual layers and accessories.
2. Over-The-Bump Jeans
My opinion: Don't waste your time with the demi-panel maternity jeans. They're uncomfortable and you outgrow them quickly. Get a pair of the over-the-bump jeans, and easily store them by donating 1-2 other clothing items you no longer love.
3. T-Shirt Dress
Ideal for lounging, sleeping, running quick errands, etc.

I even decided to downsize and declutter my toiletries. My skin changed a great deal when I reached my mid-thirties, and pregnancy has changed it even more drastically. So I got rid of my old skincare and makeup items, and simplified my routine and medicine cabinet. I decided to stick with a small selection of products from Glossier, Kate Somerville, Naked (by Urban Decay), Foreo, and Aesop. Nearly everything else went into the recycling bin. It always feels so good to get the bottle clutter under control. (Read more about our bathroom storage here.)
The biggest changes wardrobe-management changes will come in August and September, as we begin to clear out our closet in order to transform it into our son's nursery. In the meantime, we've been able to make do with the storage we have, which is pictured below:
1. Bathroom Shelving (read more about our bathroom storage here)
2. Whitney's Under-the-Couch Shoe Storage
3. Adam's Under-the-Couch Shoe Storage
4. The Closet (soon to be turned into the nursery)
5. The Bed Built-In Hamper (cameo by StanleeStubs)
6. The Bed Built-In Clothing Bin (photo by James Tse for "The Knot" Magazine)


Pregnant or not, small-space living can be frustrating if you have too much stuff. What I love about our home is that it reminds us to keep things simple, and requires us to routinely downsize our belongings. Since we've adopted this lifestyle, we've discovered that we have more energy and time to devote to one another, and to the things that matter most in our lives.
Disclaimer: All brands mentioned above are ones that I genuinely love to use as described. I have received compensation in the form of product for some of those mentioned in this post, but all opinions expressed are my own, regardless of compensation.