
Small Space Wardrobes
Note: Discover tips and tricks for small closets — or no closets at all! — via the e-reader and hardback versions of my book, Small Space Style: Because You Don’t Need to Live Large to Live Beautifully.

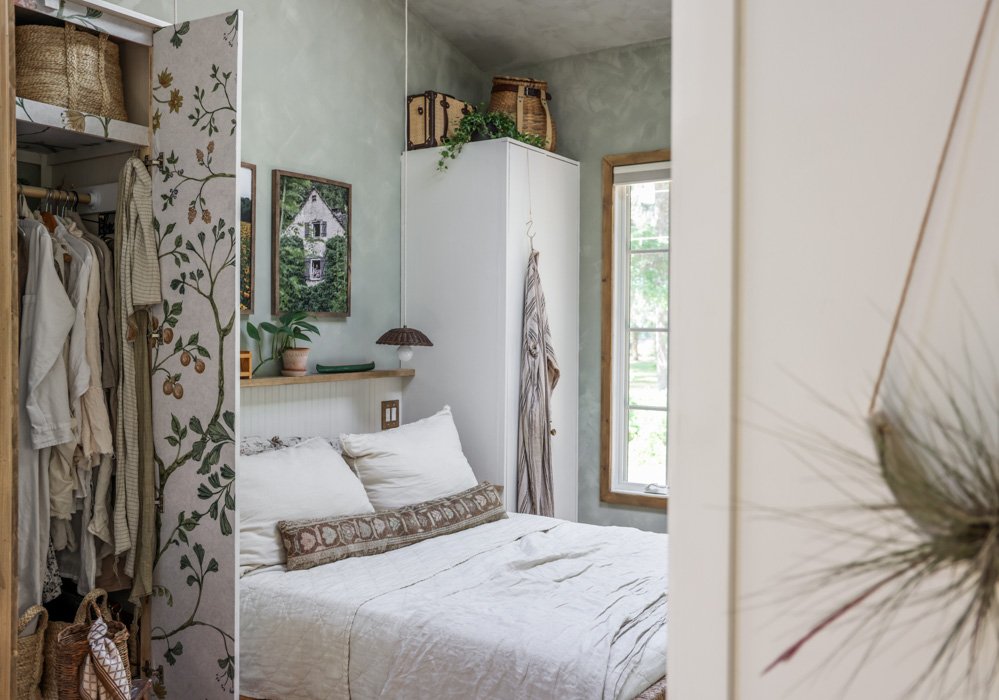
Our last home had a single closet, which we all shared once our first child aged out of his closet nook nursery. When designing our new cottage, we knew we wanted more closet space since we’re now a family of four, but not that much more closet space. We’ve found that setting firm spacial parameters help us keep our belongings pared down and our essentials in check.

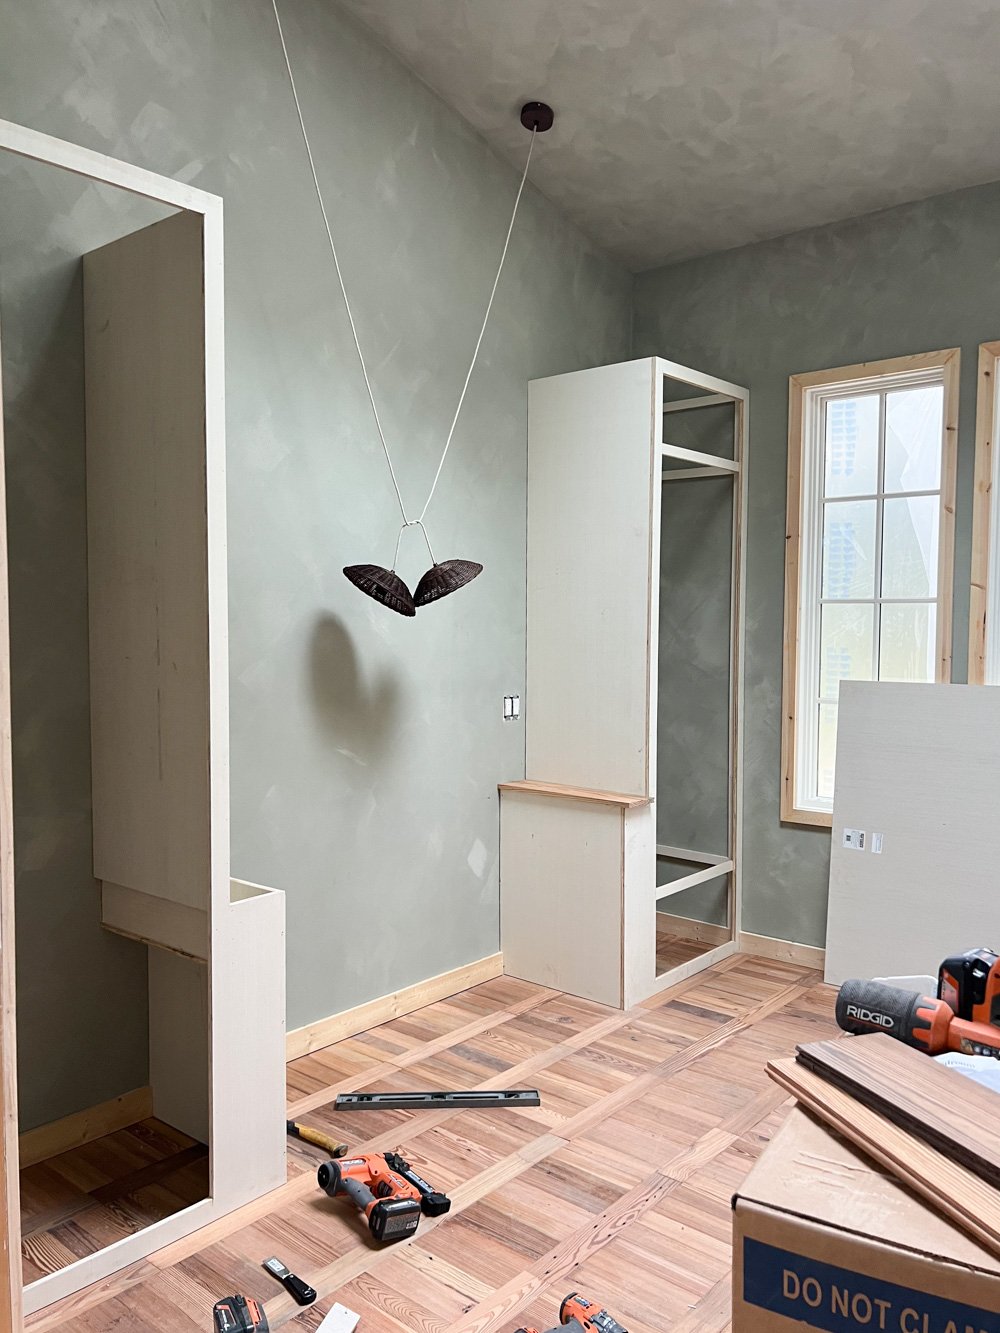
The kids share a slim, adaptable kitchen pantry turned wardrobe— details here. An impromptu hallway coat closet — established with the help of a simple wooden dowel and a linen flat sheet repurposed into a curtain (visible through the smaller doorway here) — contains everyone’s coats. So Adam and I used the space on either side of our built-in headboard to create 28” custom wardrobes for each of us, providing us with much more space per person than we’re used to.

Pictured: A thrifted basket with a baguette scarf from Maison Miette.
Usually I find that moving — or even returning home from a long trip — is such a wonderful opportunity to assess clothing and decide what is truly needed versus what is not.

Above: Steamline luggage made of renewable & sustainably sourced rattan for both travel & decor. Through April 20, 2023 use sale code SPRING 15 for 15% off sitewide at Steamline.
But we were in such a hurry to move into our new home (after 5 months of design + 5 months of permitting + nearly a year of construction — half a year longer than estimated), that we didn’t carefully finish our closets or sort our clothing before shoving it into place. We just tossed everything from the moving boxes pell-mell into the closets, using generic storage solutions that didn’t fit our specific needs.

As such, I dreaded opening those doors every day, knowing that items would topple out, and that it might take me several minutes to find what I needed. Admittedly, Adam had an easier time with this, as he has fewer garments and types of clothing.

We took the recent change of seasons and the need to swap out sweaters for swimsuits as an excuse to finally finish this project.

Above: The unfinished backs of the wardrobe doors,
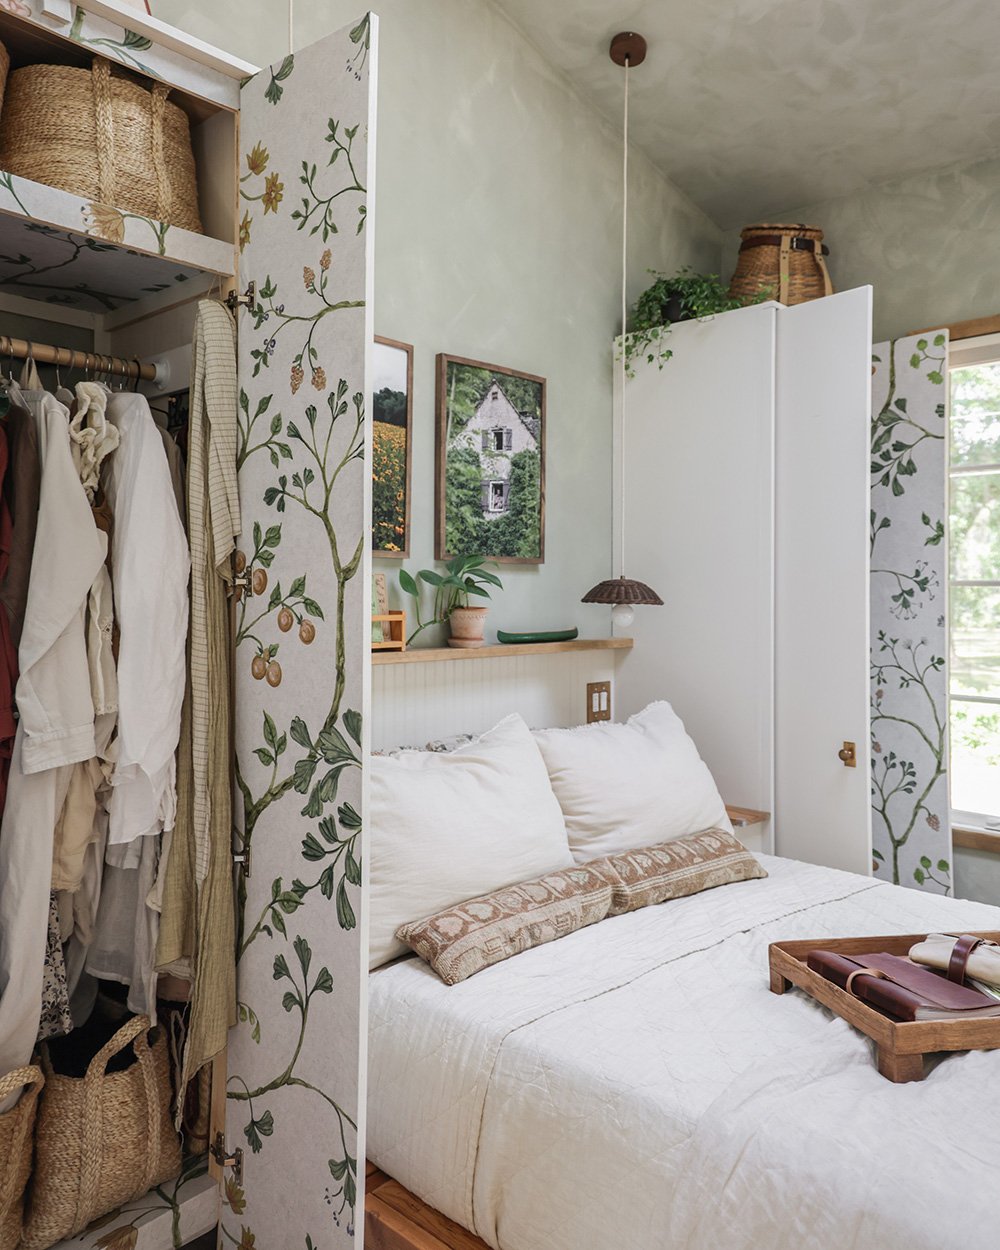
As the inside of the wardrobe doors were completely unfinished and showed measurement markings, we decided that they first needed some dressing up themselves.

We used Rebel Walls paper for the kids’ bedroom mural, and loved how it turned out. So we opted for wallpaper again, rather than just paint. We chose a peel + stick format (in Song Tree Pearl) from Rebel Walls.

The application was straightforward, and the paper is forgiving in instances when repositioning is needed.

Above: Peel & stick wallpaper from Rebel Walls
Here are some of the eco-minded reasons we picked a mural from Rebel Walls:
They offer a customized product, keeping no stock of wallpaper that risks being discarded.
Their wallpapers are printed on Non-woven FSC Certified paper.
Rebel Walls uses printing technology, that is 100% pure from solvents and other harmful substances. The wallpapers are completely free from damaging VOC substances, and have no negative impact on people, animals or nature.
The raw material is transported to Rebel Walls in large quantities in order to need as few deliveries as possible— currently just 2 times a year.
Rebel Walls produces very little waste, but the waste they do get is recycled locally.

Of all the changes we made to the closets, the wallpaper is certainly the most impactful. It elevates the room, while corresponding nicely with the lime paint and reclaimed wood used on the bed, ledge, side tables, and floors.
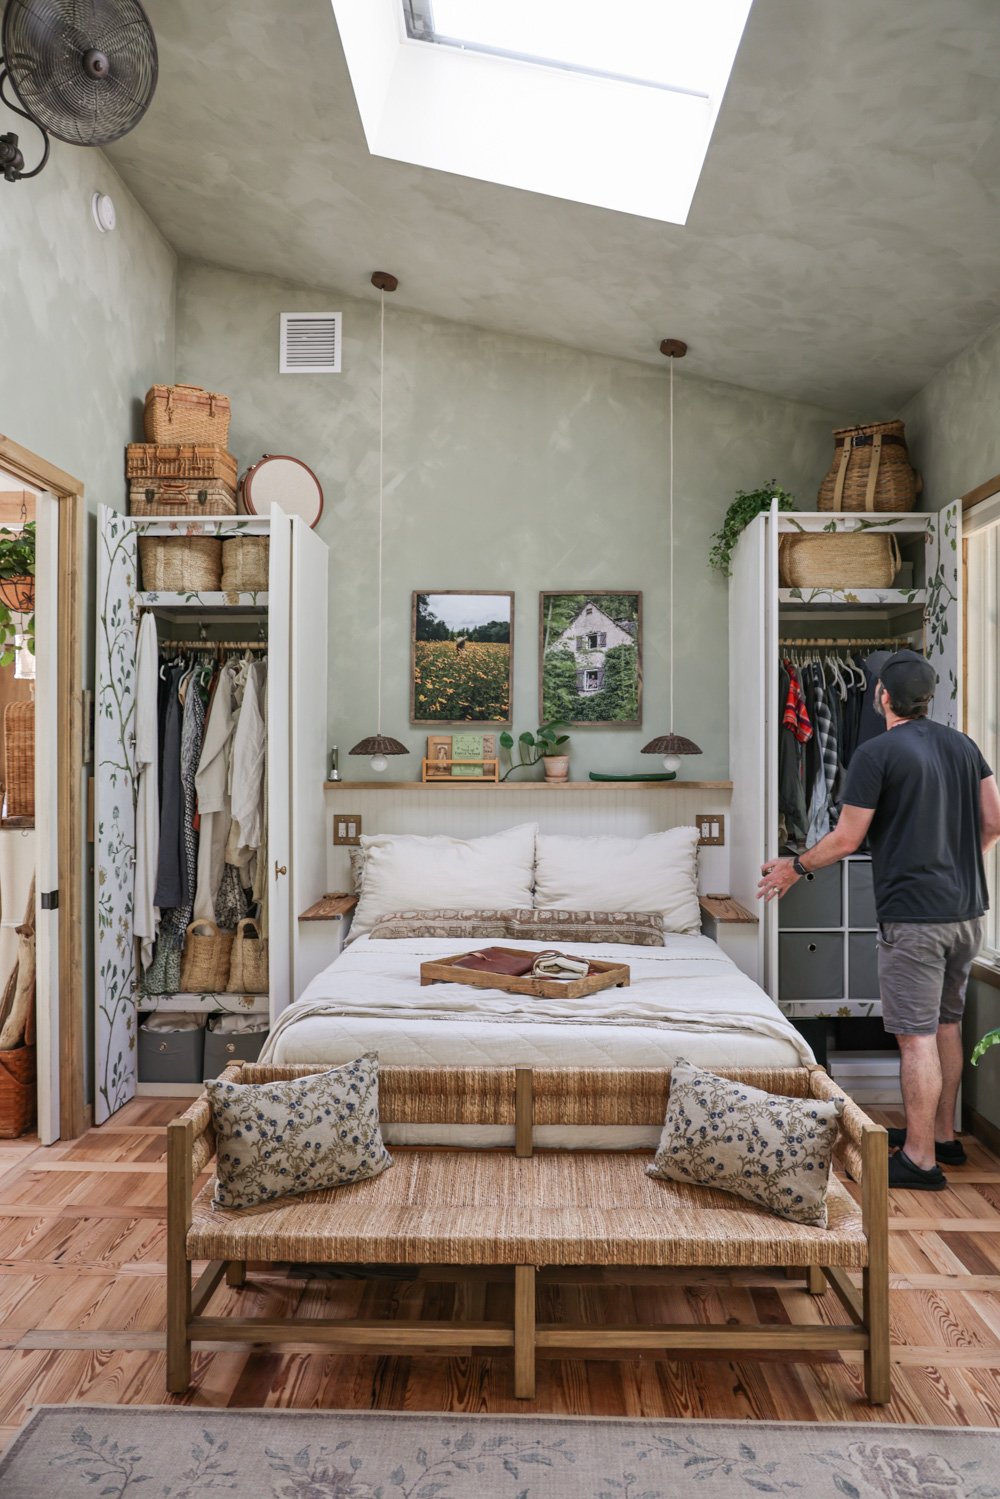
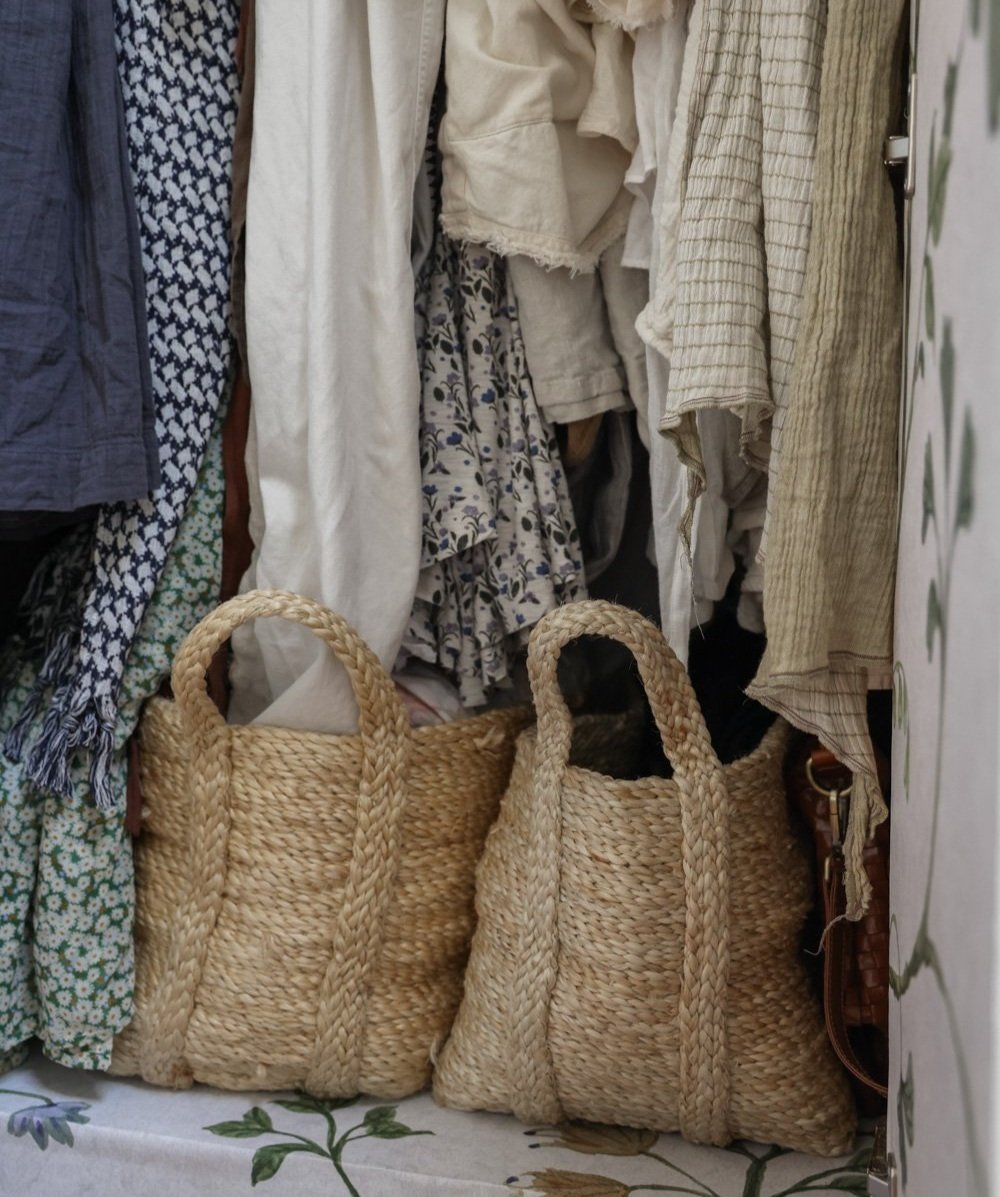
Instead of continuing to employ most of the stiff bins (which we repurposed beneath the kids’ bed for books), I once again used my old favorite, flexible and roomy jute baskets from Will & Atlas. The jute bins hold skirts and undergarments. Off-season clothing has, for now, been relocated to a harder to reach area at the foot of the built-in.

A thrifted wooden stepladder that we use throughout the cottage helps me reach the bathing suits and workout gear in the upper portion of the wardrobe.

Above: Work in progress, as we had wallpaper seams left to trim with a boxcutter— an easy task that requires mere seconds.
The wardrobe doors have burnished unlacquered brass knobs and corresponding backplates.

To maximize space on the dowel, we mainly use slim, metal top + velvet / no-slip coated hangers made with at least 80% recycled PET. We also have a few handmedown and thrifted wooden and specialty hangers. Some hold more than one article of clothing, which helps us fit more garments without needing more hangers.

On one interior wall, I’ve added two basic jewelry hangers, allowing me to keep my accessories by my clothing, without requiring extra surface space for a bulky organizer.

A couple of multi-use scarves made from deadstock fabric from Late Sunday Afternoon flank either side of the interior, suspended from loops of jute for easy access.

While a home is almost ever rarely fully finished — needs evolve, tastes shift, and environments change — we certainly feel more settled now that we were finally able to approach this key component of our cottage with intention and care.

Eco-Friendly Woodland Mural for the Kids' Bunk Wall
From the beginning, we wanted the kids’ shared room to have plenty of color, life and character, while also flowing well with the rest of the cottage when viewed through the room’s open double pocket doors.
BEFORE
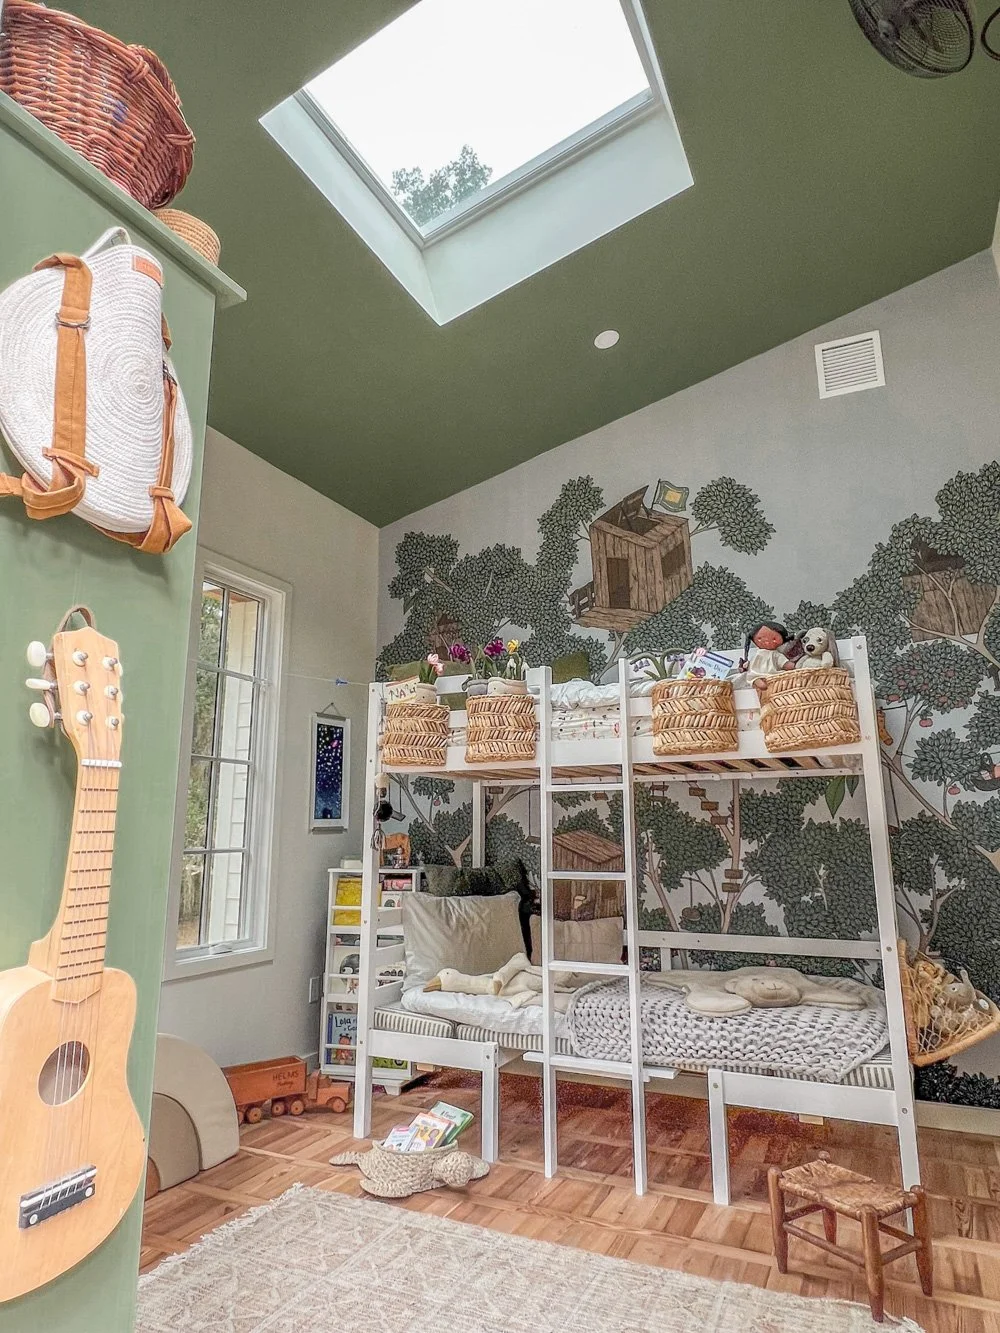
To achieve this, we painted the ceiling and select furnishings in a delightful shade of green chosen by our six year old, but we left the walls the same color as those in the main room. Since two of the walls are filled with large windows, that left two blank white walls. One of those is now a growing gallery wall, visible only when standing within the room. The other is the wall behind the kids’ convertible bunk bed.

This wall is the largest uninterrupted stretch of space in the kids’ room, and it’s visible only from within the room and certain spots in the kitchen. So we knew it’d be the perfect spot for a vibrant, playful mural.

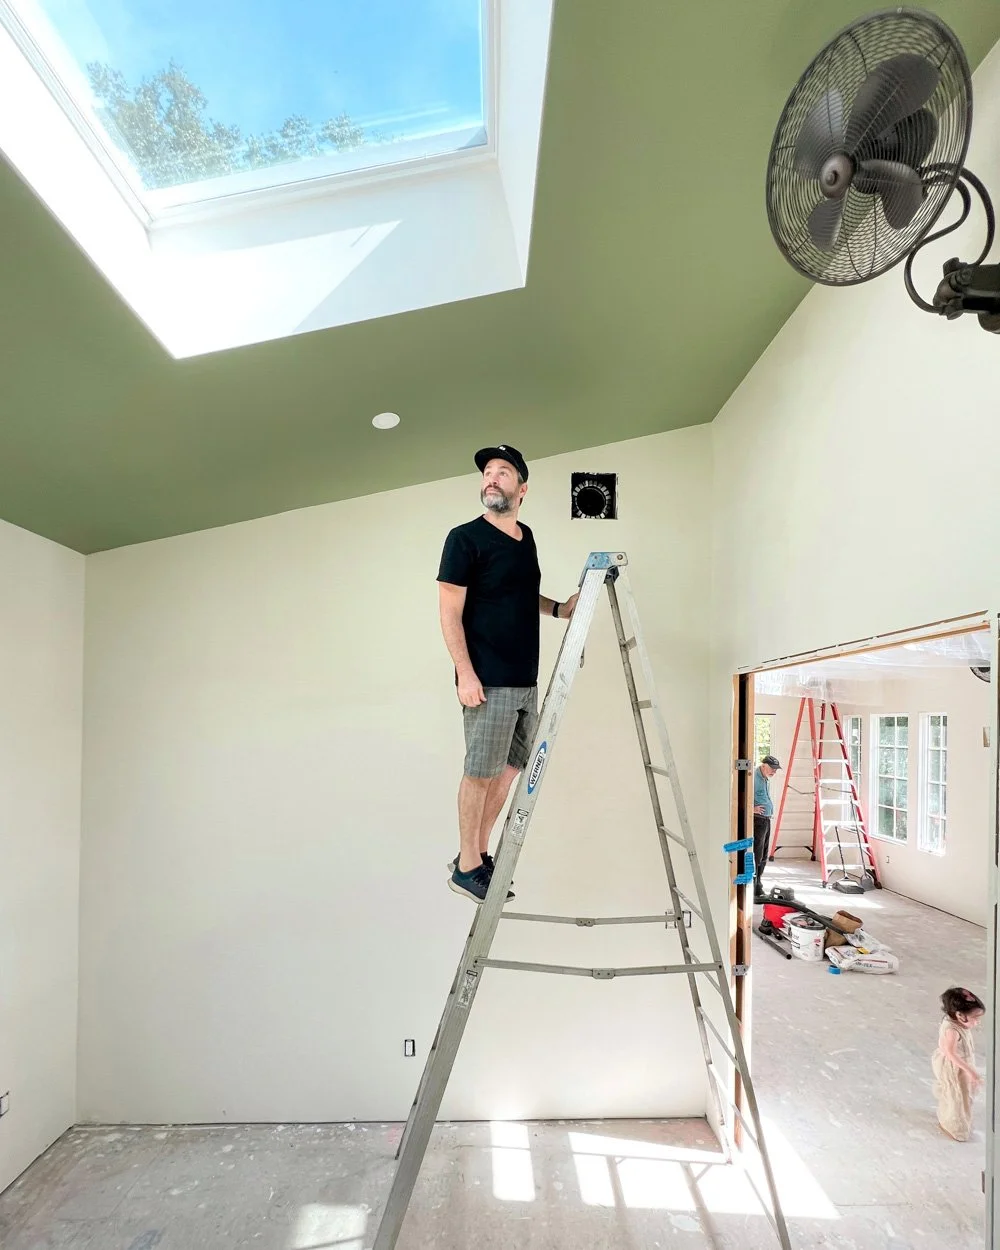
Our six year old chose a woodland design from Rebel Walls, and we are all thrilled with how it turned out. The artwork features delightful clothing lines with unexpected details, treehouses, and wooden + rope ladders, all teetering magically within tree branches of lush green.

The mural took a morning for two of us to apply, owing to the angle of the ceiling (which tops out at 12’+) and the tight dimensions in which we were working with two ladders. It was a straightforward process that went quickly once we got the feel for the application throughout our experience with the first panel. I’d absolutely recommend these murals to anyone considering them, as this one brings us joy daily!

Here are some of the eco-minded reasons we picked a mural from Rebel Walls:
They offer a customized product, keeping no stock of wallpaper that risks being discarded.
Their wallpapers are printed on Non-woven FSC Certified paper.
Rebel Walls uses printing technology, that is 100% pure from solvents and other harmful substances. The wallpapers are completely free from damaging VOC substances, and have no negative impact on people, animals or nature.
The raw material is transported to Rebel Walls in large quantities in order to need as few deliveries as possible— currently just 2 times a year.
Rebel Walls produces very little waste, but the waste they do get is recycled locally.
SOURCES
Mural: Rebel Walls
Venting Skylight: Velux
Paint: Valspar, Blanched Thyme
Floor: Recovered + reclaimed remnant cypress + pine from The Goodwin Co.
Bunk Bed: Click here
Bunk Cushions: Fragments Identity
Eco-friendly, healthy mattresses: Avocado
Most other items: Vintage, handmade and hand-me-down

Before + After: Wallpaper Hack - How We Hid a Textured Wall
As short-term borrowers of our current, temporary living space (which is partially furnished and accessorized), we’re endeavoring to strike a balance between making it comfortable for our lifestyle, while also trying not to disrupt the space irreversibly. (Read more about my feelings on this balancing act via my previous post, and discover where we are and why we’re here via this entry from January.)
In our space, there’s a little nook in the multitasking nursery + playroom + bedroom, which I knew I wanted to turn into something special for our second baby, who arrives this spring. Other than the crib, this spot will be our newest family member’s only dedicated zone.

While envisioning the room makeover from across the country prior to our move, I’d pictured using a bright, playful, peel + stick wallpaper that would wrap around the full cubby, adding visual interest and depth to the otherwise static space.


… Then I remembered that the entire room (which was built in the late 80s/early 90s) has textured walls. Naturally, wallpaper won’t successfully adhere fully to textured surfaces. And even if it did, the details of the wall would show through.
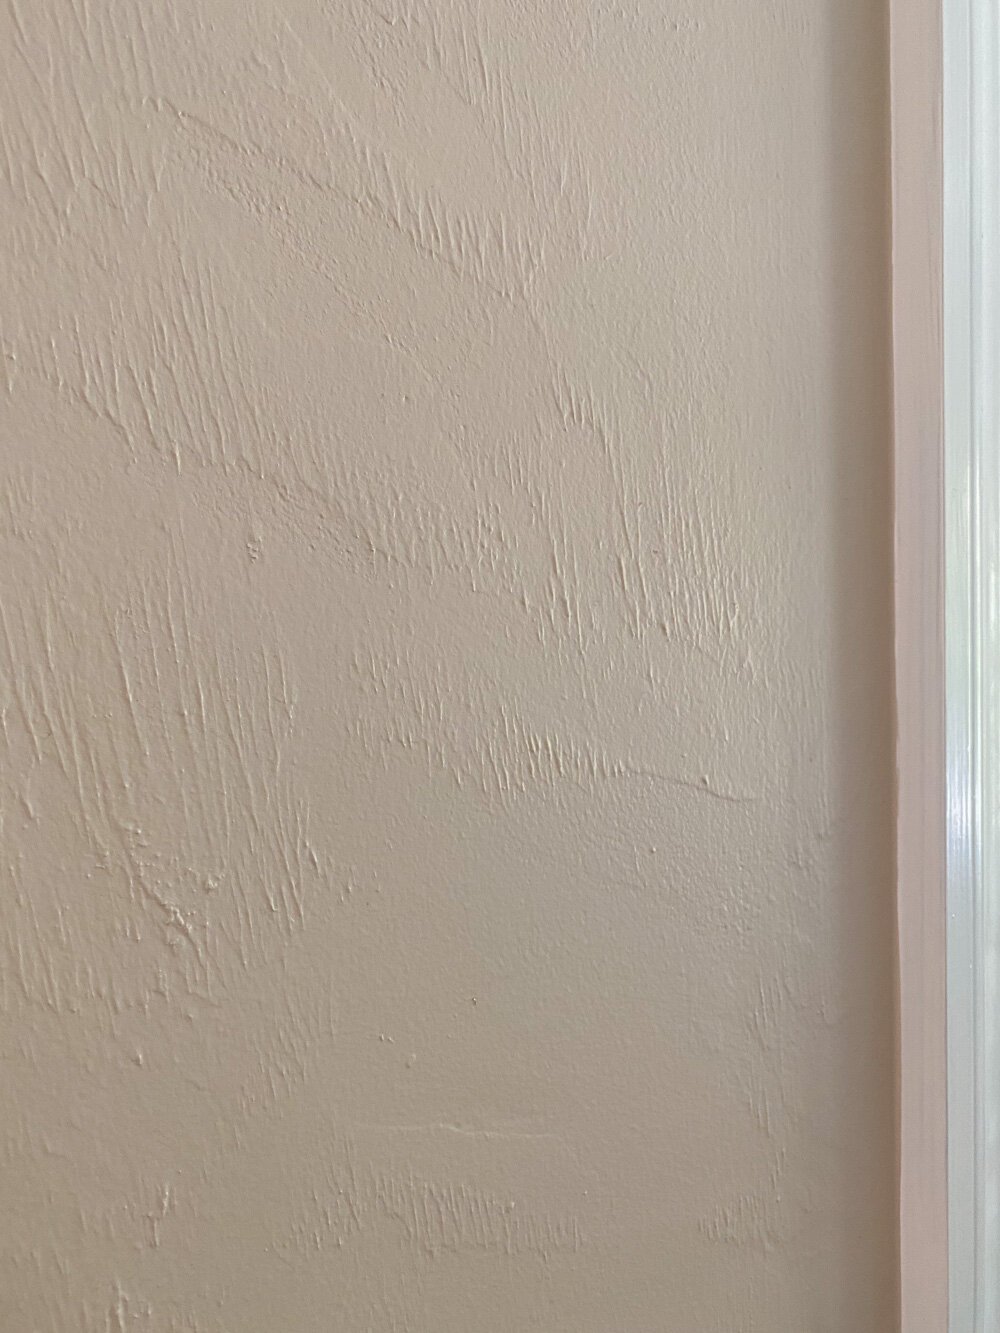
Fully resurfacing or masking the walls (like with beadboard) isn’t an option. We’re not here long enough to make the cost and footprint worth it, plus a change of that magnitude feels like a disrespectful level of change to introduce to a borrowed suite. We did, however, update the walls to Pure White, replacing the brown-beige color that was here upon our arrival. Still, the room needed something more to make it feel special, and I wasn’t willing to give up the vision for the nook.

I decided to attempt an inexpensive little hack in order to incorporate the peel + stick paper and hide the textured wall of the cut-out. We went to The Home Depot and picked out a single, thin panel of plywood that is lightweight enough to easily hang from a wall, but sturdy enough to resist major warping from humidity.

While there, we worked with an employee to cut the panel into slices sized uniquely for popping into the three divided sections of the nook. For the larger, lower slice, we used one uniform panel. For the two remaining areas, we puzzled together the plywood with neutral-toned tape (so it wouldn’t show through the wallpaper,) in order to keep the panels somewhat flexible for sliding in and out of the tightly built-in shelving. We gave up on the idea of the full wrap for the sake of our sanity, hoping that if we could pull the hack off for the back wall it would be enough to scratch the itch.

We covered the panels with a peel + stick wall mural. I chose the mural version instead of the wallpaper, as I preferred a wider spacing / larger print of the artwork for this particular project, rather than a tightly repeating pattern. I selected an orange grove design as a nod to Florida, ushering in the rich greens and playful but watered-down terracottas I’d planned to use within the room.

Thankfully, the peel + stick mural was forgiving, as Adam and I had to reset it a few times to get the layer as smooth as possible over the untreated plywood. The application took about an hour, as I’m in my 8th month of this pregnancy and my range of motion is getting more limited by the day.

To our delight, the panels popped perfectly into the cubby, and a simple screw driven into either side of each panel is enough to hold them in place.

I can’t change the carpet or the dresser, but thanks to the mural I’m no longer bothered by those features. The simple decluttering of the shelves and the addition of the bright paint and orange grove artwork were enough to make the visual and emotional impact I’d hoped.

Our 4 year old likes it, as do we. I hope his little sibling does, too. We’ll find out soon!
Sources:
Jute Baskets: Will & Atlas
Abacus: Etsy
Clothing: Primary Dot Com (Use code WHIT25 for 25% off)
Wall Mural / Paper: Society 6
Duck Baskets: Vintage via Etsy
Changing Pad: Gathre