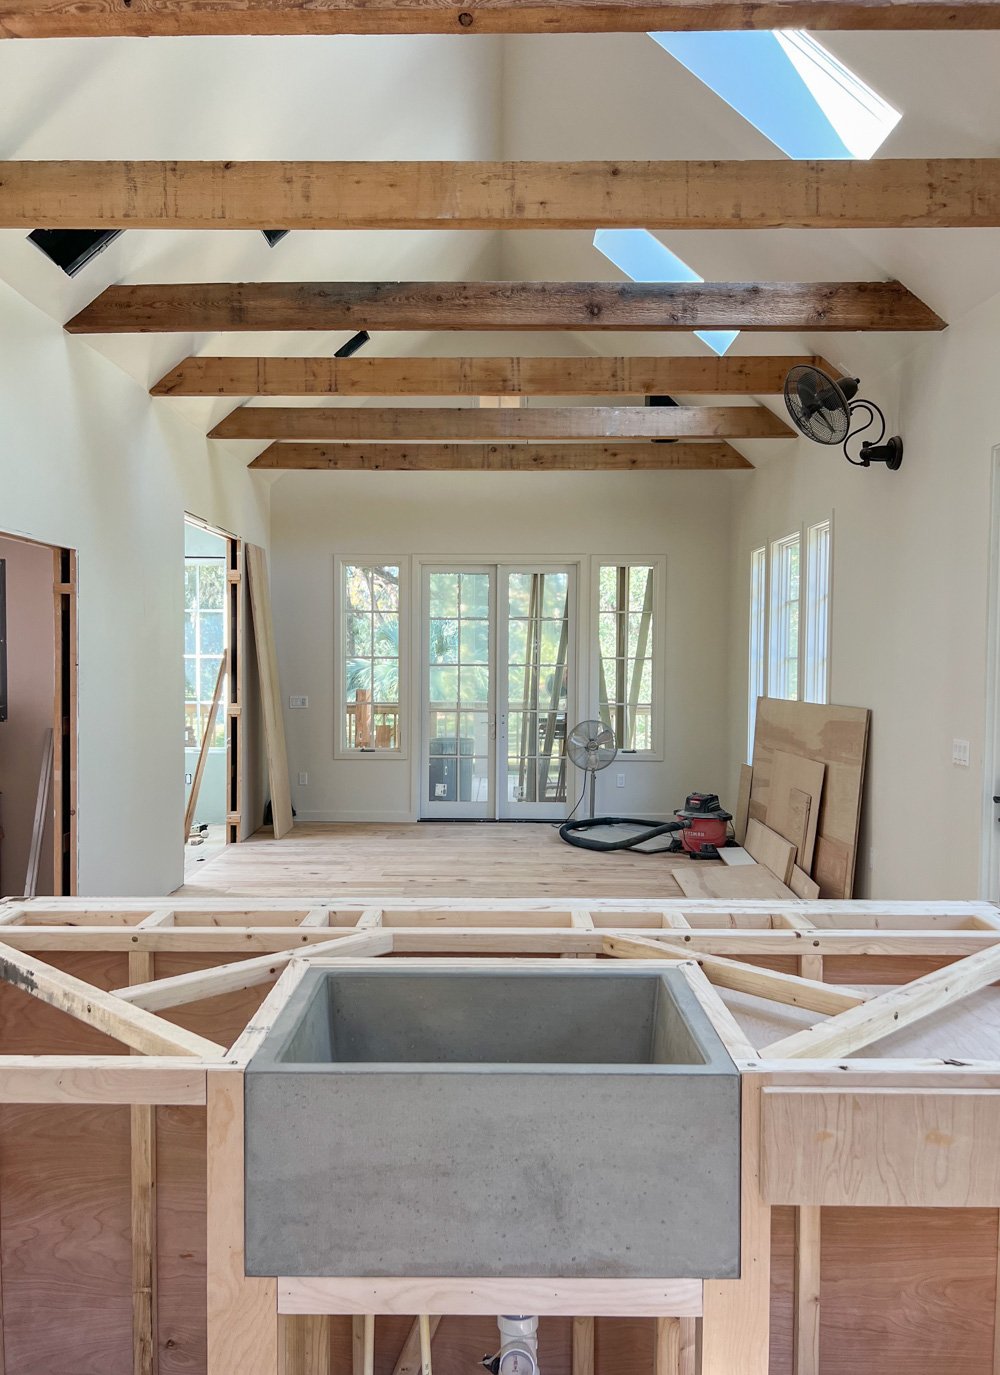
Built-In Kitchen Step Stool
Our new kitchen might be on the smaller side, but our countertops are on the (much) taller side. As a family full of folks 6’ tall and over, we’ve spent countless hours stooping over sinks and hunched over cutting boards. But no more!

One of the greatest perks of designing our little cottage from scratch was the ability to design surfaces to better suit our needs (and ease our aches). However, we have two young children and wanted to be sure they’d retain the ability to reach faucets and handle essential items on their own as needed.

In consideration of this, we’ve worked a number of unique features into our interior, one of them being a space-saving, retractable step-stool at the soon-to-be-skirted kitchen sink.

We mentioned this concept to the wonderful carpenter who has been bringing our vision to life, and he further magicked it into this design. The stool is as wide as the sink (about 22”), and features two levels of tread.

The track keeps everything from sliding side to side, and we held on to the kids while they first tested it out so that they have a better understanding of how to climb up and down safely with the retractability in mind.
Our oldest is already a pro. Our youngest will take supervising for some time, but at her age that’s the case pretty much anywhere.
It’s a work in progress, of course, but within the next two weeks it should all be wrapped up and we’ll soon be moving in!

Building Our New Small Cottage
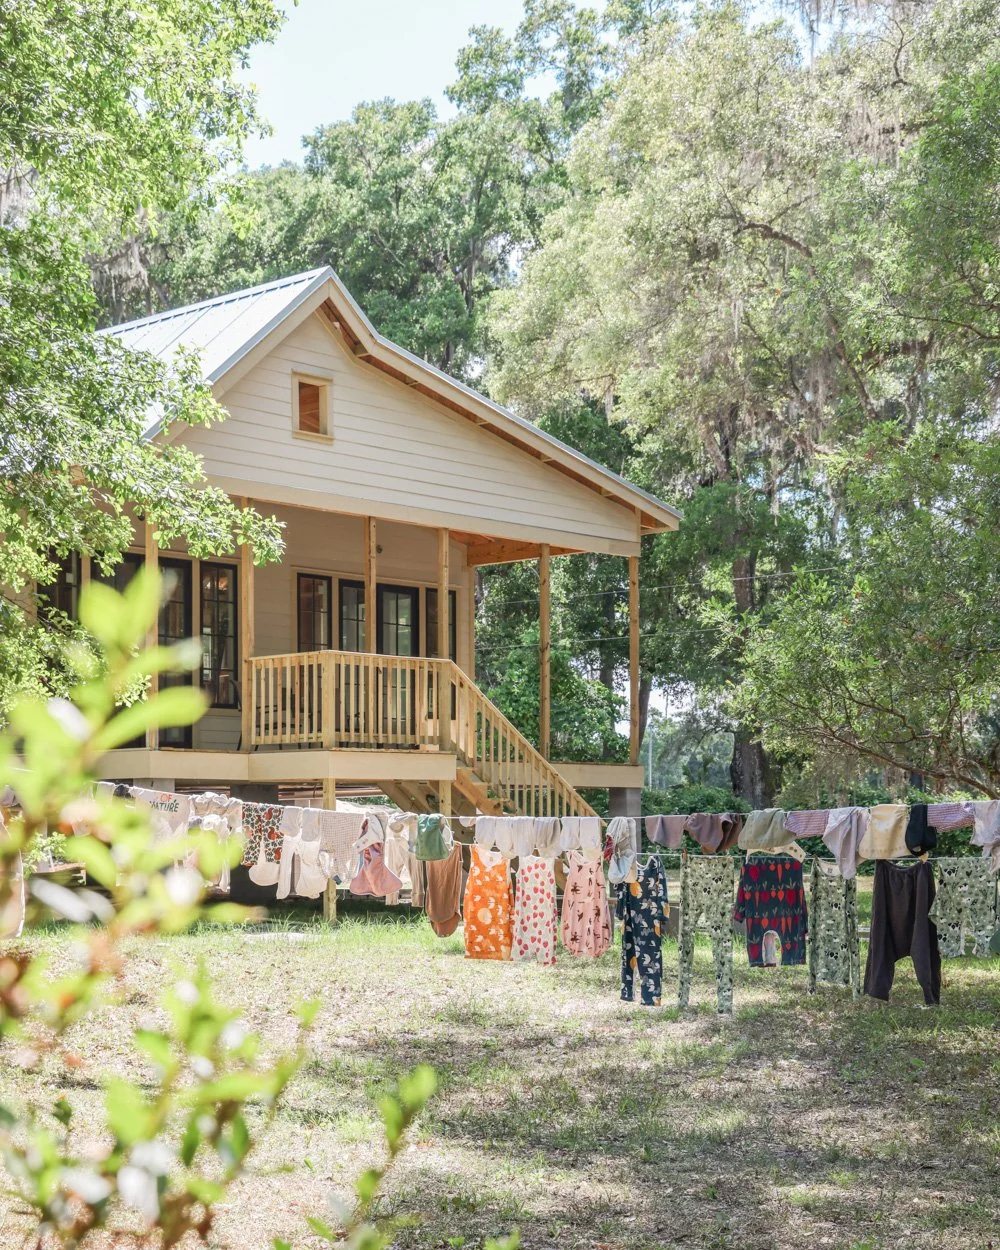
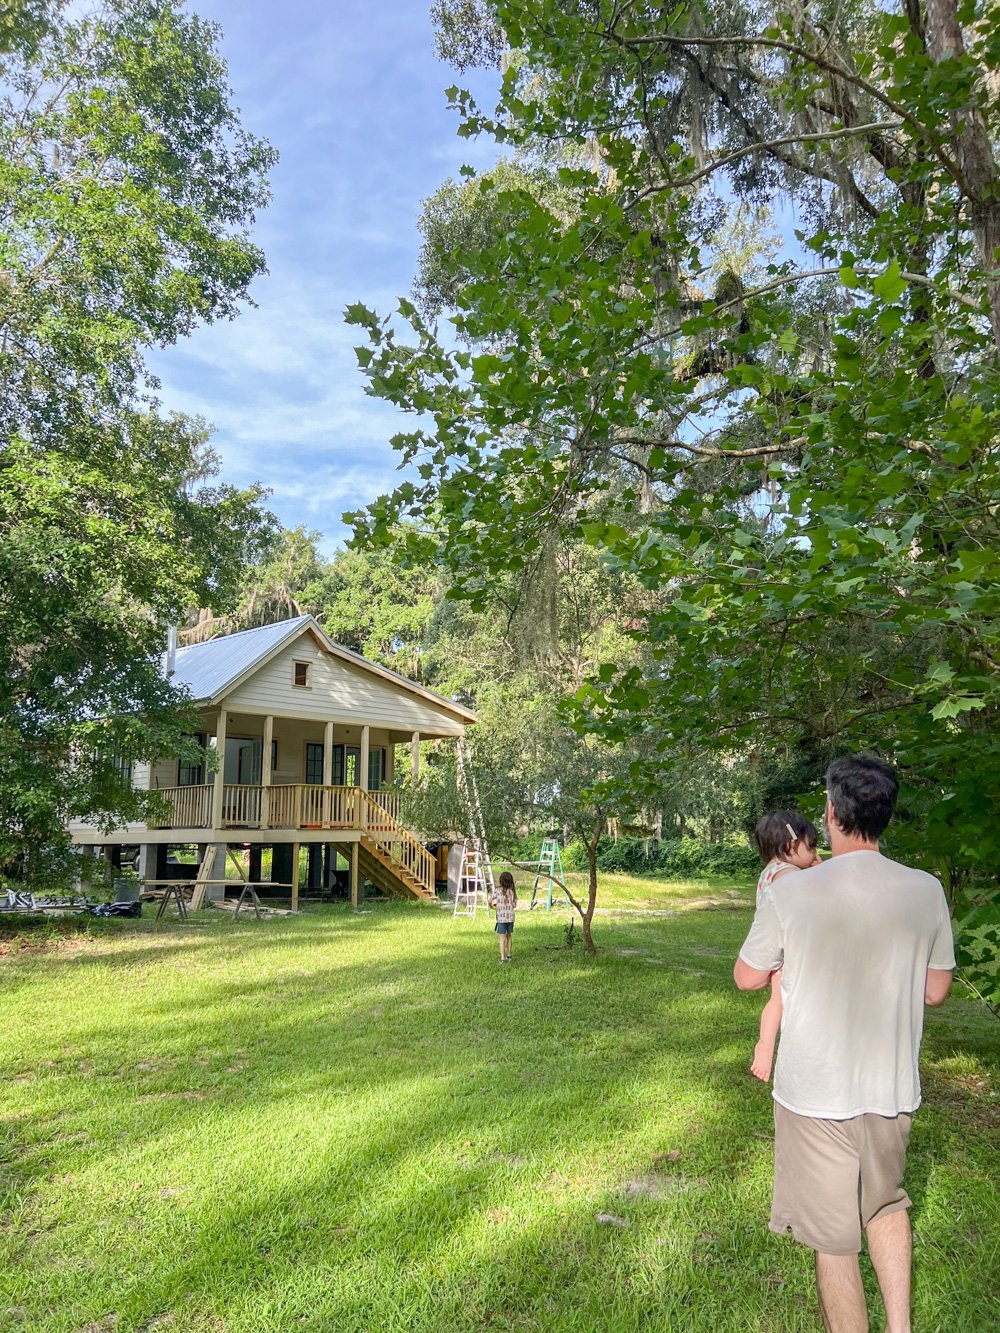
In January of this year, we broke ground on our new small Cottage in the Southeast.*
(*For those who are confused about this new cottage vs our Tiny French Farmhouse: the property that we’re restoring and renovating in France is a forever project for us, and won’t be livable full-time for several years. As such, this small Cottage will be our primary residence and studio for the foreseeable future, as planned from the onset.)


This cottage is roughly 900 square-feet. For reference, our Venice cottage was <400. The entire structure is built up about 5’-6’ off the ground due to current flood-level requirements in this particular area, which is a wildlife sanctuary.


The floorplan was a collaborative effort (dating back to November of 2020) between myself and Jennifer Langford (AIA, CNU, PA, LEED-AP) of The Sustainable Design Group.

Above rendering by & © Jennifer Langford, The Sustainable Design Group
My initial concept was a layout similar to that of our Venice cottage, but elongated to accommodate a second bedroom. Jennifer took the design and updated it to reflect the necessities of Florida living.


For example, she added a small utility room to house an HVAC system and electric water heater in order to cleverly avoid stealing space from the vaulted ceilings, which we wanted to keep as open and airy as possible.


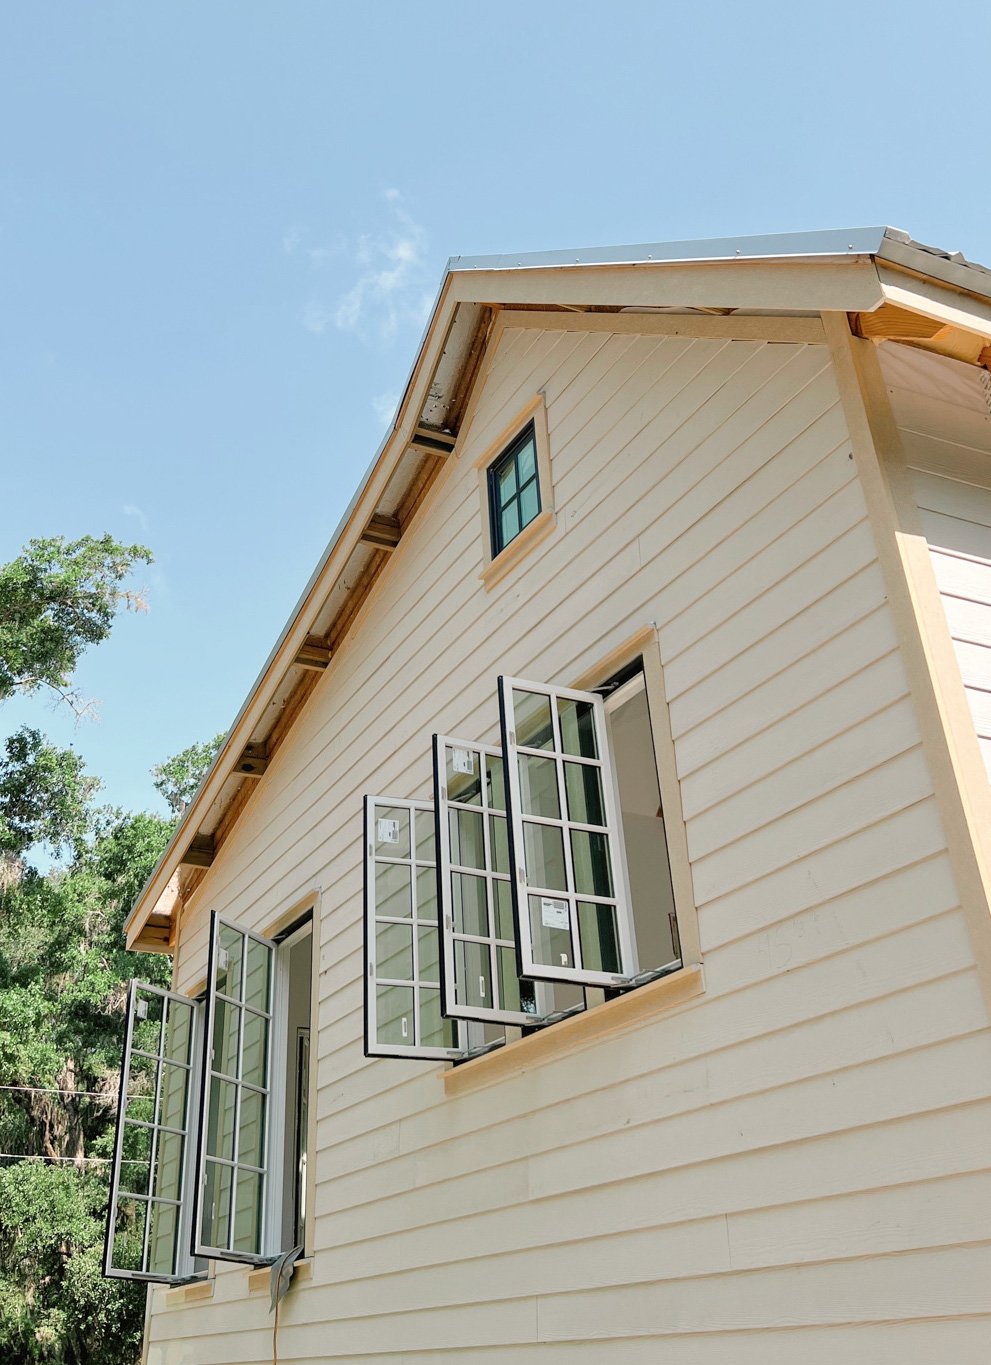
As a result of the utility room addition, she bumped out the shower in our bathroom + laundry room combo, resulting in one of our favorite features of the home thus far:


I’ll publish more of the small space design and engineering process with Jennifer in the future, but for now I’m sharing some of the exciting progress from 2022 thus far. (I’ve been covering this extensively on social media— particularly Instagram Stories, where I post daily updates and will continue to do so. Nearly 500 videos and photos of the process can be seen in the numerous “Prairie ADU” Highlights on my profile.)


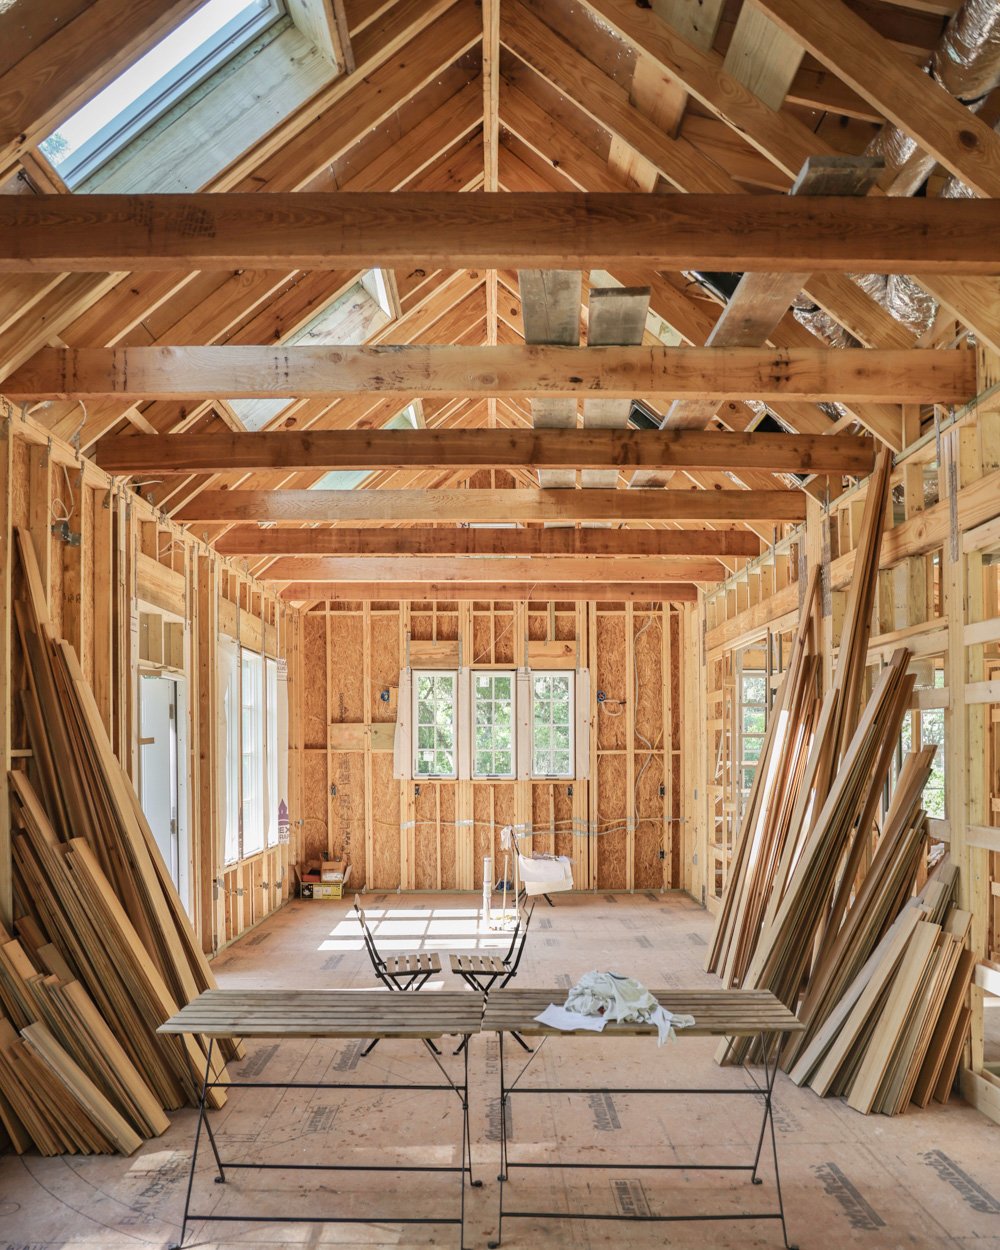


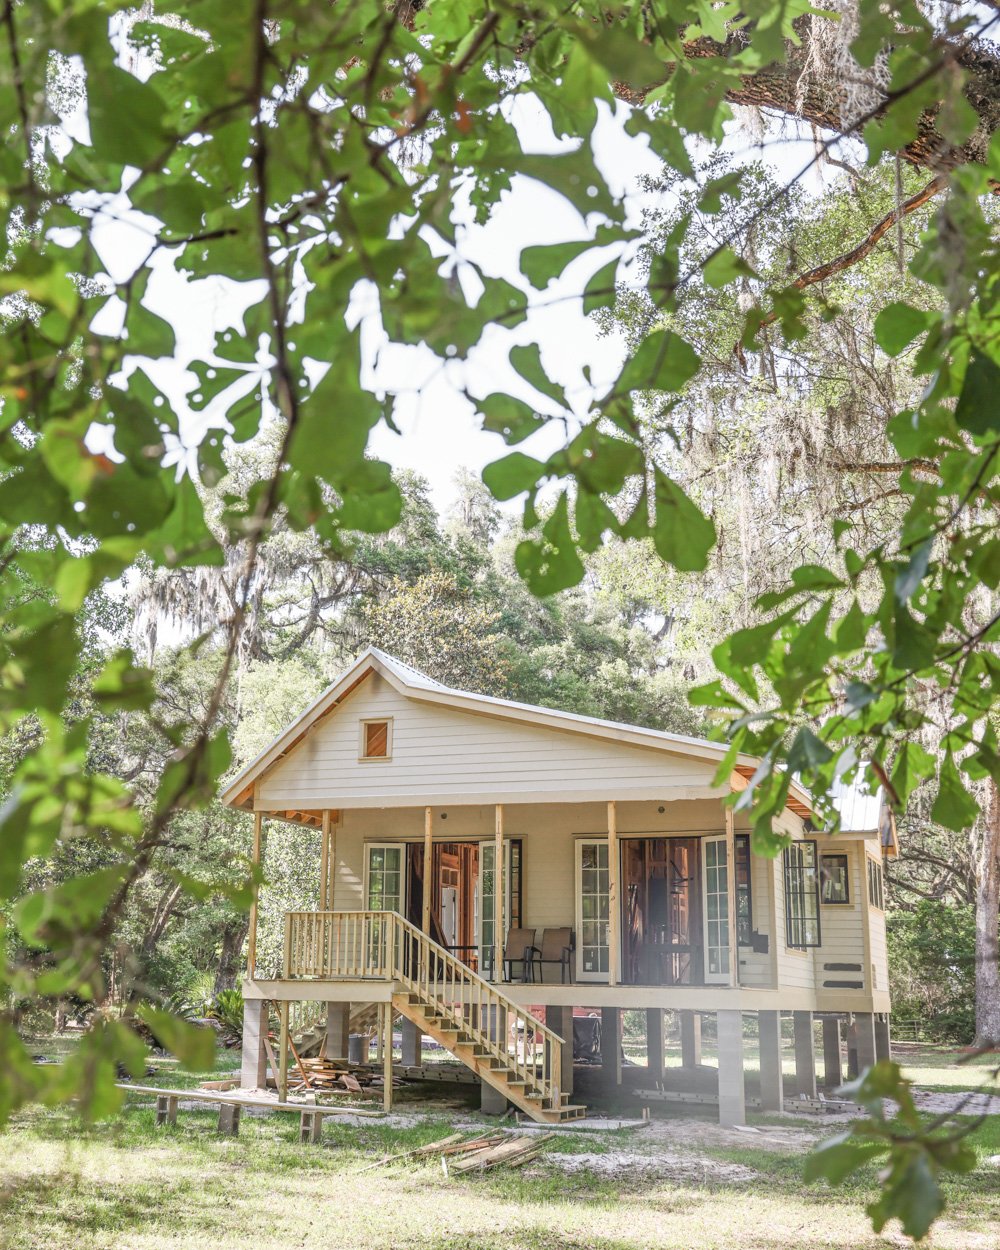
Although it has all taken longer than planned (due to numerous factors), we are pleased with our GC and his close team of subcontractors. Our home isn’t an easy one despite the compact floor plan, primarily due to the elevation and our decision to opt for custom framing. But the team is really bringing something beautiful to life for my family and business.

It’s been a year and a half since we left Venice, so we’re beyond eager to move in and resume our small space lifestyle… in our new setting, and with our newest family member.

We’re almost at the finish line!


Intimacy in a Small Space (Part II)
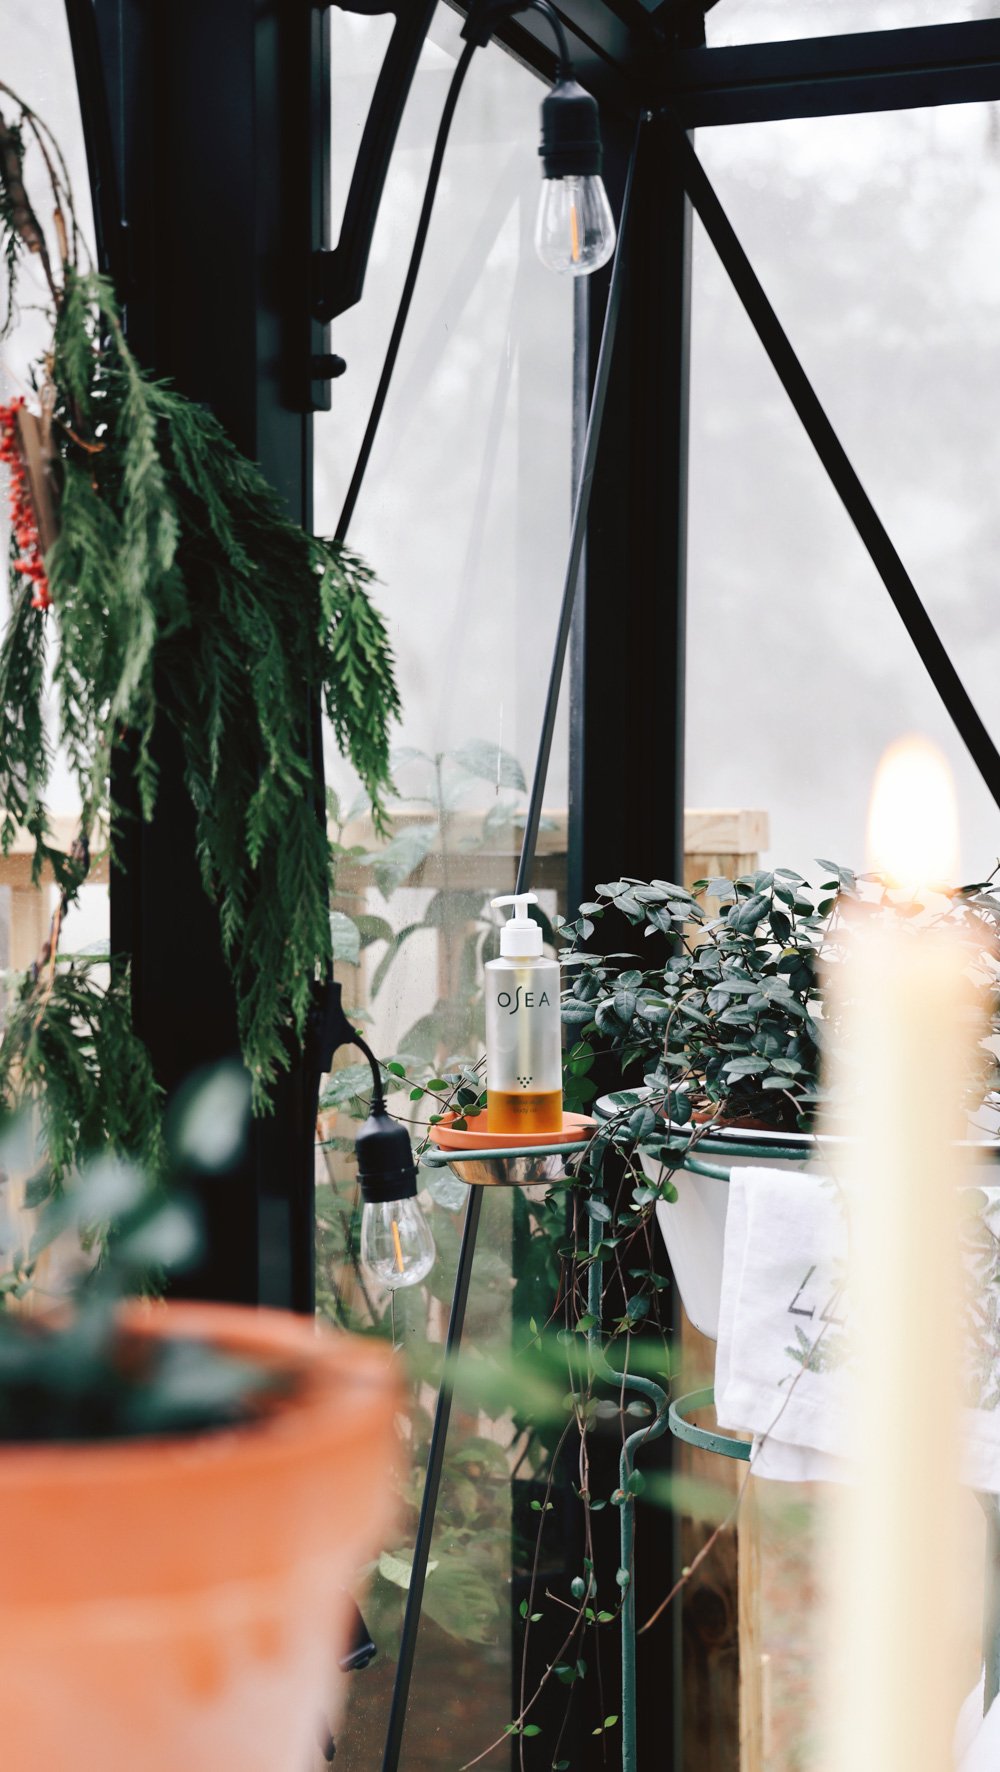
One of my most read entries on this blog is about intimacy in a small space. It was a personal post inspired by Maude, which is a sexual wellness company whose work and products are geared towards inclusive, accessible modern intimacy and destigmatizing the subject. The company was founded by our bold and brilliant friend, Éva Goicochea, whose work has turned a legacy industry upside-down, forcing it to confront its biases and narrowed viewpoint. I am so proud of her and her team that I want to shout it from the mountaintops.
Since Maude’s launch, Adam and I have used their products because they’re beautifully, artfully, and mindfully designed, plus they’re marketed with dignity. And, when it comes to small spaces, items often get left out in the open, so it helps when those items are visually appealing and even multitasking, like Maude’s.

Here are some of my favorites:
The Drop: See that lovely, dark green tear-drop shaped item on the bath tray? That’s the Drop, a personal massager that can be used for stress relief and pleasure, and is ideal on neck pain, erogenous zones, and joint pain. It is water resistant, has a small canvas carrying case + a travel mode setting so it won’t accidentally turn on when you’re on-the-go, and it is so tastefully designed that it can stay out in the open without shame.
The Burn Massage Candle: Massage is a powerful tool for fighting stress (which can reduce libido), and it releases oxytocin. Maude’s hand-poured burn massage candle is made with skin-softening jojoba and soybean oils, a 100% cotton, lead-free wick, and cruelty-free + vegan ingredients. Let the candle burn for 10–15 minutes, gently blow out the flame, then pour and apply the massage oil. (It will be warm, but not burning hot.)
The Compostable Wipe: You know I prefer reusable everything when possible, but sometimes wipes just come in handy. These are 100% compostable, water-activated, fragrance-free, OEKO-TEX® Certified, and hypoallergenic towels made for gently cleaning skin and sensitive areas.
The Tub Kit: These two products — the Soak and the Bath Salts, are made for solo relaxing or for soaking with a partner. Both are made from hand-harvested blends that infuse water with nourishing vitamins and minerals. Both are vegan and made with cruelty-free ingredients and never tested on animals.

Expect to see more Maude here over time, because intimacy has proven to be a crucially important part of successful small space living for us as a couple.

Small Space Design Hero: Solar Powered Fresh Air Skylights
Small Space Design Hack: Use skylights to enhance your home AND mood.
ANNOUNCEMENT: Now through Feb. 28, enter the VELUX Sunlight Lovers' Sweepstakes for a chance to win two VELUX No Leak Solar Powered Fresh Air Skylights with solar-powered shades and installation.
We’re current building a ~900 square foot cottage in the woods for our small family and business. (This is in tandem with our restoration of the shared, Tiny French Farmhouse, as our permanent move to France won’t happen for years.)

When I set about designing the space with our sustainable architect, I had a few firm requirements for the space:
Green practices and materials where possible
Just four rooms, no hallways
Space-saving interior pocket doors
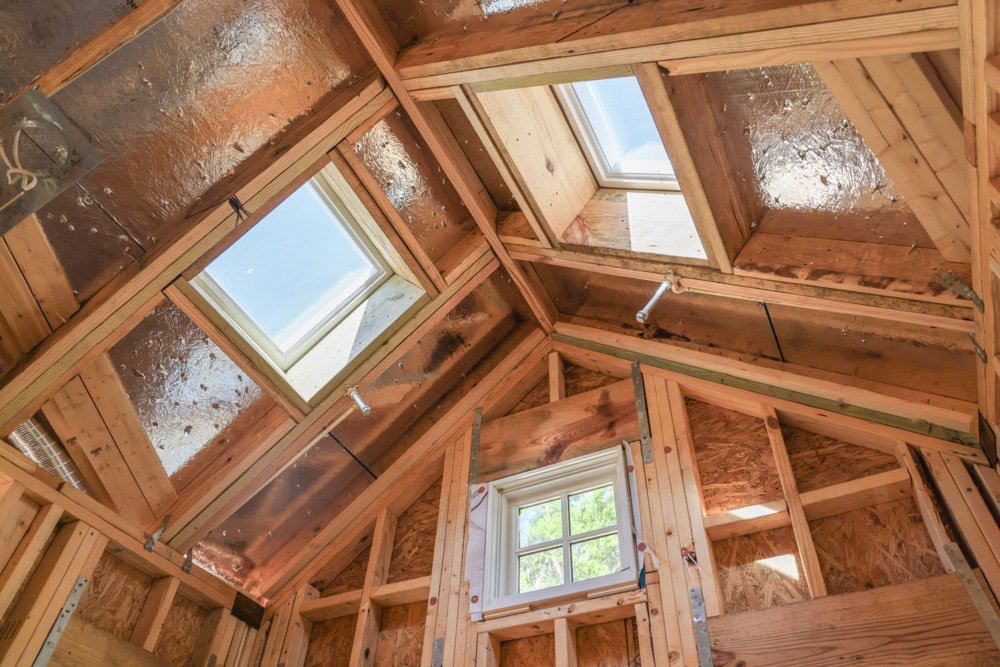
Abundant natural light via window placement and ample skylights

We had skylights in our Venice Tiny Canal Cottage, and they made ALL the difference in visually expanding and lifting the <400 sqft space, but they lacked several features we desired. For example, there was no way to vent them, nor filter the sunlight when desired. So, when planning for our new cottage, I knew exactly how to get the look we love, along with the quality and functionality we were lacking before. It can all be achieved through the use of VELUX skylights.
On a side note, we also used VELUX skylights for the roof restoration and ceiling renovation in our Tiny French Farmhouse, but that’s a post for another day…
We selected VELUX No Leak Solar Powered Fresh Air Skylights. Since they’re solar powered, so no wiring is required during installation, despite the myriad of functions these skylights can perform.

Not only will the VELUX skylights provide the natural, mood-enhancing light we crave, but they’ll usher in the incredible natural surroundings, from the towering oak tree canopy to the stars at night. Plus they can be opened / closed via a remote control or smartphone for airflow. Fresh air ventilation has wellness benefits, since interior air is often more polluted than outdoor air. And in case we accidentally leave the skylights open, they have am acoustic sensor that automatically closes the skylight at the first sign of rain.
We also know just how impactful skylights are at visually enhancing the interiors of small spaces. The overhead natural light eliminates dark corners, amplifies the mindfully selected decor, and visually enlarges the space.

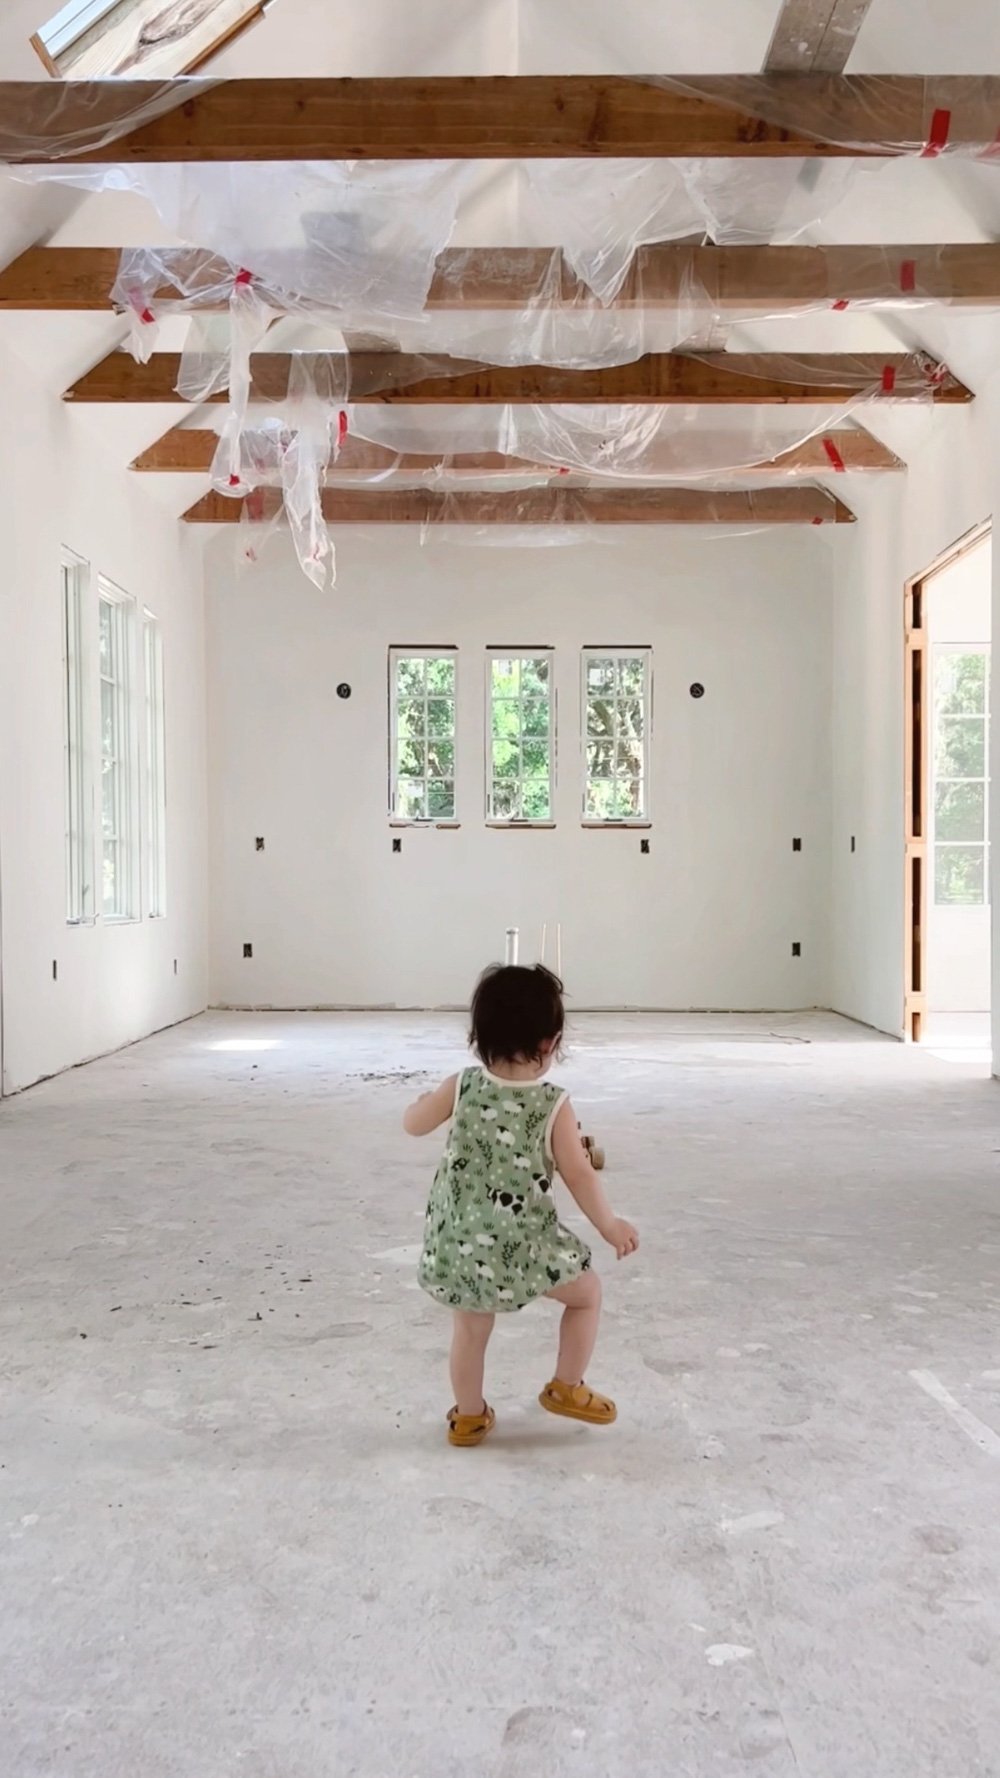
We opted for 3 slimmer skylights in our main room, which is the living + dining + entry + kitchen space, one skylight for the main bedroom, and one for the kids’ room.
When using skylights in a bedroom, it’s nice to have the option of blinds. (We learned this the hard way in our old cottage.) Our new skylights have solar powered blinds (controlled via remote or smartphone). For the bedrooms, we picked room darkening shades. For the main room, we used light filtering shades to diffuse but not block the sun.

We’re nearing the end of the framing stages of the new cottage build, and as of today ALL of the skylights are framed in. I’ll share updates on the installation and reveal of our VELUX No Leak Solar Powered Fresh Air Skylights.
In the meantime, there are still a handful of days to entire the VELUX Sunlight Lovers' Sweepstakes, which is open from Feb. 1 through Feb. 28 at 11:59:59 pm EST. The grand prize is two VELUX No Leak Solar Powered Fresh Air Skylights with solar-powered shades and installation. CLICK HERE TO ENTER.


9 Tips for a Lower-Impact, Practical, Temporary Living Space
Ways to make a temporary space function efficiently and less wastefully through planning, decor, creativity, and patience.
We’re starting off the new year exactly as we closed out the previous year…. in limbo. (I should note that I’m typing these words with a lack of gusto, but no lack of gratitude.)

At this point last year, we started packing up our holiday decorations at the Tiny Canal Cottage and, once the festive frills were gone, we simply kept packing. We eventually wrapped up our small business and 10 years of life into a fraction of a shared, cross-country moving van, and relocated too a temporary space on the East Coast. (Read about our attempt at a low waste, long distance move here.)

The space was meant to be our home for around six months while we awaited the build of a little ADU cottage in the woods of North Central Florida. However, we didn’t find a general contractor for months, as new construction is having a (stomach-turning, tree-uprooting) boom in North Central Florida. Then permit process took an additional five months, and — on top of that — global supply chain snags then came into play.

So six months turned into eleven, and here we are. But the build is, thankfully, FINALLY underway.
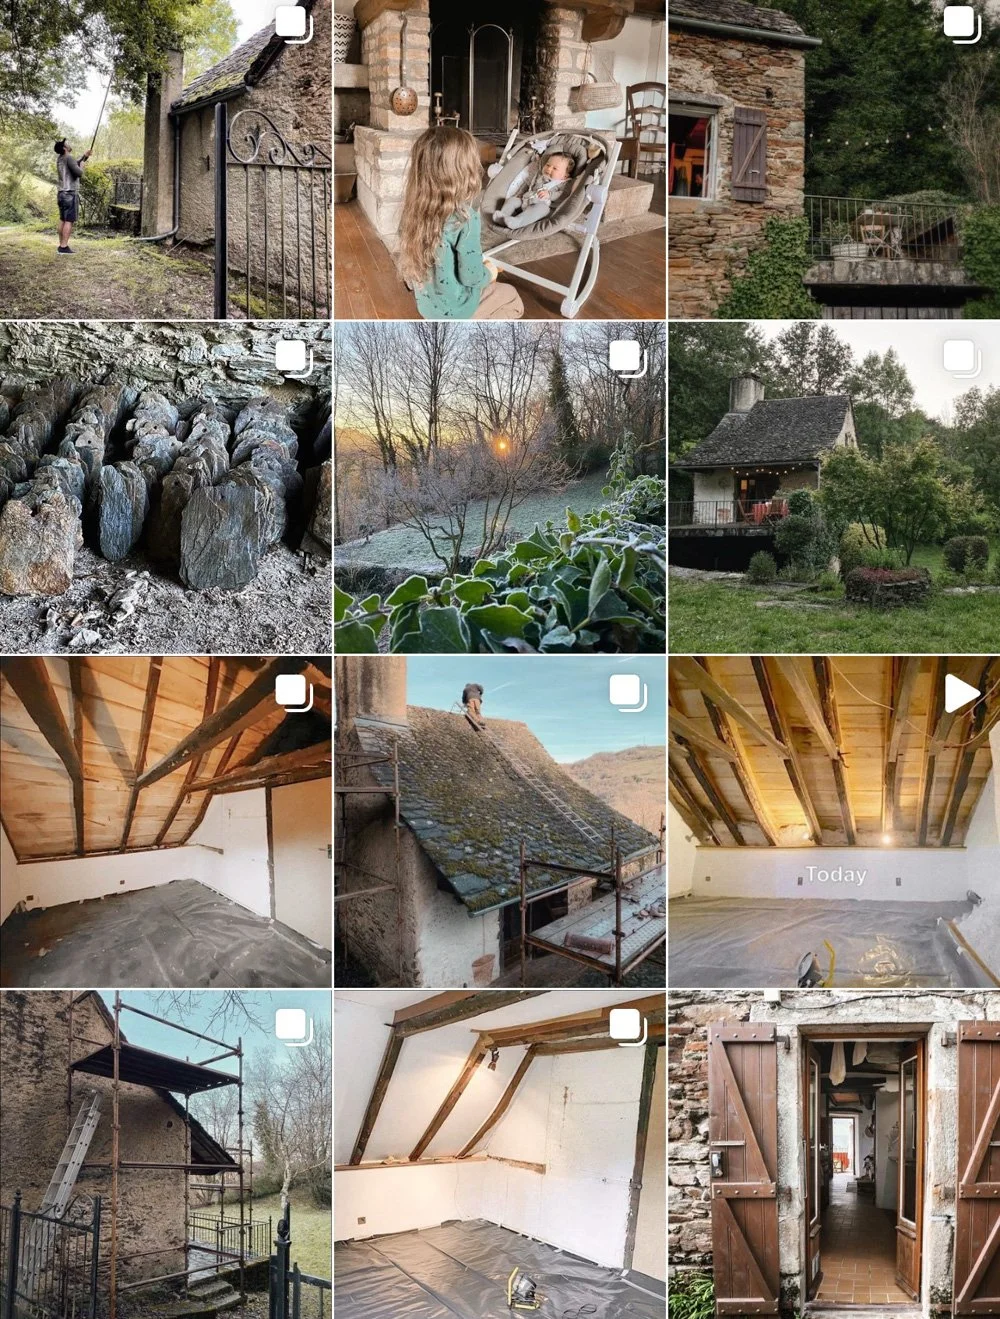
Surprisingly, we’ve had better luck in France with our little, shared Farmhouse. Thanks to our long-standing roots in the region, we quickly found local contractors and friends to begin the restoration of the our little, shared farmhouse since we can’t be there year-round just yet. I’m giddy with delight that this unique project is humming along marvelously, and I’m publishing regular updates on a secondary Instagram account: @TinyFrenchFarmhouse.
Overall, 2021 was a doozy of a year for us to uproot our lives and dive willingly into a state of ongoing upheaval. But the situation, while not ideal, has certainly had some very significant perks. All in all, I believe the move was the right decision. But the right decision is often not the easiest one to make, and this has been a bumpy road to traverse.
As someone with a full business and career in the Home industry, I’ve been looking for ways to take this experience and turn it into something helpful. I’m still seeking the mental bandwidth and available moments to conceptualize and execute whatever that would look like. So, for now, a humble blog post will have to suffice.

As far as personal matters are concerned, my main concerns regarding our temporary living arrangements were two-fold:
How would we make a temporary space designed for adults FUNCTION well (and safely) for us as a family with a pre-schooler, a newborn, two dogs, and a small business?
How would we keep environmental impact light without our usual belongings, practices and habits in place? (Especially during the pandemic, and in a far less eco-minded community than we were used to.)
Note: Before I jump into the following takeaways, I should distinguish what I mean by a “temporary space.”
First off, I’m not a young graduate just starting out on my own, nor am I in an industry that requires me to travel often for long stretches of time. I’m 40 years old, and I have a family, as well as a business based on the Art of Home. As such, I had believed my days of nomadic living to be behind me.
Secondly, technically our Tiny Canal Cottage was temporary, as we were renters who could’ve been asked to vacate at any time. But, despite the fact that we rented, it was our HOME. We knew that we wanted to invest in it as fully as possible, because we intended to live our lives to the fullest there as long as we could.
Our current situation is like a bridge for us. We’re slowly crossing over, sweetly mourning the life we left (as I expect we always will), while excitedly tackling two very different living projects ahead of us. The rooms to which we currently have access are not open for us to transform as we normally would. I liken our current existence to living in a loving, comfortable Airbnb. We’ve moved in and are using it to the fullest, but it’s not our own.
So, with that, here’s some of what I’ve learned, hugely condensed.

Don’t Be Trapped by a Space’s Intended Use
As is often the case with a small space, temporary living situations might need to multitask, or function in entirely different ways than their intended use. And that’s okay.
It’s. Just. Temporary.
For example, we’re using the upper floor of a single family home. The kitchen is on the ground floor, and the sounds from it carry throughout the entire house. When I was expecting the arrival of our second child in April, I knew that the last thing I’d want to do after breastfeeding and then pumping every two hours is trudge up and down the loud stairs in the middle of the night while exhausted and attempting to not wake the dogs or disturb the rest of the household. So I had to find a way to lightly convert part of the second floor bathroom into an area where I could clean / boil / dry pump parts, safely store breastmilk until he morning, and so forth. Was all this the stuff of Instagram dreams? Definitely not. But did it work just fine, while keeping everyone else asleep and preventing me from tumbling bleary-eyed down the stairs at 3am? Yes indeed.

Fully Ignore Decor Rules
To piggy-back on the above, sometimes you just need a means to an end in a space that’s not yours, so go ahead and break the rules if that’s what works. In our case, we have access to two bedrooms (filled with furnishings and items that aren’t ours), but the typical two bedroom layout was no longer working for our daily lives based on safety of the children and various parenting responsibilities. So Adam and I recently squeezed the provided queen bed + full bed, and our daughter’s crib into one (packed) room, freeing up a safe play area for both of our kids in the remaining bedroom. For now, it all functions exactly as we need it to, and we can put up with the unusual layout since we know it’s not forever.
Note: Our farmhouse and future cottage only have 2 bedrooms as well, but we will have the ability to equip and arrange them in a way that suits everyone’s needs.)

Pack with a Plan / Take What You Need
I’ve never been a fan of storage spaces. Ashlee Piper goes into the waste and excess involved in the storage industry in her book, Give a Sh*t, which I both recommend and refer to often. But my family has had to keep the vast majority of our belongings in a storage unit for the past 11 months while our little cottage is still being constructed and the shared farmhouse is being restored. Knowing that this would be the case for quite some time, we wanted to prevent financially and ecologically wasteful practices, like the repeat buying of items we already own but lost track of in storage, or keeping reusable goods tucked away in moving boxes while we churn through single-use alternatives for the time being.

So we planned accordingly, either dragging what we needed with us in our suitcases across the country, or making sure that the moving boxes we needed most for our attempt at a lower waste lifestyle were clearly marked and easily accessible upon pickup and delivery.

Plan for Setbacks
What we didn’t plan for was the (very) extended time our Cottage construction would take, so we failed to wisely pack and mark our first child’s hand-me-down items for his little sibling beyond a certain point. In other words, we considered the need for access to newborn goods, but not 9+ month goods. Same for seasonal garments. While there is only so much we can accommodate in our temporary space, we could’ve better planned the packing, labeling and placement of things we’d need if and when our finish line became pushed further back.

Do What You Can (Within Reason) via Limited Decor
Functional decor such as plants, portable lighting sources, mirrors, bedding, and rugs can make a large impact in both the look and feel of a room. If these are items that you already have on-hand, or ones that can be repurposed in your next space, why not go for it— temporary space or not.
Find a Stop-Gap with Extended Uses If Needed
Our homes can make all the difference in our lives— this why I love what I do for a living. If a living space is preventing you from being able to function the way you need for your mental health or livelihood, perhaps search for a stop-gap if possible. (A rental studio, an external office, a gym membership, a library card, etc.) Personally, I need a small space for my job of course… but small spaces are also my muse. For whatever reason, I feel infinitely more creative in limited square footage. This is one of the reasons why we built our 114 sqft greenhouse over the summer. It scratched an itch both personally and professionally, while also providing us with a versatile structure that we’ll hopefully have the opportunity to enjoy in evolving ways for years to come, extreme weather events permitting.

Set Ego Aside
I’d flat-out be lying if I said I didn’t struggle with our current setup. Again, I’m ever-so grateful, but it’s still a pride-swallowing situation as a 40 year old who is also the main earner in the family to tuck her family and business into someone else’s home. However, I can say with all sincerity that when I take external voices and societal pressures out of the picture and just listen to my family’s needs, this situation is 100% fine for us for the time being. We’re learning what we need — and don’t need — in this region and community, and we’re experiencing incredible moments as a multi-generational family that will stay with us forever.
Stick to a Budget
It can be tempting to go all out in a temporary space. (“I should add some on-trend bead board! This carpet has to go! That lighting fixture is not my style!”) But if you know for a fact that a more preferable living situation is just around the corner — and if budget is a consideration for you as it is for us — then consider every decor and design project you forego in your current space to be another project you can tackle in your more accommodating future home.

Work With What You’ve Got
Look around you to find the hidden uses and unexpected joys of your temporary space.

The following is an extremely specific example, but I think it’s a good one: Our Venice cottage had a built-in bed with an integrated headboard that turned out to be a perfectly cushioned spot for hours and hours of playing games of suction cup darts with our little one. Now he uses zero waste Stabilo art sticks to safely draw on the greenhouse windows while I work.

Put your temporary space to extended use whenever possible— unanticipated gems might perhaps reveal themselves, sparking moments that make a less-than-ideal situation into something you’ll cherish down the road.


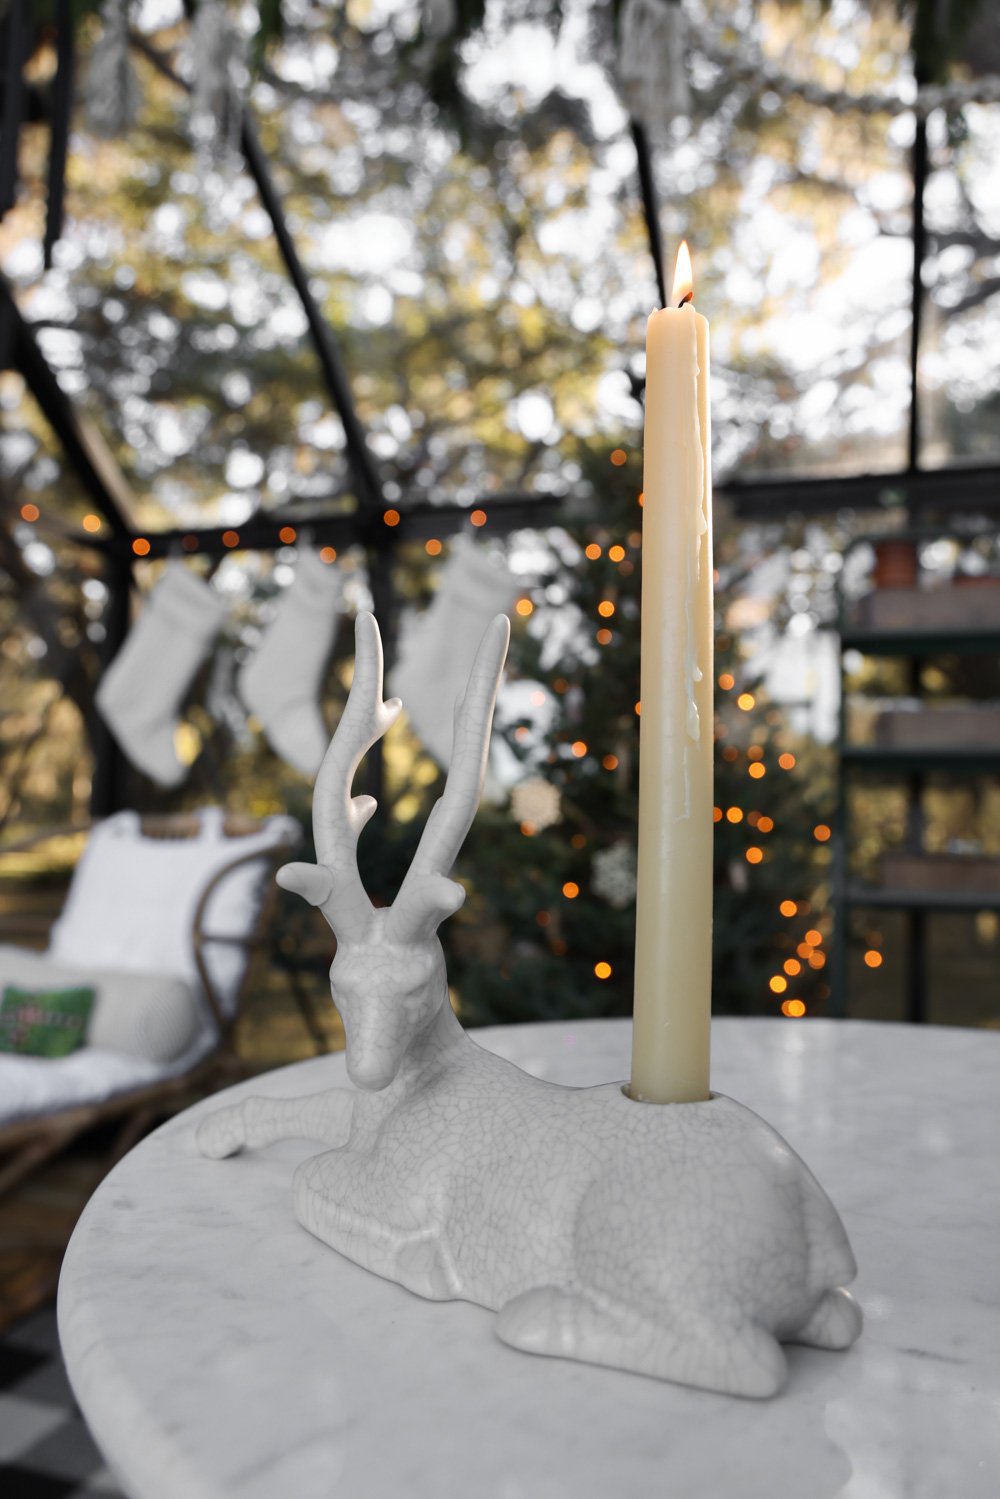
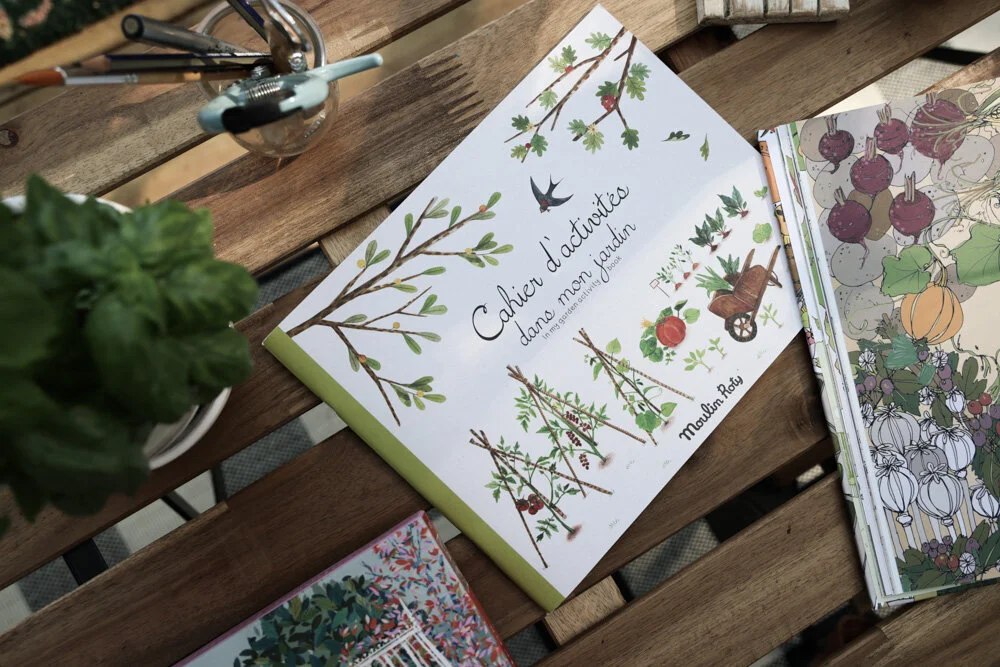
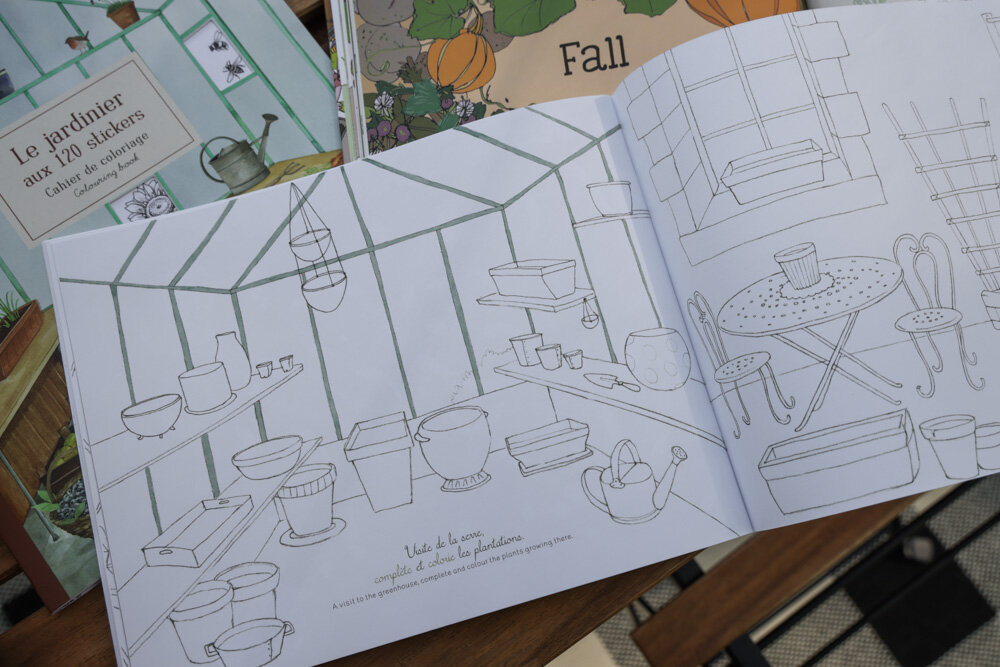
Dressing the Tiny Greenhouse for the Holidays
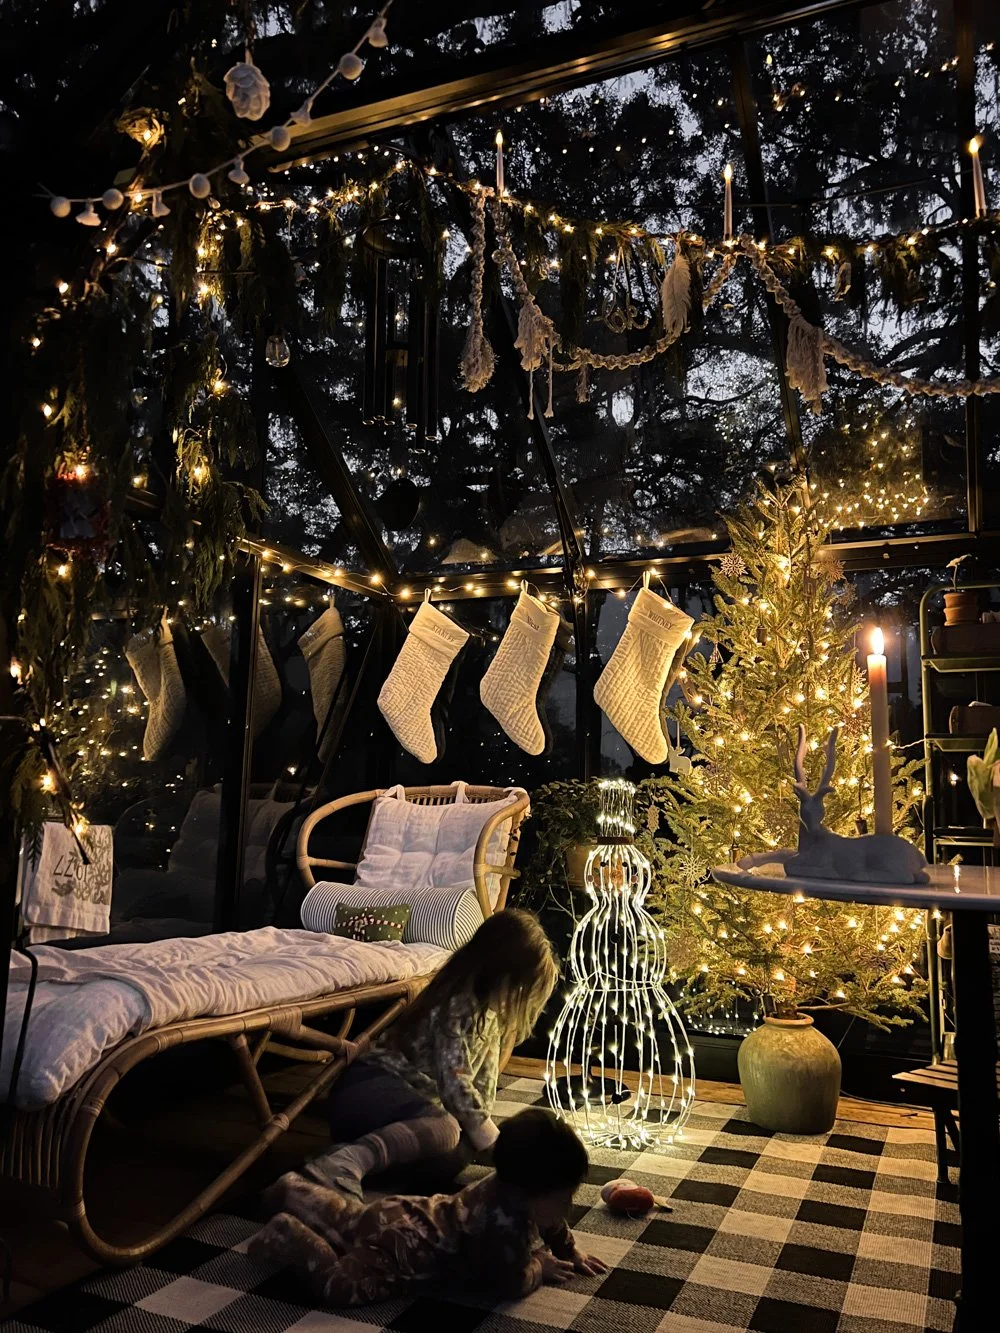
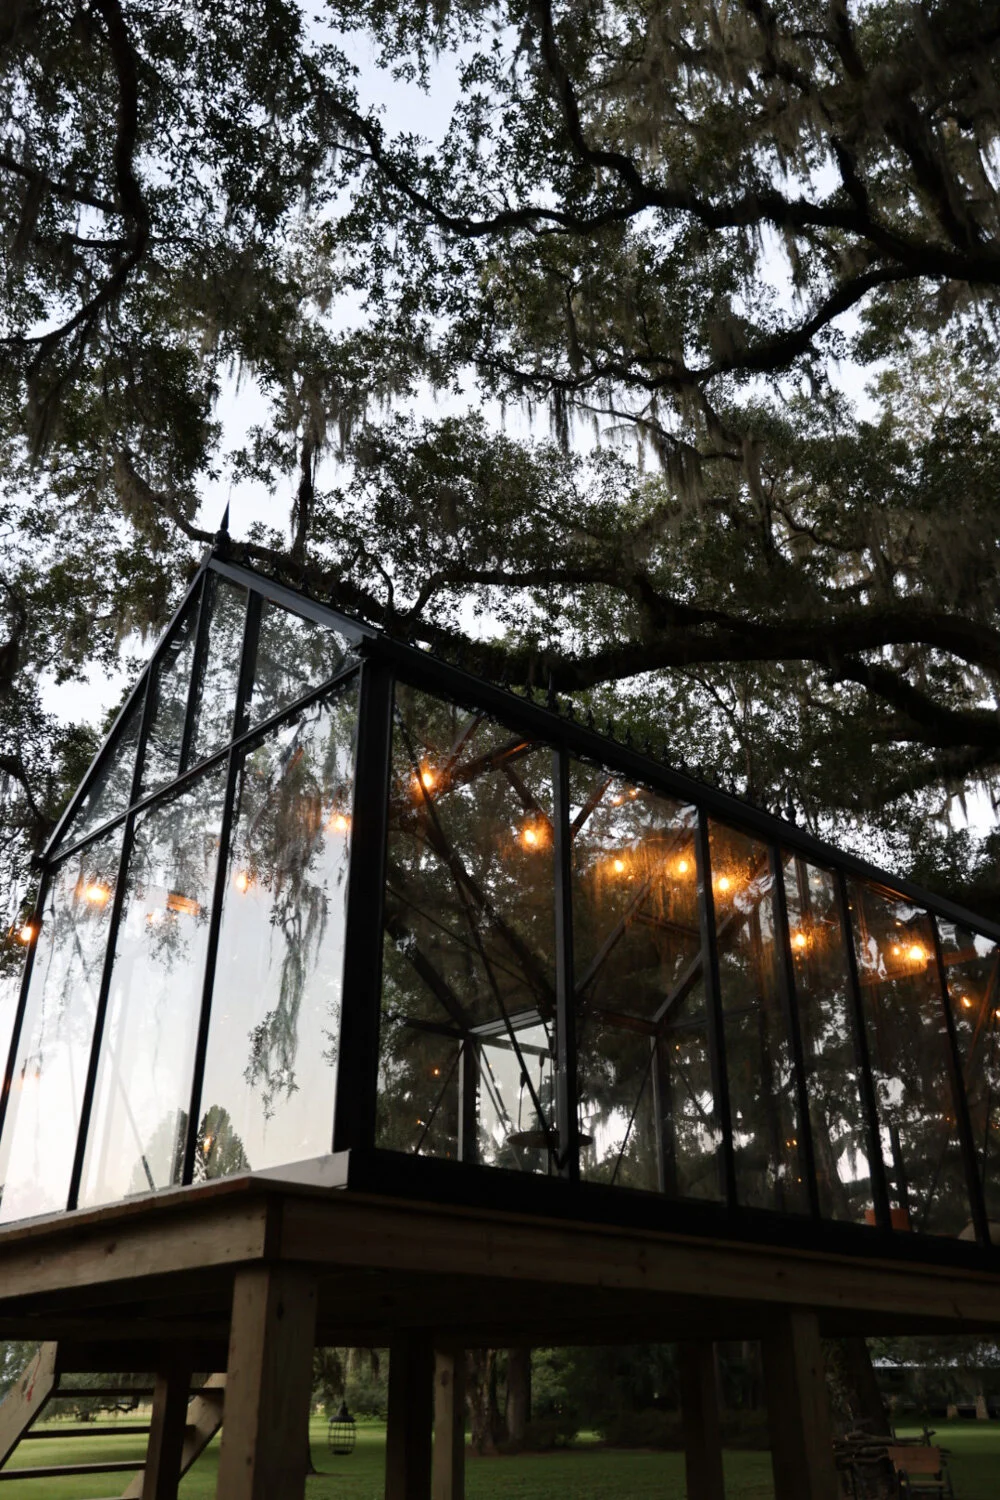
This holiday season, I wanted to create a little bit of magic for our 5 year old, who has shown immense compassion, understanding, patience, and love this year. As were still between homes (our small ADU cottage is under construction, and the farmhouse roof is being replaced/restored), I figured that decorating our tiny, mixed-use greenhouse would do the trick:

We’ve long kept all our holiday decor in a vintage suitcase, with the exception of the live tree, and garlands made from discarded clippings, which we get locally.

In celebration of our tiny cottage and the canals, we got one new ornament this year: a green canoe, just like the old one we had when living in Venice.

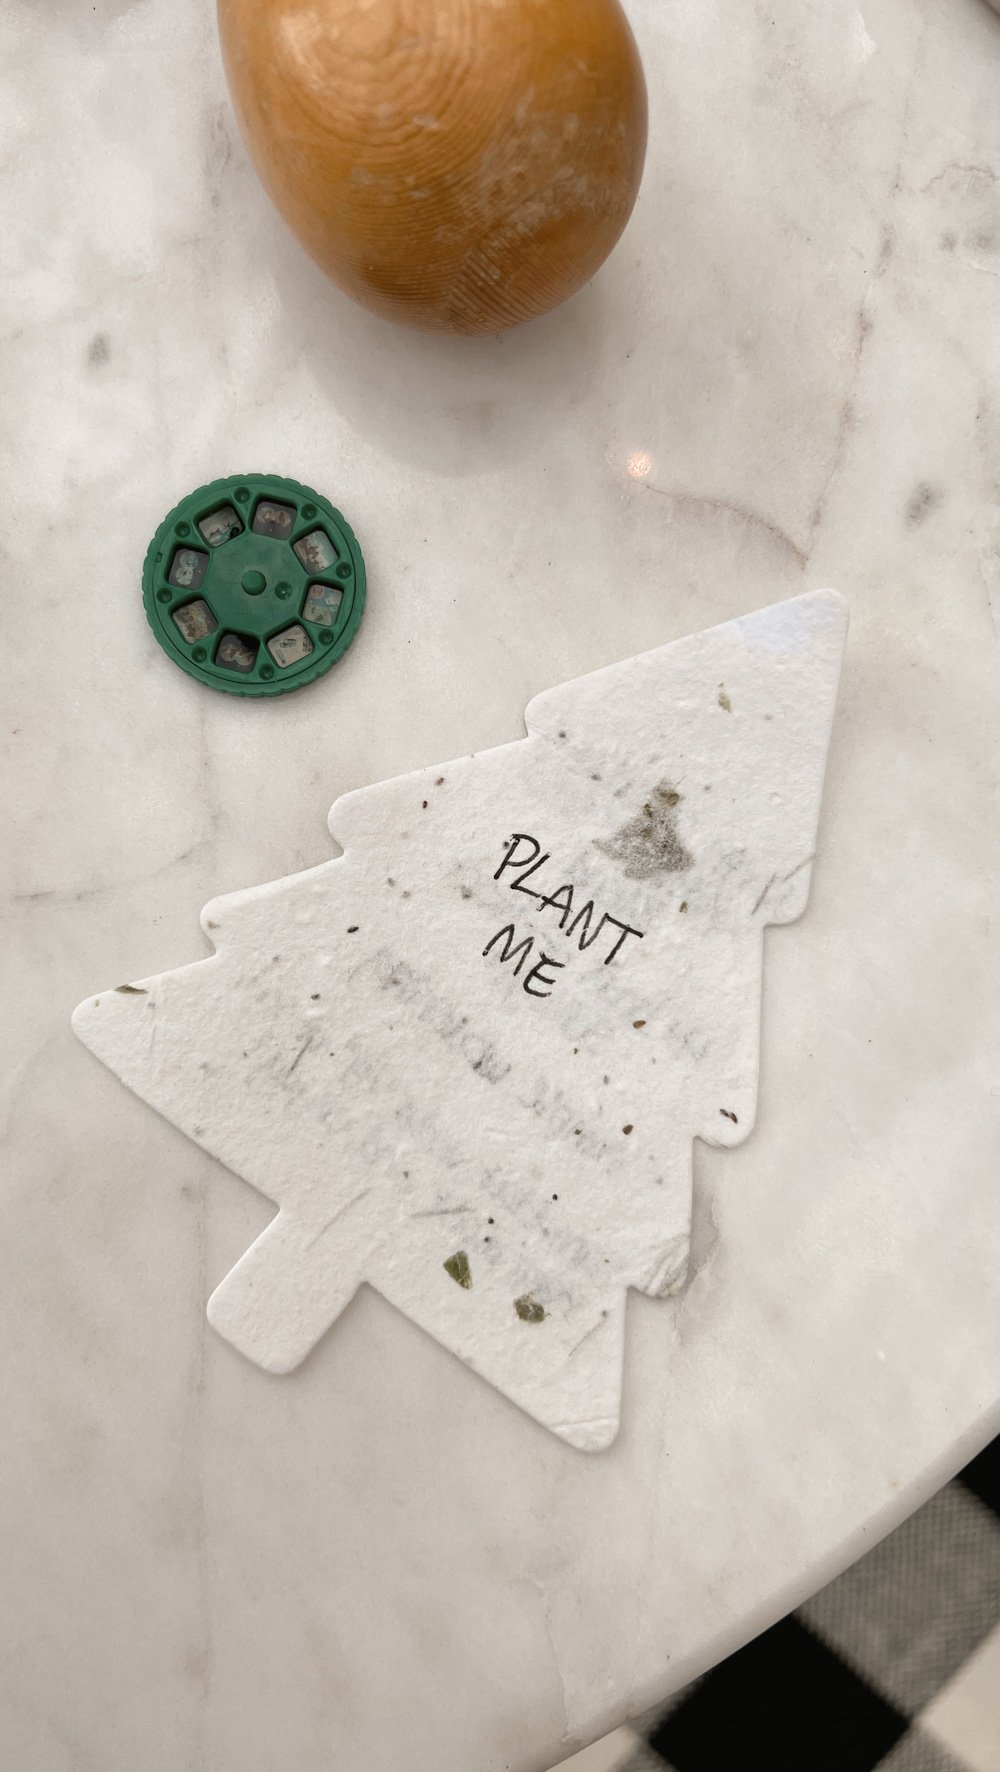
(Pictured below: A sampling of hand-me-down, add-on, and handmade stocking-stuffers for the kids. They don’t have to be new, pricey or flashy to be exciting for the littles.)


The greenhouse is powered by an extension cord that leads to the main house. There’s one plug-in, multi-strand string of warm, twinkling lights for the tree and stockings, and three battery-powered strands for the garlands. (I use rechargeable AAs, as well as carbon neutral batteries from Better Battery Co.

Here are some of our ornaments, most of which we put on the sprawling garlands, rather than on the little tree. Our tree is decorated with small brass bells, and wooden snowflakes and deer that were intended to be used as gift-topper tags.
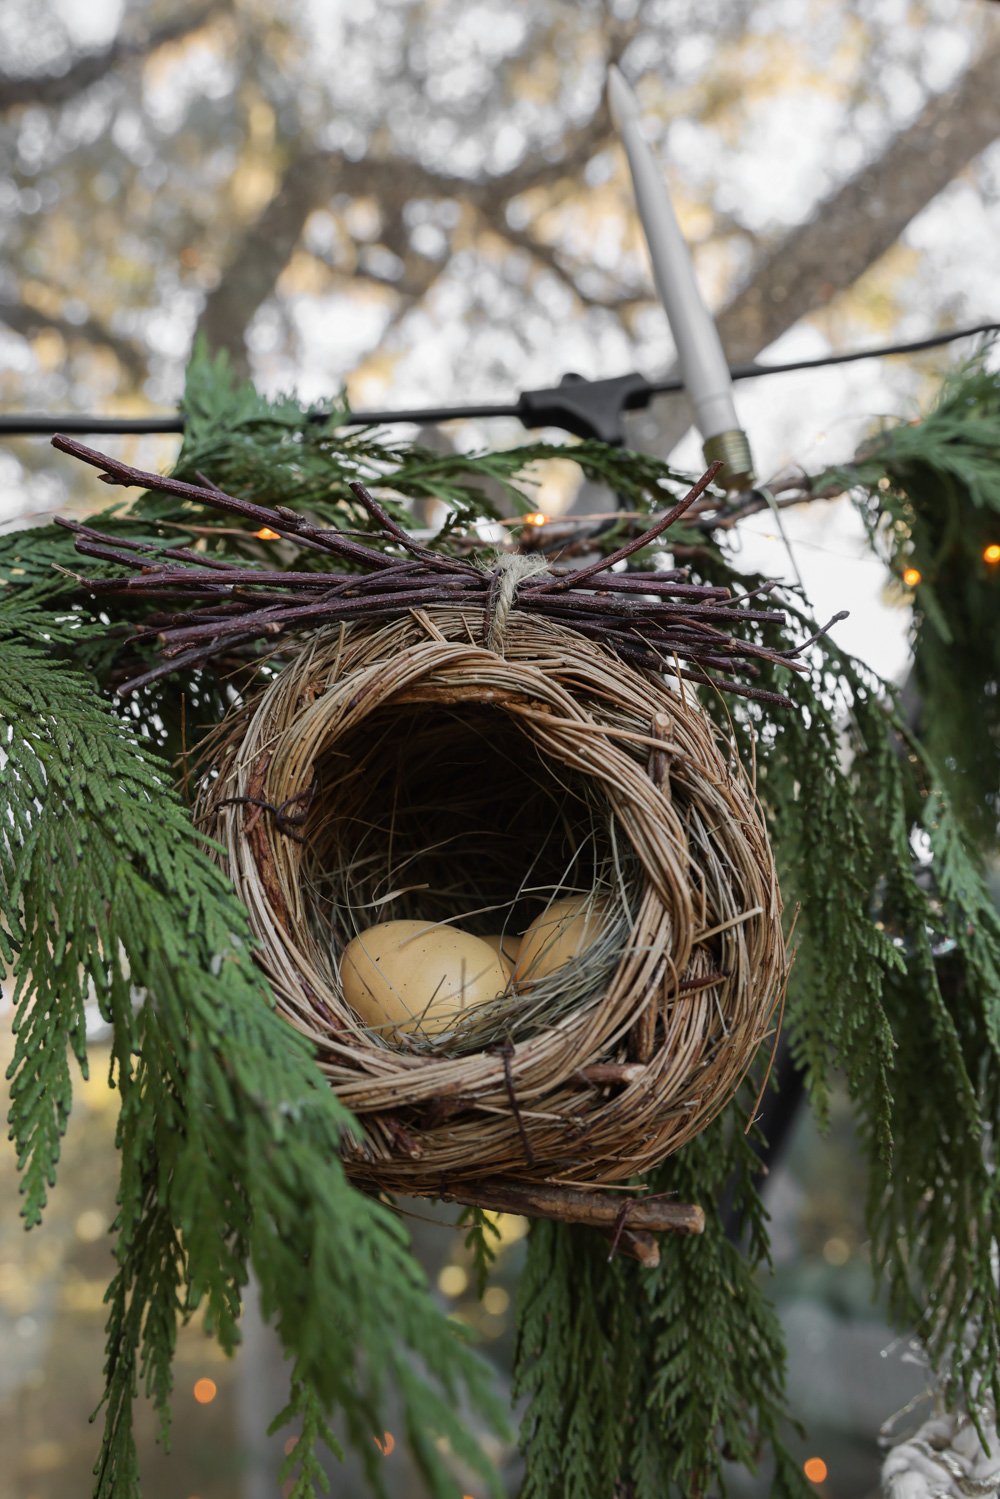
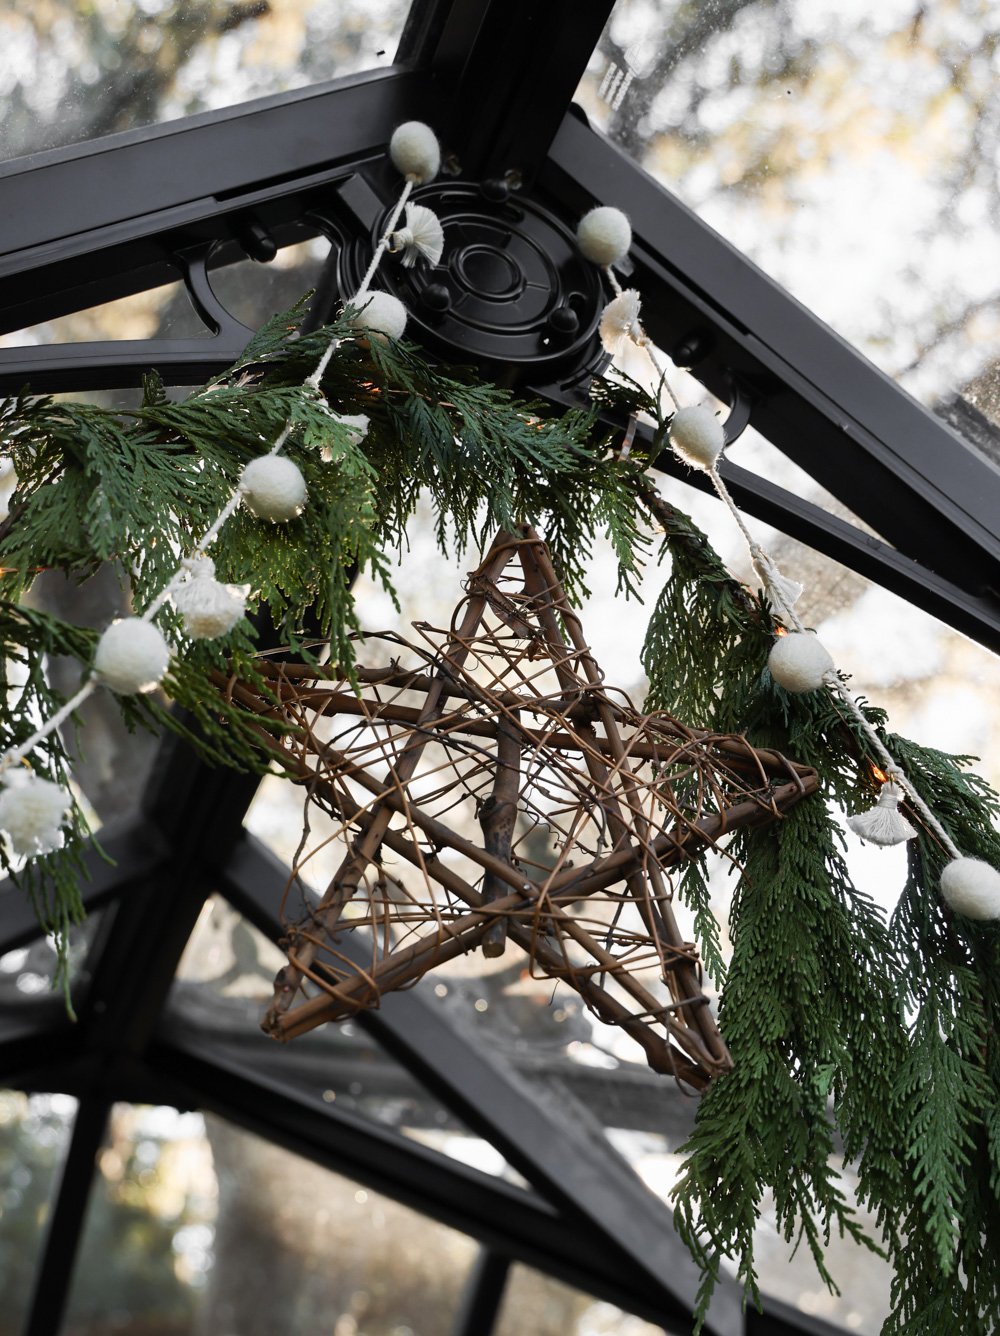


We don’t leave the lights on too long so as to minimize the disturbance of wildlife. But when the strands are switched on, they reflect off the angled panes of glass, amplifying the glittering glow.

It’s a happy little place, and I think we’ll make this holiday dressing a yearly event whenever we’re in the States for December. (The farmhouse needs to be further winterized, which is a project we’ll have to tackle later down the road for budgetary reasons.)
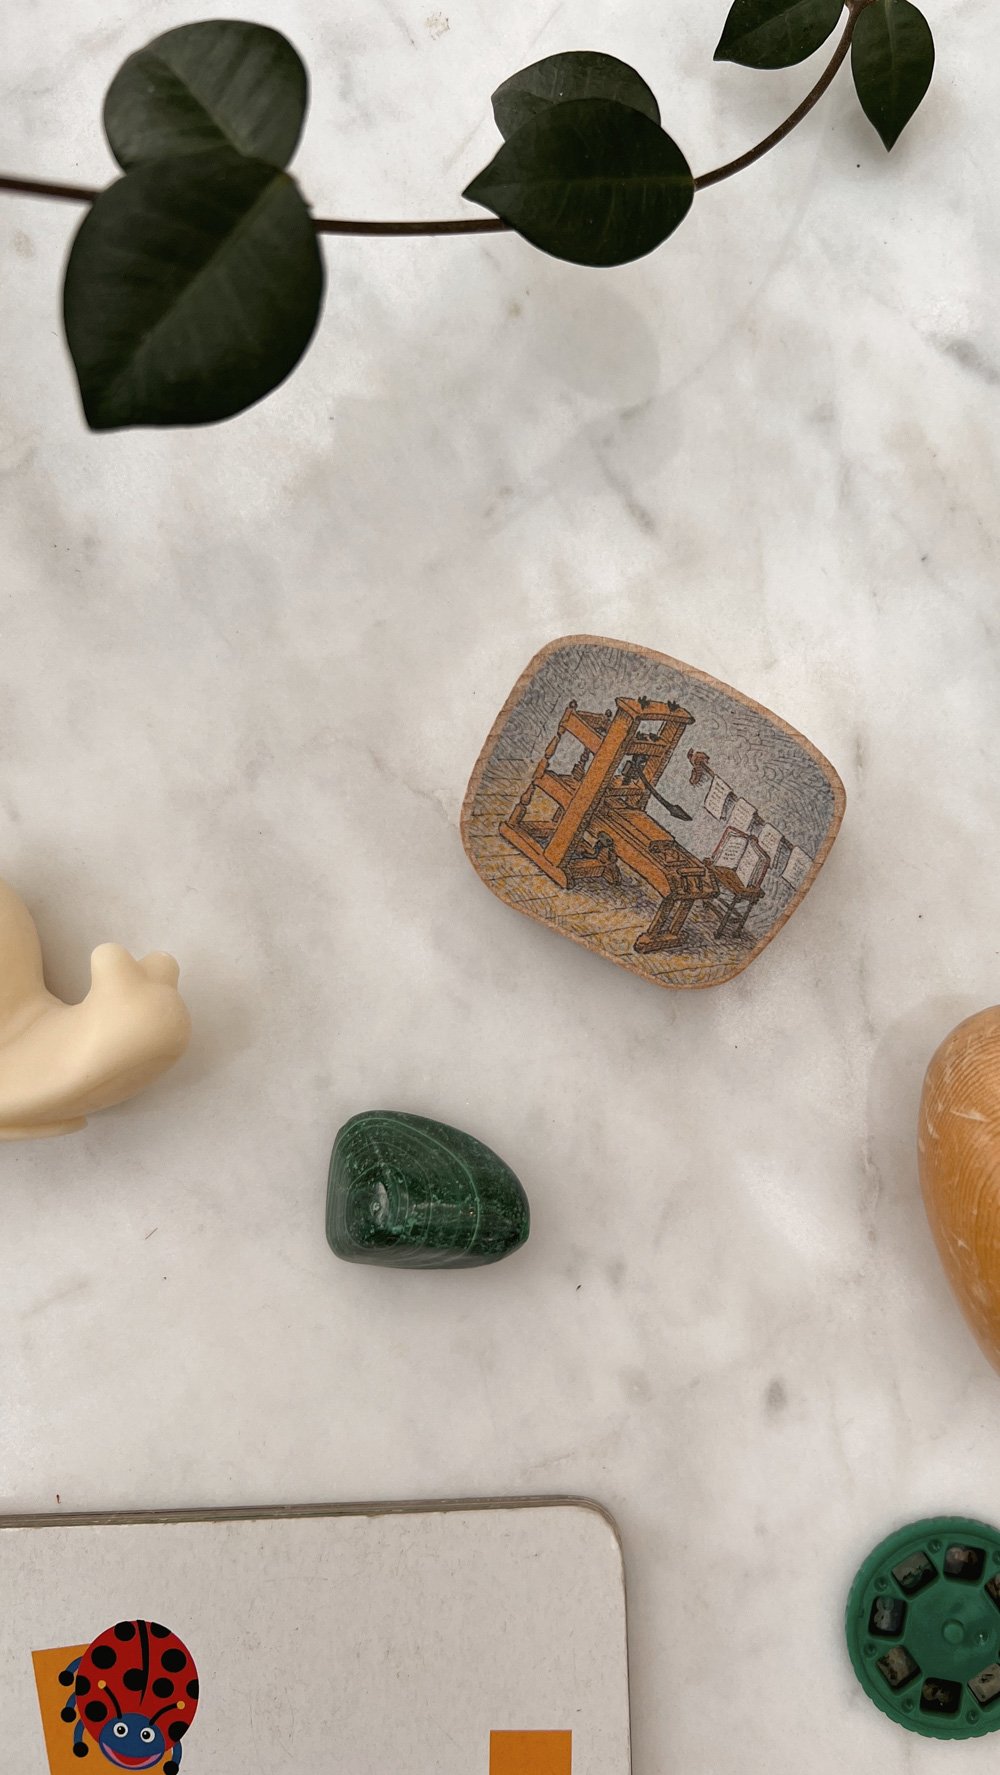
(Pictured below: The yearly stocking-stuffers I get for myself.)

Although we are extremely eager to have a house of our own soon — either the farmhouse or the ADU — this special space is certainly making us feel at home for the holidays.


Guide for Avoiding Unnecessary Gifts
How to politely deal with unwanted gifts— hopefully before they’re given, but also after the fact.
This is an updated, more comprehensive version of an earlier post entitled, “How to Politely Handle Unwanted Gifting.”
It’s the time of year… for unwanted and unnecessary gifts. With the planet in crisis, folks struggling financially, and families grappling with an excess of clutter in their homes after being indoors for the greater part of two years, I’d argue that it’s time we more widely accept and respect one’s decision to firmly avoid giving and receiving gifts.

But how do we kindly tell a child’s grandparents to stop sending toys?
What do we do about well-intended friends who insist on giving “something!”?
What solutions are there for rehousing the unwanted gifts that inevitably make their way through the door, despite the recipients wishes?
And what are some unique gifts that won’t further contribute to overflowing households, and — inevitably— landfills, which have a greater impact on disenfranchised and marginalized populations?
Since living in our cottage, having our first child, and learning more about the climate emergency, we began gently telling our friends and family that the absolute best gift they can give our son is an inhabitable planet for his generation and those that follow, and that giving him random stuff doesn’t help him in the long run.

For years, this conversation was easy for us, as most people knew that we lived in a tiny house that couldn’t accommodate excessive belongings. Now, as we’re in limbo and transitioning between living environments, we’ve had to remind folks that even though we’re temporarily in a larger home, we still have the same views regarding gifting. We were hit with a wave of presents for both West and his little sister when she was born. We know that everything was acquired and sent our way with so much love, but we believe that the impact of the items (from the manufacturing, to workers’ rights, to packaging, to transport, to haphazard placement within our temporary home, to eventual disposal of some sort,) matters more than the intent.

For folks who take affront, and/or just don’t quite understand our reasoning, I suggest or give a copy of The Future We Choose: Surviving the Climate Crisis, and/or Aja Barber’s book, Consumed: The Need for Collective Change: Colonialism, Climate Change, and Consumerism.
Of course it needs to be acknowledged that to ward off gifting of this nature is a privilege, as so many people are living unhoused and without the basic necessities. But, as Barber wrote in a recent* Instagram post, “The things which are said to us in childhood normalize living in a world with inequality… “ (ie: “Be grateful for your food / gifts, because so many people are going without!”) So instead of tricking ourselves into believing that we should simply continue to accept unnecessary gifts and keep our thoughts to ourselves, we’ve instead started pointing the folks who wish to convey their love in tangible form in the direction of nonprofits such as The RightWay Foundation, which are in constant need of financial and product donations.
We are, however, always happy to receive children’s books, knowing that our kids will explore them thoroughly for years, and that we can ultimately pass them along to other children, a library, or a local school once they’re no longer being read.
We also embrace the idea of gifting experiences, such as museum or garden memberships / admissions, Airbnb Experiences, digital subscriptions, local food and beverage, and other such presents that support an organization or small business while also providing our family or others with a new adventure of some sort.

When it comes to regifting unwanted items, I look at it this way: If a giver circles back and asks me to reveal the whereabouts of a present they once gave us, that relationship is probably one that needs some reconsidering or deep work. And besides, there are so many people, families and organizations in need of certain goods that I feel no guilt in passing along a thing we do not need here, and giving it instead to someone who can put it to good use.
When rehousing an item, we’ve discovered that it’s extremely important to first verify that an organization can indeed put it to specific use, otherwise it is statistically destined for a landfill. Hopefully the original gift-giver would understand and support that action.
’Tis, after-all, the season to share.
(*Reference to a post by Aja Barber entitled, “Where do out human rights and and others begin?”)

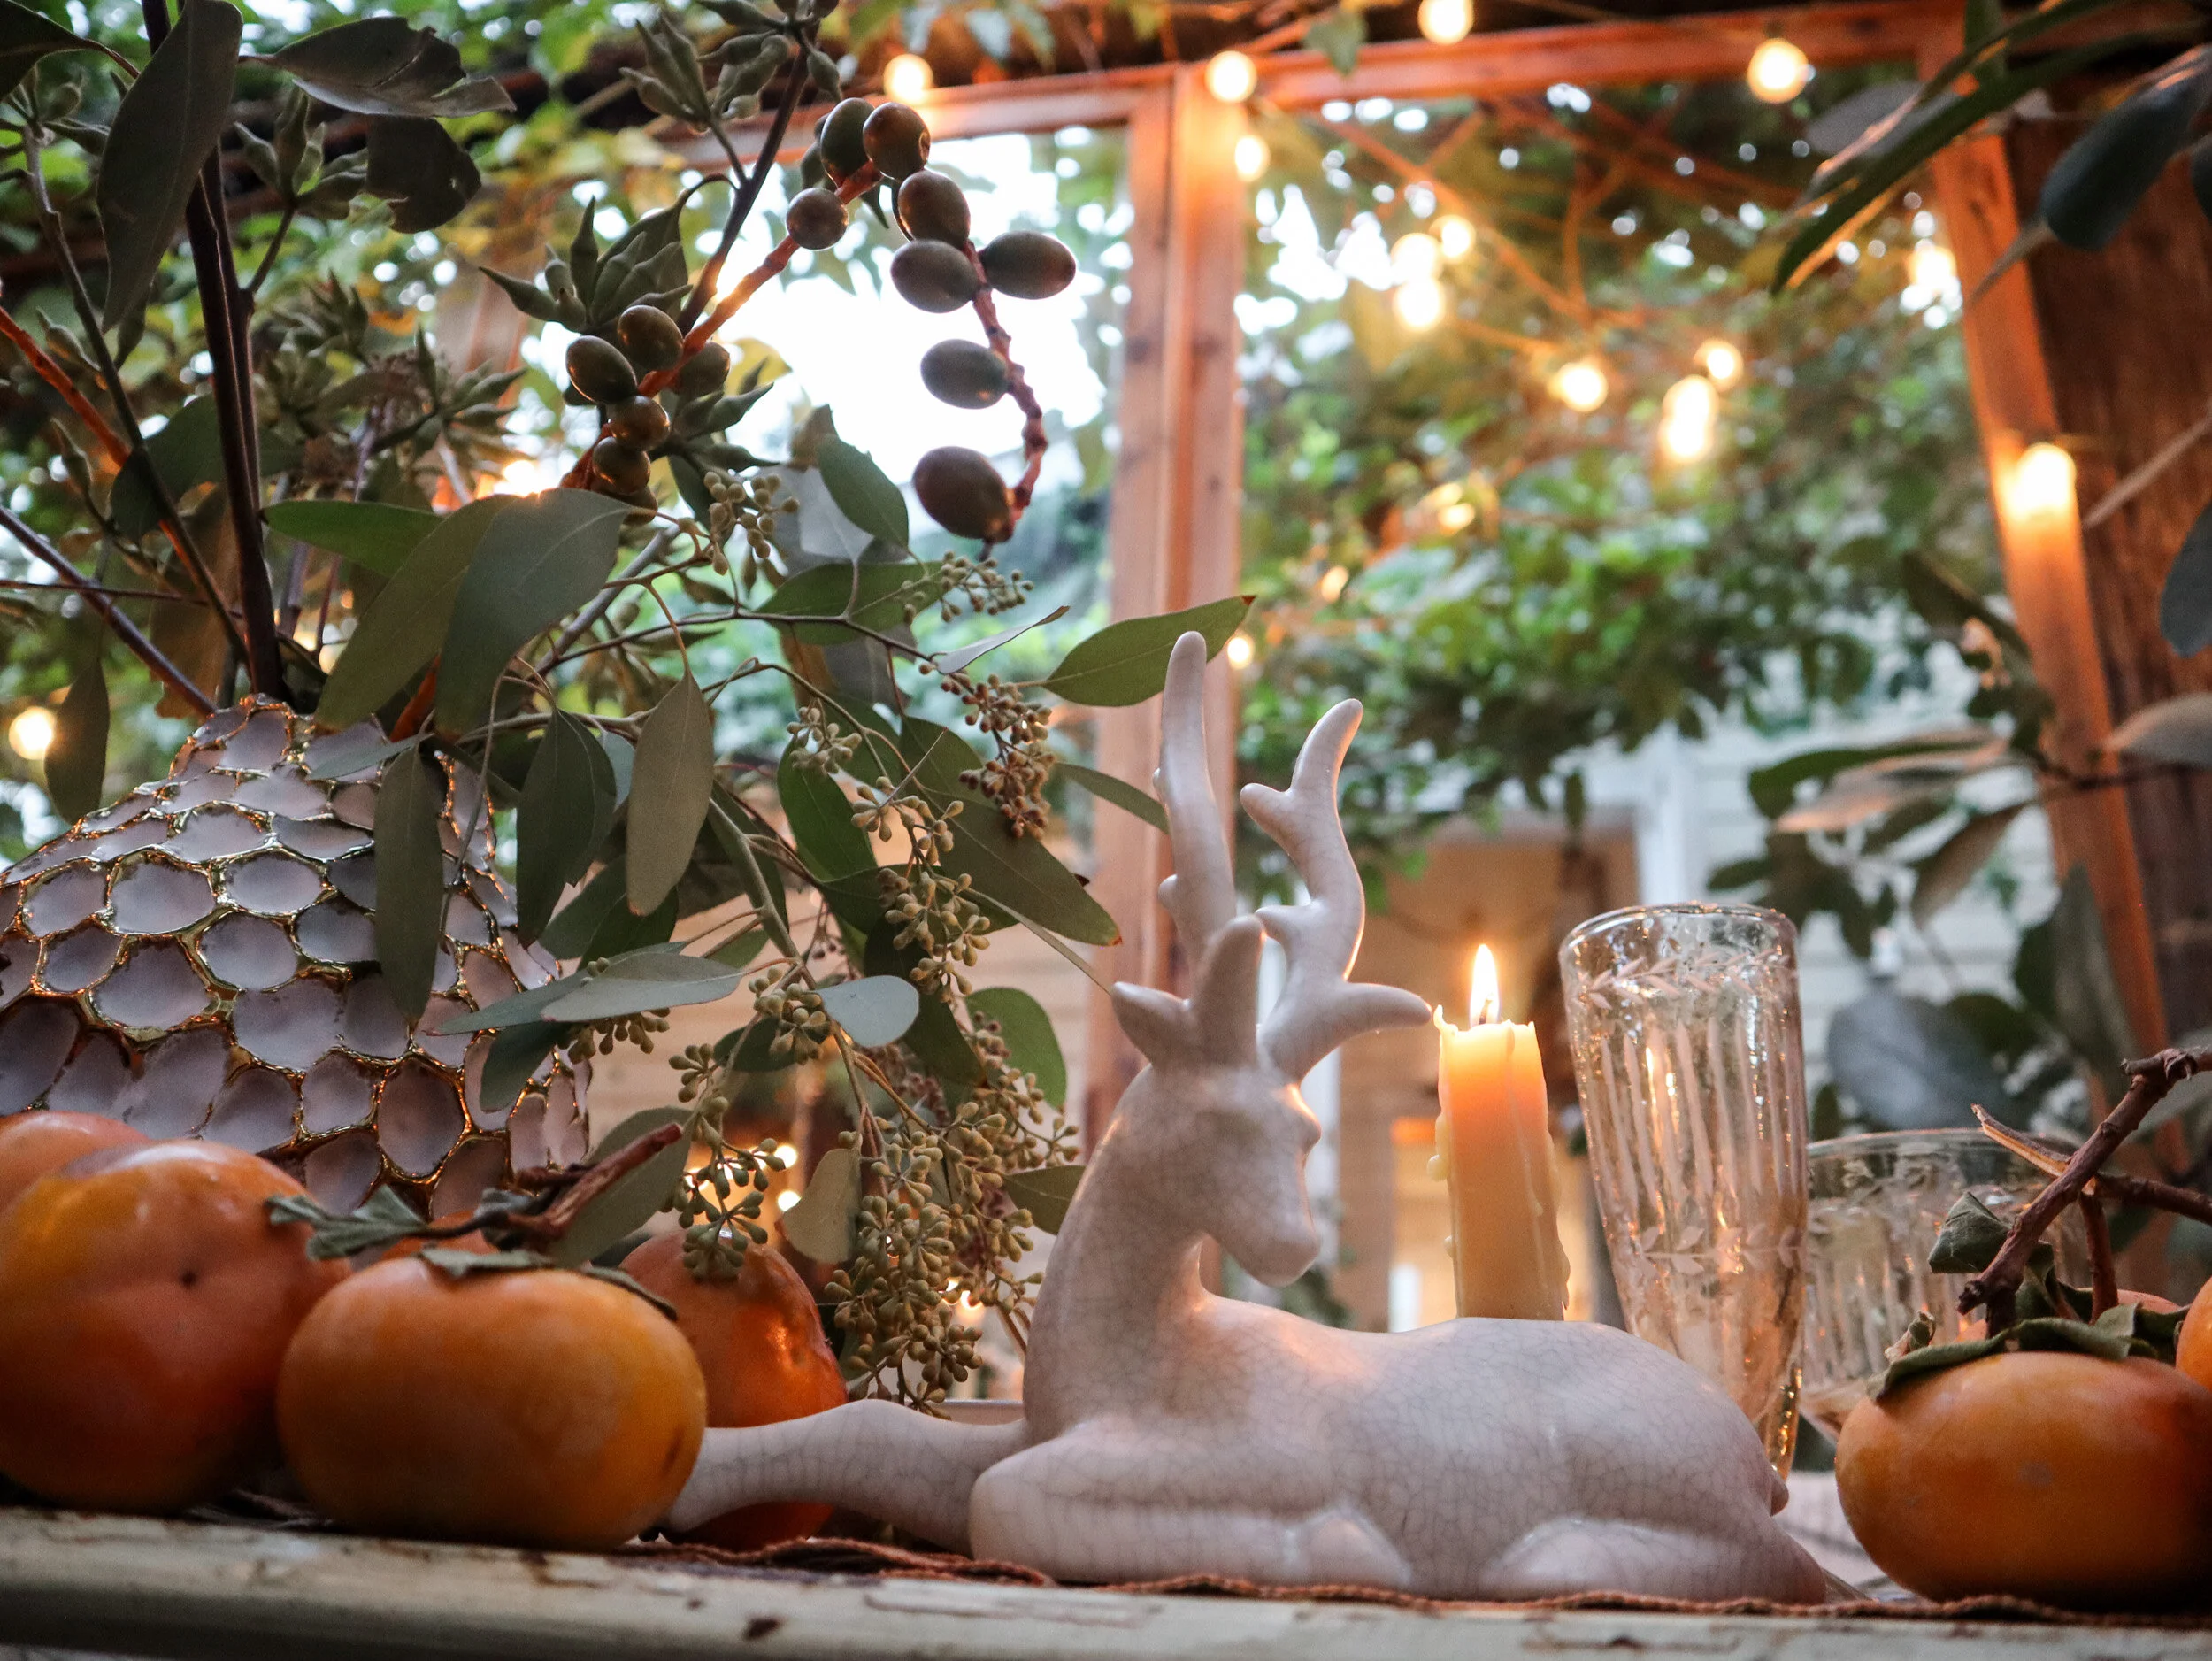
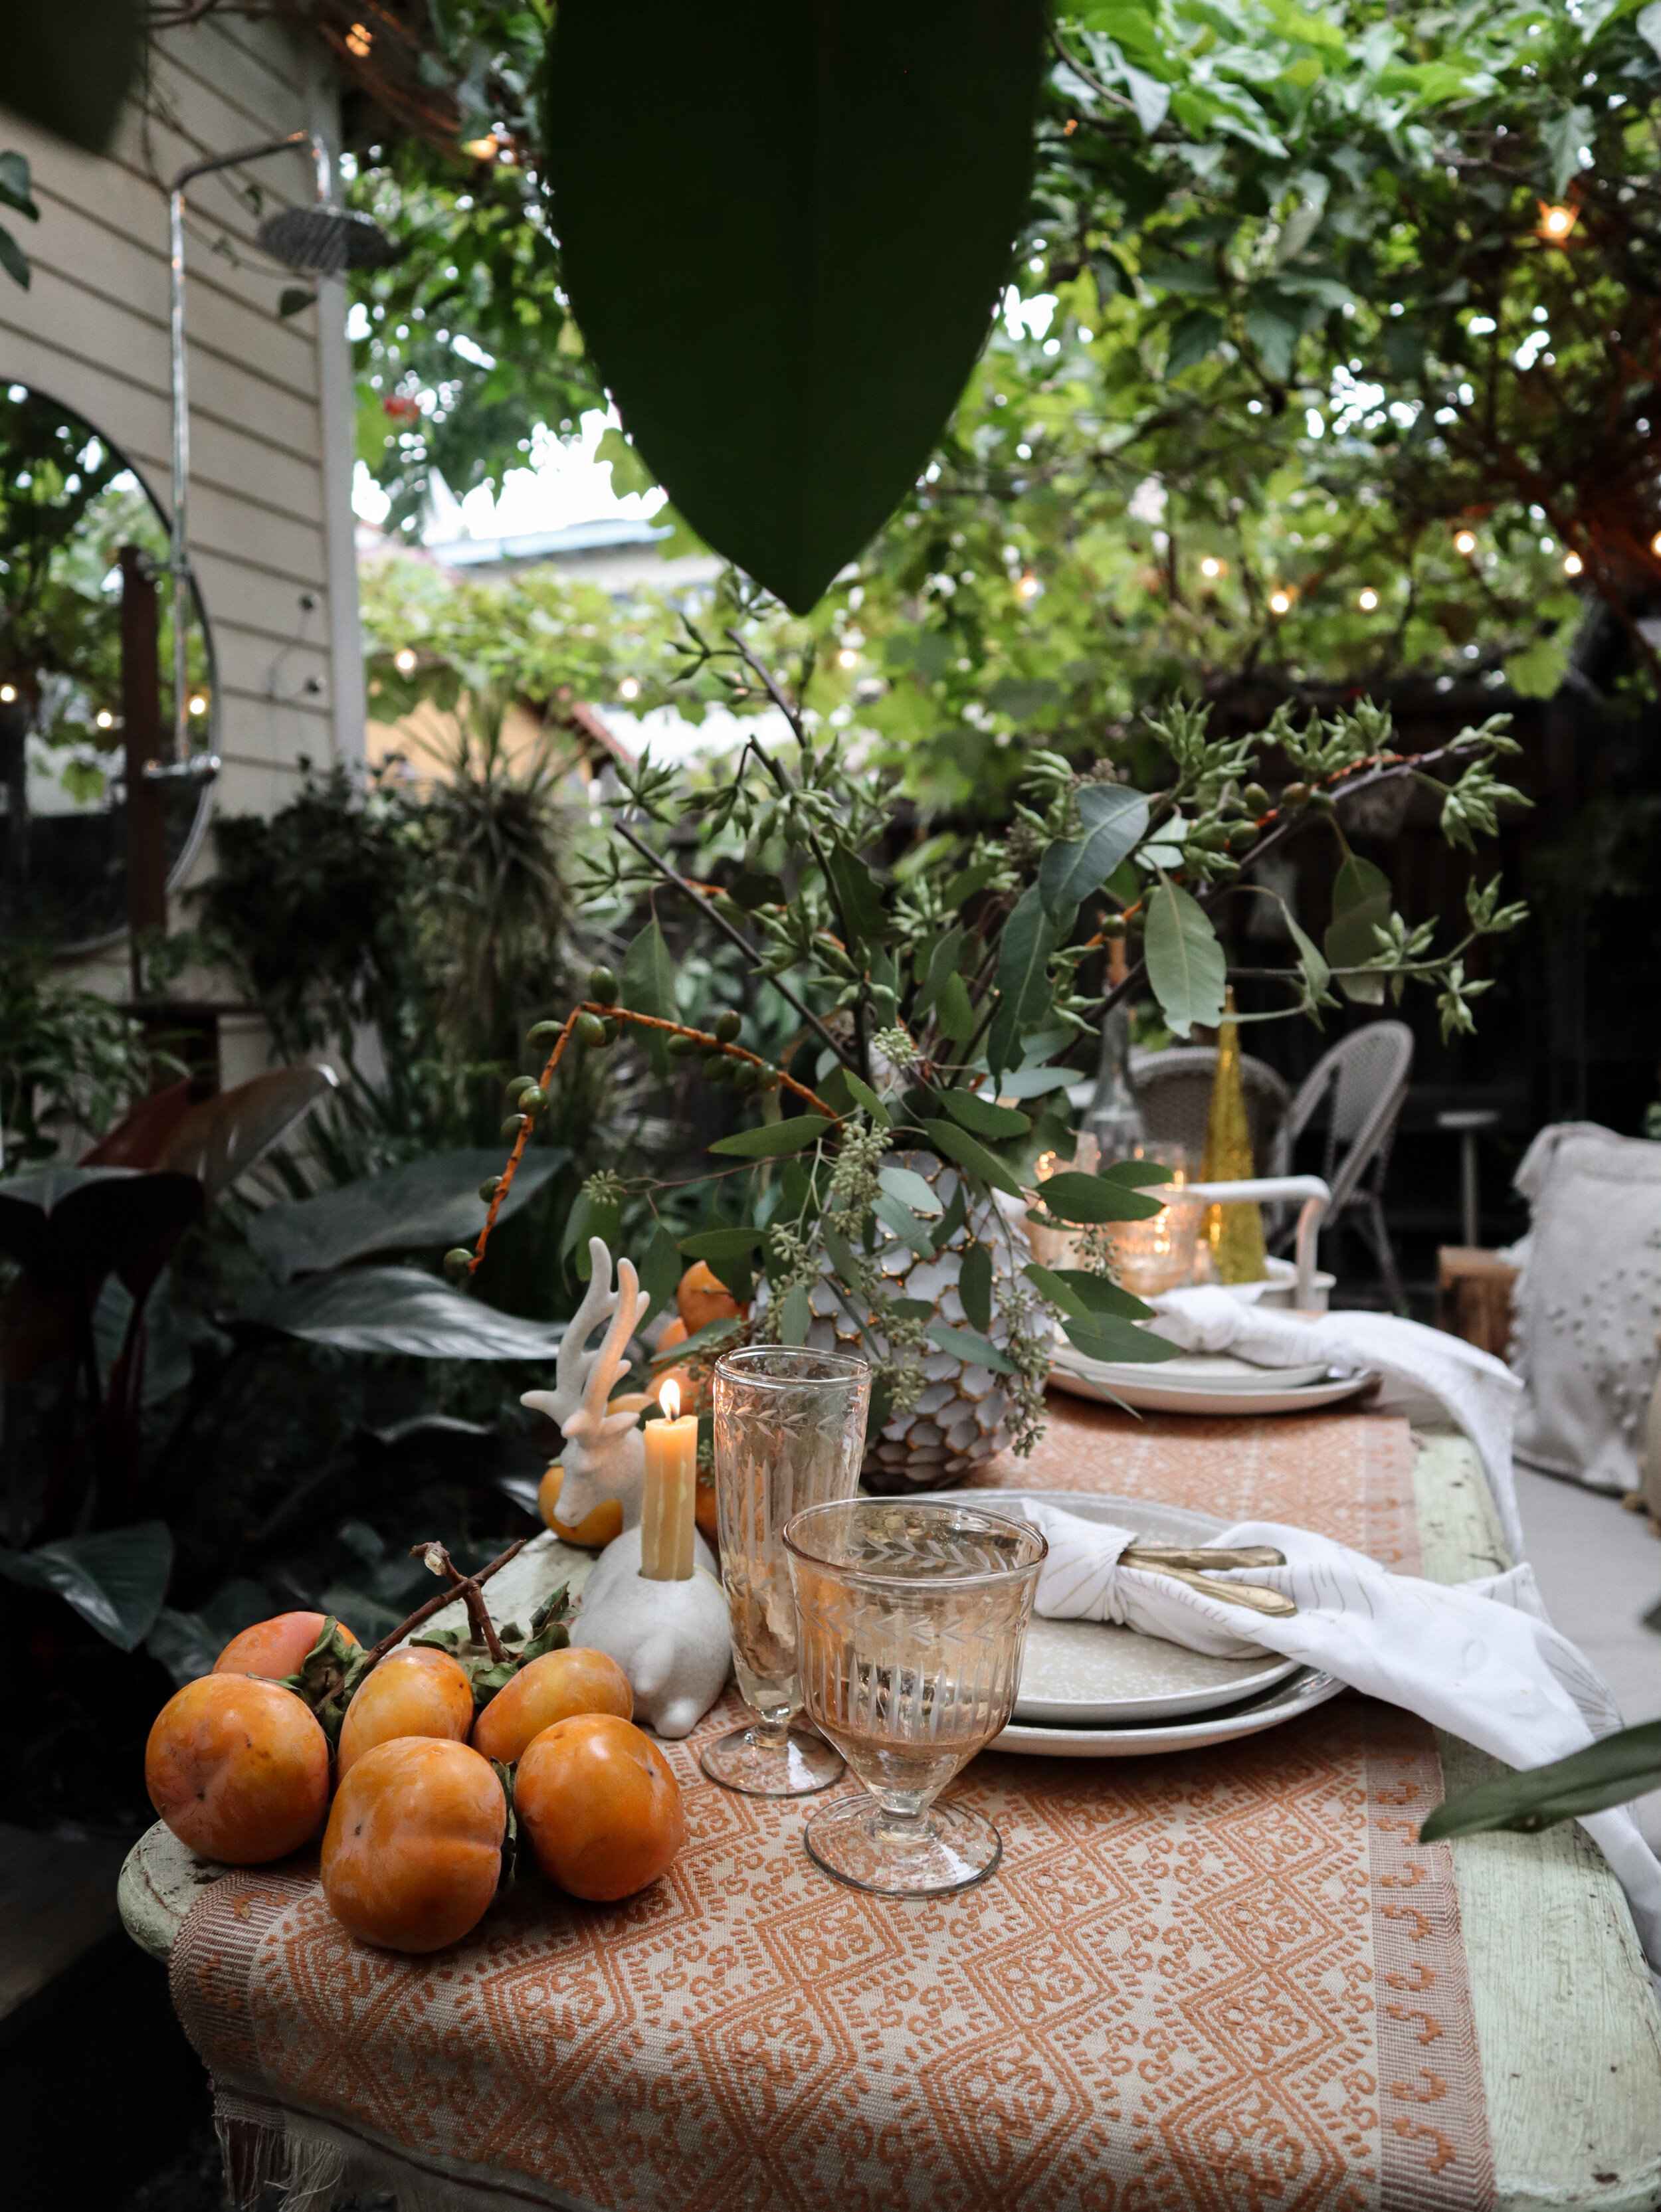
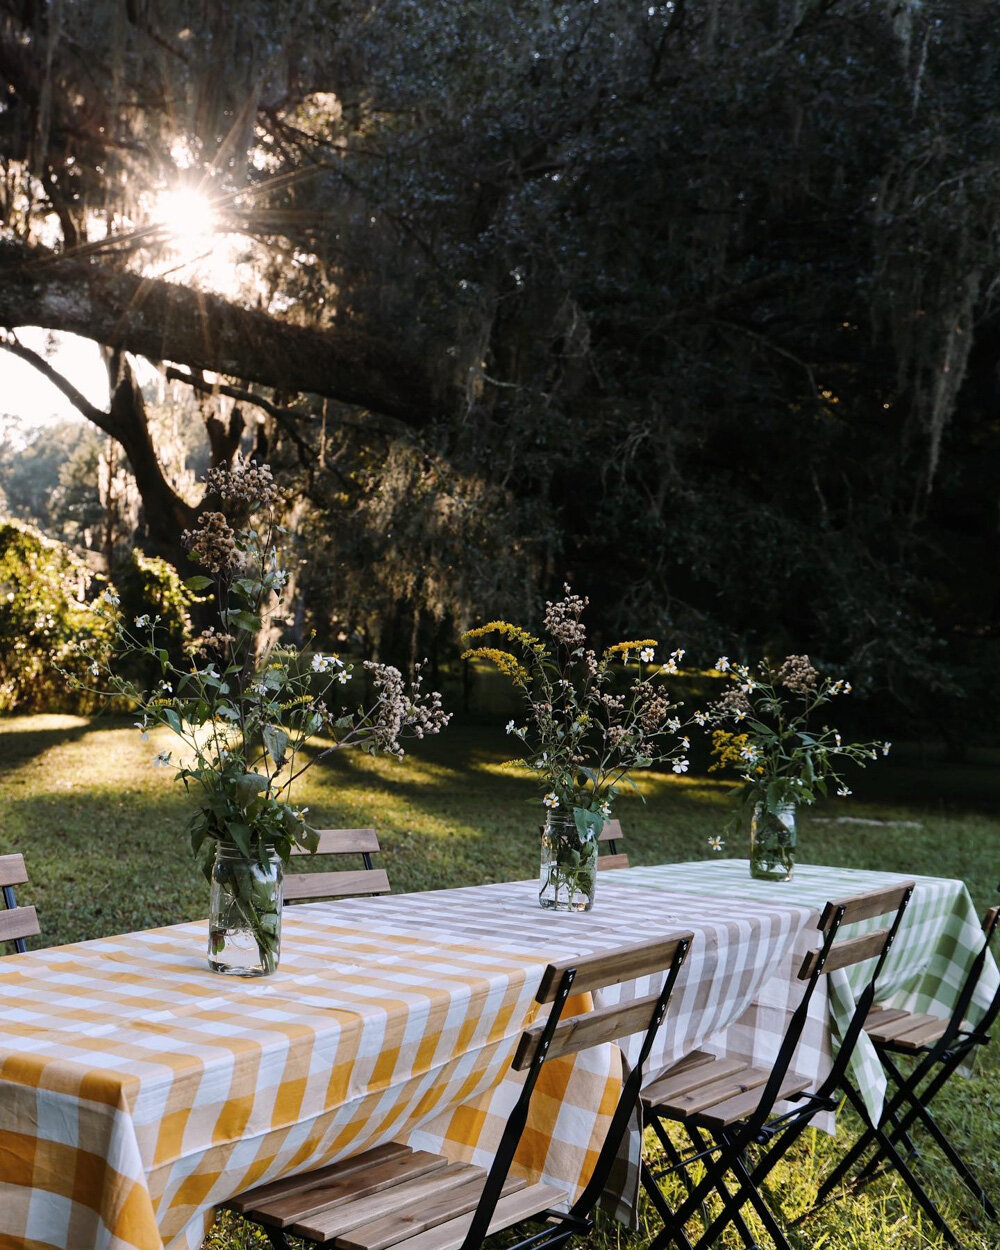
Traditional Yet Informal Holiday Hosting
Creating a festive holiday tablescape in a small home or garden.
I can’t remember the last time we hosted… perhaps late November of 2019? Regardless, I’m eager to get back to it. In the meantime, I’m resharing this informal-meets-traditional tablescape I created for Food52 during a live broadcast, in the hopes it’ll provide some ideas for folks who are entertaining in small spaces this holiday season:


Low Waste Holiday Wall Decor for Small Spaces
Creative, low waste alternatives to Christmas trees for small spaces.
Not enough room for a tree in your small space? Here’s one easy way to use fresh greenery to create space savvy holiday decor for a small home. (View the 30-second video here.)

List of supplies:
Live branches
A bit of rope
A nail or damage-free Command strip
Battery-operated twinkle lights (we use rechargables)
A zip tie (to attach the battery pack to the back of the branch)
Clippers

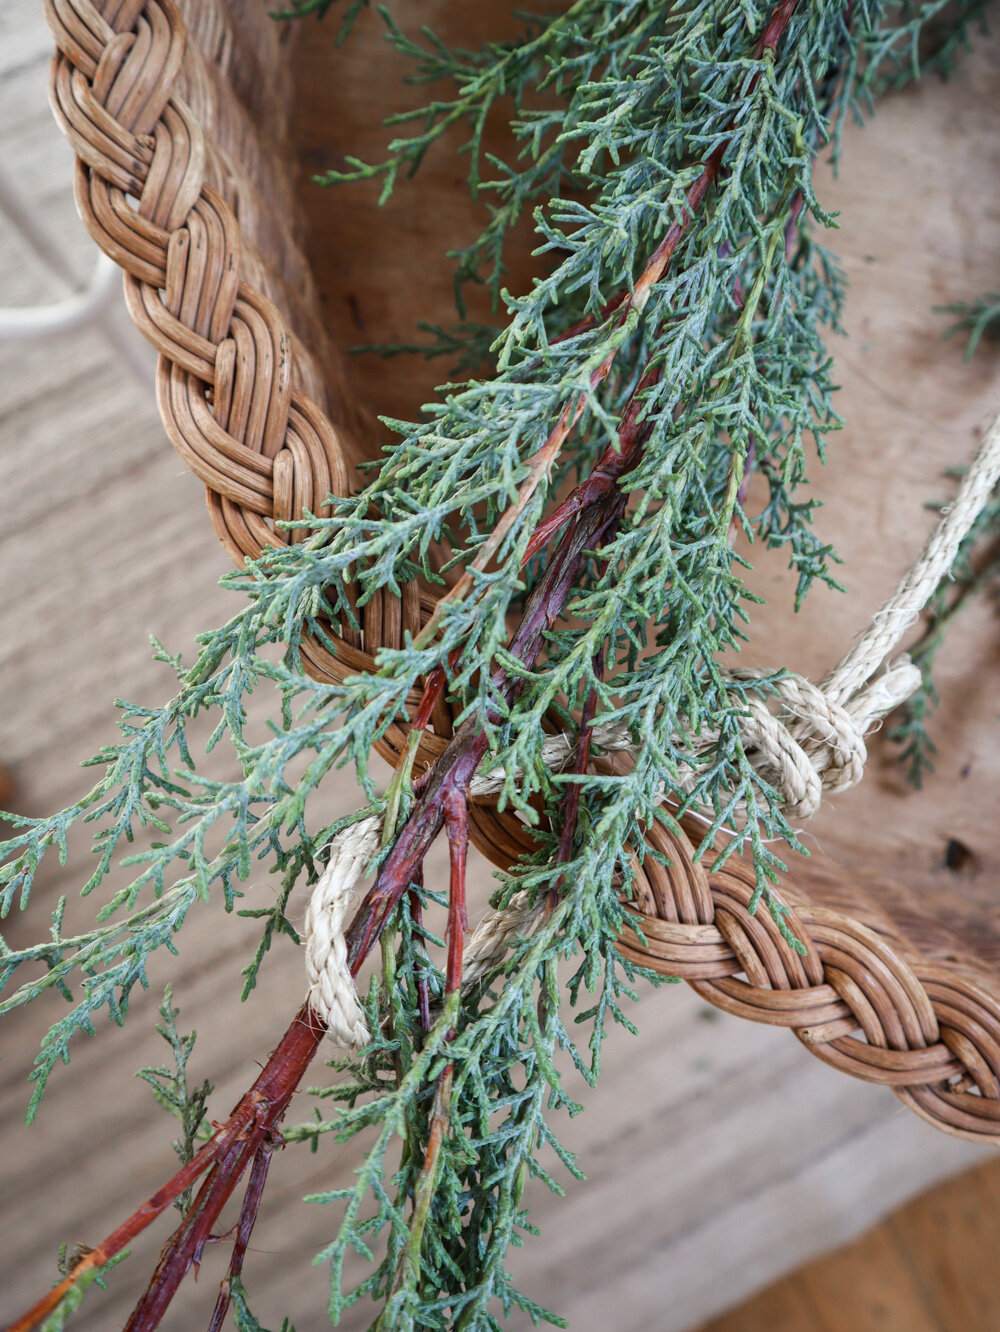
I simply wrapped the twinkle lights around the branch, tied the rope to either end, suspended the entire piece from a sturdy wall hook, and then added small florals and twigs throughout the branch for a pop of color and variation in texture. I carefully spritz the branch with a bit of water every few days, and replace the bright floral clippings as needed after they’ve fully dried up.

The final result is simple yet striking. And, best of all, at the end of the season the rope, hook and twinkle lights can be reused, and the greenery can go in the compost.


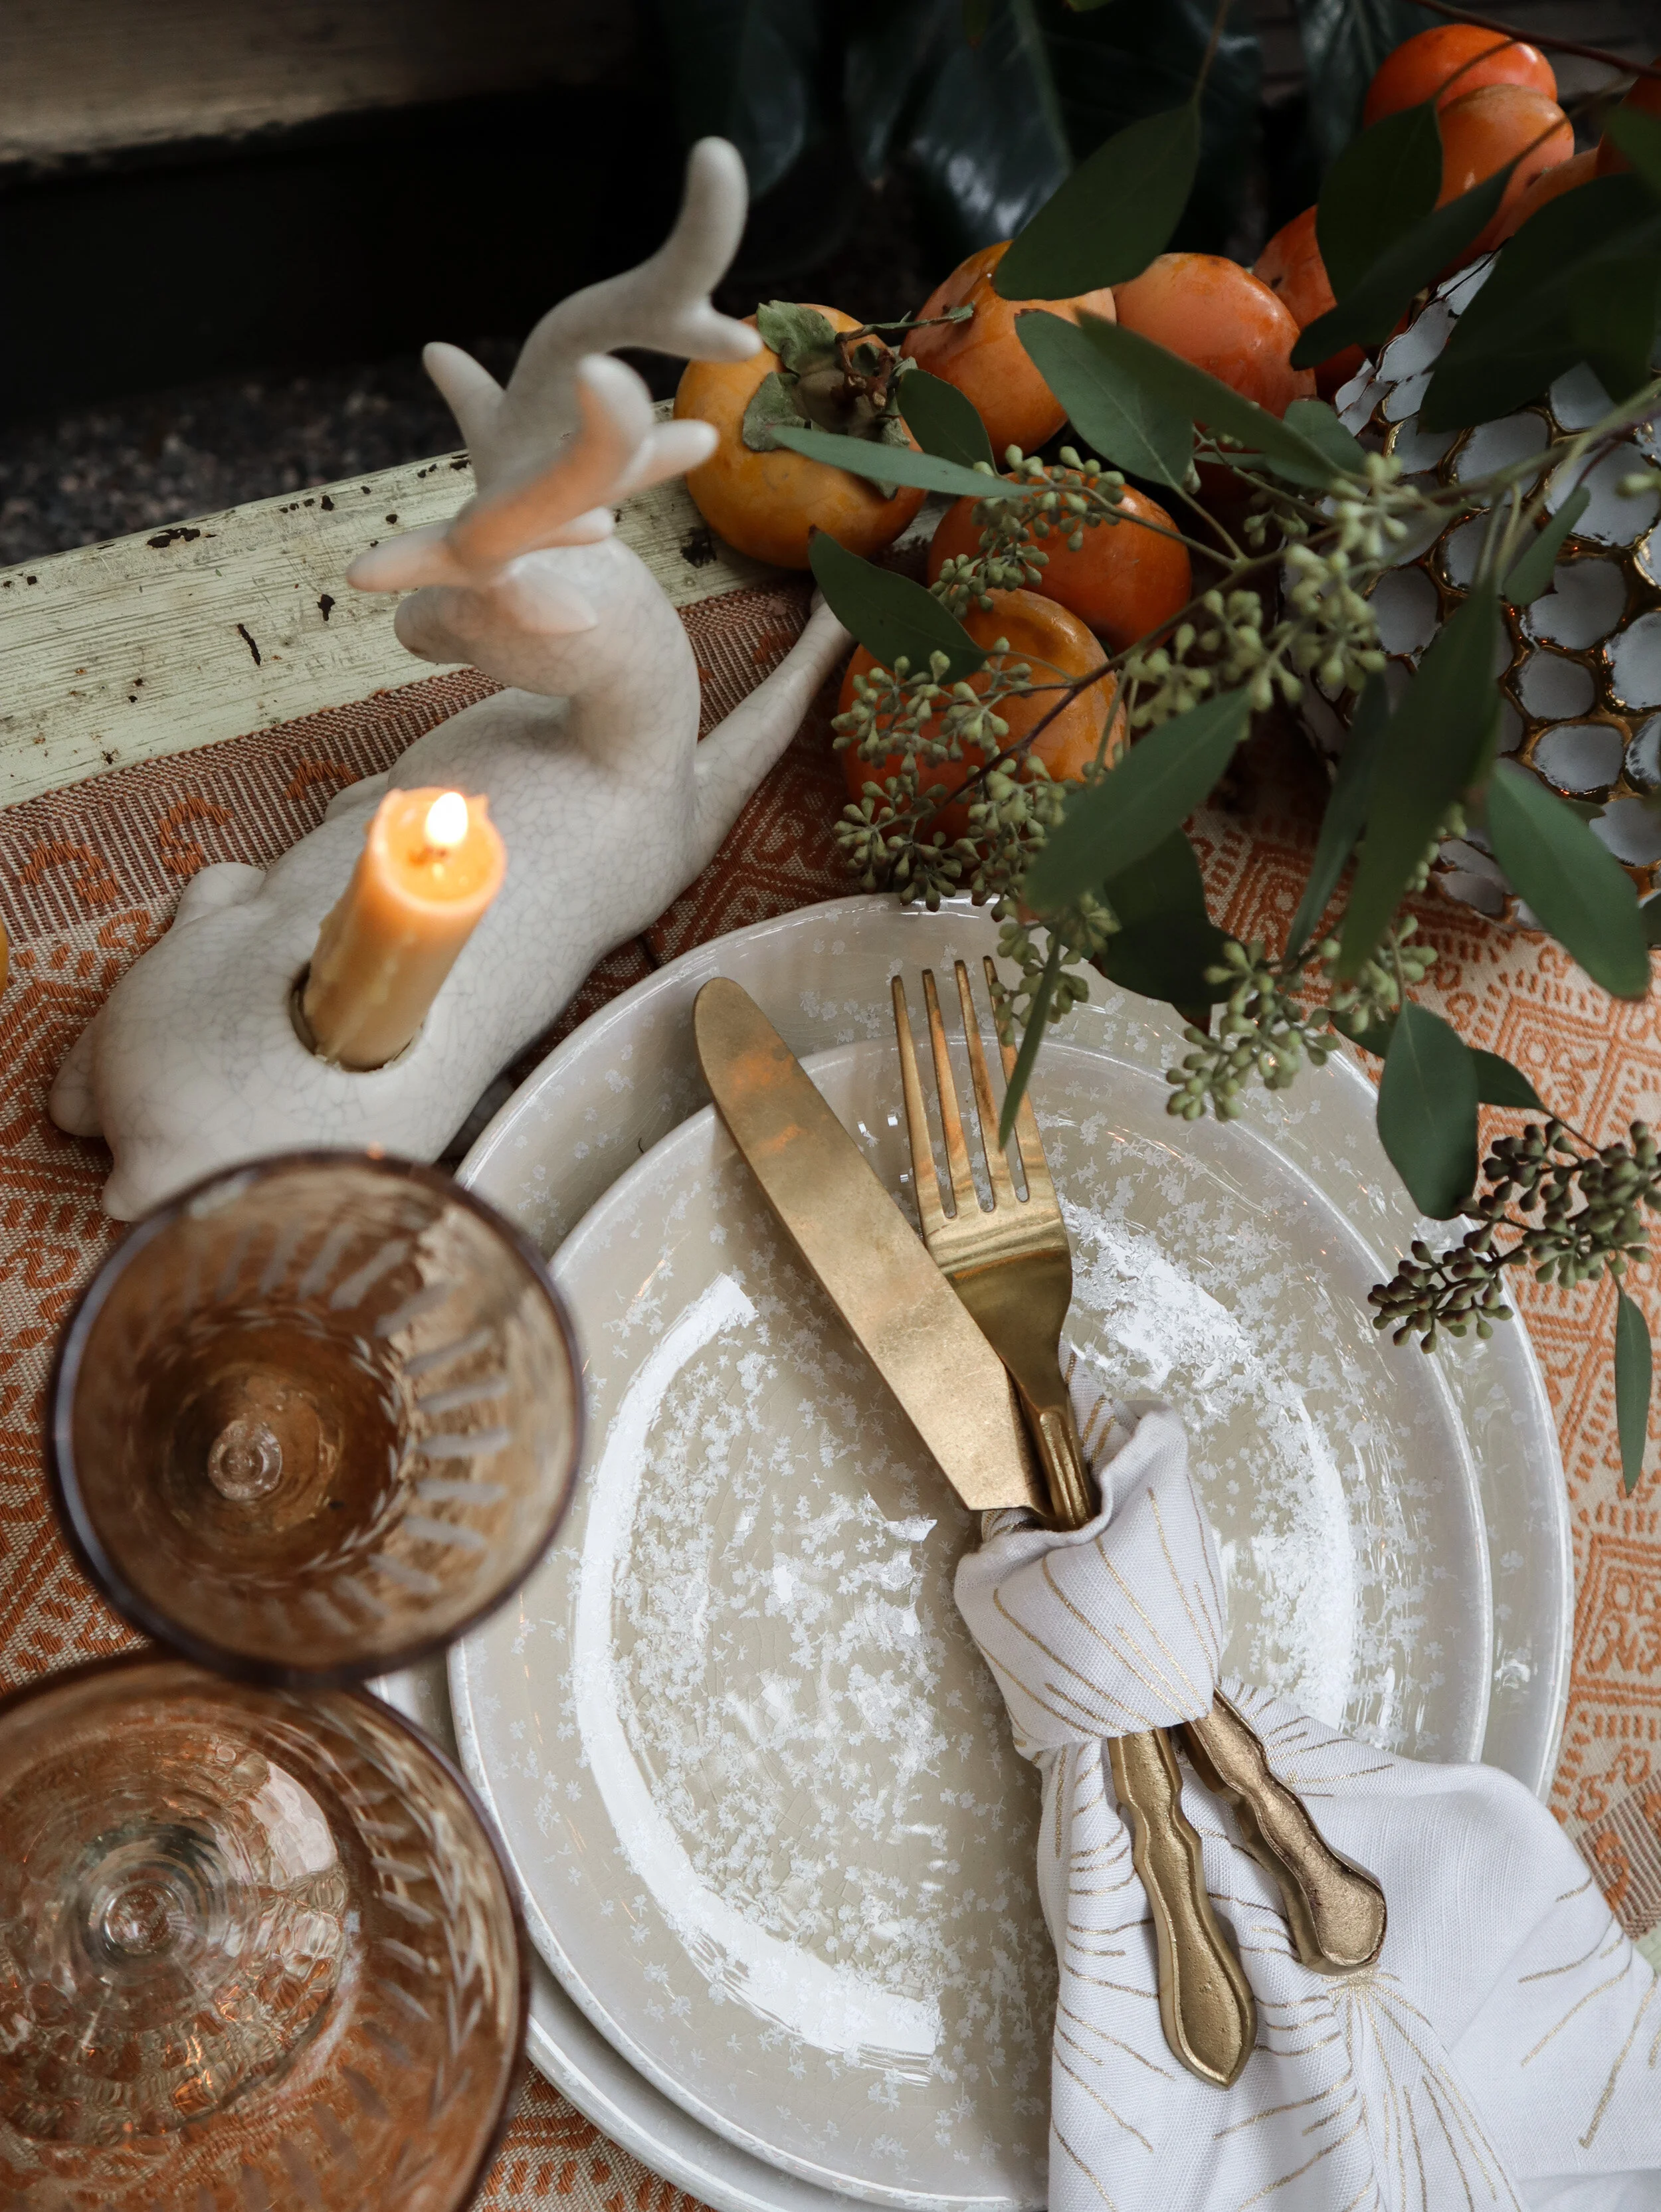
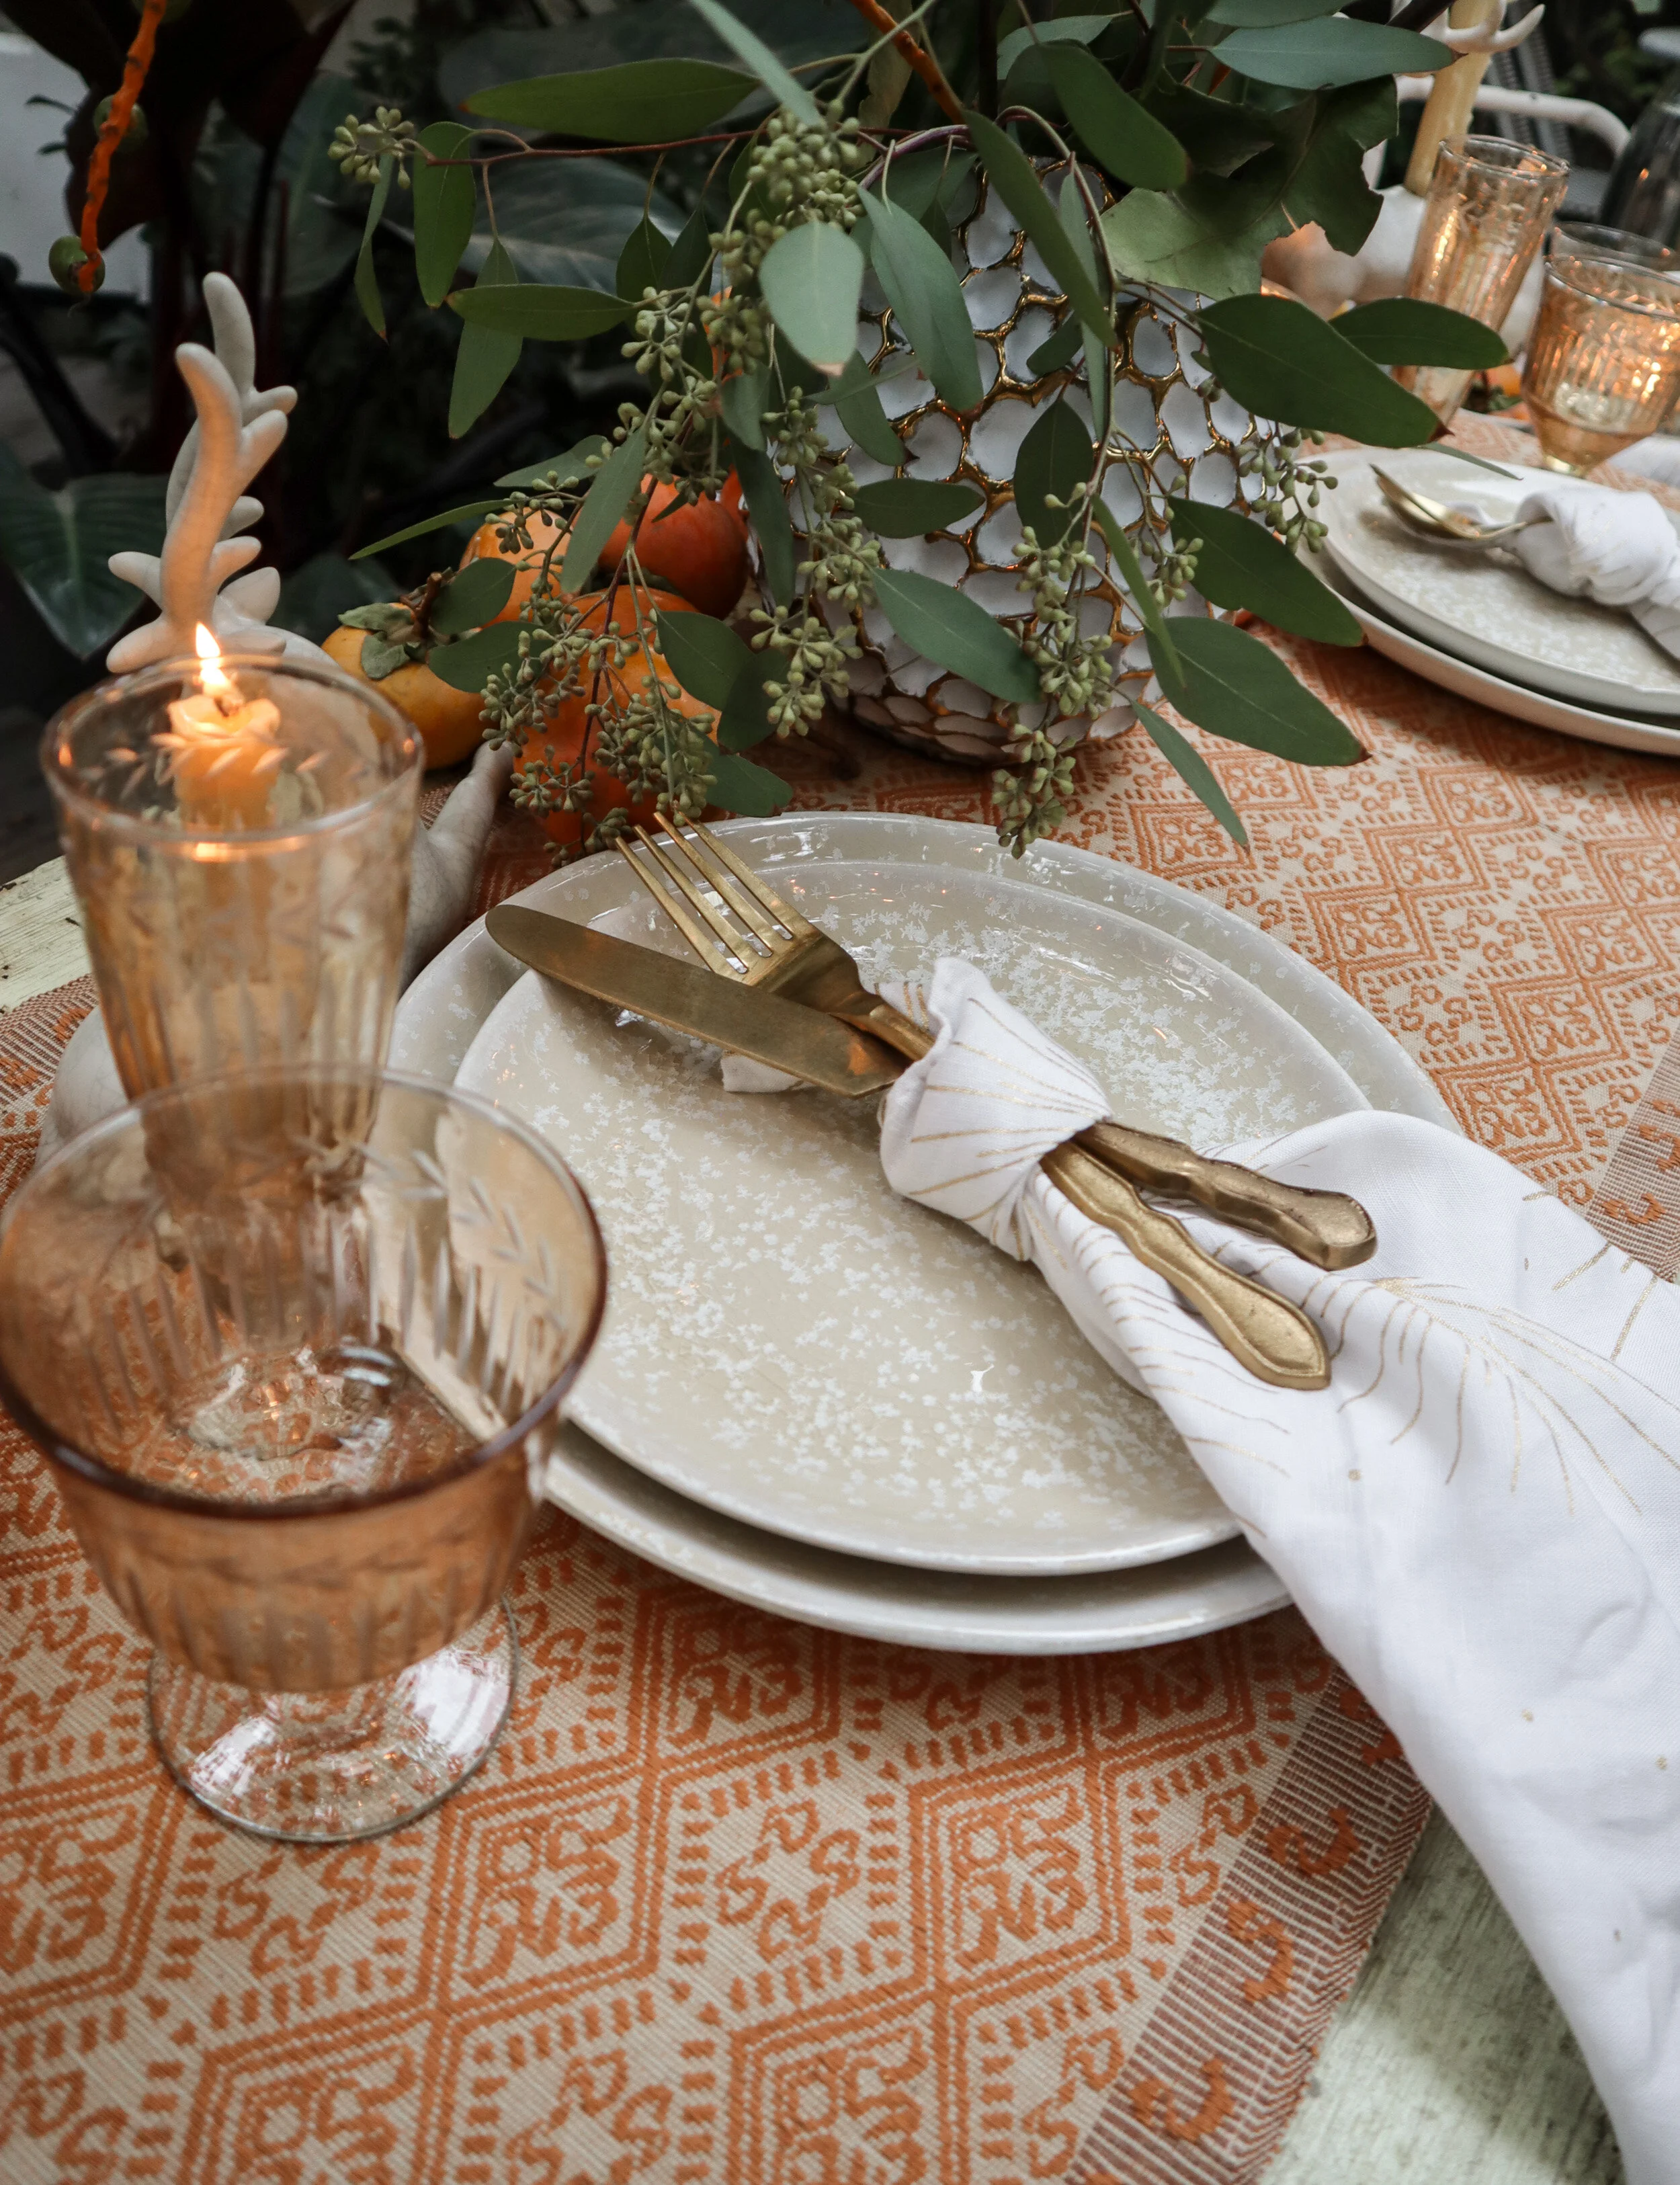
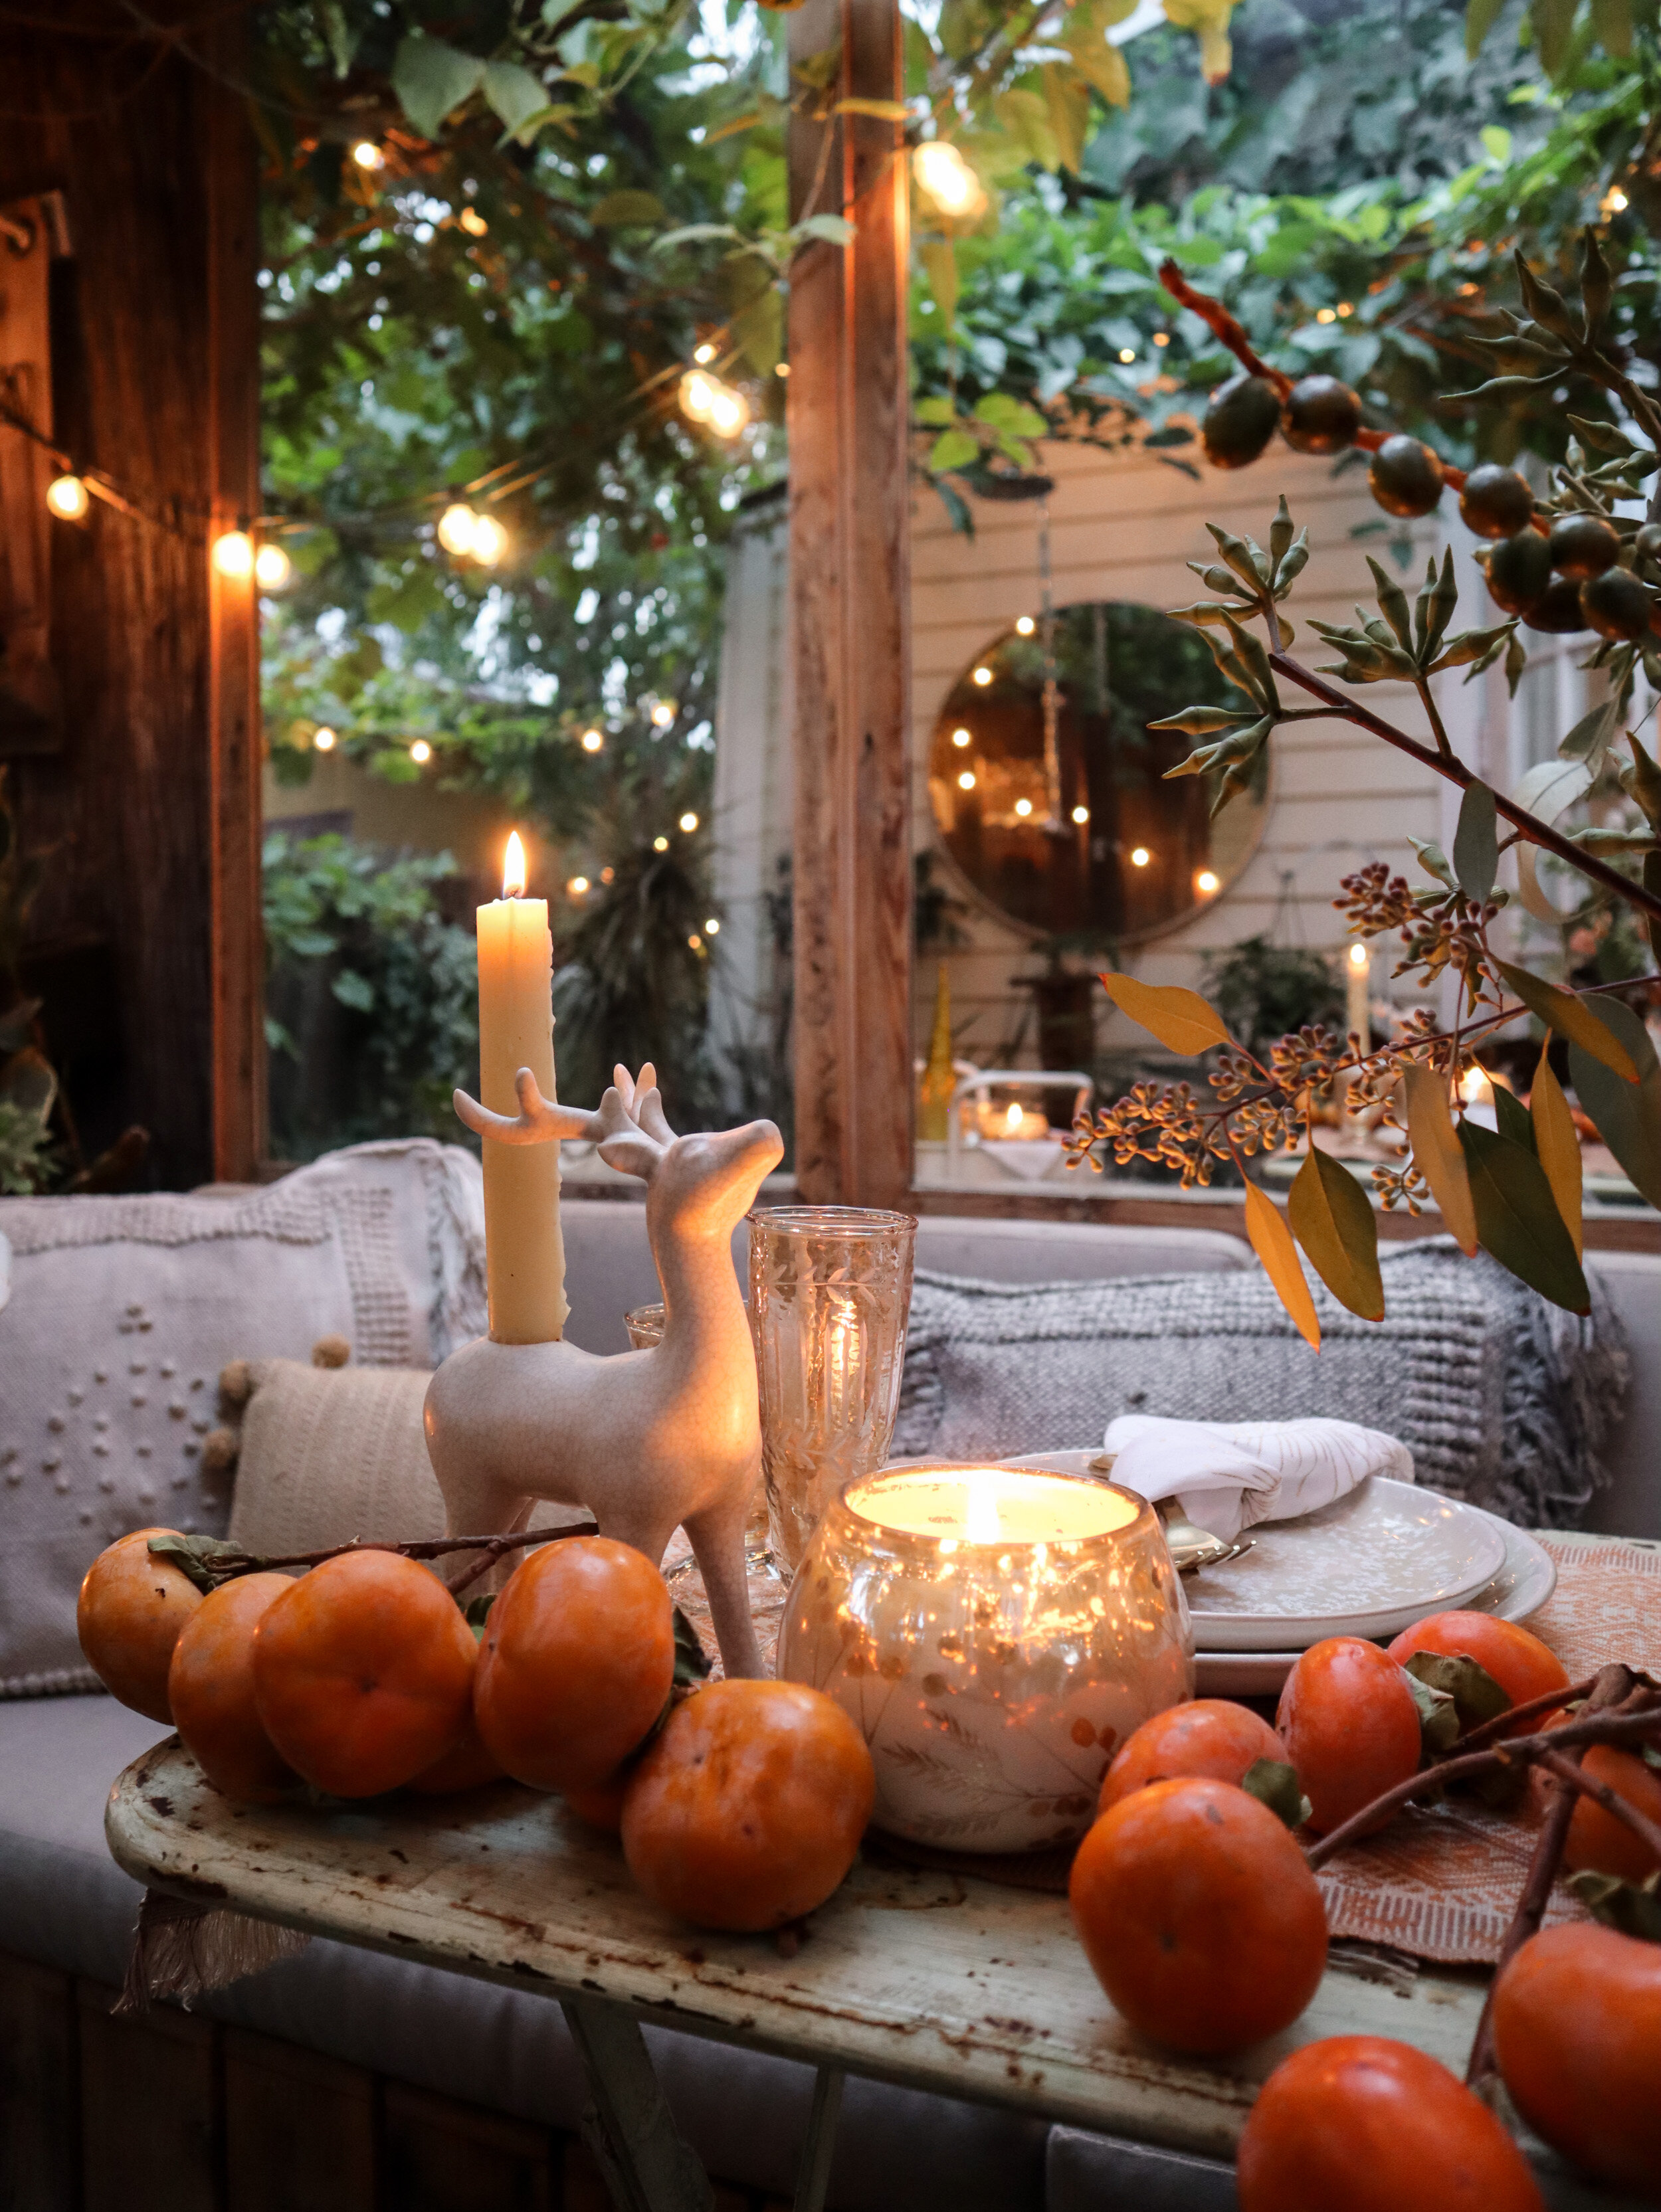
A Dramatic, Space-Saving Holiday Table
Creating a space-saving, dramatic, festive table of live greenery for the holidays.
(Originally posted in 2019)
Gathering with friends and/or family around a table in a small home or apartment can be such a uniquely intimate experience. But during the holidays— when we tend add extra decorative touches and welcome more people to the table than usual— surface space needed for tabletop essentials can suddenly become extra challenging to preserve.
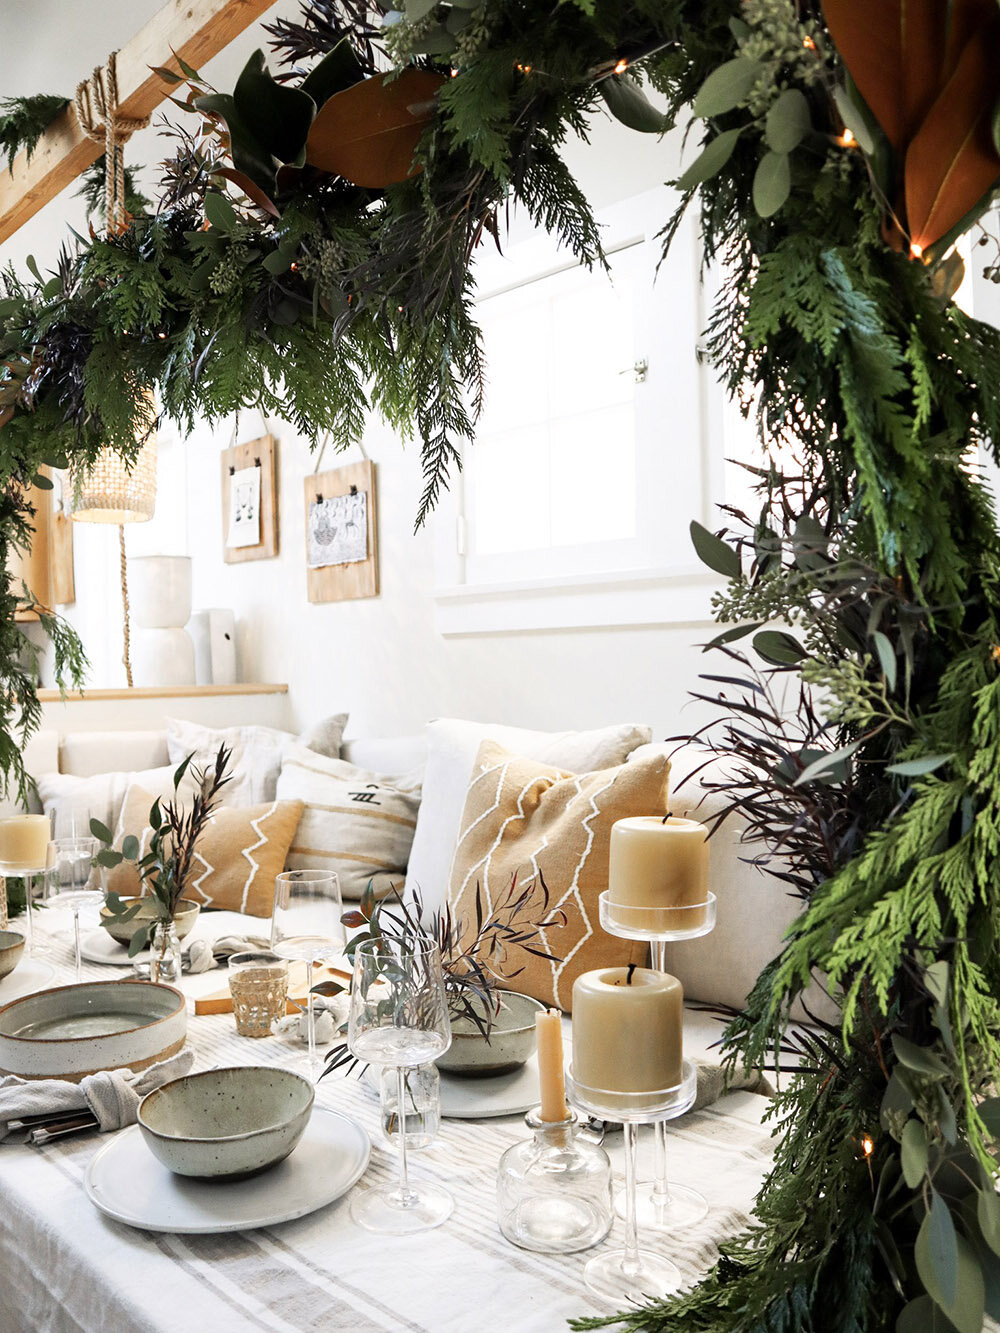
Certain items can help with this, such as rectangular plates and pedestal/cake stands. (Skipping some of the superfluous things you don’t need, such as napkin rings, chargers and placemats can save inches as well.) But if you want to add some wild branches or lush floral/greenery/dried bouquets to your table, you might be out of luck. As such, I wanted to demonstrate an easy, low waste way to add striking decor to your table without sacrificing your dining surface. (I also offer up additional suggestions in my book: Small Space Style.)
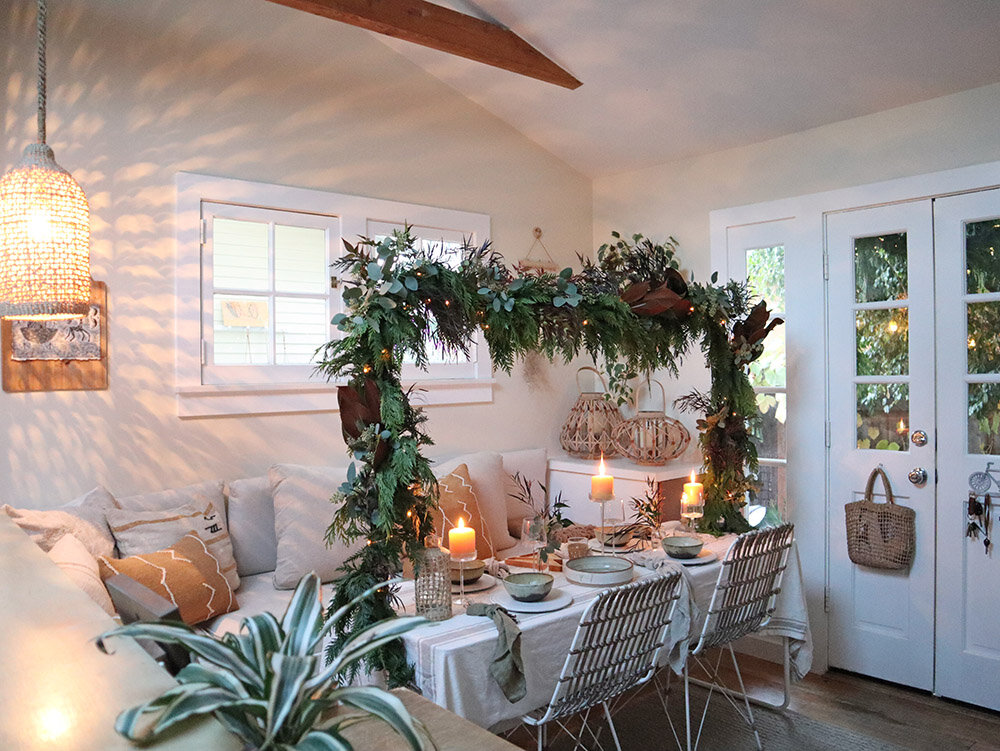
This display cost me about $150. I bought the garland and branches from a local shop, and used an over-the-table adjustable iron rod and battery operated twinkle lights (with rechargeable batteries) to create an overgrown and glittering display indoors. (I used real candles for the photos, but swapped them out for battery operated versions for safety after we snapped the images.) A bit of floral wire (and a vacuum) were the only other items I needed to attain the look.


Setting up the iron display rod took only a few minutes. The height is fixed, but the width is adjustable. When the setup is no longer needed, it breaks down easily for slim storage.

I used all living branches and clippings, so everything can be composted when the time comes.


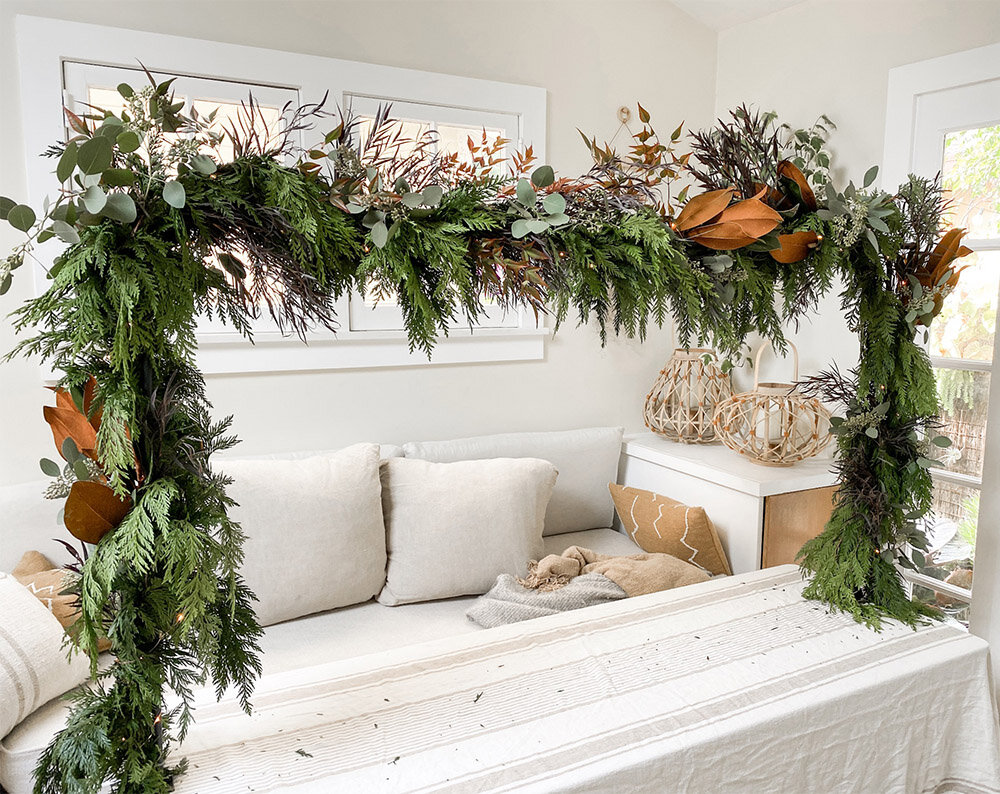
Adding the clippings to the garland took the longest, but was simple enough.

The entire process took about 90 minutes, and it was a surprisingly relaxing activity for me.

I (still) don’t really cook, nor do we host that often these days, so I enjoyed going out of my way to do something special for the guests we’ll have over in the coming days.

I’ll share a small space, low waste holiday decor video and post in early December.


In the meantime, I’m looking forward to spending time with our friends and family here at home. (And I’ll be following along with The Conscious Kid for insights and information regarding Native American Heritage Month.)

Whatever you and yours are doing this holiday, we wish you a safe and happy long weekend.


Using Our Tiny Greenhouse as an Adaptable Sunroom
How we styled our ~114 sqft greenhouse to function as an easily-adaptable office, an activity space for our child, a quiet reading lounge, a dining / gathering space, and a grow zone.
Summary: How we styled our ~114 sqft greenhouse to function as an easily-adaptable office, an activity space for our child, a quiet reading lounge, a dining / gathering space, and a grow zone.

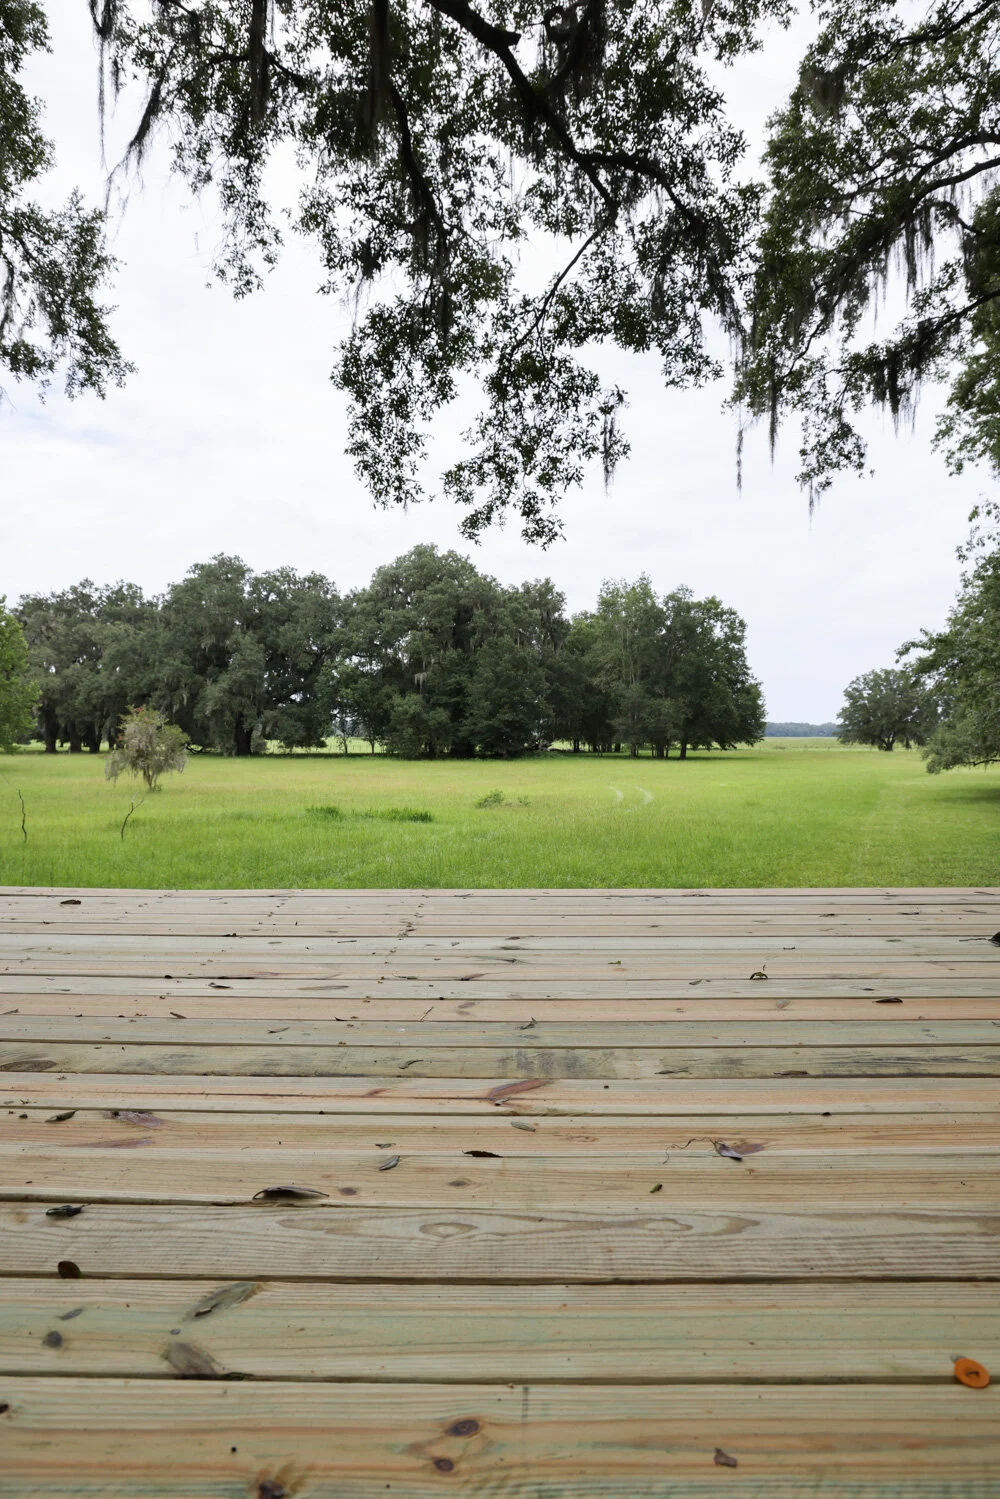
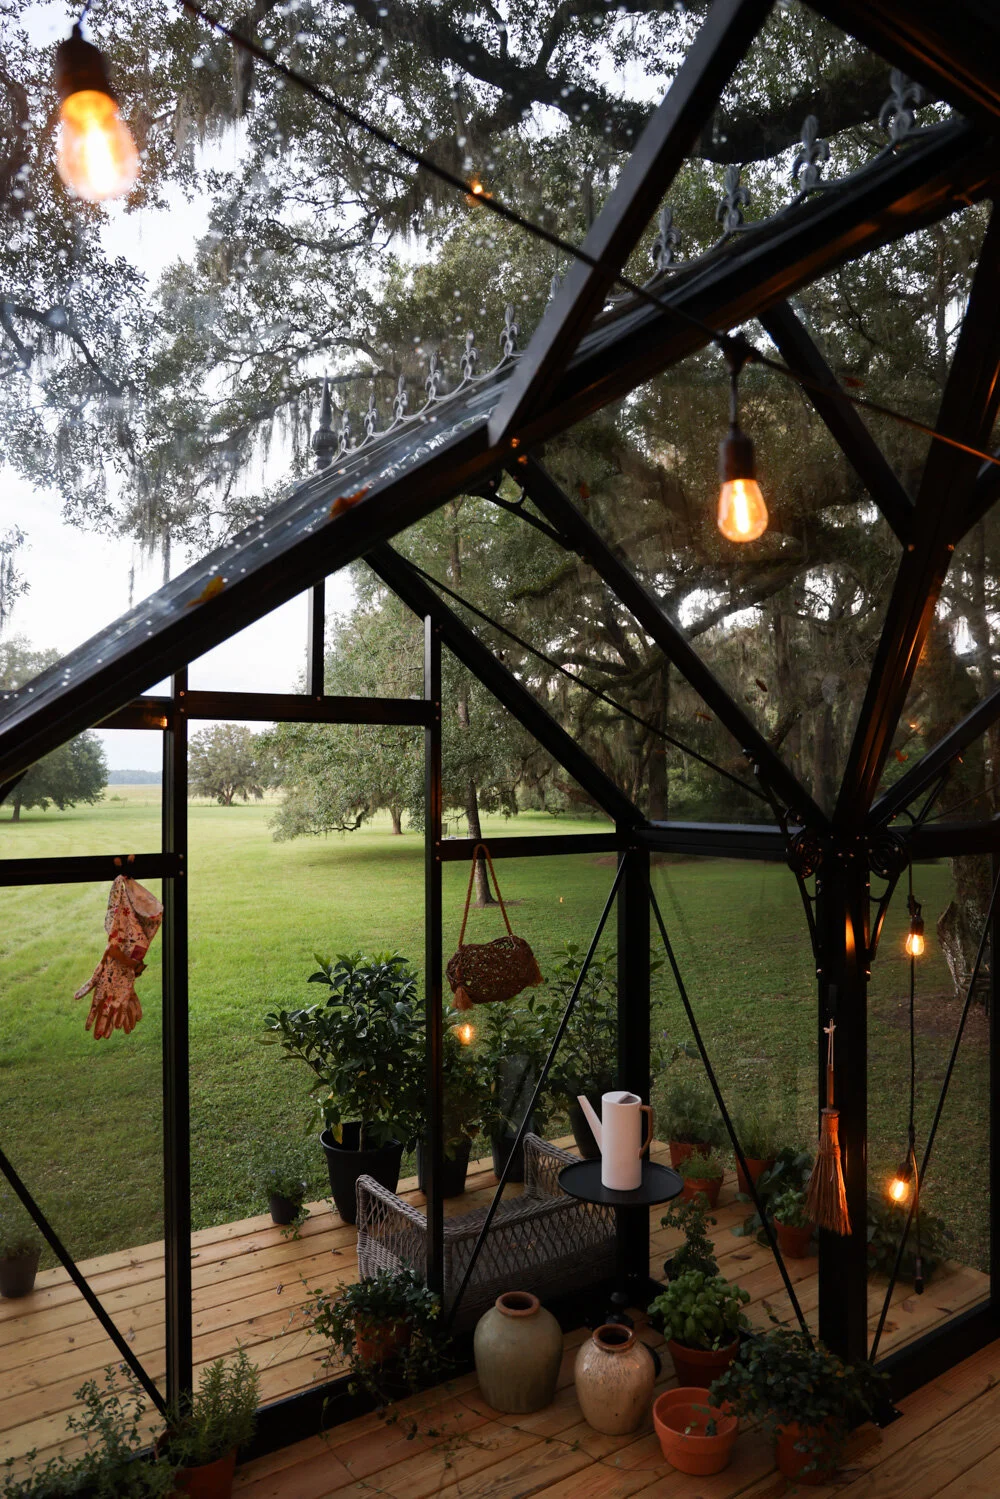
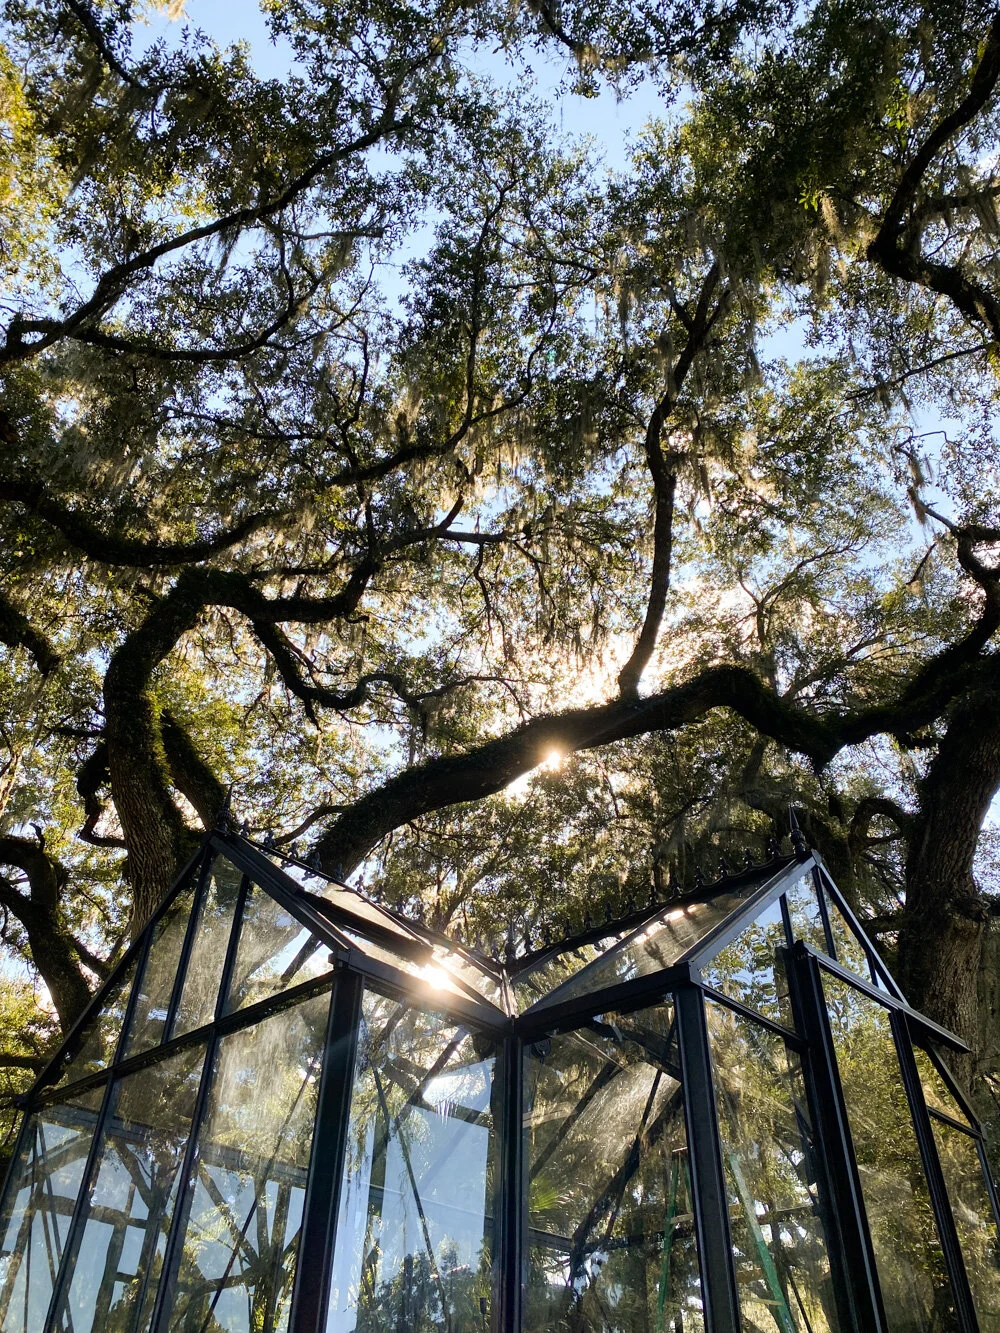
Our tiny greenhouse is a T-shaped design that straddles the sunny field of the prairie and the cool canopy of the oak trees. It’s propped up on a tall deck, resembling a house on stilts, as it’s required to sit above the flood zone in this region.


The goal behind this space was never for it to be used purely as a grow zone, though we do intend to use it for seedlings and select greenery.


Instead, it is meant to be fluid and adaptable, just all of my favorite small spaces.

Its uses already include an office, an activity zone for our child, a quiet reading/writing lounge, and a dining/gathering room.

This post contains images of the default set-up, which contains areas for working, lounging, potting and playing. The post does not contain images of the dining set-up, though it’s not hard to envision. (It also doesn’t reflect the recent railings we added to the platform the day after I captured these photos.)

Almost all of the pieces in the space are collapsible, from the standard chairs, to the second-hand potting bench from the cottage, to the corner shelves, and the desks/tables.

The remaining furnishings are lightweight and easily mobile. The focal points on either side — with a stunning view of both the woods and prairie — are two long, slim loungers from Serena & Lily.

We also have extra folding tables and chairs so we can create a farmhouse-style dining setup inside the greenhouse (after relocating the loungers), or just beyond the platform in the grass leading to the prairie:
By leaving a few extra feet in front of the greenhouse door, we’ve been able to create a useful stoop, where we rehabilitate and grow plants from/for elsewhere.

Two spare folding chairs sit out front, offering views of the prairie and a place to take off muddy shoes or drop bags of soil.

For pops of playful and functional decor, we placed gardening gloves, tools, aprons and bags to the framework along the walls.

We added beautiful bolster pillows (in moss/white ticking) from Serena & Lily, an extra-long doormat (inside the sliding glass door), cafe lights, a patio rug, and a fan to help the ceiling vents and front door cool the room a bit when needed.

We also have useful items such as reusable cleaning cloths, candles, tablecloths, matches, etc. tucked out of sight but easily within reach.


We rounded everything off with a gardening-related selection of books, games and tools for growing and learning in both French and English for our five year old.


I’ve found that I truly am so much more creative and content when working with small spaces. This little greenhouse has reignited a feeling I’d lost track of this year in my stress and uncertainty, and I’m excited to get to fully use and know this space with my family throughout the upcoming cooler, festive months.


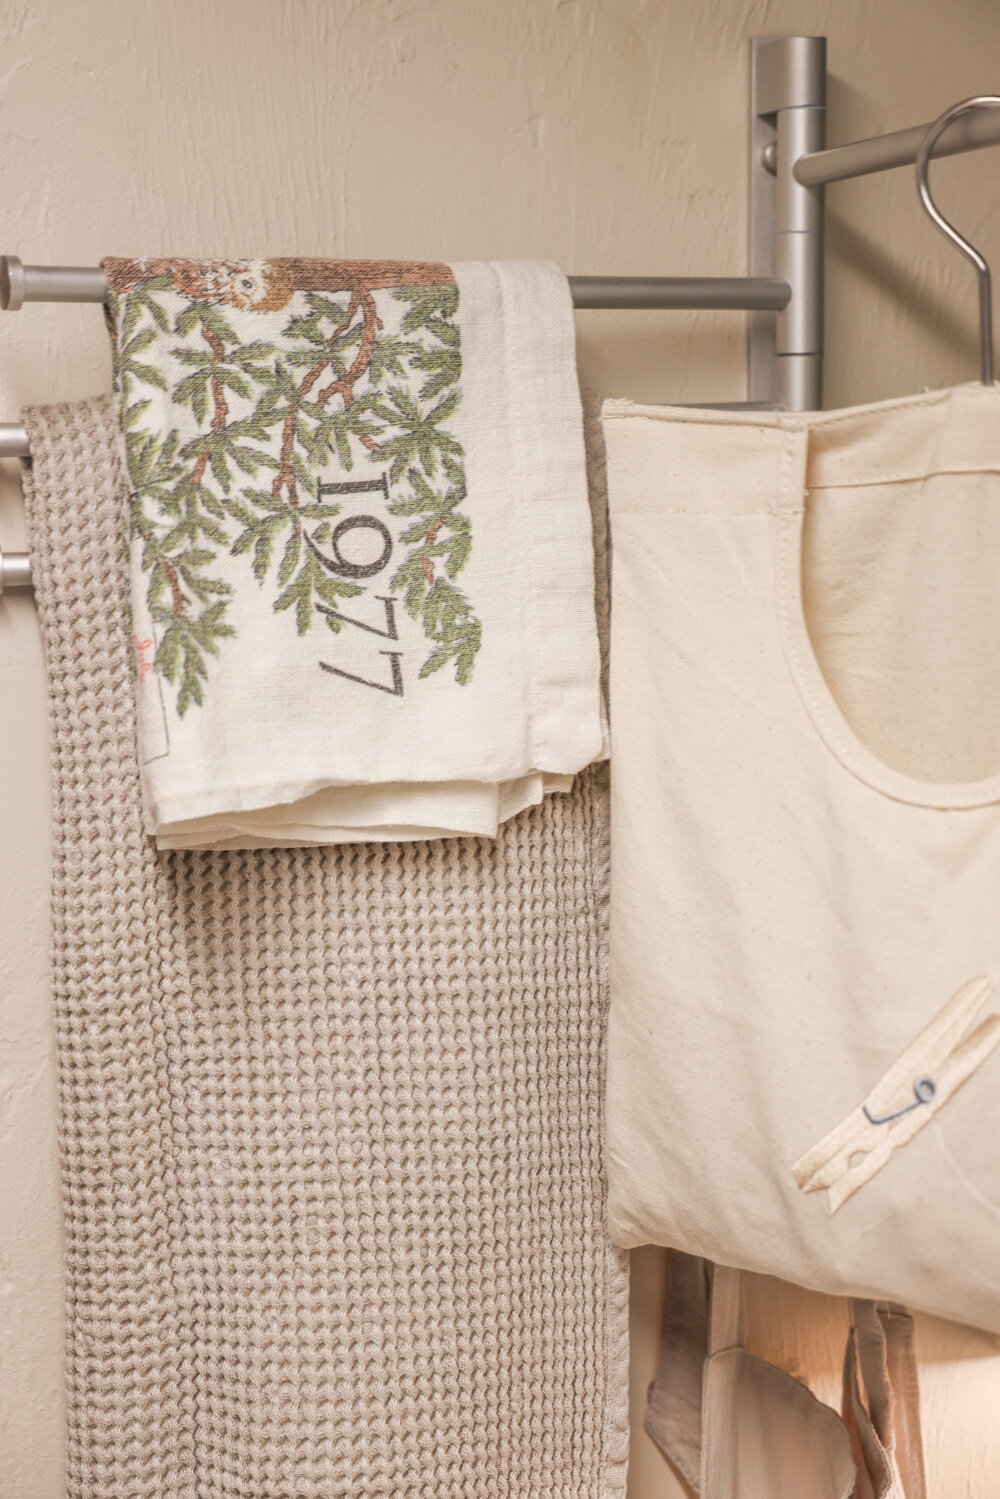
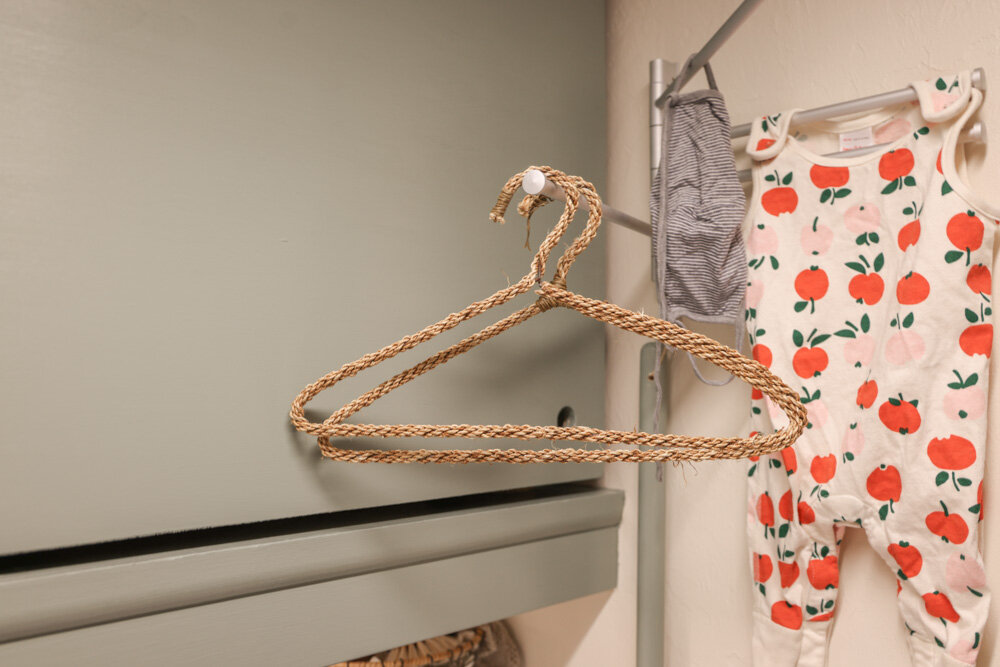
A Compact Thoroughfare Laundry Room Makeover (<$250)
For thirty years, my folks have been meaning to spruce up their tiny, windowless, thoroughfare laundry room. They enter and exit their house through this compact space multiple times per day. Not only has the room been long overrun with household cleaning products and dog gear, but it’s now also packed to the gills with all the typical COVID-era necessities as well.
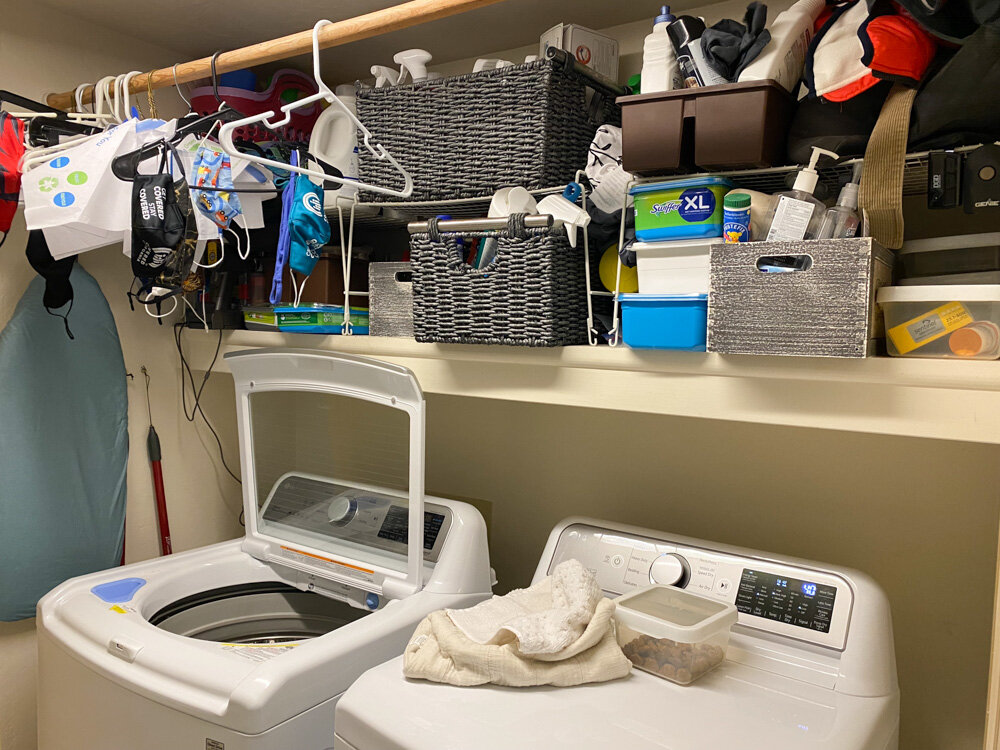
The main issue with this hallway / muck room / laundry bay isn’t its size. It’s that the overflowing supplies are on full display when the interior door to the room is ajar, which it usually is since for one reason or another.
Upon returning from France, I decided it was time to finally tackle this mini-makeover, and make it an area that my parents could keep as-is once completed, or upgrade guilt-free in the years to come. As with most of my projects of this nature, I wanted to work with that we already had on-hand to minimize waste. And since we have large projects underway (such as the restoration of the farmhouse roof and the building of the prairie ADU), I wanted to keep the updates under my budget of $250.

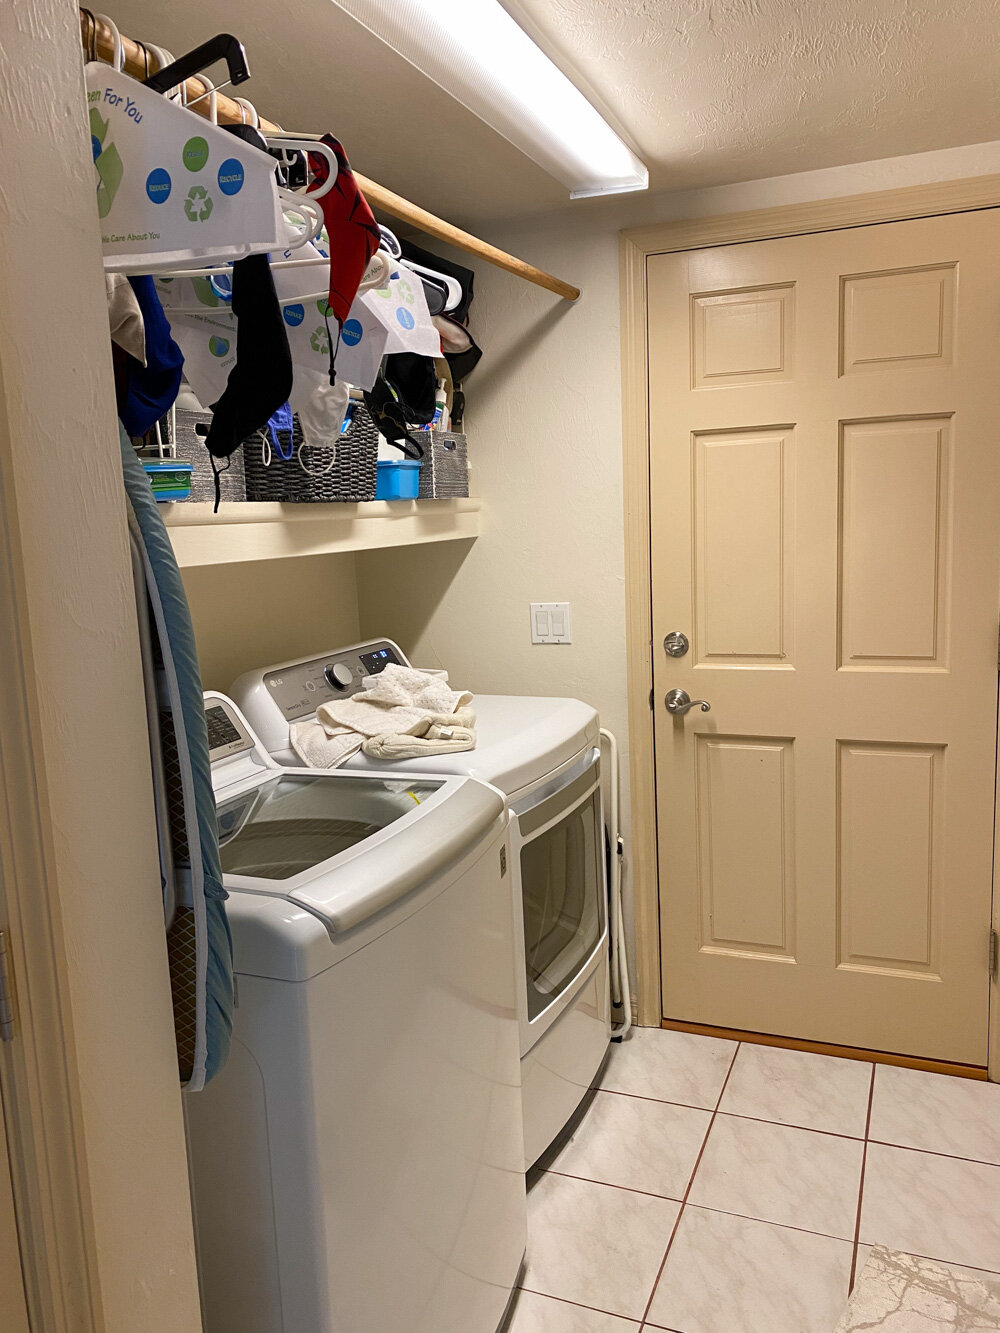
Our modifications were minimal but impactful:
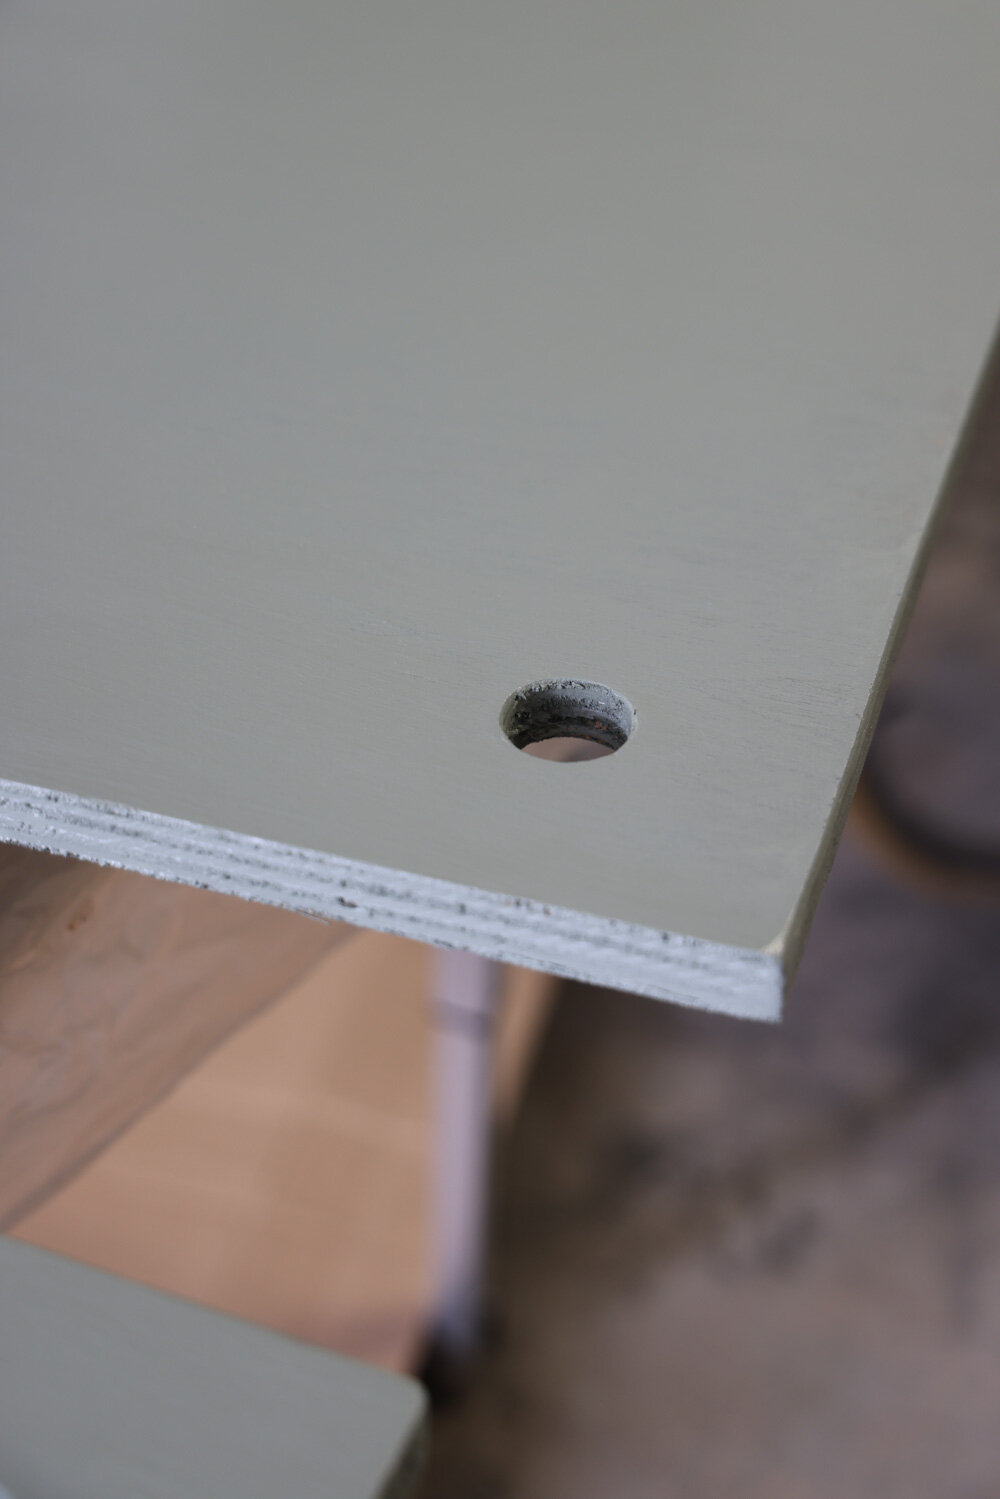
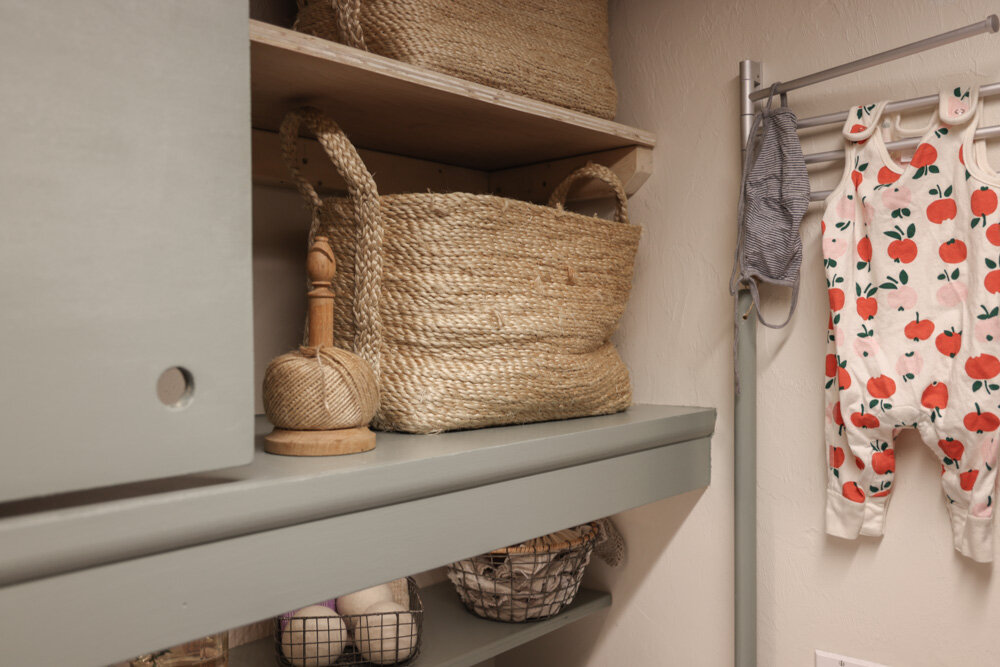
Shelving
A touch of open shelving in this area is nice for quickly tipping items like masks, leashes and cleaning supplies out of overloaded hands. But having ONLY open storage is what was causing the most visual clutter. So I opted to custom-cut and install simple sliding doors to conceal the contents of the existing shelf, which we divided into 2 levels to maximize vertical space. We also added a new, low profile shelf slightly above the washer and dryer for smaller goods.

Doors
The sliding doors were a space-saving choice, as cabinets would’ve encroached into headspace when opened. We also opted to forgo handles on the doors to further save every bit of space, since the sliding panels overlap and are situated close to the collapsible, swing-arm drying racks I installed in place of the bulky overhead closet-style dowel.
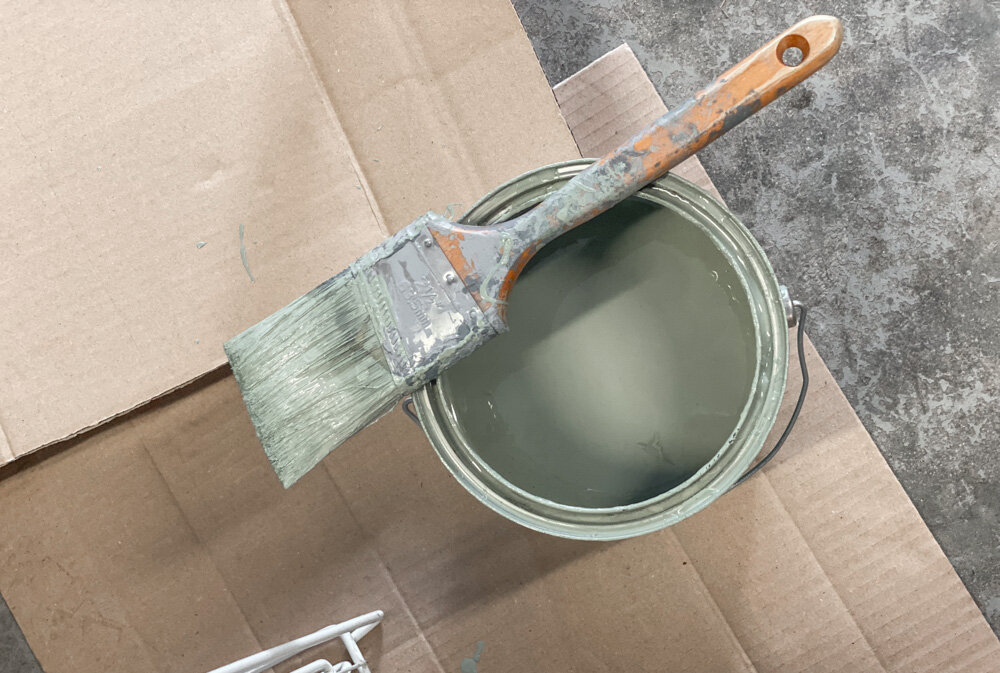
Paint
I used the paint leftover from West’s reading nook makeover (color: Sherwin-Williams Evergreen Fog SW9130) for the doors and shelves. It’s an easy-going, green-grey hue that adds a pop of personality without overcrowding a tight, windowless space such as this one. (Eventually we’ll do an additional coat and paint the interior shelf, as well as touch up the walls nearby, but one thing at a time.)
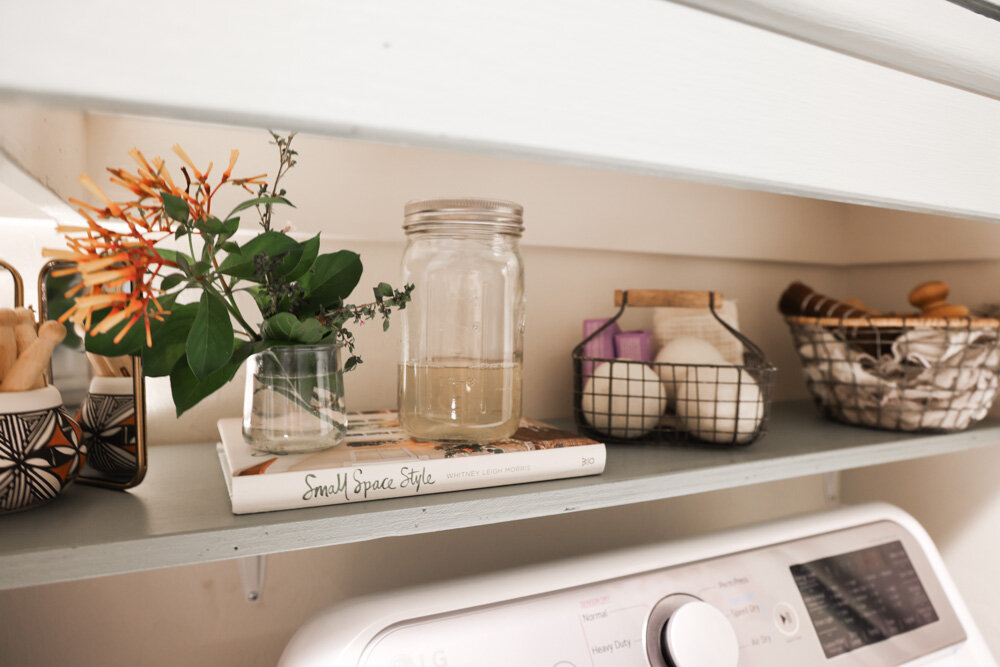
Cleaning Supplies
Over time, as my folks used up their existing supplies, I replaced their disposable dryer sheets with reusable wool dryer balls, their plastic jugs of detergent with refillable glass jars accepted by the local refill station (Life Unplastic), their numerous household cleaning liquids with a bottle of concentrate and refillable spray bottles, and their paper towels with washable cotton rags. Not only do reusable / refillable goods reduce waste and save money over time, but they also free up a remarkable amount of space. Plus they look far nicer in my opinion.


So, while it’s not perfect, it’s loads better. We can now leave the interior door open without wincing when we walk by or pass through. Remember: you don’t necessarily need more space or clever storage solutions. You just need to get a bit creative with the space you’ve got.

Our Tiny (~114 sqft) Greenhouse
Constructing a tiny, multi-purpose greenhouse.
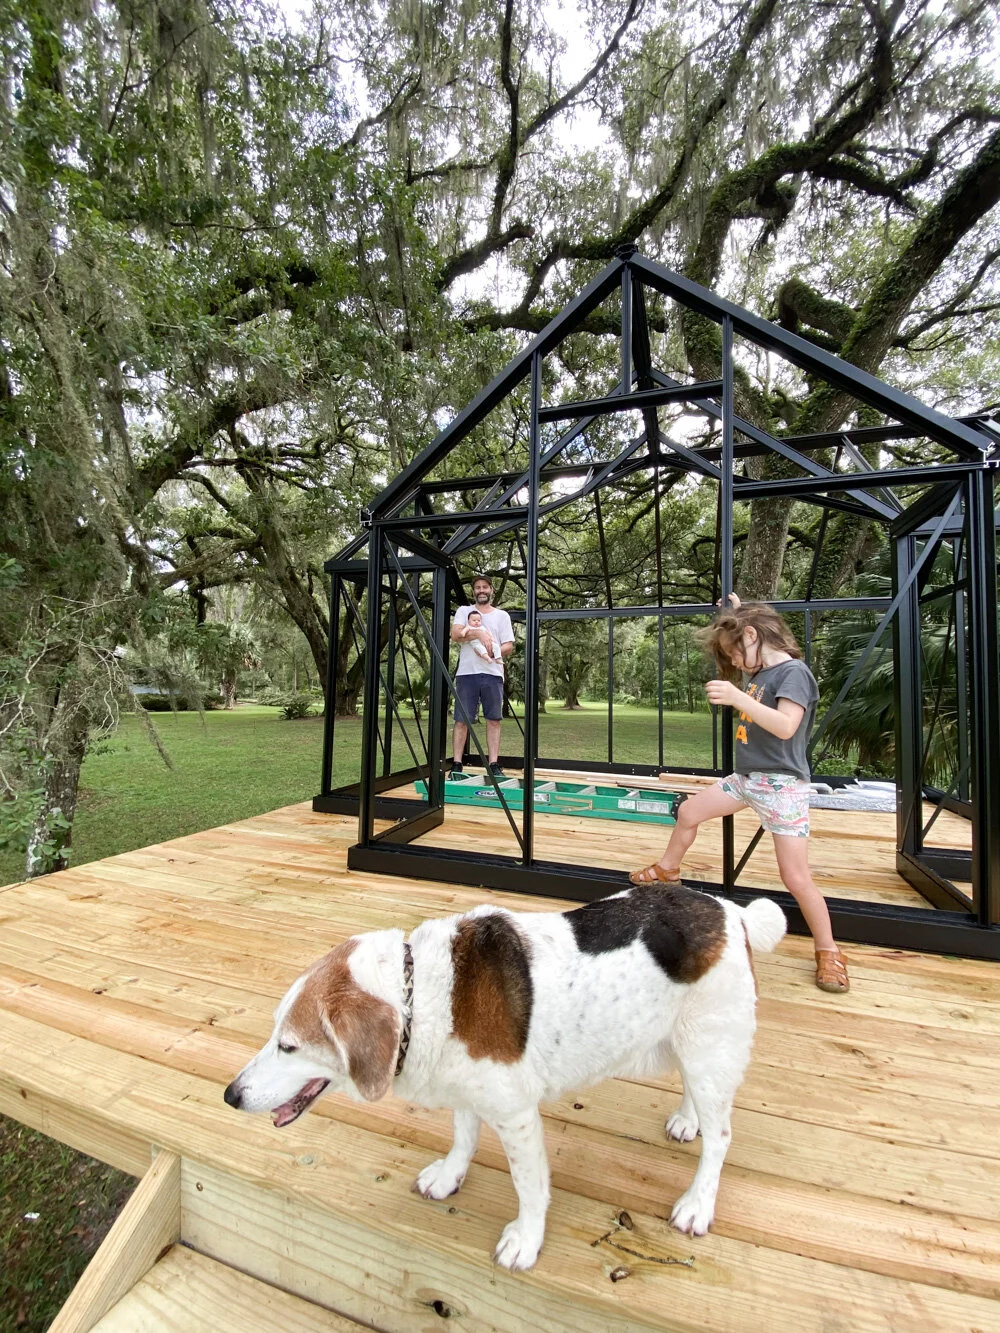
The tiny greenhouse is up, folks!
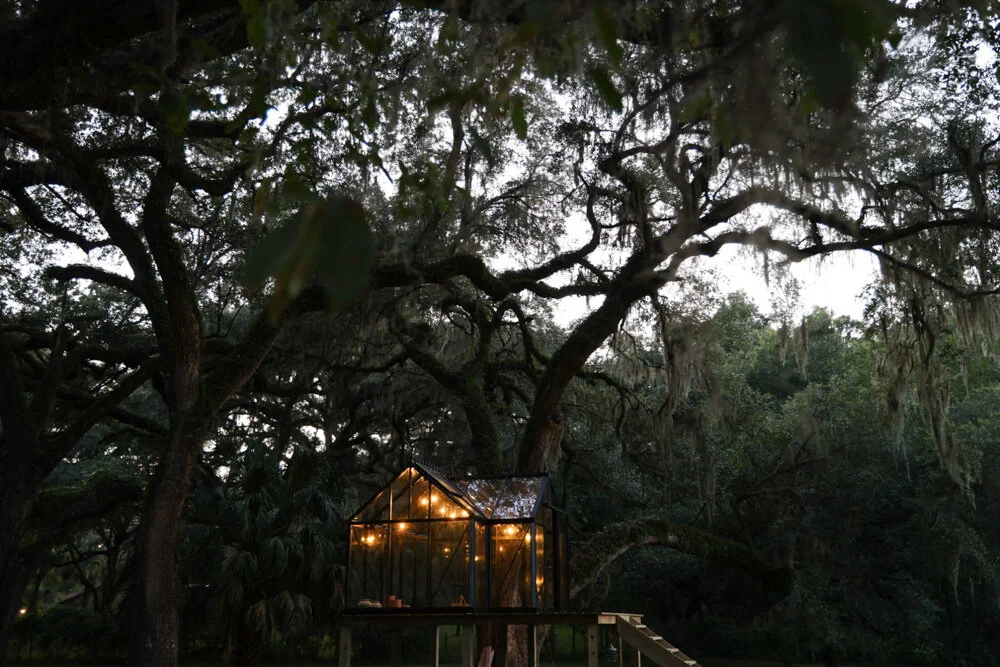
It is a ~114 sqft, T-shaped design that straddles the sunny field of the prairie and the cool canopy of the oak trees. It’s still a work in progress as far as finishing touches and styling are concerned, but that’s the easy part!

We started this project back in the spring, but first had to navigate the permitting process since we’re in a flood zone here in the Southeast. Turns out that we had to lift the structure 5’ off the ground to satisfy requirements, so now it’s got a treehouse vibe to it.

If we could’ve build it on the ground, I would’ve done so on top of a low, 2-3’ brick or stone perimeter wall to create more height and to mix-and-match textures and materials. Still, I’m so happy with how it turned out!
Since we’re in a high wind zone here in Florida, where there are product approvals to pass before building anything new, we couldn’t construct a structure of recycled/repurposed windows and materials. So instead, we found this sweet little aluminum + tempered glass greenhouse kit from The Home Depot.
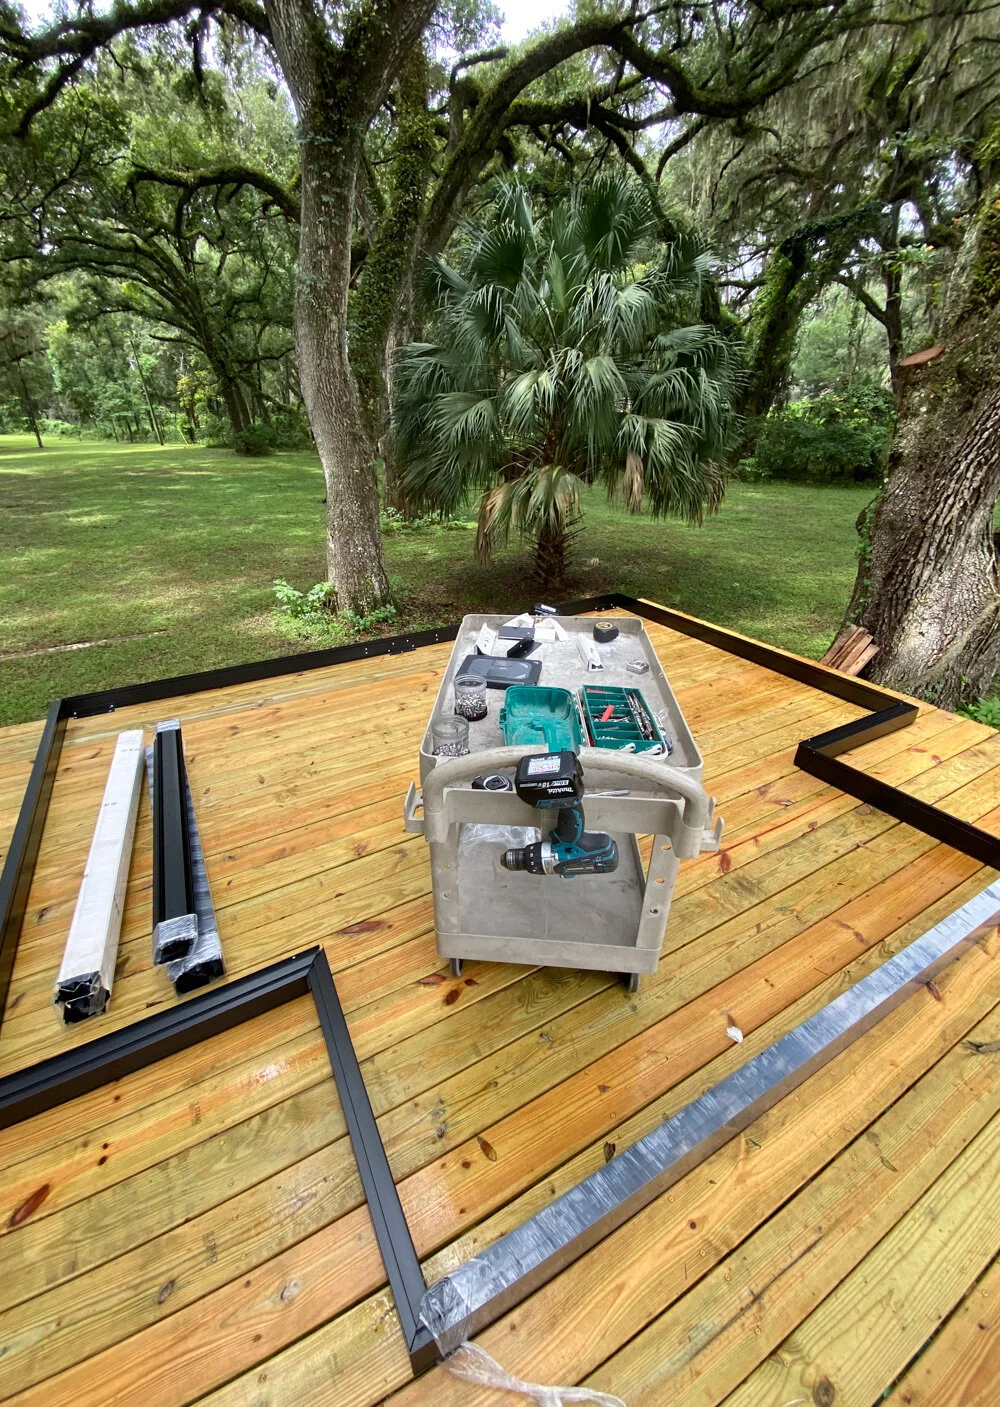

What drew us to this partial model was its unique shape and compact but easily navigable size. Despite its small footprint, it has an overall height of 8’2” so our family can sill move comfortably around the interior. (I’m almost 6’ tall, and Adam and my father are even taller.)
The framework base can anchor to bare level ground, a concrete slab, or a wood platform like the one we had to create. We used pressure-treated lumber from The Home Depot to make the 14’ x 14’ deck, and placed the greenhouse towards the back of the surface so that the extra square footage extends beyond the front of the greenhouse like a miniature — but very usable! — stoop.

It took about a one week for two people (our friend Alan and my husband + business partner, Adam) to construct the unit. Alan studied the instructions in advance, and came prepared with all the necessary tools and back-up materials, just in case. It would’ve all been completed sooner had they not stopped repeatedly for the summer rains. Uninterrupted, I estimate that it would’ve taken 3-4 days of work for the two of them.
Now that it’s all up, we’re debating— deck paint? Slip-proof tile? Both, I think! And of course we need to add some railings.
In the meantime, we’ll be outfitting this gem with flexible zones for potting + growing and lounging, and we fully intend to enjoy it as much in the fall and winter as we undoubtedly will when spring rolls around again.

Since the greenhouse has a sliding front door and 2 roof windows for ventilation, it’s actually quite a comfortable temperature inside — especially with a fan oscillating. This is welcome news for us, since we intend to use the space like a conservatory or sunroom, more so than strictly a greenhouse for plants.
I’m sure some readers will be concerned about the possibility of bird strikes, so I want to address that topic in this post as well. Prior to constructing the greenhouse, we spoke with a neighbor in the community about their experience with strikes on their greenhouse. They’d not yet experienced any, but we went ahead and purchased some decals on Etsy anyway, just in case. Thankfully this small house has several aluminum beams in addition to our furnishings and accessories to visually break up the glass. In the three weeks it’s been up we’ve had no incidents, but we’ll remain on alert. (As a family of vegetarians with three rescue pups, we take animal safety seriously.)
There will be many more posts featuring this beautiful little greenhouse to come. We’re thrilled with how it turned out, and I look forward to sharing more small space living stories from it with you.
I want to thank The Home Depot for working with us on this project. They’ve always been so supportive of our small business’ funny little ideas— from our tiny closet nursery at the cottage, to our galley kitchen’s more energy-efficient renovation, to our outdoor shower and mini thoroughfare garden makeover in Venice.
Note: This post features gifted product from The Home Depot. Our small business appreciates that The Home Depot has, for years, tangibly supported designers, bloggers and creators of color and from the LGBTQ community.

Creating a Closet Reading Nook for a Child
View the corresponding video for this post via Pinterest, here.
As we closet out the summer and welcome the fall, we’re still somewhat in a place of limbo as far as our home life is concerned. Our shared farmhouse in France is undergoing fundamental repairs (which we knew would be required going into the acquisition), and our small shared cottage in the Southeast has just been permitted for construction. As such, when in the USA, we’re in a temporary space. While we are comfortable, we still feel adrift, which has been a challenge for everyone, including our four year old.

Starting with our uprooting from Venice, and continuing on to our move across the country (and across the Atlantic, to a certain extent), and the arrival of baby Léa, our pathway through 2021 has been a serpentine one.

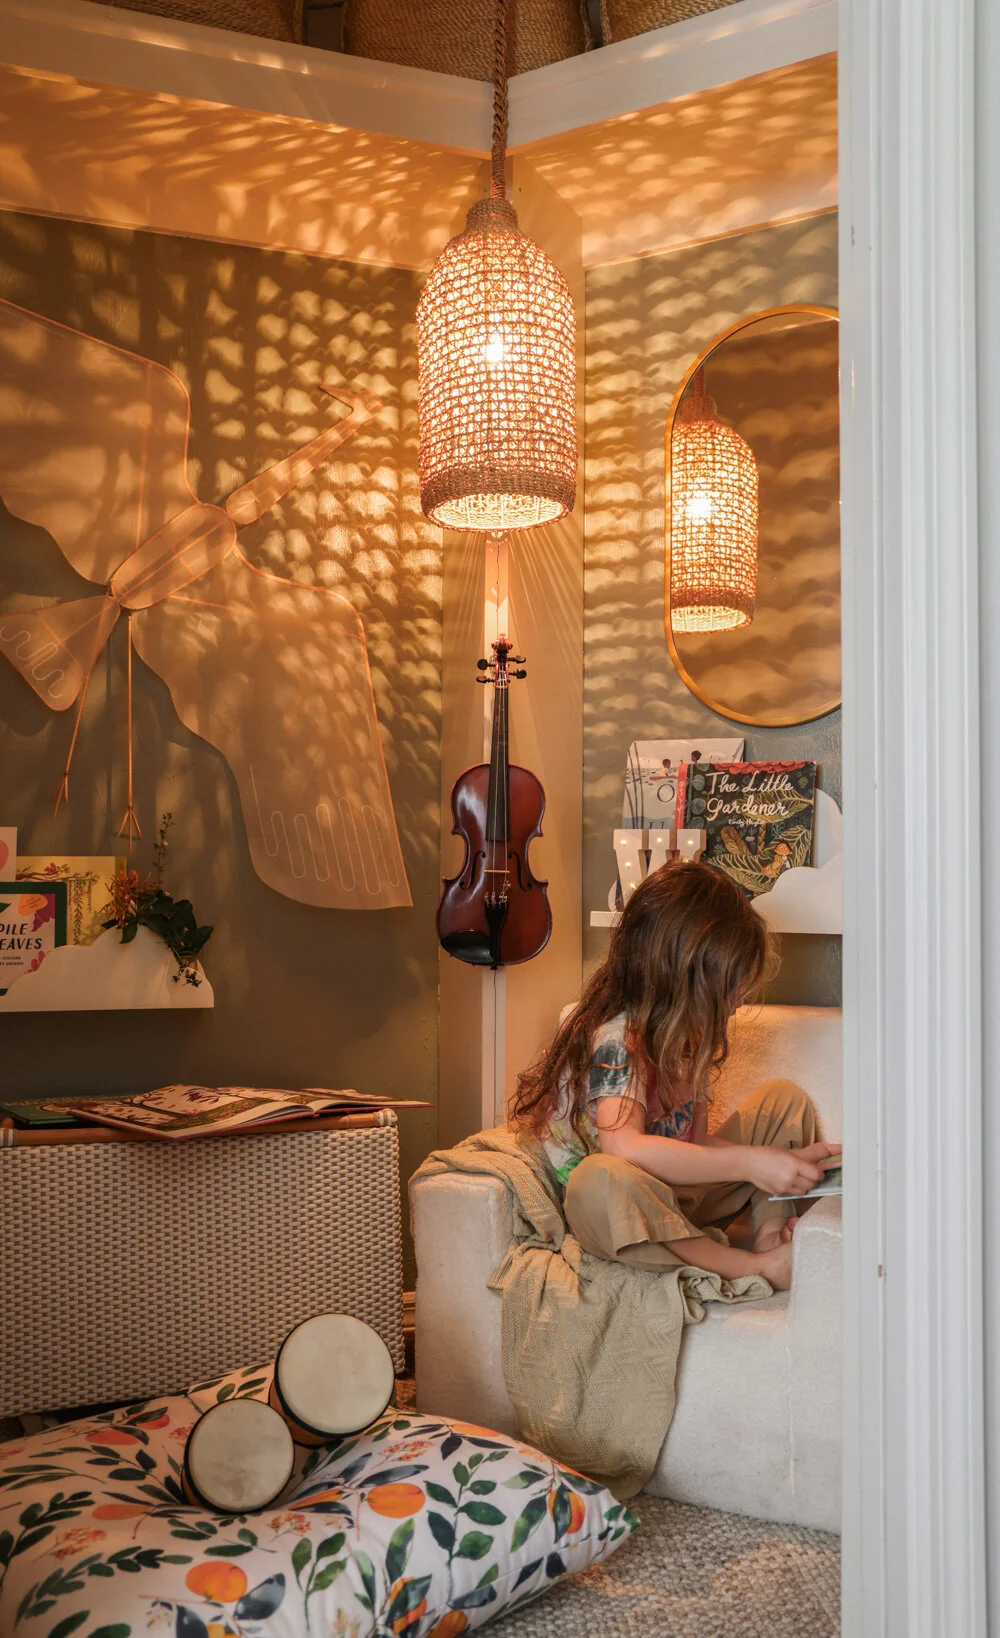
To give our pre-schooler a solid little place to catch his breath and call his own as we work on our long-term home projects, we transformed a walk-in closet into a quiet little reading nook. Here, he can escape the barking dogs, the crying baby, and his frenzied parents when need be.
We decided to simply work with the existing space, using various items left over from various partnerships and our cottage. This helped us keep the budget, waste and overall lift minimal.
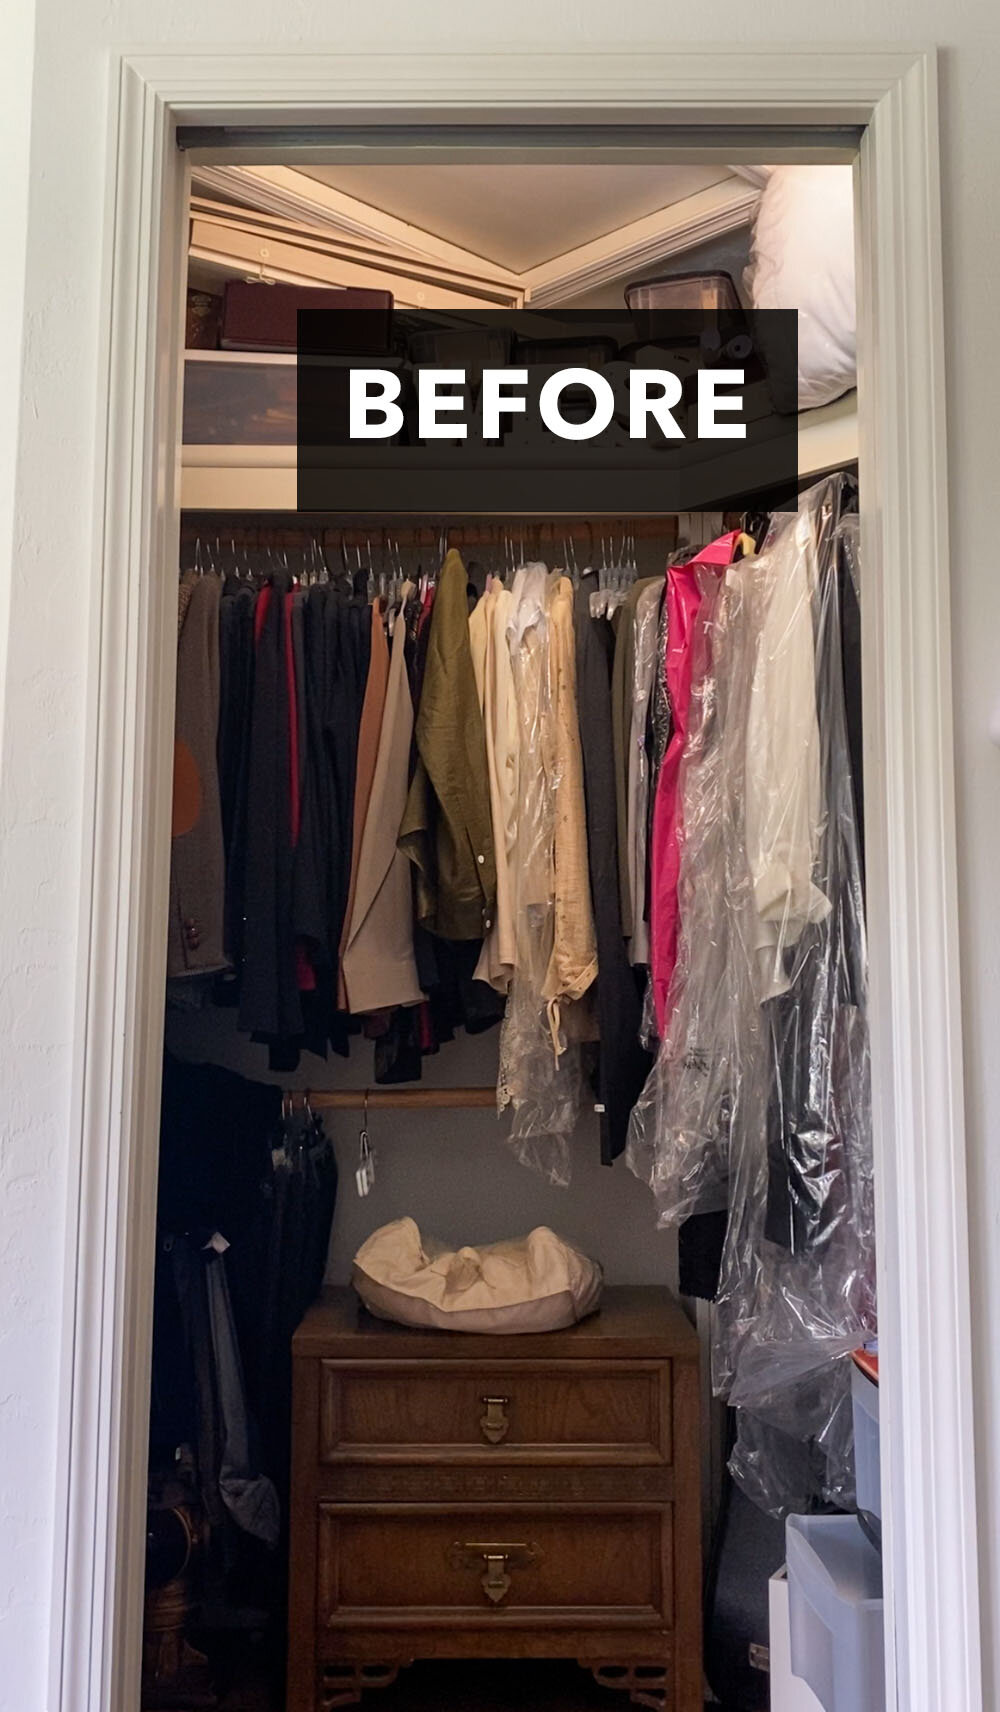
After temporarily relocating most of the closet’s clothes (which belong to other family members, as this is also a shared space), we confirmed that the walk-in was indeed quite roomy and usable for our little one.

All that was needed was a fresh coat of paint to match tones from the bedroom while adding a pop of color. We chose Evergreen Fog (SW 9130) by Sherwin-Williams, as it’s a subdued but striking green-grey blend that’s full of soothing character. Our son participated enthusiastically in the painting process, which hopefully provides him with even more of a sense of connection with the space.

With the help of floating shelves, a pendant lamp, a child’s reading chair, and a stack of library books, West now has his own escape pod. Naturally, he often finds Sophee in there waiting for him, but what else would you expect from our sweet beagle menace?

Thank you to Sherwin-Williams for providing the lovely paint used for this quick and playful small space makeover.

My Top Small Space Hack
Recently I’ve needed to remind myself of my number one small space hack: STOP ACQUIRING SO MUCH STUFF.

Above: Wearing a “Farm-to-Closet” dress, made with regeneratively grown cotton, from Christy Dawn.
At the end of the day, it’s not actually about nifty organizers and design tricks. It’s about discovering what you need — and don’t need — in order to live comfortably and happily, day by day.

A side perk of travel (even a short overnight trip) is that it can present an opportunity to reevaluate your belongings and true necessities.

• What items in your home can serve multiple purposes, eliminating the allure of obtaining more?
• What nonessentials require all sorts of finite resources to manufacture, acquire, maintain and store… then drain time, money and materials that should be protected or put to better use another way?

As we prepare to experience our tiny farmhouse for the first time, I’ll be keeping these topics at the top of mind. And, in the meantime, I’ll be reading The Afrominimalist’s Guide to Living with Less by Christine Platt.


Thoughts on Sustainability x Home Design
In reading decor and design trend predictions for post-pandemic life, I noticed that the topic of sustainability is only touched upon in the context of product sourcing.
The articles reference buying responsibly-crafted materials and furnishings, but rarely do they delve into the wider picture of what consumer trends (like having several walk-in pantries to contain an overflow of small appliances and plastic organizers, or having a dedicated entertainment room AND a dedicated gym AND a bedroom-sized closet) mean in terms of larger global impact.

As we await the permitting of our small ADU cottage on the prairie, I’ve been thinking a lot about this.
(For folks inquiring about when we’ll post a home tour: well, we’ll post one when we have an actual house. And, hopefully, we’ll get to the French Farmhouse soon, and I’ll share plenty from there as well.)
Some of the materials and concepts we’re putting into play in the cottage were chosen with sustainability at heart, while other decisions were made almost entirely with logistics, climate and constraints at the top of mind, at the seasoned recommendation of the GC. I’ll go into much greater detail and cover the process step-by-step once the construction begins, as I prefer to have more evolved visuals to accompany my words. But my hope is that the scale of our project is so small that any imperfect impact is minimal.

Our family is very, very eager to return to small space living (and documenting our experiences), but things like this take time, which is something that’s easy to forget in the age of instant gratification and the glossy home transformations we see on social media and on TV. Plus it’s simply a great deal to juggle in tandem with a newborn who has digestion difficulties, a four year old who is going through major lifestyle changes, and a small business.
Thanks for being with us during the interim. We’ve learned so much about the value of multigenerational living (I’ll share more on that later as well), and I’ve really appreciated this transitional situation of ours during my 4th trimester.


Small Space Jungalow Gems
“I believe that creativity, not wealth, is the key to having an amazing home.”
- Justina Blakeney
She celebrates maximalism, whereas I focus more on minimalism.
She’s a connoisseur of color, I gravitate towards muted tones.
She plays endlessly with bold patterns, I am satiated by subdued textures.
And yet, despite our enormous differences in design tendencies, I am one of Justina Blakeney’s most avid fans. I’ve used Justina’s work in nearly every interior project I’ve tackled, including my own living spaces, where her books are always within arm’s reach.
Justina is not only a one-of-a-kind, world renowned artist, designer and creative director— she is also a strong champion of others. She supports numerous non-profits (including The RightWay Foundation), she helps other makers with her generosity and transparency, she speaks up loudly and clearly for human rights, and she pulls as many folks as she can up with her as she vaults past milestone after milestone in her business.
I’m ever in awe of her talent and spirit, and I cannot believe that I get to call this wonderful woman my friend.
This week, Justina and her team revealed some of their newest designs in collaboration with Target, so I’ve rounded up 10 small space gems from that collection. (Pieces available June 26th.)


Creating an Outdoor Shower on a Budget
When we left our tiny home in Venice, we’d planned to take our outdoor shower with us, as we enjoyed and used it so much. But when the day of the move arrived, it dawned on me that the design wasn’t ideal for storm-prone Florida, as it could easily become a projectile in a hurricane. As such, we left it under the vine canopy for the next steward of the cottage, and decided instead to incorporate a wall-mounted garden shower in our new-build ADU.
(Related Posts: Our outdoor shower at The Tiny Canal Cottage / Enhancing privacy around our outdoor shower at the Cottage)

The construction of the ADU will take place over the spring and summer, which is, of course, when an outdoor shower is of the most use in the intense North Florida heat. So for the time being, I created a temporary, mobile shower with the help of a handful of items:
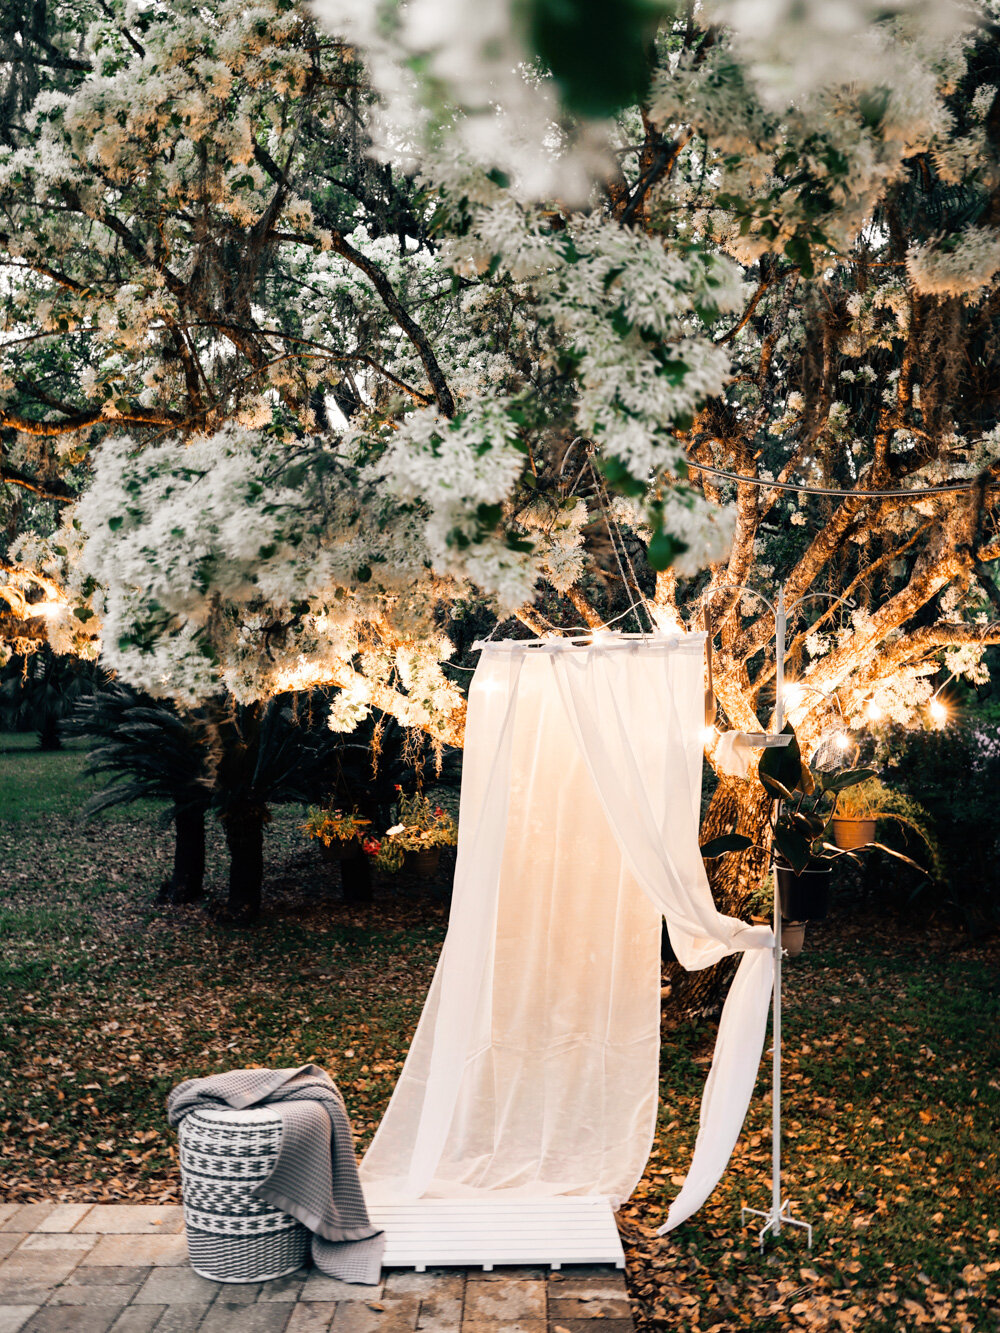
A garden hose with an adjustable nozzle
Outdoor curtains with tie or button tabs
A 3’ or 4’ hula hoop
A bird feeder stake
An patio stool / accent table
A teak bath mat (which can also be used to trap down the bottom of the curtains on breezy days)


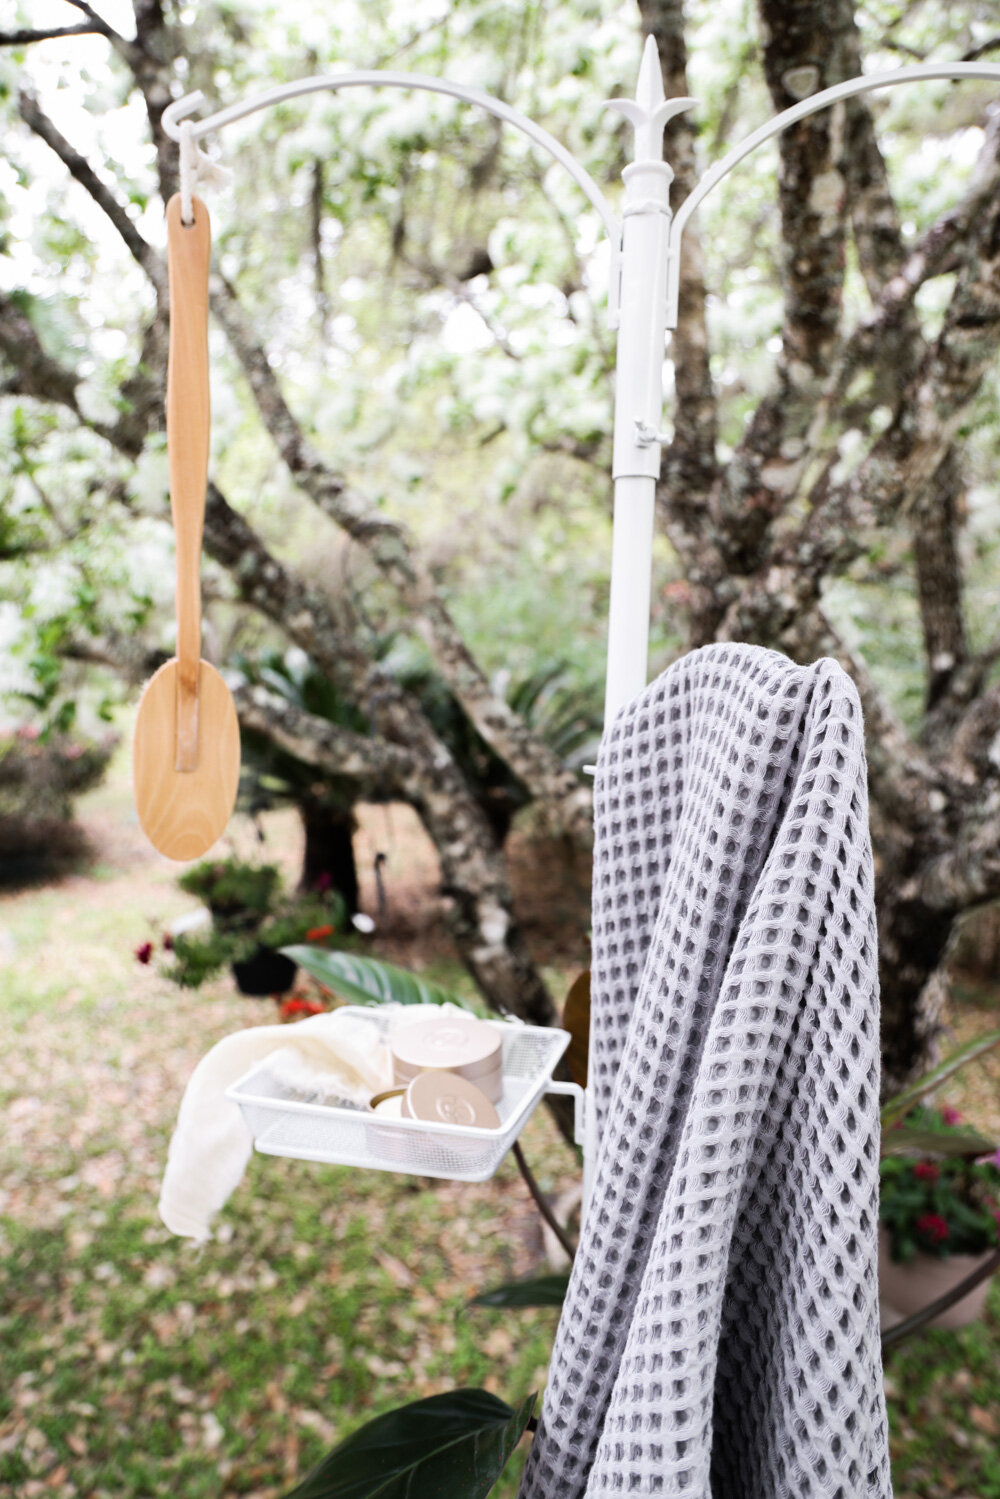
It’s not the most polished finished product, but it actually makes for a dreamy shower experience, while being simple and inexpensive.


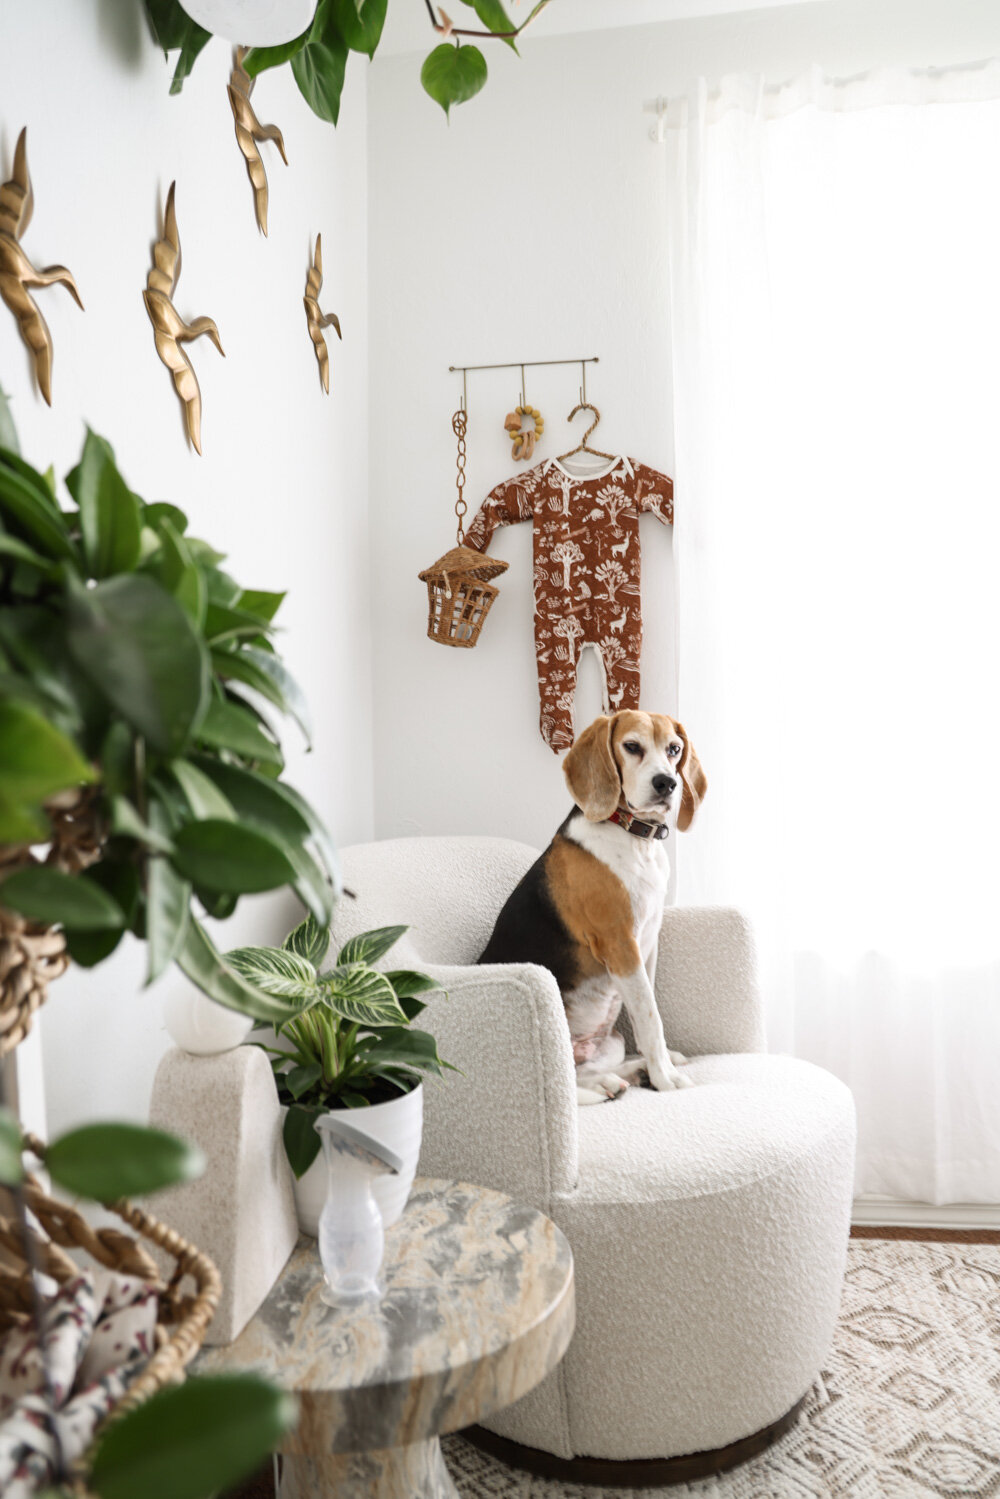
Before + After: A (Temporary) Multitasking Nursery + Bedroom + Playroom
Our second child arrives this month! As such, I figured it was time for us to finally finish the nursery / bedroom / playroom that we’re sharing while we await the construction of our prairie cottage, and the ability to travel to our little French farmhouse. Below are the before + after, along images, along with detailed views and process visuals. (I’ll let the photos do the heavy lifting in this post, as I’m currently wading through a thick cloud of third trimester insomnia and can’t seem to find my words the way I usually do.)


Click here to read about the space, and what we could change vs what we couldn’t.
Click here for the nook makeover, and details regarding how we hid the textured wall.


Below: The quick mockup / mood board I created to help me picture the space:

Beyond the nook, the primary pieces in the space are the rug, compact swivel chair, arched floor mirror, and side table from Lulu & Georgia:
Flexible jute baskets from Will & Atlas:

Below: A space-savvy vintage lamp I found on Etsy, then painted with Adam to better suit the space:


Below: Our favorite, all-in-one, washable cloth diapers by Grovia:

Below: Brass cranes by Justina Blakeney of Jungalow.:

We used several brass details throughout the space in honor of my Grandpa Lou, who ran a scrapyard. and collected brass pieces from the site.

Below: A space-saving, swivel-arm wall rack that we painted white:

Below: A handmade Sandhill Crane figure (via Etsy) floats above the crib.

Below: We chose a convertible mini crib from Bloom that expands in size and adapts in style when outgrown. Click here to read the full post about this piece, which we first assembled at the Cottage.


Below: A vintage wicker, toy lantern dangles from a wall hook from Connected Goods:


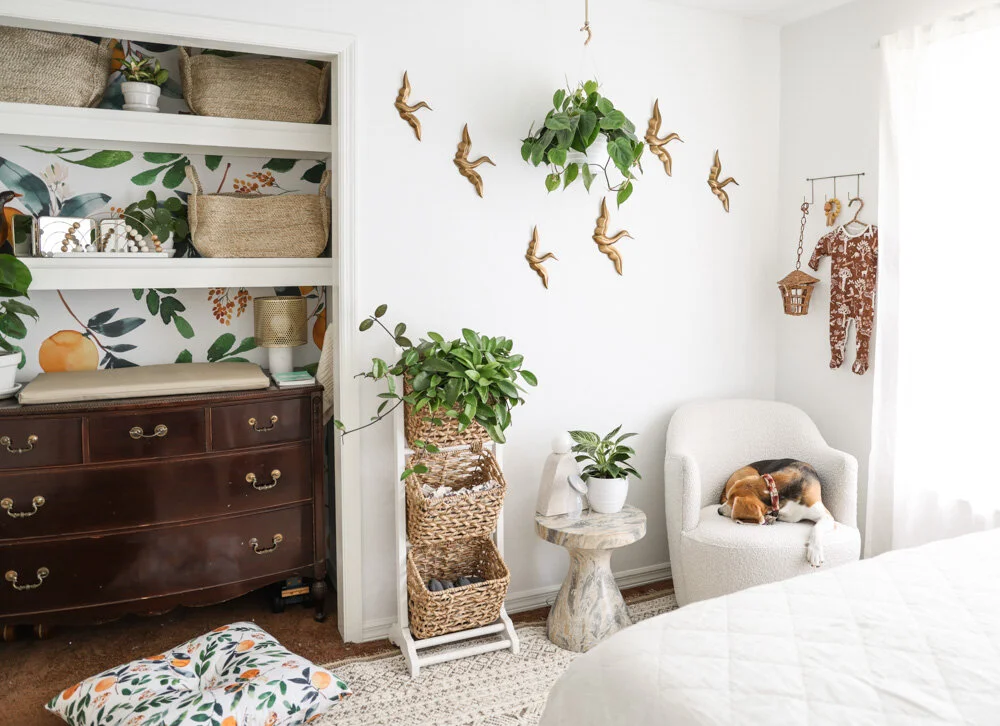
Before + After: Wallpaper Hack - How We Hid a Textured Wall
As short-term borrowers of our current, temporary living space (which is partially furnished and accessorized), we’re endeavoring to strike a balance between making it comfortable for our lifestyle, while also trying not to disrupt the space irreversibly. (Read more about my feelings on this balancing act via my previous post, and discover where we are and why we’re here via this entry from January.)
In our space, there’s a little nook in the multitasking nursery + playroom + bedroom, which I knew I wanted to turn into something special for our second baby, who arrives this spring. Other than the crib, this spot will be our newest family member’s only dedicated zone.

While envisioning the room makeover from across the country prior to our move, I’d pictured using a bright, playful, peel + stick wallpaper that would wrap around the full cubby, adding visual interest and depth to the otherwise static space.


… Then I remembered that the entire room (which was built in the late 80s/early 90s) has textured walls. Naturally, wallpaper won’t successfully adhere fully to textured surfaces. And even if it did, the details of the wall would show through.
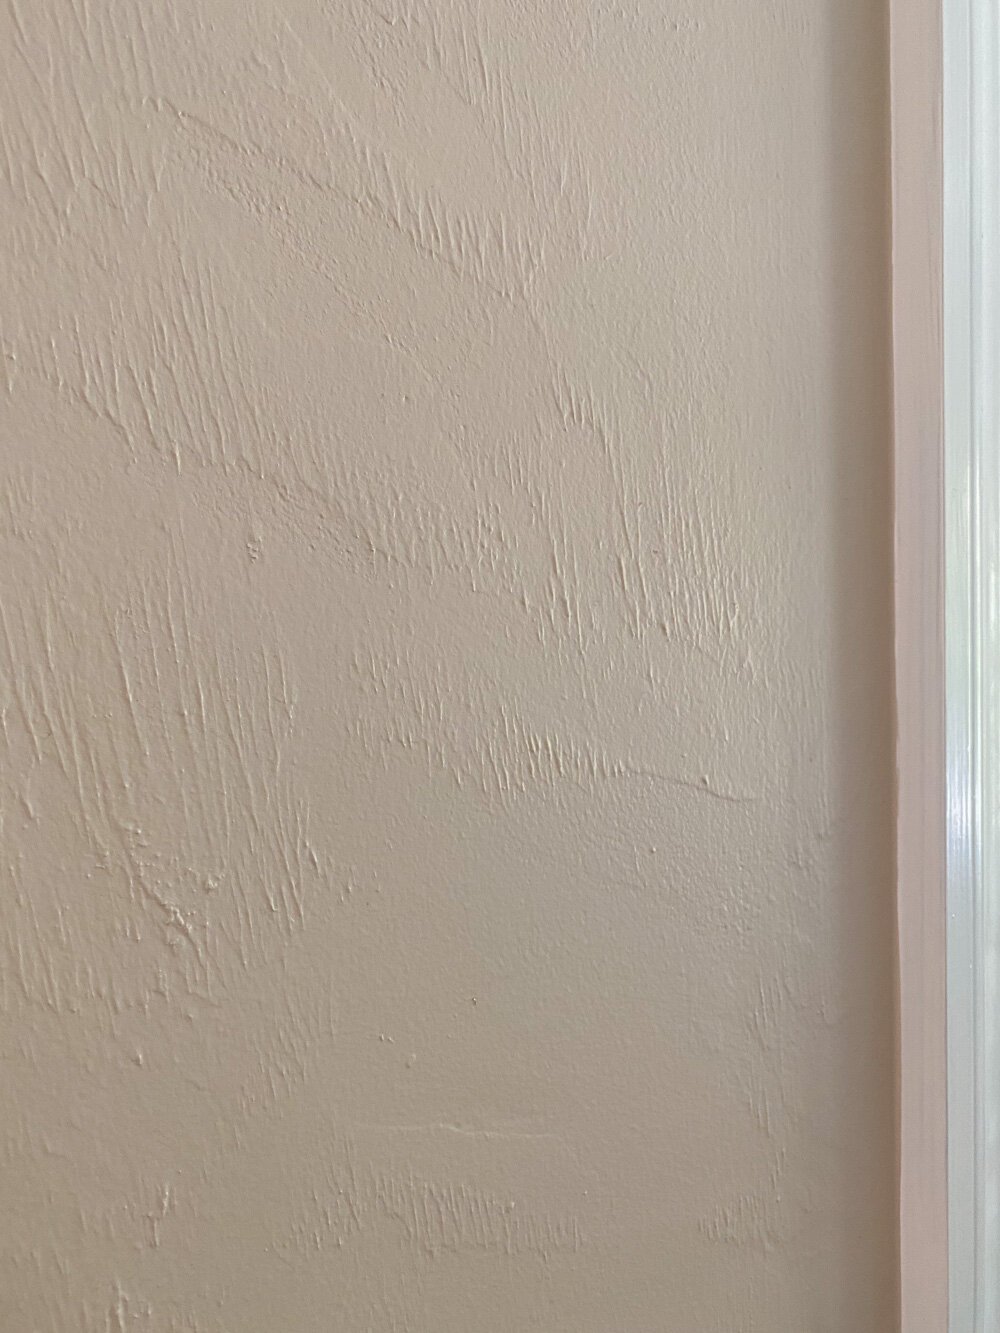
Fully resurfacing or masking the walls (like with beadboard) isn’t an option. We’re not here long enough to make the cost and footprint worth it, plus a change of that magnitude feels like a disrespectful level of change to introduce to a borrowed suite. We did, however, update the walls to Pure White, replacing the brown-beige color that was here upon our arrival. Still, the room needed something more to make it feel special, and I wasn’t willing to give up the vision for the nook.

I decided to attempt an inexpensive little hack in order to incorporate the peel + stick paper and hide the textured wall of the cut-out. We went to The Home Depot and picked out a single, thin panel of plywood that is lightweight enough to easily hang from a wall, but sturdy enough to resist major warping from humidity.

While there, we worked with an employee to cut the panel into slices sized uniquely for popping into the three divided sections of the nook. For the larger, lower slice, we used one uniform panel. For the two remaining areas, we puzzled together the plywood with neutral-toned tape (so it wouldn’t show through the wallpaper,) in order to keep the panels somewhat flexible for sliding in and out of the tightly built-in shelving. We gave up on the idea of the full wrap for the sake of our sanity, hoping that if we could pull the hack off for the back wall it would be enough to scratch the itch.

We covered the panels with a peel + stick wall mural. I chose the mural version instead of the wallpaper, as I preferred a wider spacing / larger print of the artwork for this particular project, rather than a tightly repeating pattern. I selected an orange grove design as a nod to Florida, ushering in the rich greens and playful but watered-down terracottas I’d planned to use within the room.

Thankfully, the peel + stick mural was forgiving, as Adam and I had to reset it a few times to get the layer as smooth as possible over the untreated plywood. The application took about an hour, as I’m in my 8th month of this pregnancy and my range of motion is getting more limited by the day.

To our delight, the panels popped perfectly into the cubby, and a simple screw driven into either side of each panel is enough to hold them in place.

I can’t change the carpet or the dresser, but thanks to the mural I’m no longer bothered by those features. The simple decluttering of the shelves and the addition of the bright paint and orange grove artwork were enough to make the visual and emotional impact I’d hoped.

Our 4 year old likes it, as do we. I hope his little sibling does, too. We’ll find out soon!
Sources:
Jute Baskets: Will & Atlas
Abacus: Etsy
Clothing: Primary Dot Com (Use code WHIT25 for 25% off)
Wall Mural / Paper: Society 6
Duck Baskets: Vintage via Etsy
Changing Pad: Gathre