
Eco-Friendly Wood Floors & Ceilings
Eco-friendly, safe wood floors and ceilings from responsibly-soured materials
We’re currently building a 900 square foot cottage in the woods for our family and small business.

We want to be responsible stewards of the environment and use reclaimed and recycled resources whenever possible — from hand-me-down furnishings (and plants!) courtesy of our neighbors, to reimagined building materials.


As such, for truly eco-friendly and healthy wood floors and ceilings from our region, Adam and I looked to The Goodwin Company. Not only are their products created with responsibly soured wood, but their entire business — from the log recovery process to their sawmill grounds — is fascinating.


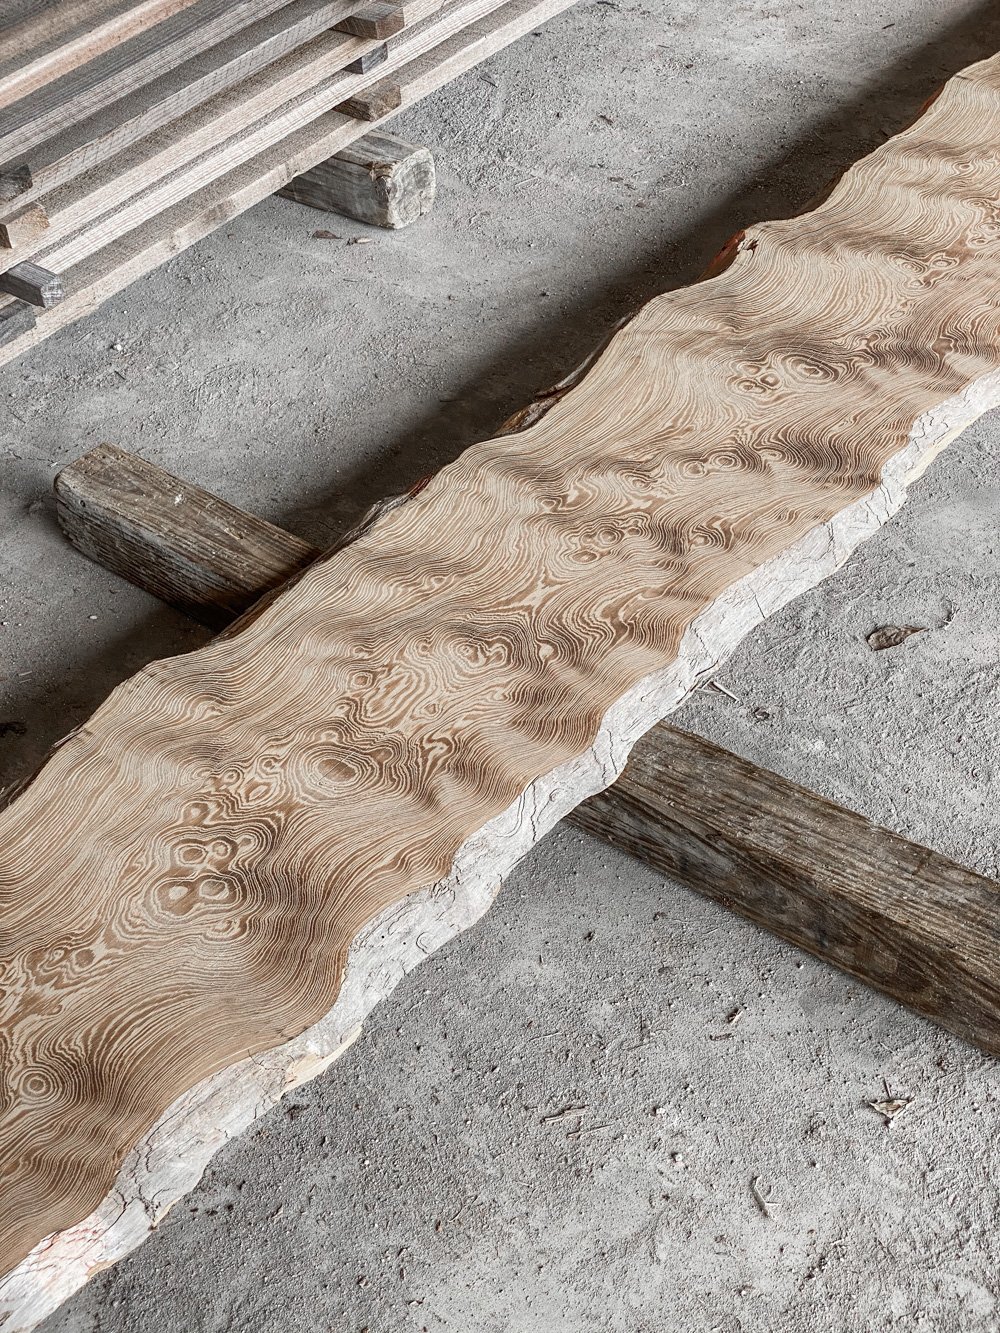
Goodwin works with state-permitted divers who recover, by hand, sunken logs of precious Heart Pine and Heart Cypress that were lost during river transport a century ago.

When Goodwin’s dive partners recover these logs from rivers, they do so in a way that preserves the underwater habitat. Goodwin actually spearheaded the responsible legal and industry standards for this practice, and their River Recovered wood comes from rivers close to the sawmill.

The logs are stored safely and naturally on-site. Over 600 are in their pond, which is filled with wildlife:

Goodwin also uses old-growth trees toppled by storms, and wood rescued from demolition, breathing new life into beautiful antique wood that would have otherwise been destroyed or sold to mills not practicing sustainable manufacturing.

Goodwin even reuses the sawdust from their mill, providing it to select blueberry producers to help crops grow.

Stay tuned for the reveal of this special wood in our little cottage. And, in the meantime, you can read all about Goodwin’s environmental mission here, and learn more about their process on-site via their Instagram channel.


Eco-Friendly Organization Tools
Tips for organizing, and living mindfully, beautifully, and practically in spaces of all sizes.
I’m delighted to be featured on the UASHMAMA blog today, sharing tips for organizing, and living mindfully, beautifully, and practically in spaces of all sizes.

I answered such questions as:
Many people want to de-clutter and live with less, but generally don’t know where to start and what to let go of. Do you have any tips for those who are just beginning the process of a living with less lifestyle or mindset?
… as well as:
When thinking about designing in a small space, should you prioritize design or function? Or can you have both?


9 Tips for a Lower-Impact, Practical, Temporary Living Space
Ways to make a temporary space function efficiently and less wastefully through planning, decor, creativity, and patience.
We’re starting off the new year exactly as we closed out the previous year…. in limbo. (I should note that I’m typing these words with a lack of gusto, but no lack of gratitude.)

At this point last year, we started packing up our holiday decorations at the Tiny Canal Cottage and, once the festive frills were gone, we simply kept packing. We eventually wrapped up our small business and 10 years of life into a fraction of a shared, cross-country moving van, and relocated too a temporary space on the East Coast. (Read about our attempt at a low waste, long distance move here.)

The space was meant to be our home for around six months while we awaited the build of a little ADU cottage in the woods of North Central Florida. However, we didn’t find a general contractor for months, as new construction is having a (stomach-turning, tree-uprooting) boom in North Central Florida. Then permit process took an additional five months, and — on top of that — global supply chain snags then came into play.

So six months turned into eleven, and here we are. But the build is, thankfully, FINALLY underway.
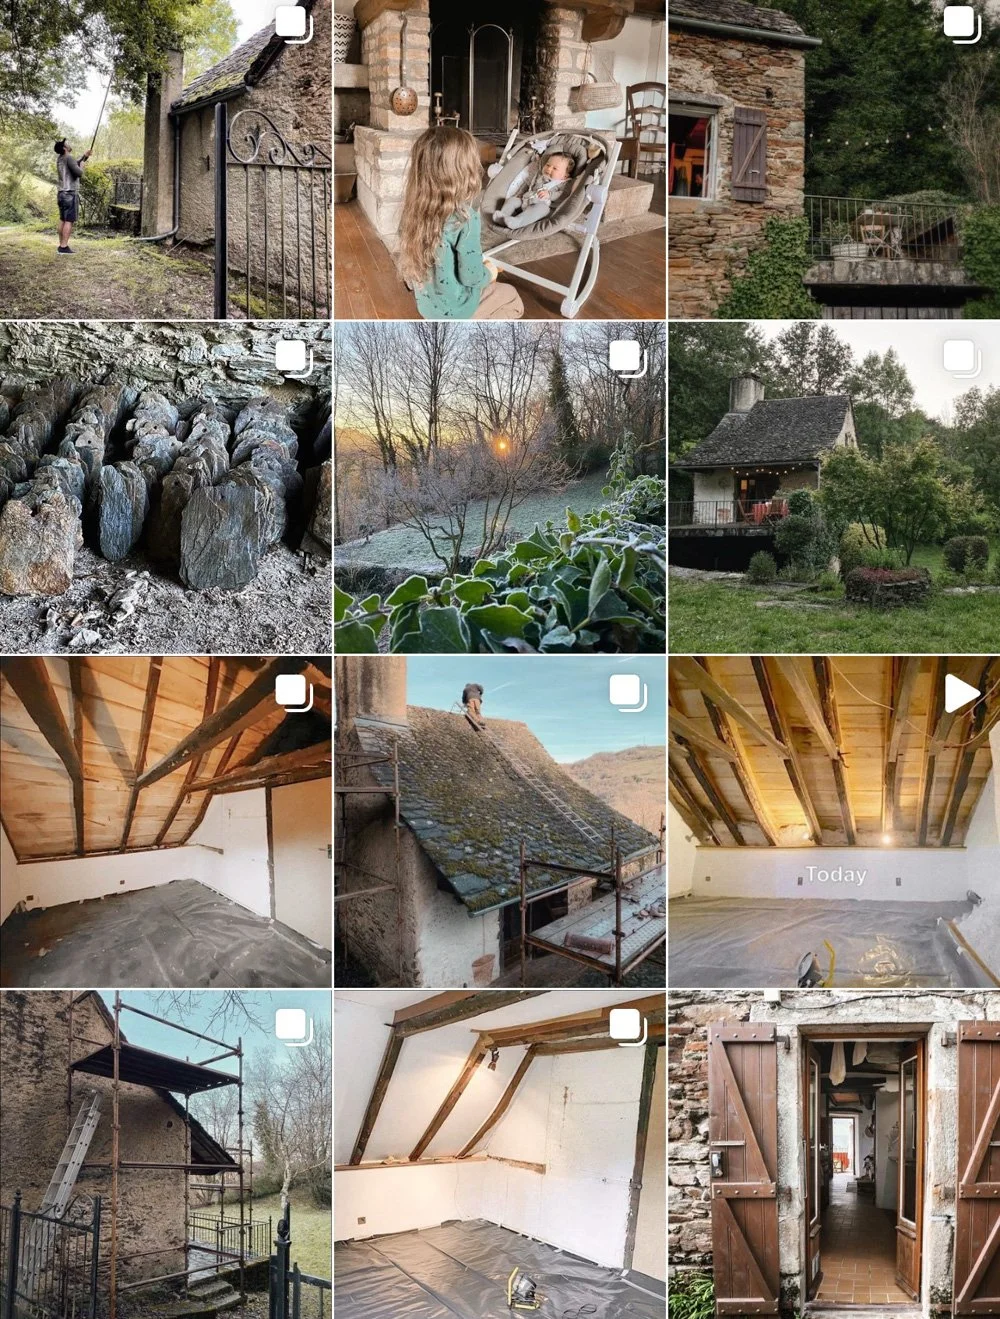
Surprisingly, we’ve had better luck in France with our little, shared Farmhouse. Thanks to our long-standing roots in the region, we quickly found local contractors and friends to begin the restoration of the our little, shared farmhouse since we can’t be there year-round just yet. I’m giddy with delight that this unique project is humming along marvelously, and I’m publishing regular updates on a secondary Instagram account: @TinyFrenchFarmhouse.
Overall, 2021 was a doozy of a year for us to uproot our lives and dive willingly into a state of ongoing upheaval. But the situation, while not ideal, has certainly had some very significant perks. All in all, I believe the move was the right decision. But the right decision is often not the easiest one to make, and this has been a bumpy road to traverse.
As someone with a full business and career in the Home industry, I’ve been looking for ways to take this experience and turn it into something helpful. I’m still seeking the mental bandwidth and available moments to conceptualize and execute whatever that would look like. So, for now, a humble blog post will have to suffice.

As far as personal matters are concerned, my main concerns regarding our temporary living arrangements were two-fold:
How would we make a temporary space designed for adults FUNCTION well (and safely) for us as a family with a pre-schooler, a newborn, two dogs, and a small business?
How would we keep environmental impact light without our usual belongings, practices and habits in place? (Especially during the pandemic, and in a far less eco-minded community than we were used to.)
Note: Before I jump into the following takeaways, I should distinguish what I mean by a “temporary space.”
First off, I’m not a young graduate just starting out on my own, nor am I in an industry that requires me to travel often for long stretches of time. I’m 40 years old, and I have a family, as well as a business based on the Art of Home. As such, I had believed my days of nomadic living to be behind me.
Secondly, technically our Tiny Canal Cottage was temporary, as we were renters who could’ve been asked to vacate at any time. But, despite the fact that we rented, it was our HOME. We knew that we wanted to invest in it as fully as possible, because we intended to live our lives to the fullest there as long as we could.
Our current situation is like a bridge for us. We’re slowly crossing over, sweetly mourning the life we left (as I expect we always will), while excitedly tackling two very different living projects ahead of us. The rooms to which we currently have access are not open for us to transform as we normally would. I liken our current existence to living in a loving, comfortable Airbnb. We’ve moved in and are using it to the fullest, but it’s not our own.
So, with that, here’s some of what I’ve learned, hugely condensed.

Don’t Be Trapped by a Space’s Intended Use
As is often the case with a small space, temporary living situations might need to multitask, or function in entirely different ways than their intended use. And that’s okay.
It’s. Just. Temporary.
For example, we’re using the upper floor of a single family home. The kitchen is on the ground floor, and the sounds from it carry throughout the entire house. When I was expecting the arrival of our second child in April, I knew that the last thing I’d want to do after breastfeeding and then pumping every two hours is trudge up and down the loud stairs in the middle of the night while exhausted and attempting to not wake the dogs or disturb the rest of the household. So I had to find a way to lightly convert part of the second floor bathroom into an area where I could clean / boil / dry pump parts, safely store breastmilk until he morning, and so forth. Was all this the stuff of Instagram dreams? Definitely not. But did it work just fine, while keeping everyone else asleep and preventing me from tumbling bleary-eyed down the stairs at 3am? Yes indeed.

Fully Ignore Decor Rules
To piggy-back on the above, sometimes you just need a means to an end in a space that’s not yours, so go ahead and break the rules if that’s what works. In our case, we have access to two bedrooms (filled with furnishings and items that aren’t ours), but the typical two bedroom layout was no longer working for our daily lives based on safety of the children and various parenting responsibilities. So Adam and I recently squeezed the provided queen bed + full bed, and our daughter’s crib into one (packed) room, freeing up a safe play area for both of our kids in the remaining bedroom. For now, it all functions exactly as we need it to, and we can put up with the unusual layout since we know it’s not forever.
Note: Our farmhouse and future cottage only have 2 bedrooms as well, but we will have the ability to equip and arrange them in a way that suits everyone’s needs.)

Pack with a Plan / Take What You Need
I’ve never been a fan of storage spaces. Ashlee Piper goes into the waste and excess involved in the storage industry in her book, Give a Sh*t, which I both recommend and refer to often. But my family has had to keep the vast majority of our belongings in a storage unit for the past 11 months while our little cottage is still being constructed and the shared farmhouse is being restored. Knowing that this would be the case for quite some time, we wanted to prevent financially and ecologically wasteful practices, like the repeat buying of items we already own but lost track of in storage, or keeping reusable goods tucked away in moving boxes while we churn through single-use alternatives for the time being.
So we planned accordingly, either dragging what we needed with us in our suitcases across the country, or making sure that the moving boxes we needed most for our attempt at a lower waste lifestyle were clearly marked and easily accessible upon pickup and delivery.

Plan for Setbacks
What we didn’t plan for was the (very) extended time our Cottage construction would take, so we failed to wisely pack and mark our first child’s hand-me-down items for his little sibling beyond a certain point. In other words, we considered the need for access to newborn goods, but not 9+ month goods. Same for seasonal garments. While there is only so much we can accommodate in our temporary space, we could’ve better planned the packing, labeling and placement of things we’d need if and when our finish line became pushed further back.

Do What You Can (Within Reason) via Limited Decor
Functional decor such as plants, portable lighting sources, mirrors, bedding, and rugs can make a large impact in both the look and feel of a room. If these are items that you already have on-hand, or ones that can be repurposed in your next space, why not go for it— temporary space or not.
Find a Stop-Gap with Extended Uses If Needed
Our homes can make all the difference in our lives— this why I love what I do for a living. If a living space is preventing you from being able to function the way you need for your mental health or livelihood, perhaps search for a stop-gap if possible. (A rental studio, an external office, a gym membership, a library card, etc.) Personally, I need a small space for my job of course… but small spaces are also my muse. For whatever reason, I feel infinitely more creative in limited square footage. This is one of the reasons why we built our 114 sqft greenhouse over the summer. It scratched an itch both personally and professionally, while also providing us with a versatile structure that we’ll hopefully have the opportunity to enjoy in evolving ways for years to come, extreme weather events permitting.

Set Ego Aside
I’d flat-out be lying if I said I didn’t struggle with our current setup. Again, I’m ever-so grateful, but it’s still a pride-swallowing situation as a 40 year old who is also the main earner in the family to tuck her family and business into someone else’s home. However, I can say with all sincerity that when I take external voices and societal pressures out of the picture and just listen to my family’s needs, this situation is 100% fine for us for the time being. We’re learning what we need — and don’t need — in this region and community, and we’re experiencing incredible moments as a multi-generational family that will stay with us forever.
Stick to a Budget
It can be tempting to go all out in a temporary space. (“I should add some on-trend bead board! This carpet has to go! That lighting fixture is not my style!”) But if you know for a fact that a more preferable living situation is just around the corner — and if budget is a consideration for you as it is for us — then consider every decor and design project you forego in your current space to be another project you can tackle in your more accommodating future home.

Work With What You’ve Got
Look around you to find the hidden uses and unexpected joys of your temporary space.

The following is an extremely specific example, but I think it’s a good one: Our Venice cottage had a built-in bed with an integrated headboard that turned out to be a perfectly cushioned spot for hours and hours of playing games of suction cup darts with our little one. Now he uses zero waste Stabilo art sticks to safely draw on the greenhouse windows while I work.

Put your temporary space to extended use whenever possible— unanticipated gems might perhaps reveal themselves, sparking moments that make a less-than-ideal situation into something you’ll cherish down the road.


Decorating with Nature
I am starting to consider myself more of a facilitator or celebrator of nature than an “artist.” - Ava Roth

Ava Roth is a mixed-media Artist, a Bee Keeper, and — in her words — a Honeybee Collaborator. Her works first caught in my eye (and took my breath away) via Instagram. From her use of found quills, willow, antler sheds, leaves, and above all, beeswax, to her way of celebrating and nurturing wildlife, to the “fundamental” slowness in her creation process, I respect her methodology as much as I am enamored with her artwork.
Note: All animal-derived materials have — of course — been ethically sourced.

We were lucky enough to become the stewards of an incredible piece by Ava, who agreed to the below Q&A for those of you who, like me, are interested in her creations and mindset.

I’m fascinated and inspired by your use of natural materials for your work. What are your preferred materials, and why?
My primary inspiration is the natural environment, and at this point almost all of the materials I use are organic. However, this was not always the case. For many years I would simply incorporate little bits of natural ephemera into whatever I was making. Over time, I have learned to let the materials not just appear in my work, but to actually dictate every aspect of the process, leaving as delicate an “artificial” touch as possible. Increasingly, I find myself doing so little to the natural objects I have my hands on, such as leaves or crystals or porcupine quills, that I am starting to consider myself more of a facilitator, or celebrator of nature, than as an “artist.”
Beeswax is the cornerstone of (almost) all my work. Using beeswax to make art, which is known as encaustic, is a very ancient practice. Encaustic was used by early Egyptians and Greeks, and was the common medium for painting before the advent of oil paints. Not only is the beeswax organic and archival, it is luminous and limitless in is possibilities for application. Beeswax is the binder that holds my work together, both literally and conceptually.


You’re a beekeeper as well as a maker. How do these practices intersect when it comes to mindset and method?
I love this question so much, because it goes right to the heart of my intentions as a maker. The answer is simple – they intersect completely on every possible level! When I first started using beeswax as a medium I was interested in bees, but knew relatively little about them. The more I learned, the more that knowledge folded back into my work, and a beautiful feedback loop took root. Having direct contact with bees is essential. It is like a touchstone, keeping me connected to the core beliefs that hold my practice together.

What proportion of your materials are foraged vs otherwise? Is the foraging an important part of the creation process for you, and if so, why?
Although I do forage for my materials as much as possible, unfortunately, I can only collect a small percentage of what I use. This is because I live in a climate that is encased in snow for well over half the year! What I don’t forage myself, I buy from local sellers who collect their local materials and sell to artists like myself (I use Etsy a lot.)
Despite the fact that I rely on other foragers, I will still claim that foraging is a very important part of my creative process. The prospect of finding new materials to work with has taught me to walk through my environment in a state of attentiveness and inspiration. Looking in this way, with searching and awe, has further opened my eyes to my surroundings. I have learned to identify trees, birds, fungus as I scoop up Hemlock cones or driftwood or White Pine needles.

How do you balance your respect for bees and other animals with the use of such materials? (Much of our community is vegan and will be curious about this.)
I am wholly dependent on the natural environment, and bees in particular, for my work, and the well being of both are vitally important to me. Like with everything, slowing down and learning and listening is a crucial aspect of respect.
Because some of my work goes directly into bee hives, people have asked about the impact of this particular project on the bees in question. I can honestly say that my inter-species collaboration is truly a collaboration, and not a top-down mandate for the bees to do my bidding. I work on their time, in their environment, in their season, and at their discretion. The process has evolved slowly over many years of careful observation and reverence for the bees. Each piece is made with non-toxic materials inside traditional Langstroth hive frames. I do not manipulate conditions, such as the structure of the hive or the time it takes bees to naturally build comb. The frames are simply slipped into the hives when pollen is at peak flow, and “finished” by bees in the dark privacy of their home.

We’re part of a culture that values efficiency and speed, and yet so many of us are craving ways in which to slow down. I imagine your work requires a phenomenal amount of time to conceptualize and create, is this true? If so, as an artist, how do you honor the process and the time that it takes to complete?
Because my work is a celebration of nature, whatever hours I spend on a piece seems paltry compared to, say, the amount of time it took for the leaf I am embroidering to grow. But the slowness of my work is not a frustration, it is actually the point. Hours and days and years spent decorating, festooning, illuminating, celebrating nature is the only way to honestly engage with nature. The slowness is fundamental. At it’s core, my work is about exploring the boundaries of where humans collide with the natural environment. My purpose is to both discover and offer a more beautiful outcome of this encounter than the one we are faced with in the news every day. For me, that mission requires an investment of my imagination, my mind, my skills and most perhaps most importantly, my time.


Dressing the Tiny Greenhouse for the Holidays
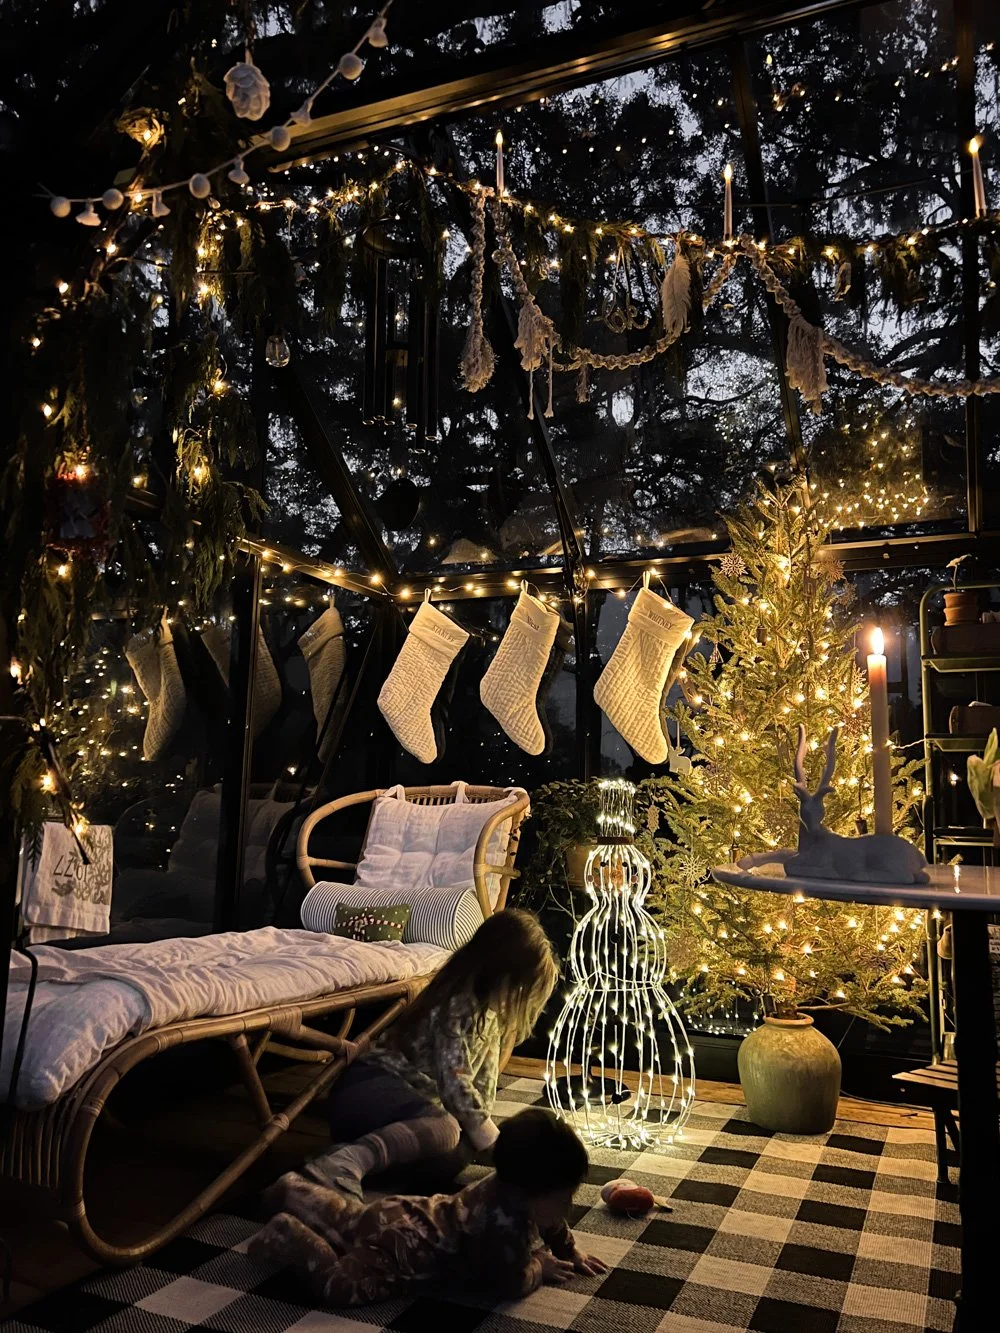
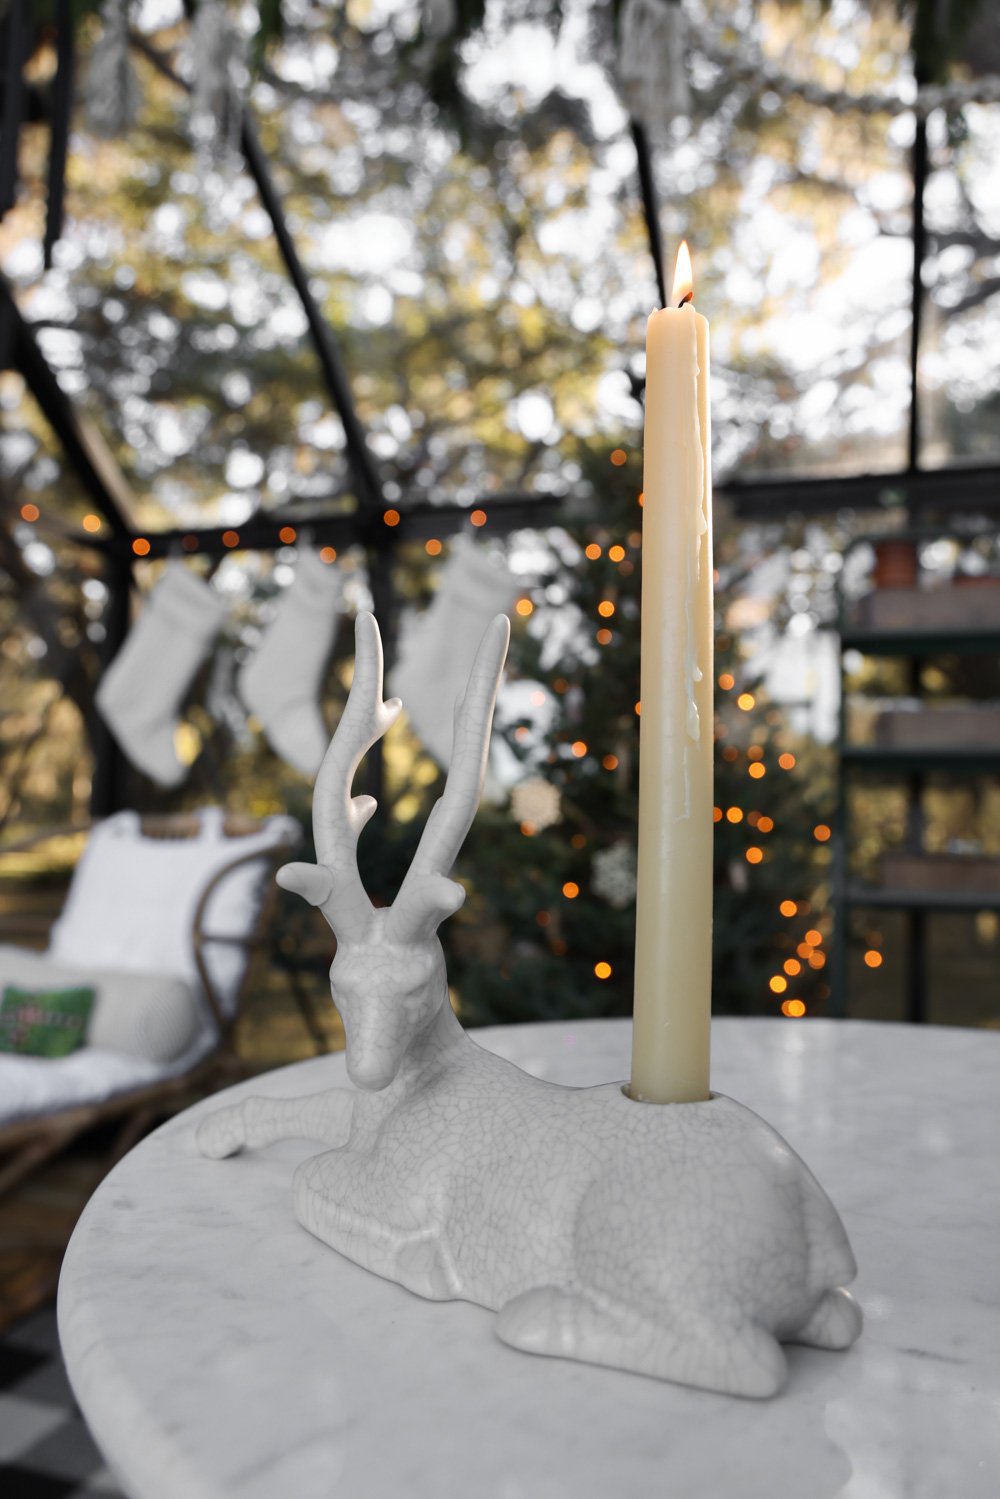
This holiday season, I wanted to create a little bit of magic for our 5 year old, who has shown immense compassion, understanding, patience, and love this year. As were still between homes (our small ADU cottage is under construction, and the farmhouse roof is being replaced/restored), I figured that decorating our tiny, mixed-use greenhouse would do the trick:

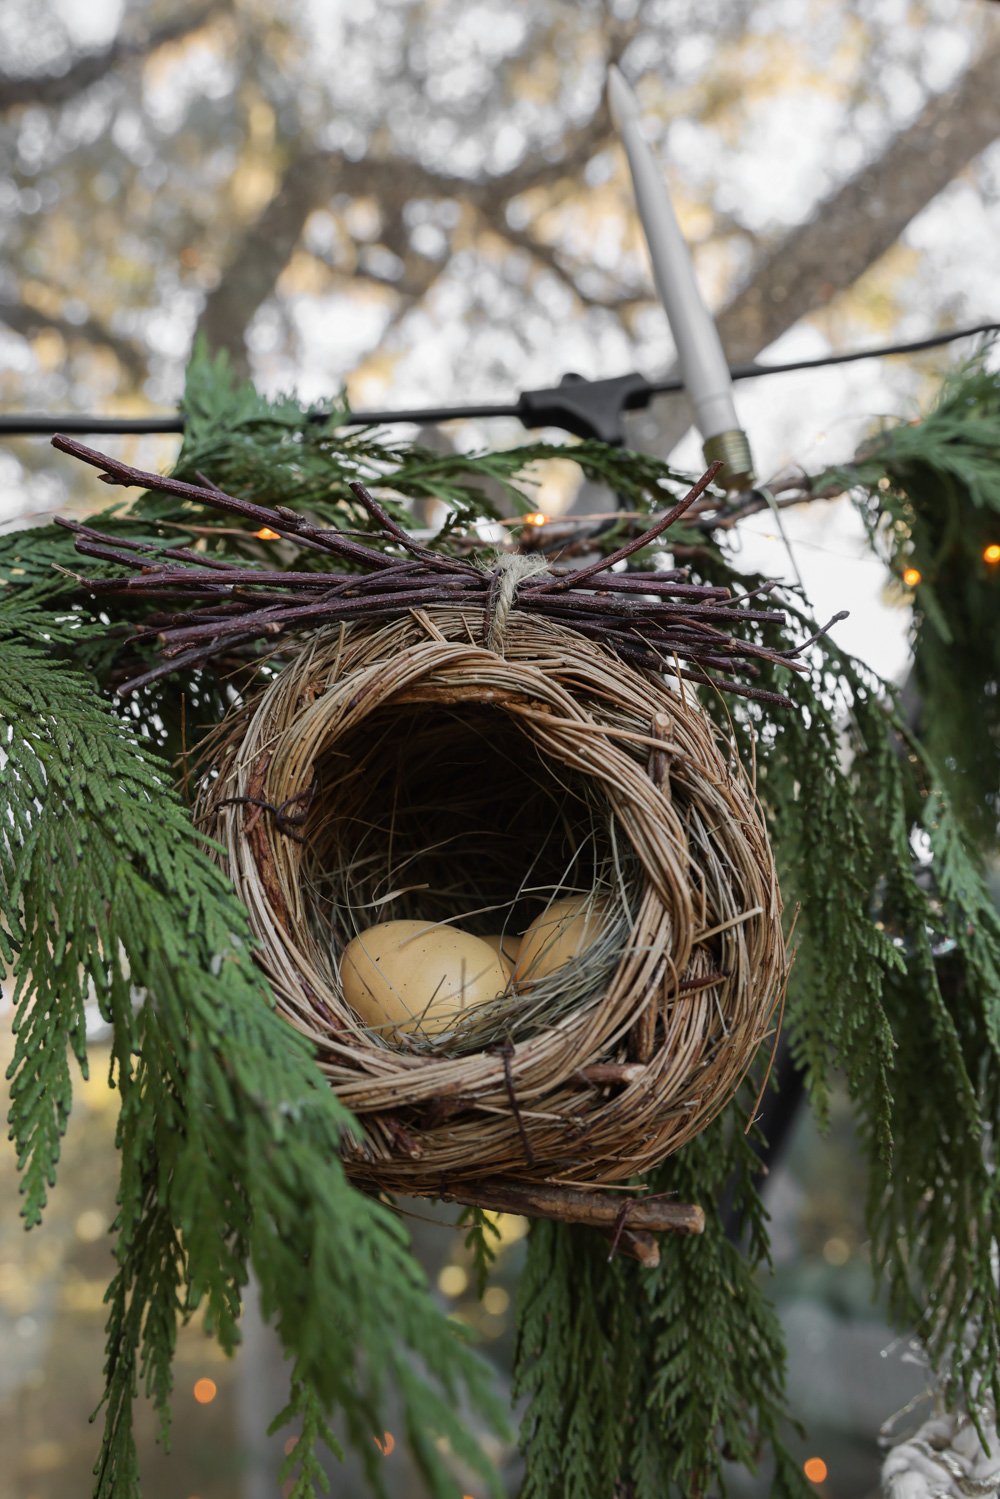
We’ve long kept all our holiday decor in a vintage suitcase, with the exception of the live tree, and garlands made from discarded clippings, which we get locally.

In celebration of our tiny cottage and the canals, we got one new ornament this year: a green canoe, just like the old one we had when living in Venice.

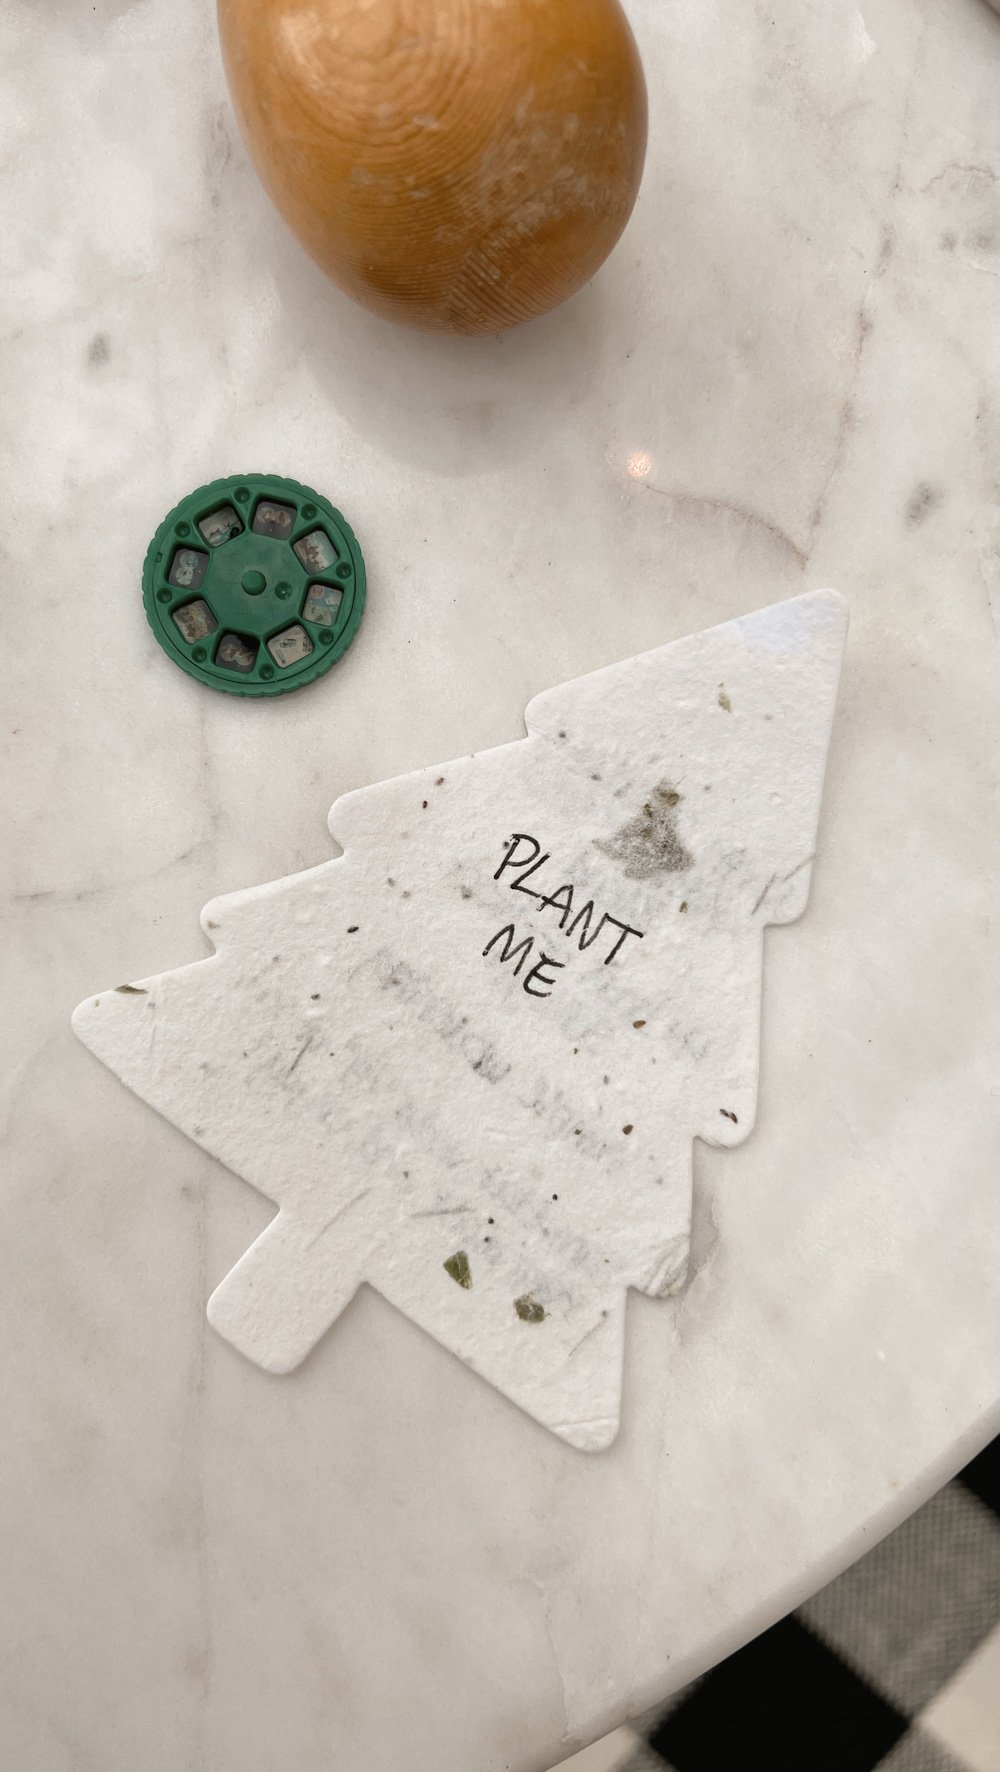
(Pictured below: A sampling of hand-me-down, add-on, and handmade stocking-stuffers for the kids. They don’t have to be new, pricey or flashy to be exciting for the littles.)


The greenhouse is powered by an extension cord that leads to the main house. There’s one plug-in, multi-strand string of warm, twinkling lights for the tree and stockings, and three battery-powered strands for the garlands. (I use rechargeable AAs, as well as carbon neutral batteries from Better Battery Co.

Here are some of our ornaments, most of which we put on the sprawling garlands, rather than on the little tree. Our tree is decorated with small brass bells, and wooden snowflakes and deer that were intended to be used as gift-topper tags.
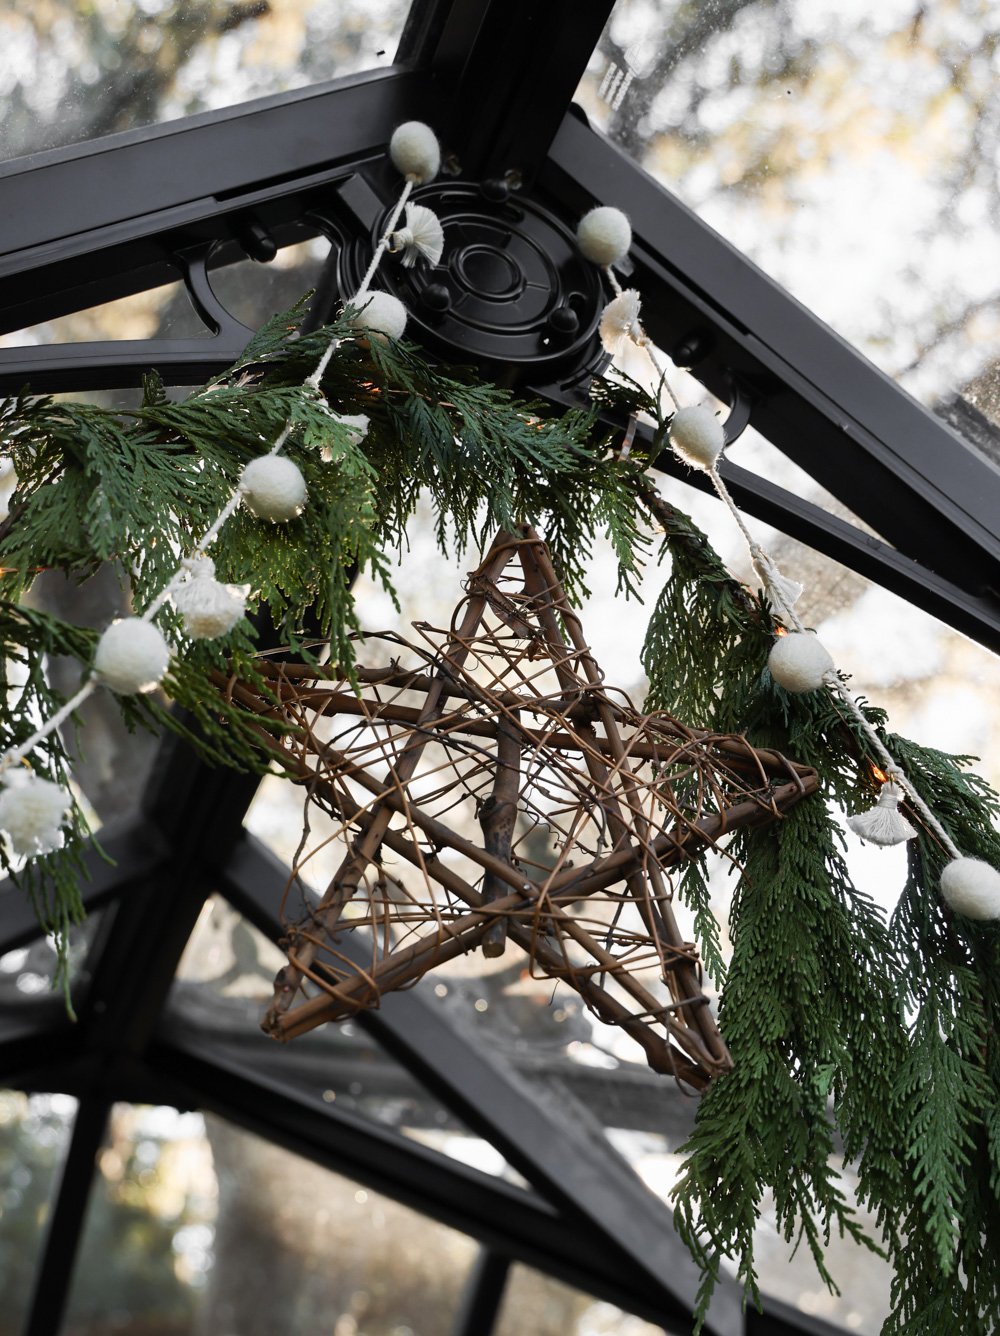


We don’t leave the lights on too long so as to minimize the disturbance of wildlife. But when the strands are switched on, they reflect off the angled panes of glass, amplifying the glittering glow.

It’s a happy little place, and I think we’ll make this holiday dressing a yearly event whenever we’re in the States for December. (The farmhouse needs to be further winterized, which is a project we’ll have to tackle later down the road for budgetary reasons.)
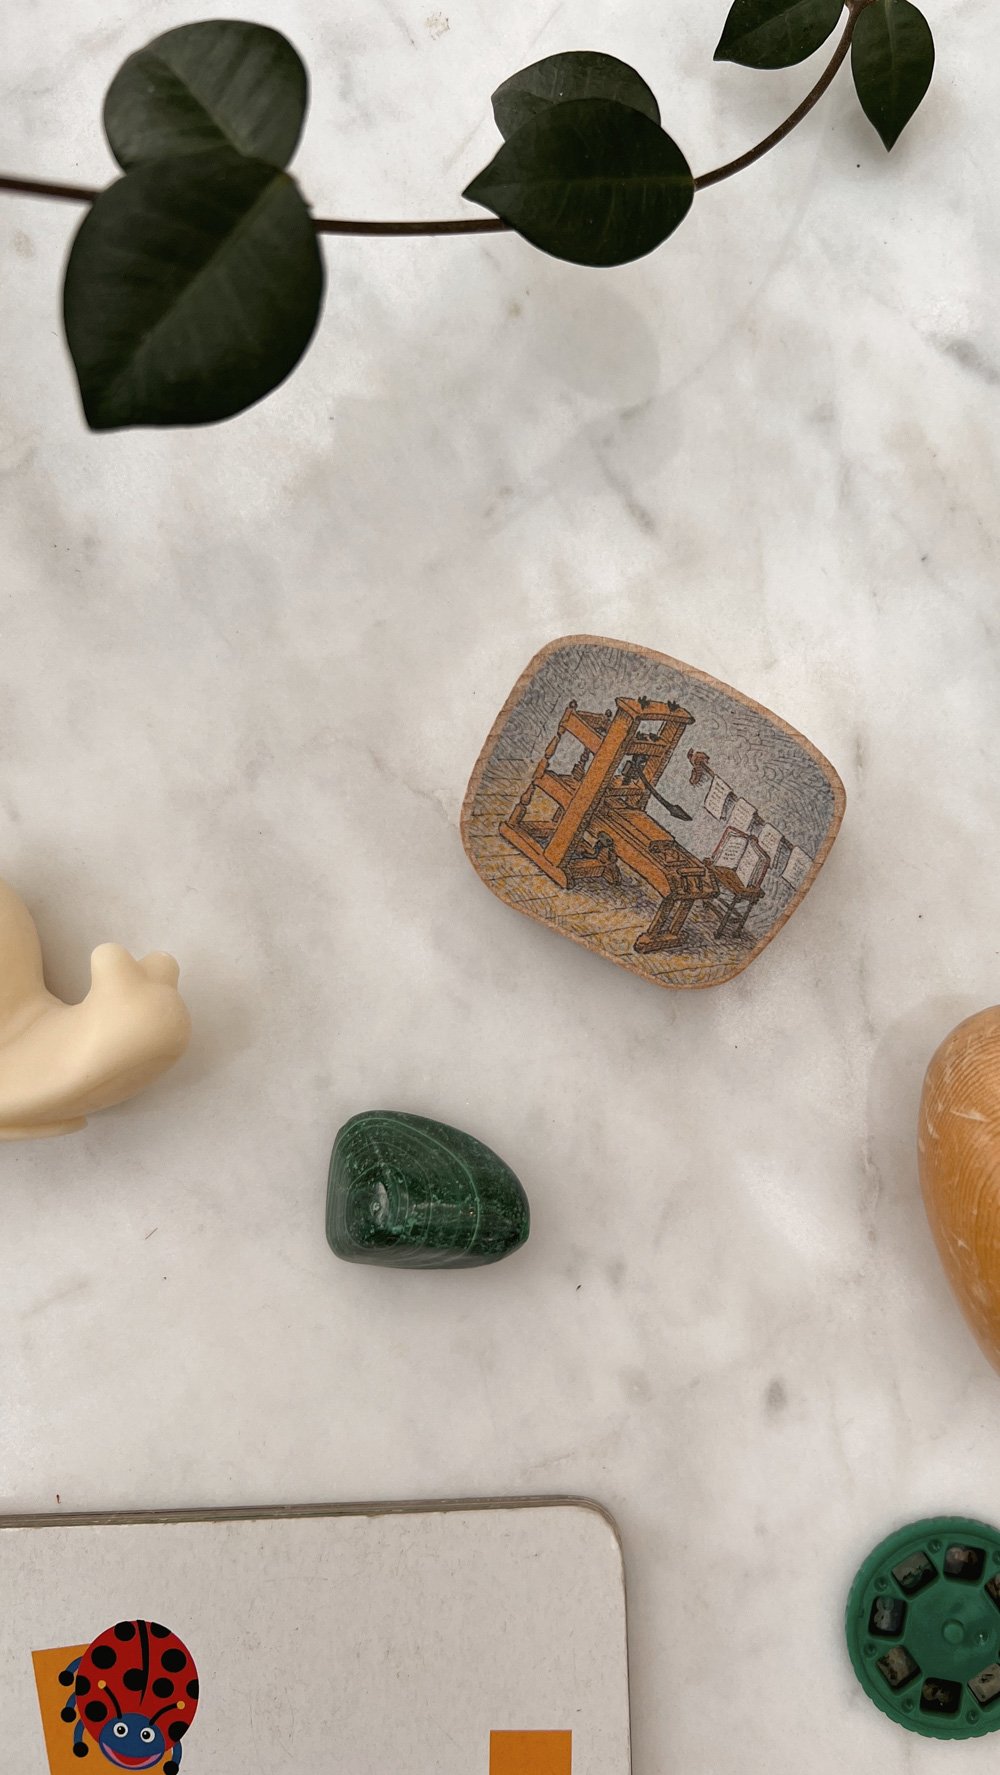
(Pictured below: The yearly stocking-stuffers I get for myself.)

Although we are extremely eager to have a house of our own soon — either the farmhouse or the ADU — this special space is certainly making us feel at home for the holidays.


Guide for Avoiding Unnecessary Gifts
How to politely deal with unwanted gifts— hopefully before they’re given, but also after the fact.
This is an updated, more comprehensive version of an earlier post entitled, “How to Politely Handle Unwanted Gifting.”
It’s the time of year… for unwanted and unnecessary gifts. With the planet in crisis, folks struggling financially, and families grappling with an excess of clutter in their homes after being indoors for the greater part of two years, I’d argue that it’s time we more widely accept and respect one’s decision to firmly avoid giving and receiving gifts.

But how do we kindly tell a child’s grandparents to stop sending toys?
What do we do about well-intended friends who insist on giving “something!”?
What solutions are there for rehousing the unwanted gifts that inevitably make their way through the door, despite the recipients wishes?
And what are some unique gifts that won’t further contribute to overflowing households, and — inevitably— landfills, which have a greater impact on disenfranchised and marginalized populations?
Since living in our cottage, having our first child, and learning more about the climate emergency, we began gently telling our friends and family that the absolute best gift they can give our son is an inhabitable planet for his generation and those that follow, and that giving him random stuff doesn’t help him in the long run.

For years, this conversation was easy for us, as most people knew that we lived in a tiny house that couldn’t accommodate excessive belongings. Now, as we’re in limbo and transitioning between living environments, we’ve had to remind folks that even though we’re temporarily in a larger home, we still have the same views regarding gifting. We were hit with a wave of presents for both West and his little sister when she was born. We know that everything was acquired and sent our way with so much love, but we believe that the impact of the items (from the manufacturing, to workers’ rights, to packaging, to transport, to haphazard placement within our temporary home, to eventual disposal of some sort,) matters more than the intent.

For folks who take affront, and/or just don’t quite understand our reasoning, I suggest or give a copy of The Future We Choose: Surviving the Climate Crisis, and/or Aja Barber’s book, Consumed: The Need for Collective Change: Colonialism, Climate Change, and Consumerism.
Of course it needs to be acknowledged that to ward off gifting of this nature is a privilege, as so many people are living unhoused and without the basic necessities. But, as Barber wrote in a recent* Instagram post, “The things which are said to us in childhood normalize living in a world with inequality… “ (ie: “Be grateful for your food / gifts, because so many people are going without!”) So instead of tricking ourselves into believing that we should simply continue to accept unnecessary gifts and keep our thoughts to ourselves, we’ve instead started pointing the folks who wish to convey their love in tangible form in the direction of nonprofits such as The RightWay Foundation, which are in constant need of financial and product donations.
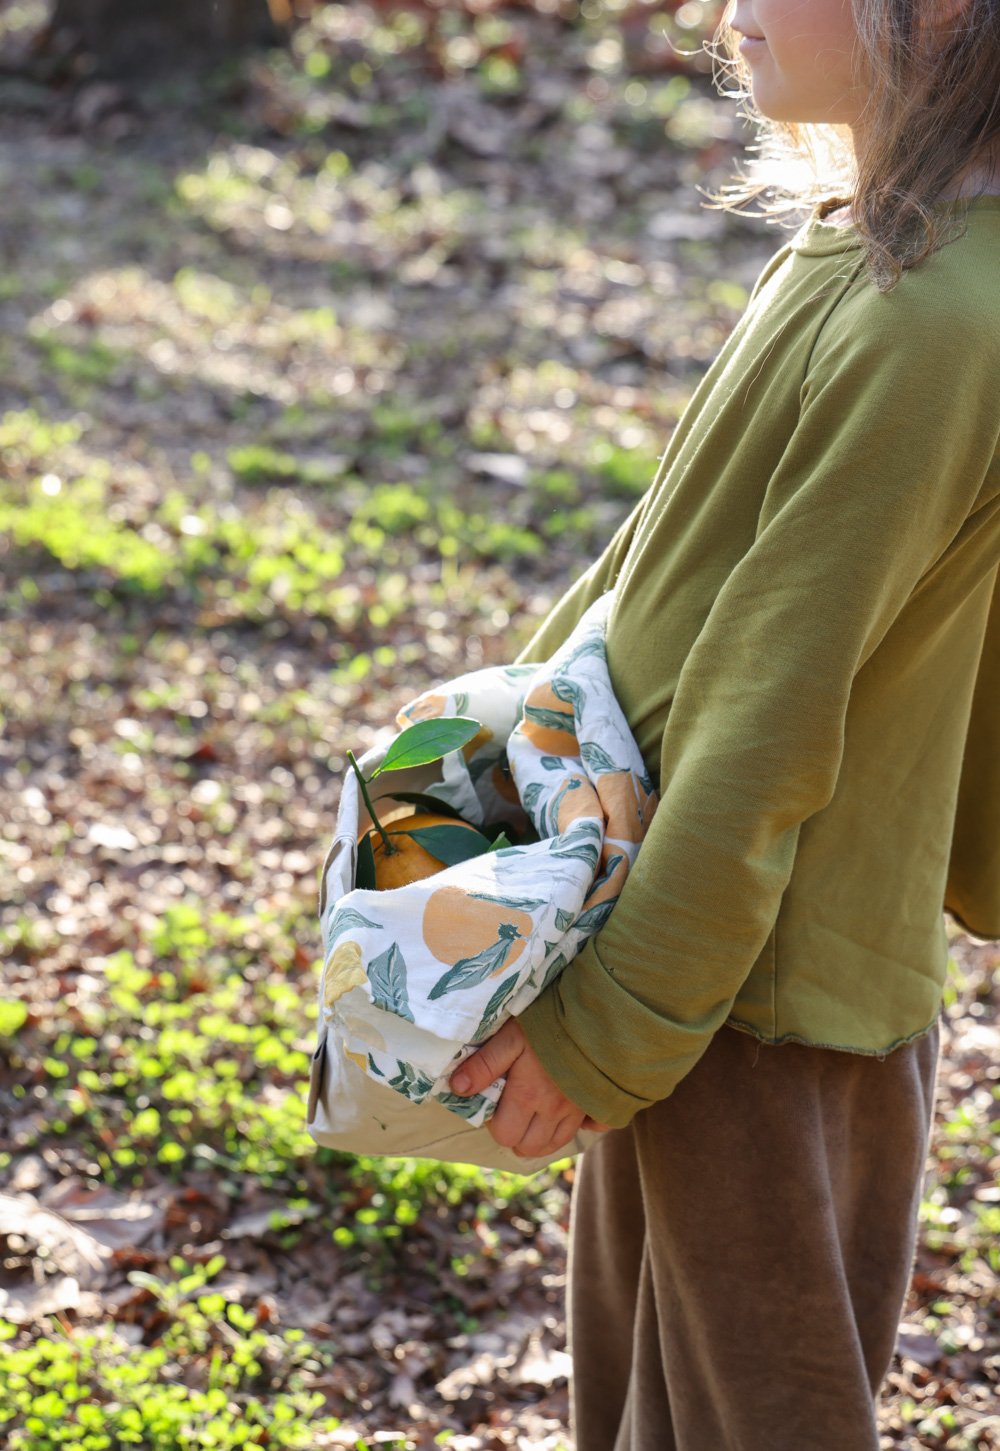
We are, however, always happy to receive children’s books, knowing that our kids will explore them thoroughly for years, and that we can ultimately pass them along to other children, a library, or a local school once they’re no longer being read.
We also embrace the idea of gifting experiences, such as museum or garden memberships / admissions, Airbnb Experiences, digital subscriptions, local food and beverage, and other such presents that support an organization or small business while also providing our family or others with a new adventure of some sort.

When it comes to regifting unwanted items, I look at it this way: If a giver circles back and asks me to reveal the whereabouts of a present they once gave us, that relationship is probably one that needs some reconsidering or deep work. And besides, there are so many people, families and organizations in need of certain goods that I feel no guilt in passing along a thing we do not need here, and giving it instead to someone who can put it to good use.
When rehousing an item, we’ve discovered that it’s extremely important to first verify that an organization can indeed put it to specific use, otherwise it is statistically destined for a landfill. Hopefully the original gift-giver would understand and support that action.
’Tis, after-all, the season to share.
(*Reference to a post by Aja Barber entitled, “Where do out human rights and and others begin?”)

Safe Housing for the Holidays and Beyond
Supporting The RightWay Foundation
My grandpa Lou was orphaned at 9. He bounced around homes, towns, and states. He watched a caregiver burn his clothes and everything he owned right in front of him. At various points he lived on a breezeway, ran away, was reunited with - and then dismissed by - relatives.
It wasn’t until he met a mentor, his rabbi, that he felt heard, safe, and guided. He took over the management and responsibilities of a scrapyard, he served and traveled in the military, he started a family, and he gave back to his communities.
When foster youth have a person and place they can count on, they can begin to pivot their energy from surviving towards thriving. This is one of the many reasons I passionately support The RightWay Foundation, and invite you to join me. (A donation link is always on my site.)

At the end of December, The County of Los Angeles Department of Children and Family Services will officially emancipate 1,370 young adults from their program, leaving them with no support. These youth will lose their housing and a stipend during the pandemic and escalating homelessness crisis. If we don’t fix our child welfare system, the cycle of trauma and poverty will continue.
RightWay’s job training, mental health sessions, housing support, and overall community services work. I’ve witnessed it first-hand, and if you sign up for their newsletter and subscribe to their Instagram feed, you’ll see it too.

Repurposed Gift Wrap with a Story
Repurpose items from around your home into low waste / reusable holiday gift wrap.
(Original post from 2020)
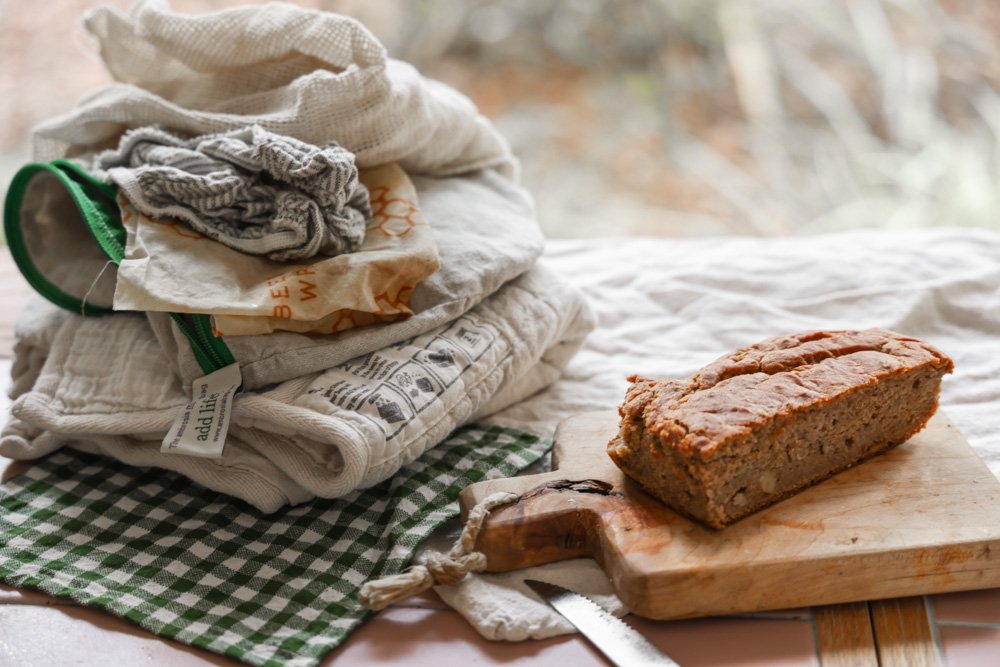
We haven’t bought wrapping paper or gift bags in years. Even though we live in a small space and don’t have many spare supplies of any sort sitting around, it’s still surprisingly easy to shop our own home for items that can be repurposed as playful packaging.

While the end result is rarely perfect, there’s so much to love— it’s original, it’s free, and it generates less waste. (Related post: Playful Low Waste Gift Wrap)

These handmade bars of soap were wrapped with completed pages from one of West’s work booklets, and topped with salvaged ribbon and tree clippings.


What I enjoy just as much as the searching and wrapping is passing along the stories behind each repurposed ribbon, book jacket, muslin bag, or fabric scrap.

Dust jackets remain my go-to for wrapping presents for kids. (We store most of these paper covers beneath our mattress throughout the year to flatten out the lines, and then grab one whenever we need some colorful packaging.)

While the illustration art is the attraction for the recipient, there’s usually a tale behind the rest of the bundle for the parents / guardians to share.

This method of wrapping is also friendly for folks who aren’t hugely into DIYs (that’s me). Plus it’s also safer this year than going to the store, as we’re meant to shelter at home whenever possible.

Below are a few glimpses of this year’s very quickly completed wrappings, as well as cleverly designed bundles that needed no wrapping whatsoever.

Above: Brown paper biodegradable tape from Net Zero Co.
Almost everything used above has a story to tell— a ribbon that has been passed down through multiple generations and households. A remnant that once held a stone that traveled the country. A string that once wrapped the weighted blanket that helped improve my sleep habits. A spare/unused shoelace from a pair of sneakers designed by a well-known creative and dear friend.

(And, of course, customized boxes of dog treats that shows the sweet faces of our pups— why would we want to cover those up?!)


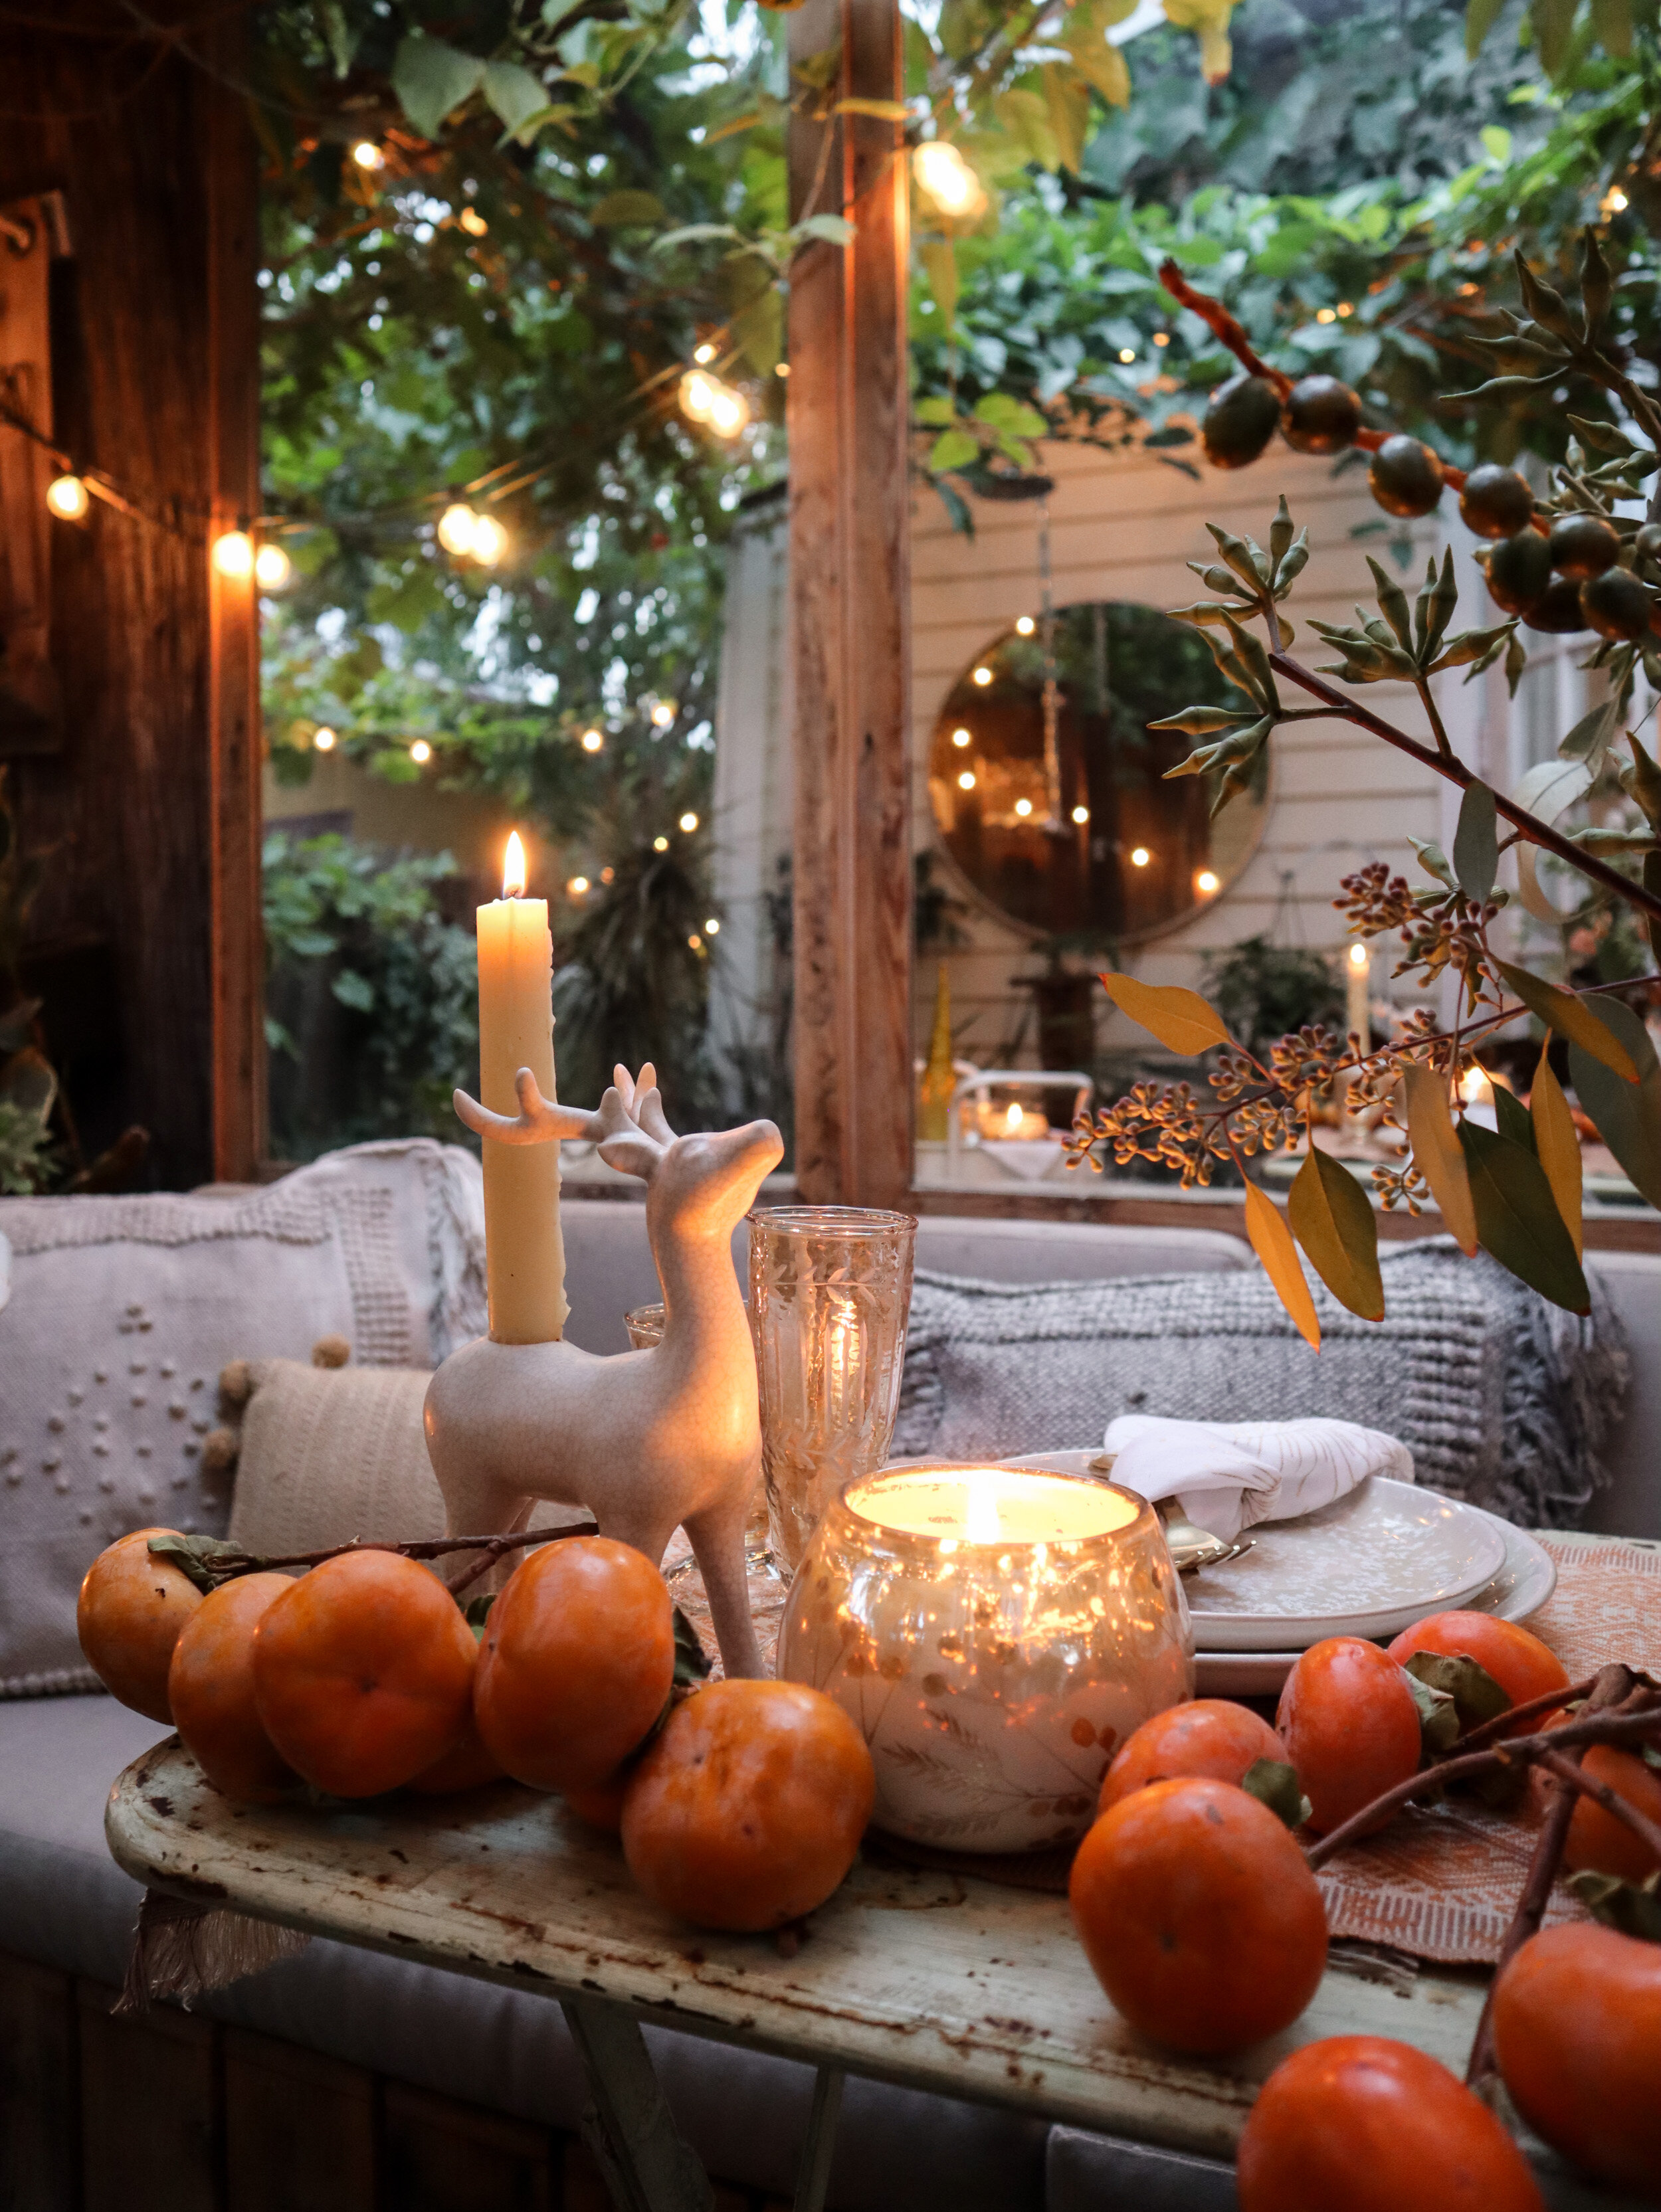
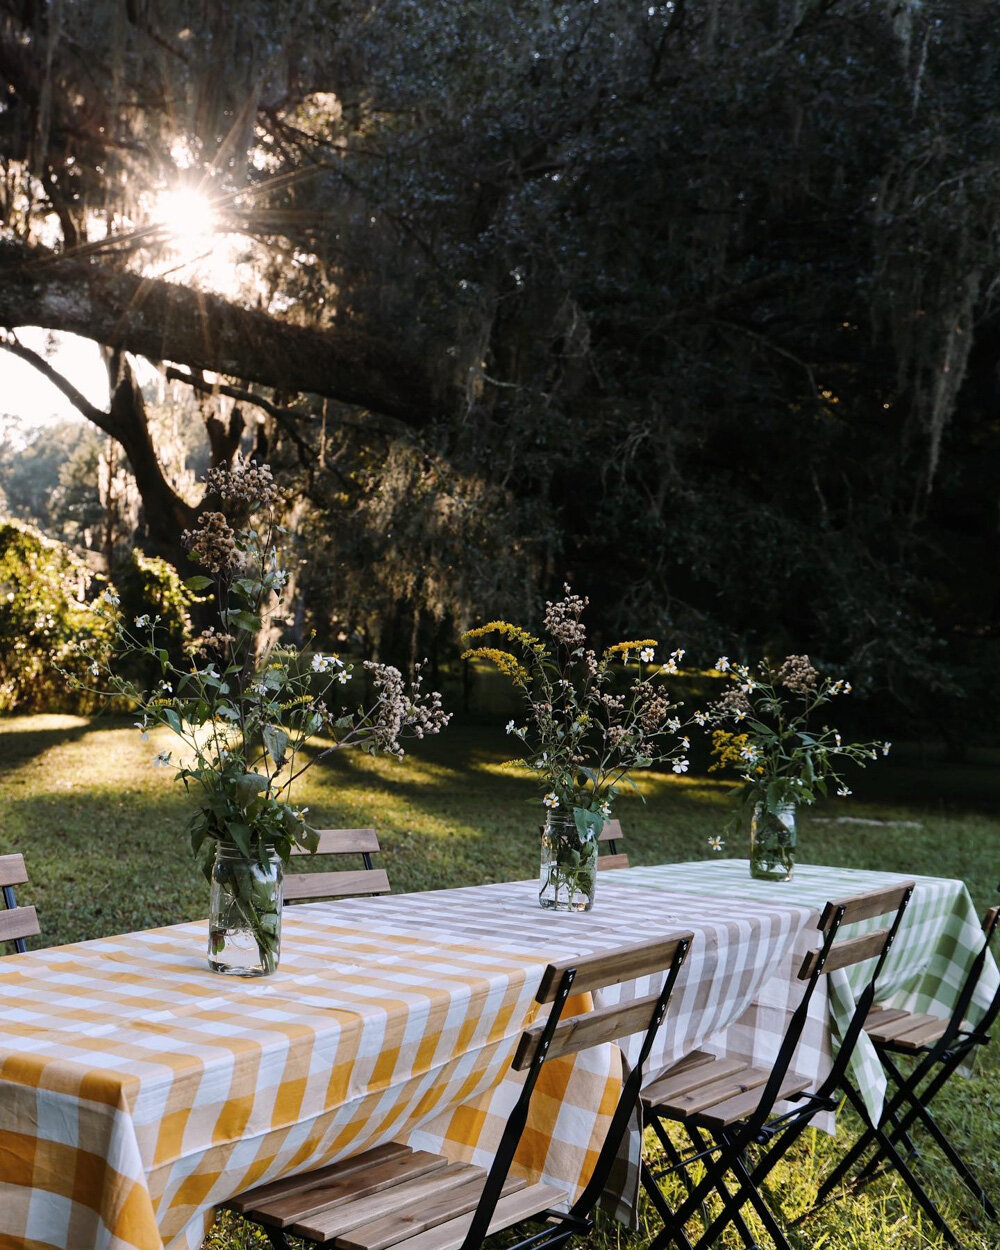
Traditional Yet Informal Holiday Hosting
Creating a festive holiday tablescape in a small home or garden.
I can’t remember the last time we hosted… perhaps late November of 2019? Regardless, I’m eager to get back to it. In the meantime, I’m resharing this informal-meets-traditional tablescape I created for Food52 during a live broadcast, in the hopes it’ll provide some ideas for folks who are entertaining in small spaces this holiday season:


Low Waste Holiday Wall Decor for Small Spaces
Creative, low waste alternatives to Christmas trees for small spaces.
Not enough room for a tree in your small space? Here’s one easy way to use fresh greenery to create space savvy holiday decor for a small home. (View the 30-second video here.)

List of supplies:
Live branches
A bit of rope
A nail or damage-free Command strip
Battery-operated twinkle lights (we use rechargables)
A zip tie (to attach the battery pack to the back of the branch)
Clippers

I simply wrapped the twinkle lights around the branch, tied the rope to either end, suspended the entire piece from a sturdy wall hook, and then added small florals and twigs throughout the branch for a pop of color and variation in texture. I carefully spritz the branch with a bit of water every few days, and replace the bright floral clippings as needed after they’ve fully dried up.

The final result is simple yet striking. And, best of all, at the end of the season the rope, hook and twinkle lights can be reused, and the greenery can go in the compost.


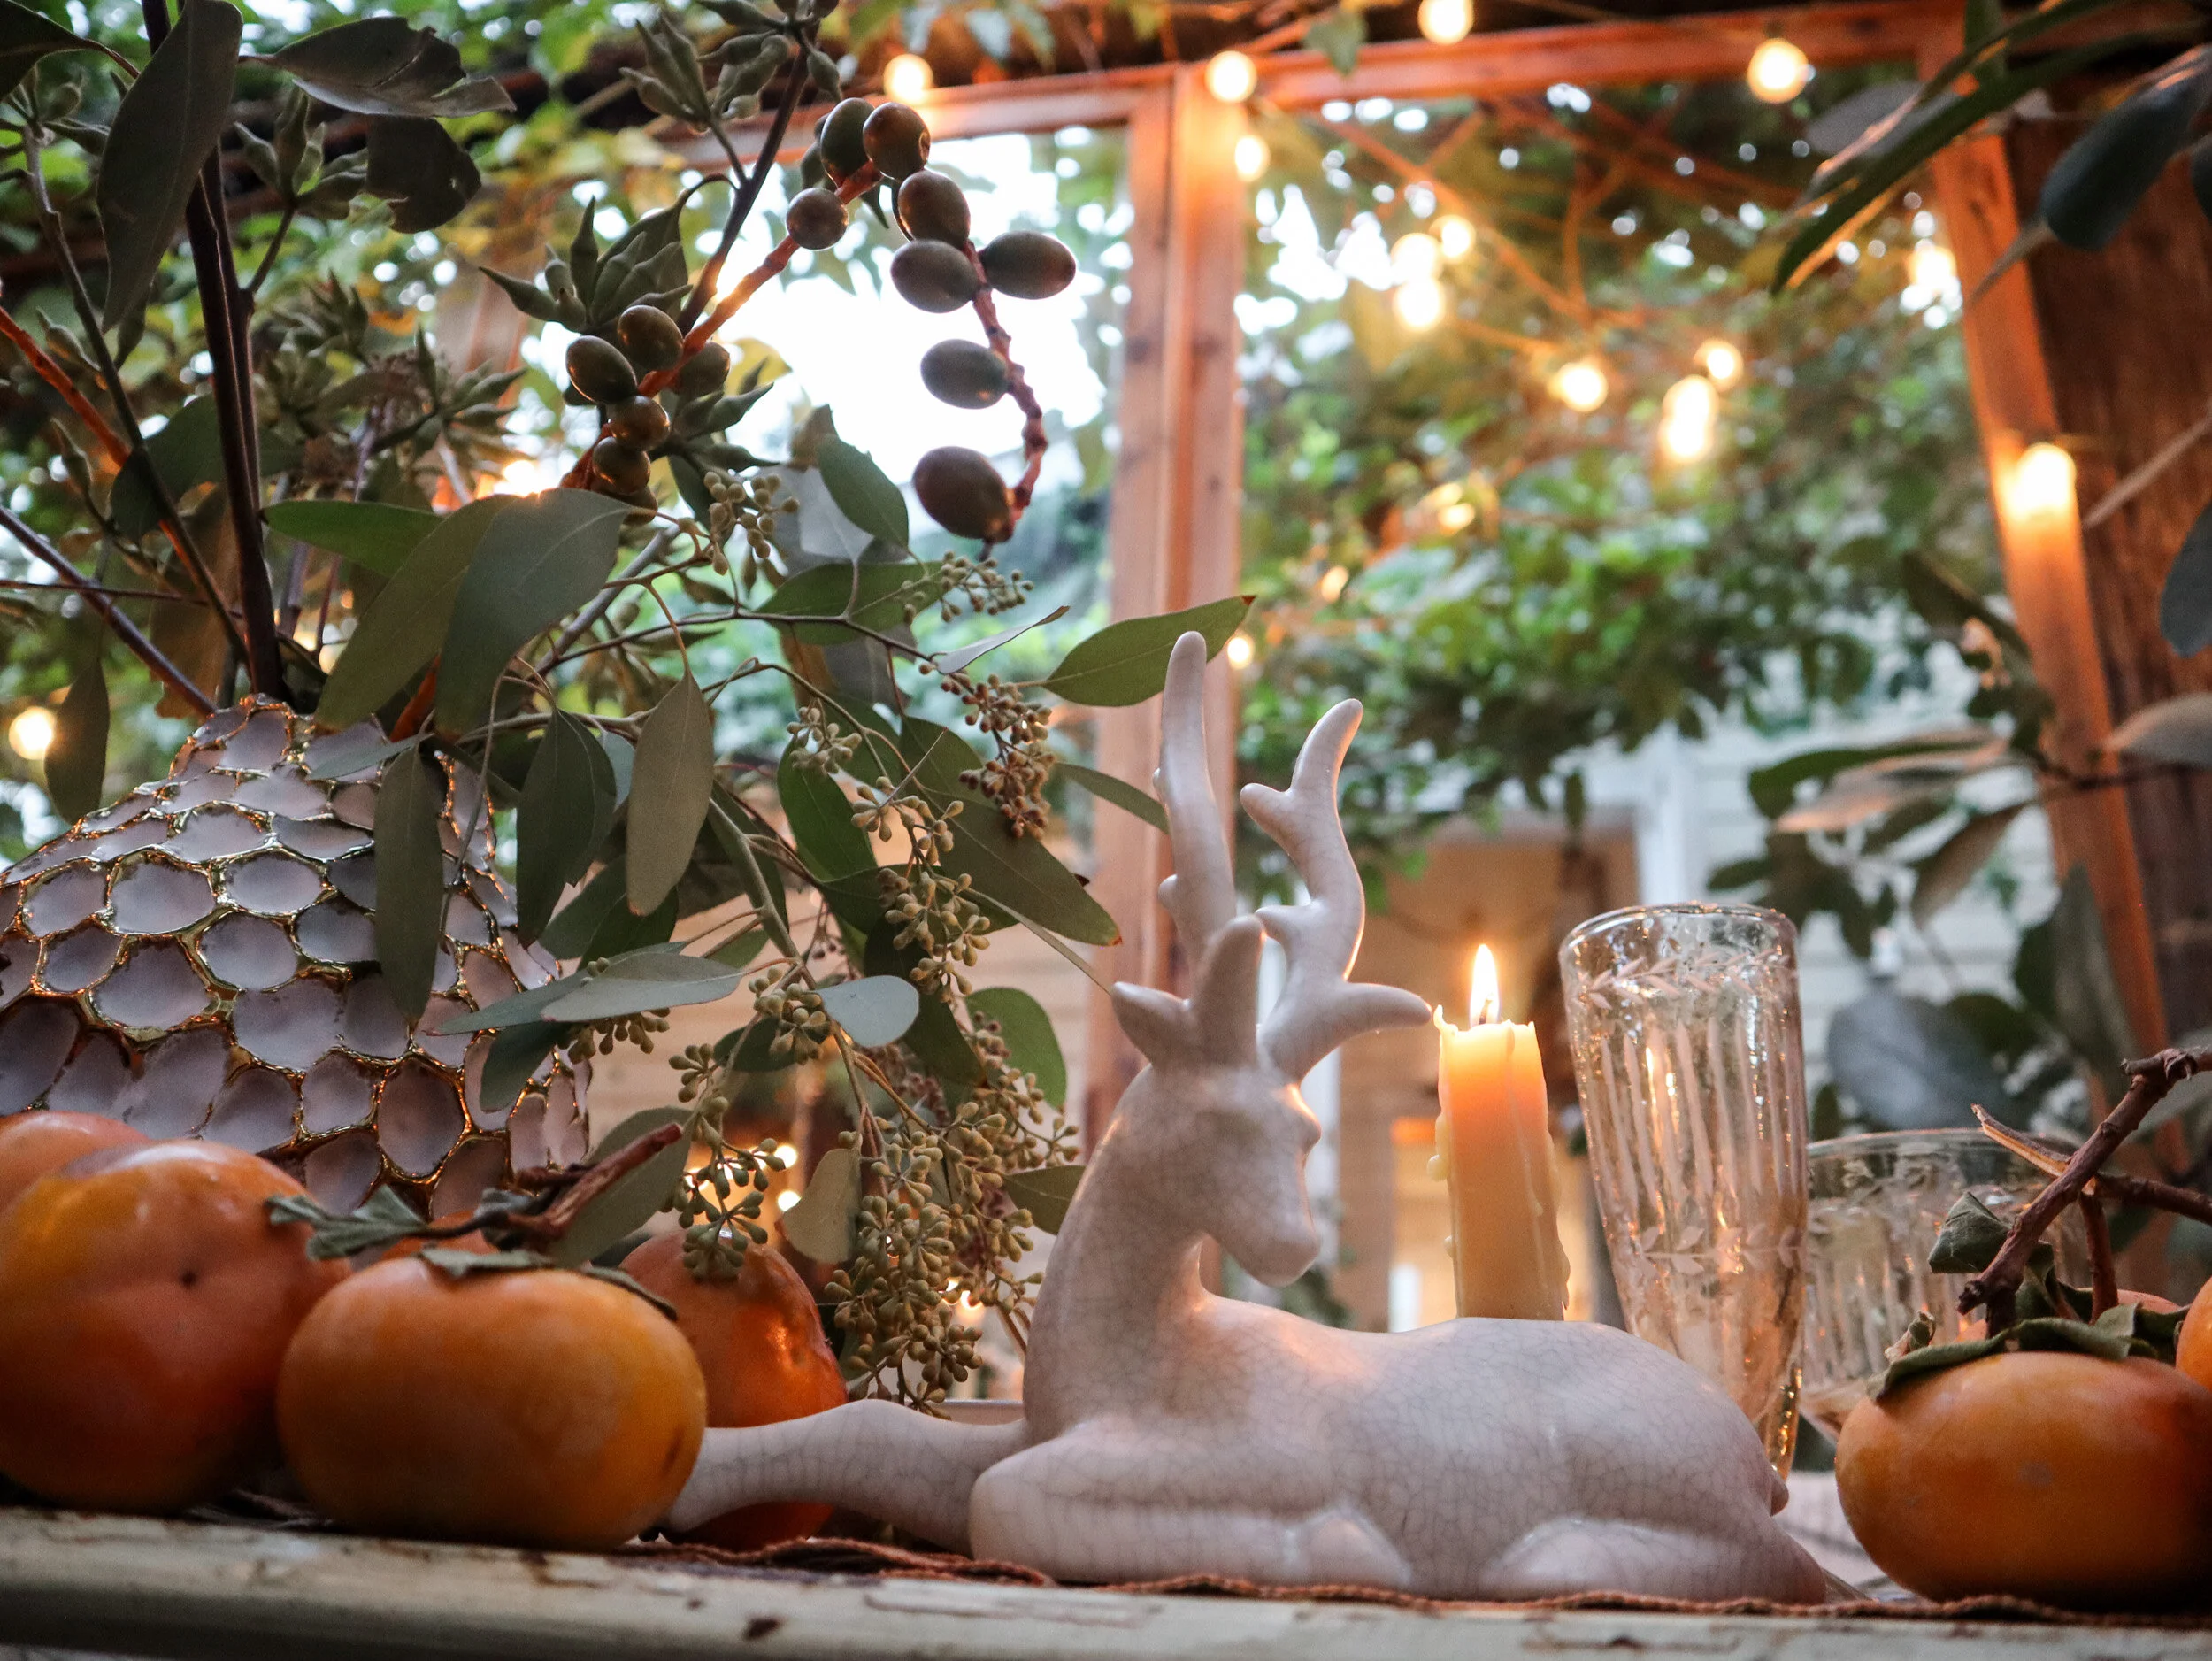
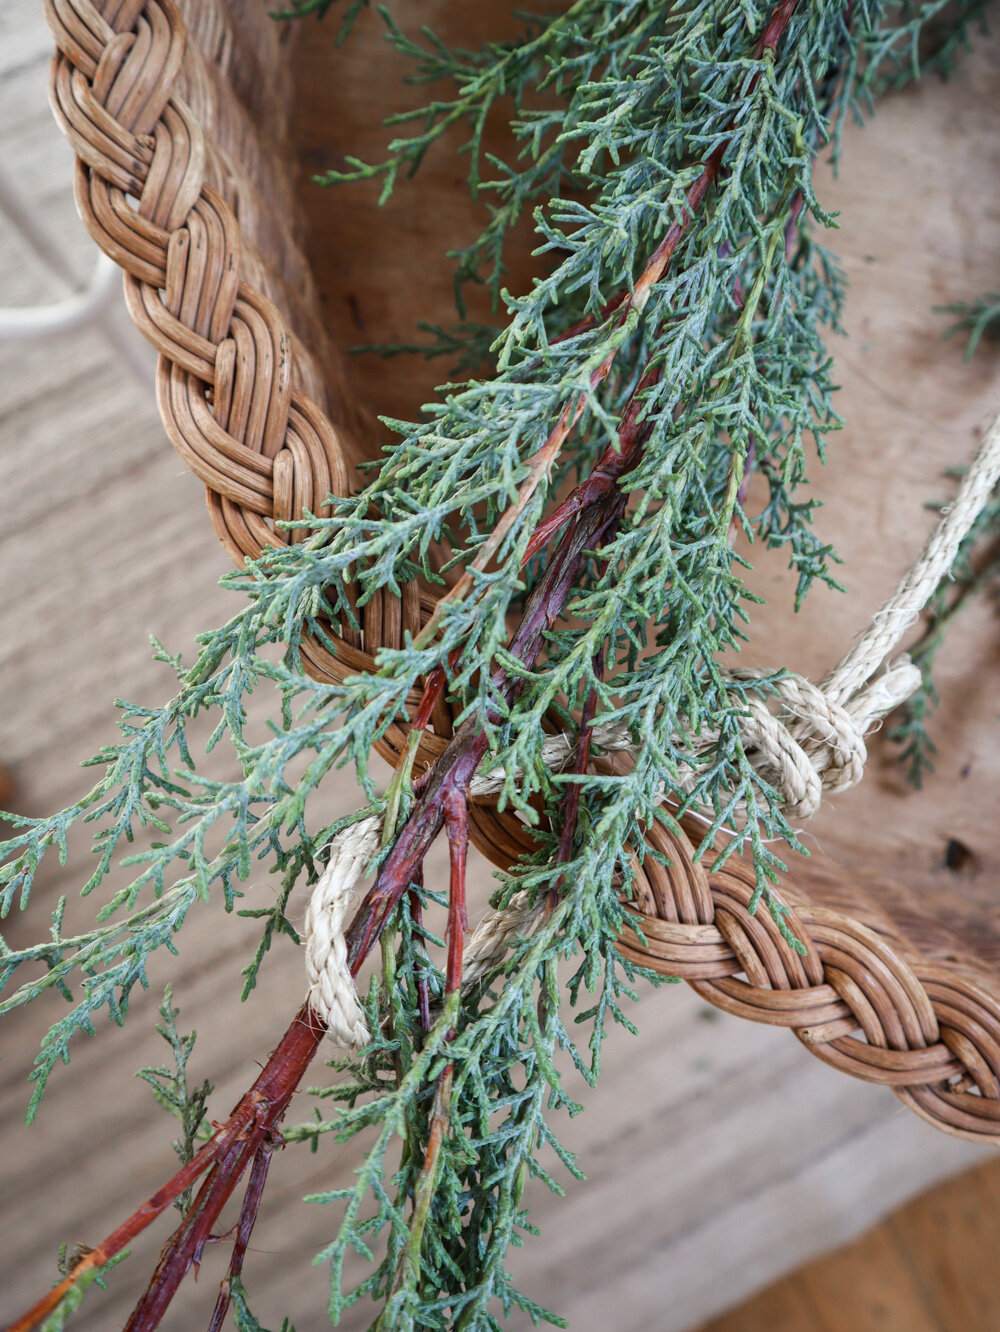
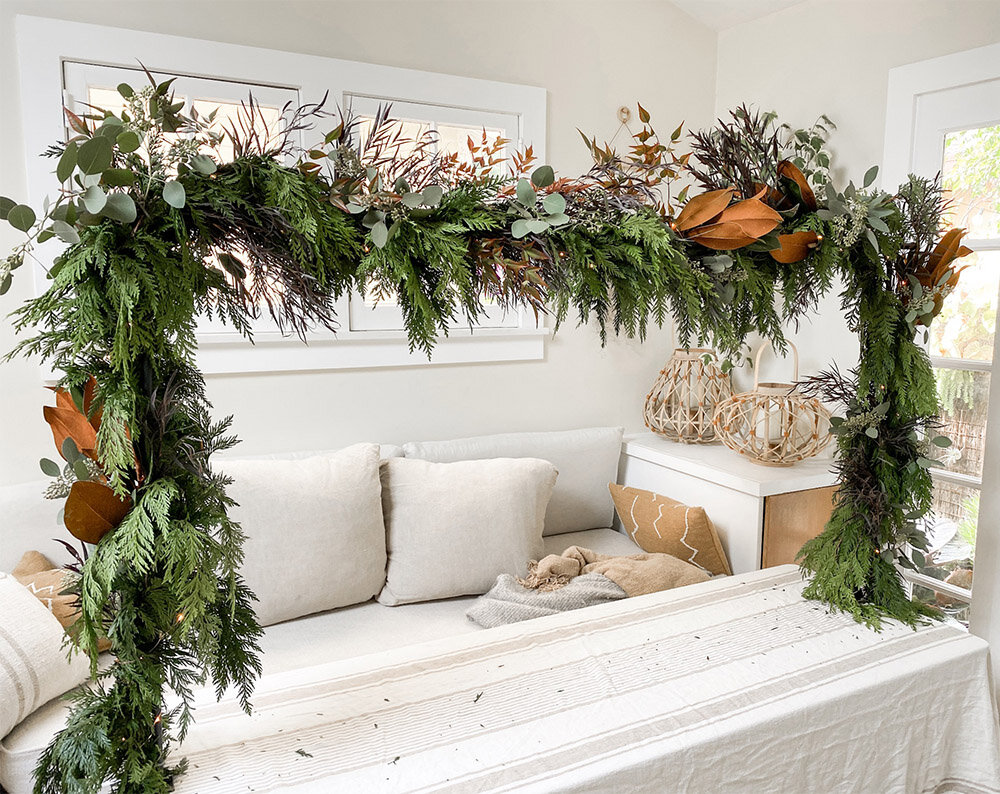
A Dramatic, Space-Saving Holiday Table
Creating a space-saving, dramatic, festive table of live greenery for the holidays.
(Originally posted in 2019)
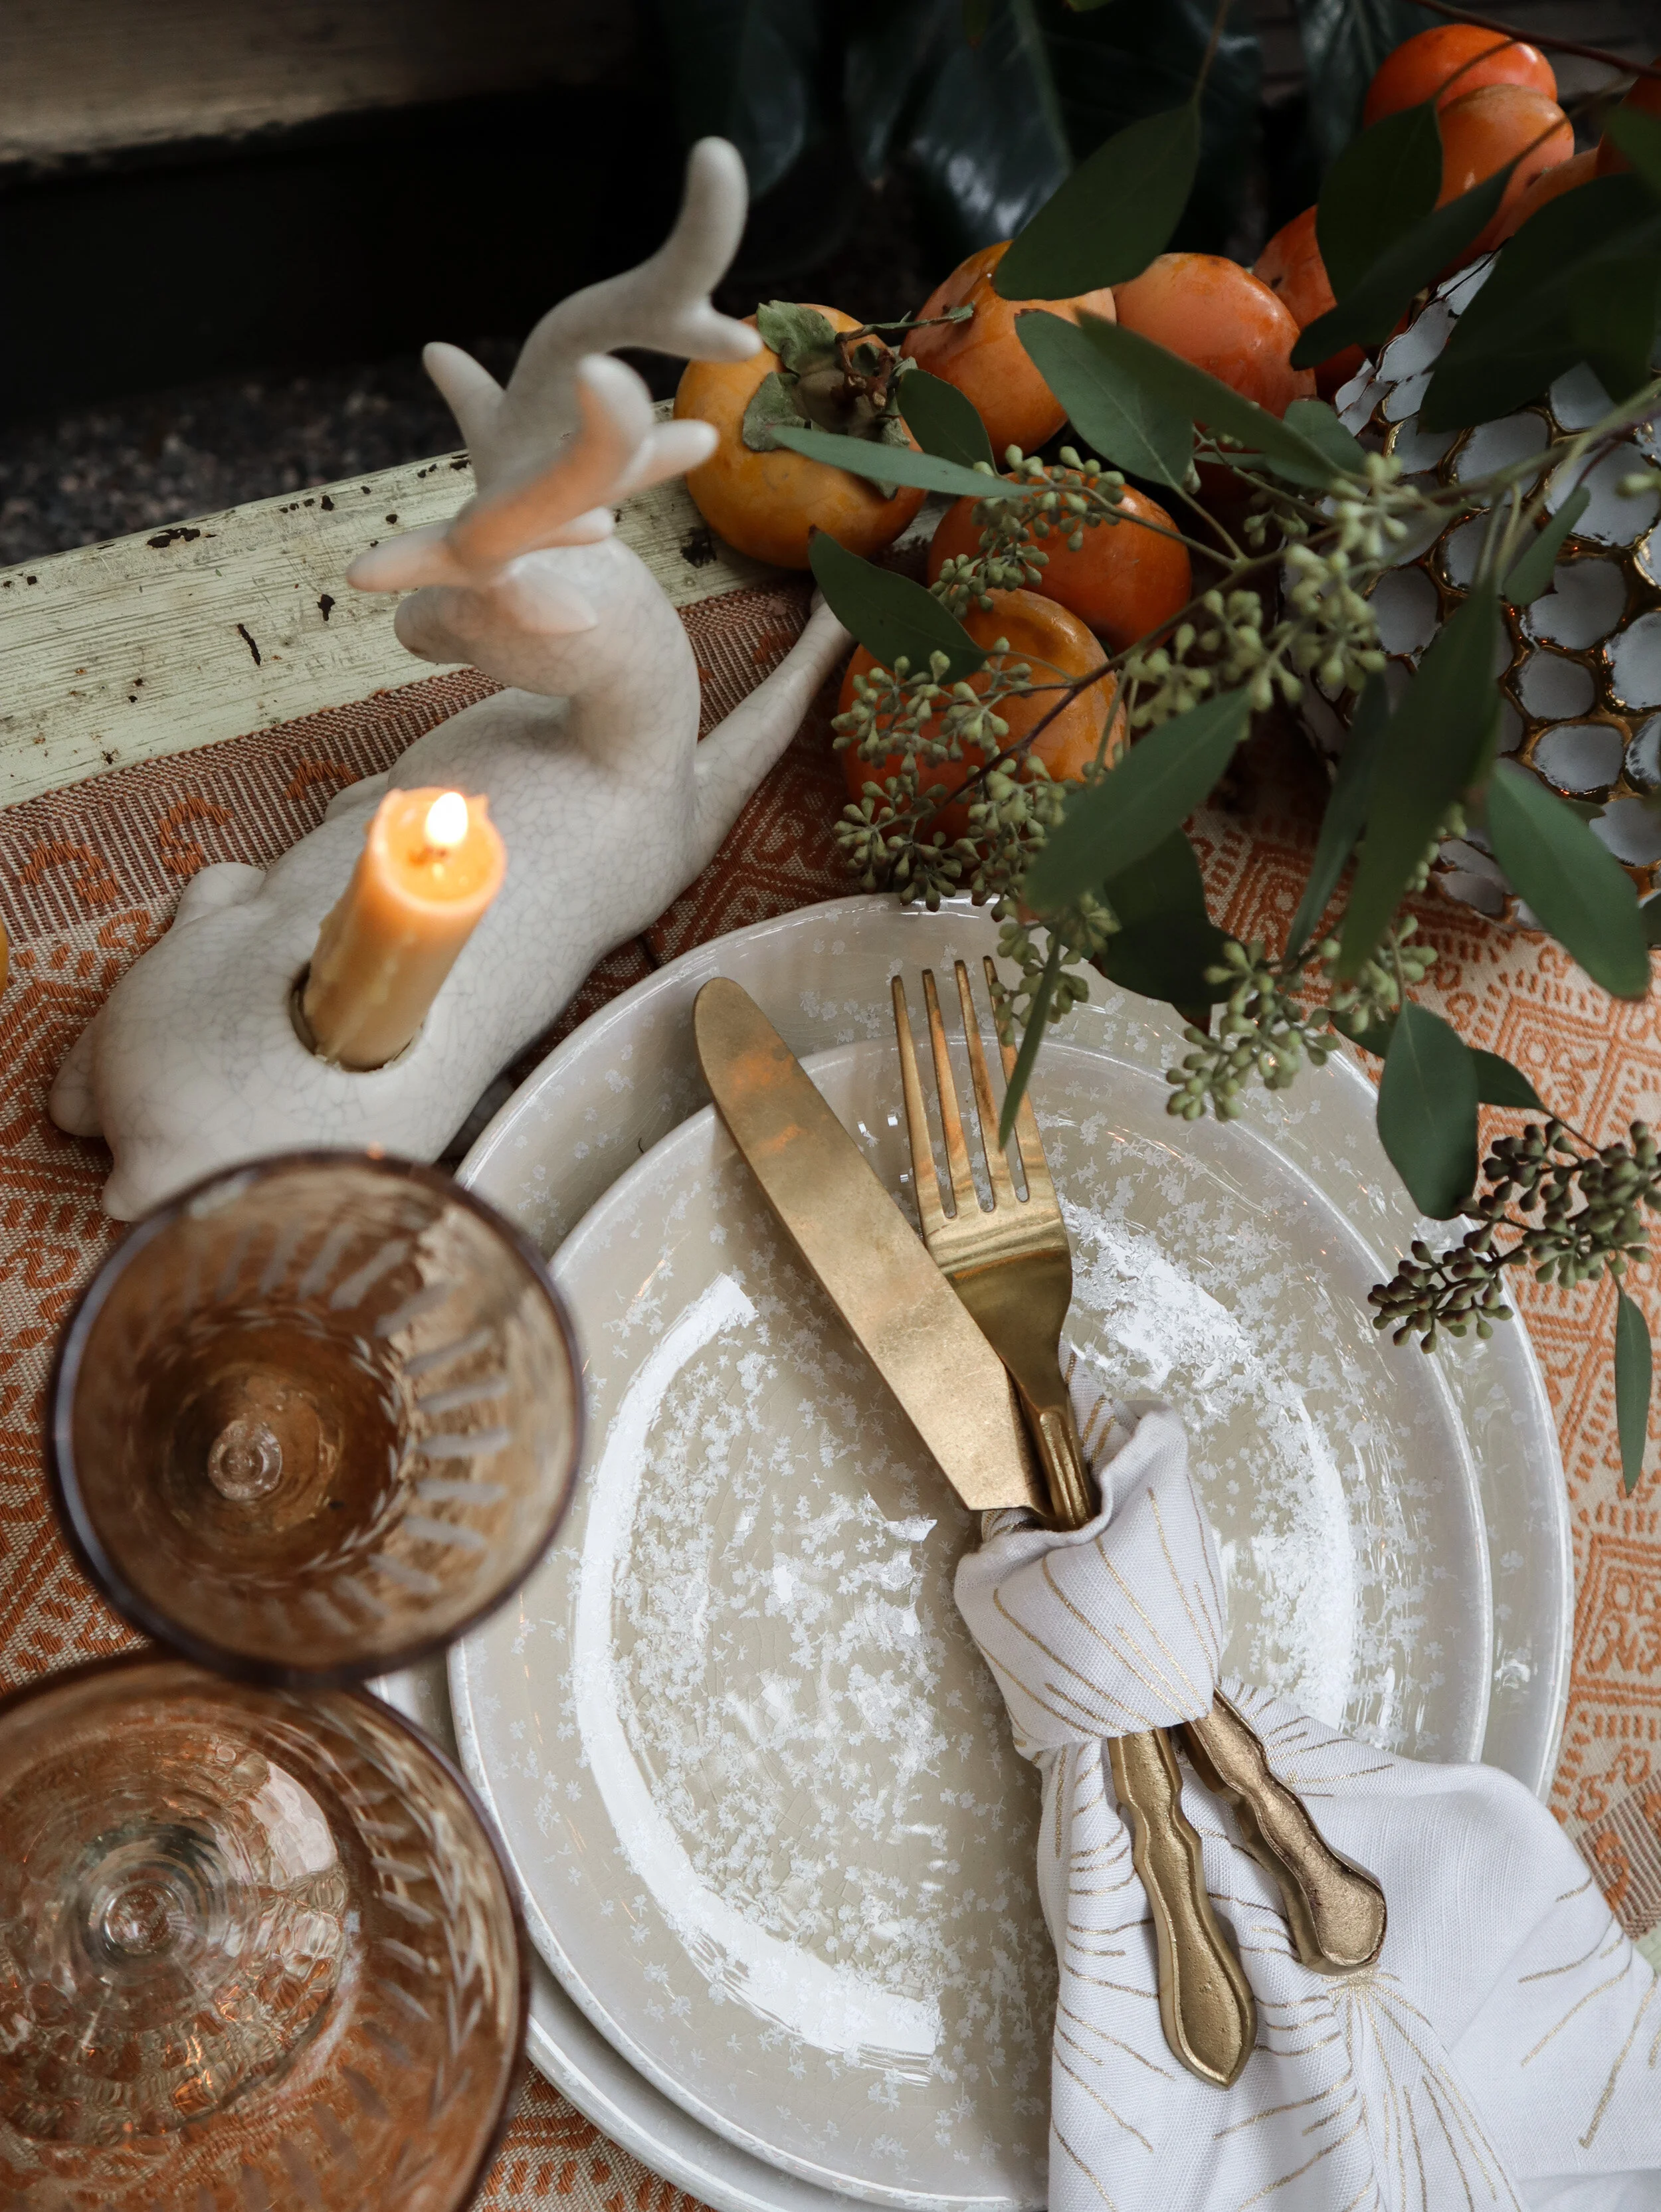
Gathering with friends and/or family around a table in a small home or apartment can be such a uniquely intimate experience. But during the holidays— when we tend add extra decorative touches and welcome more people to the table than usual— surface space needed for tabletop essentials can suddenly become extra challenging to preserve.
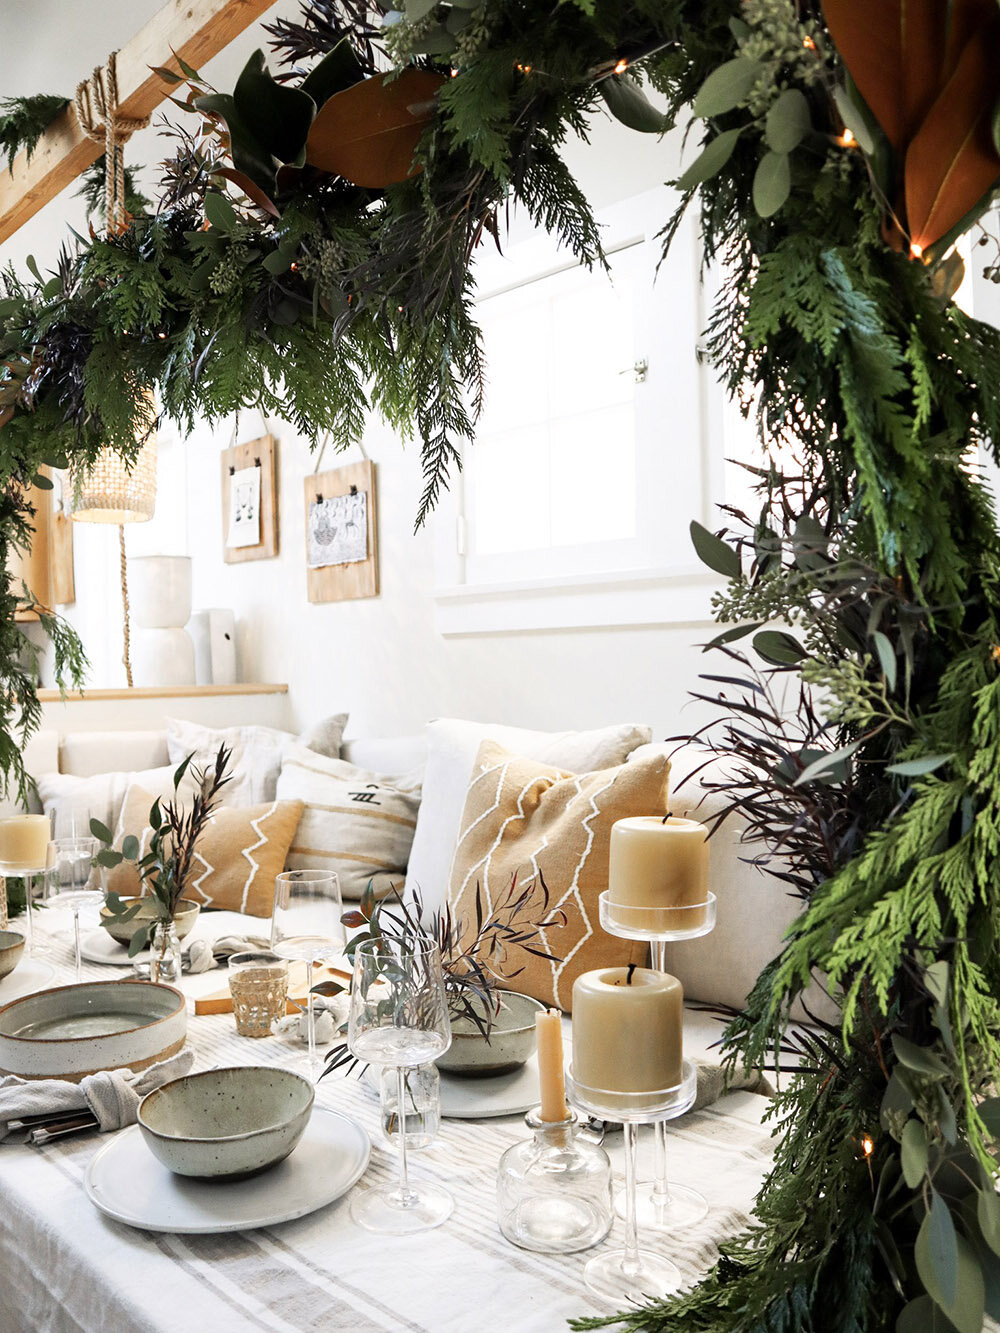
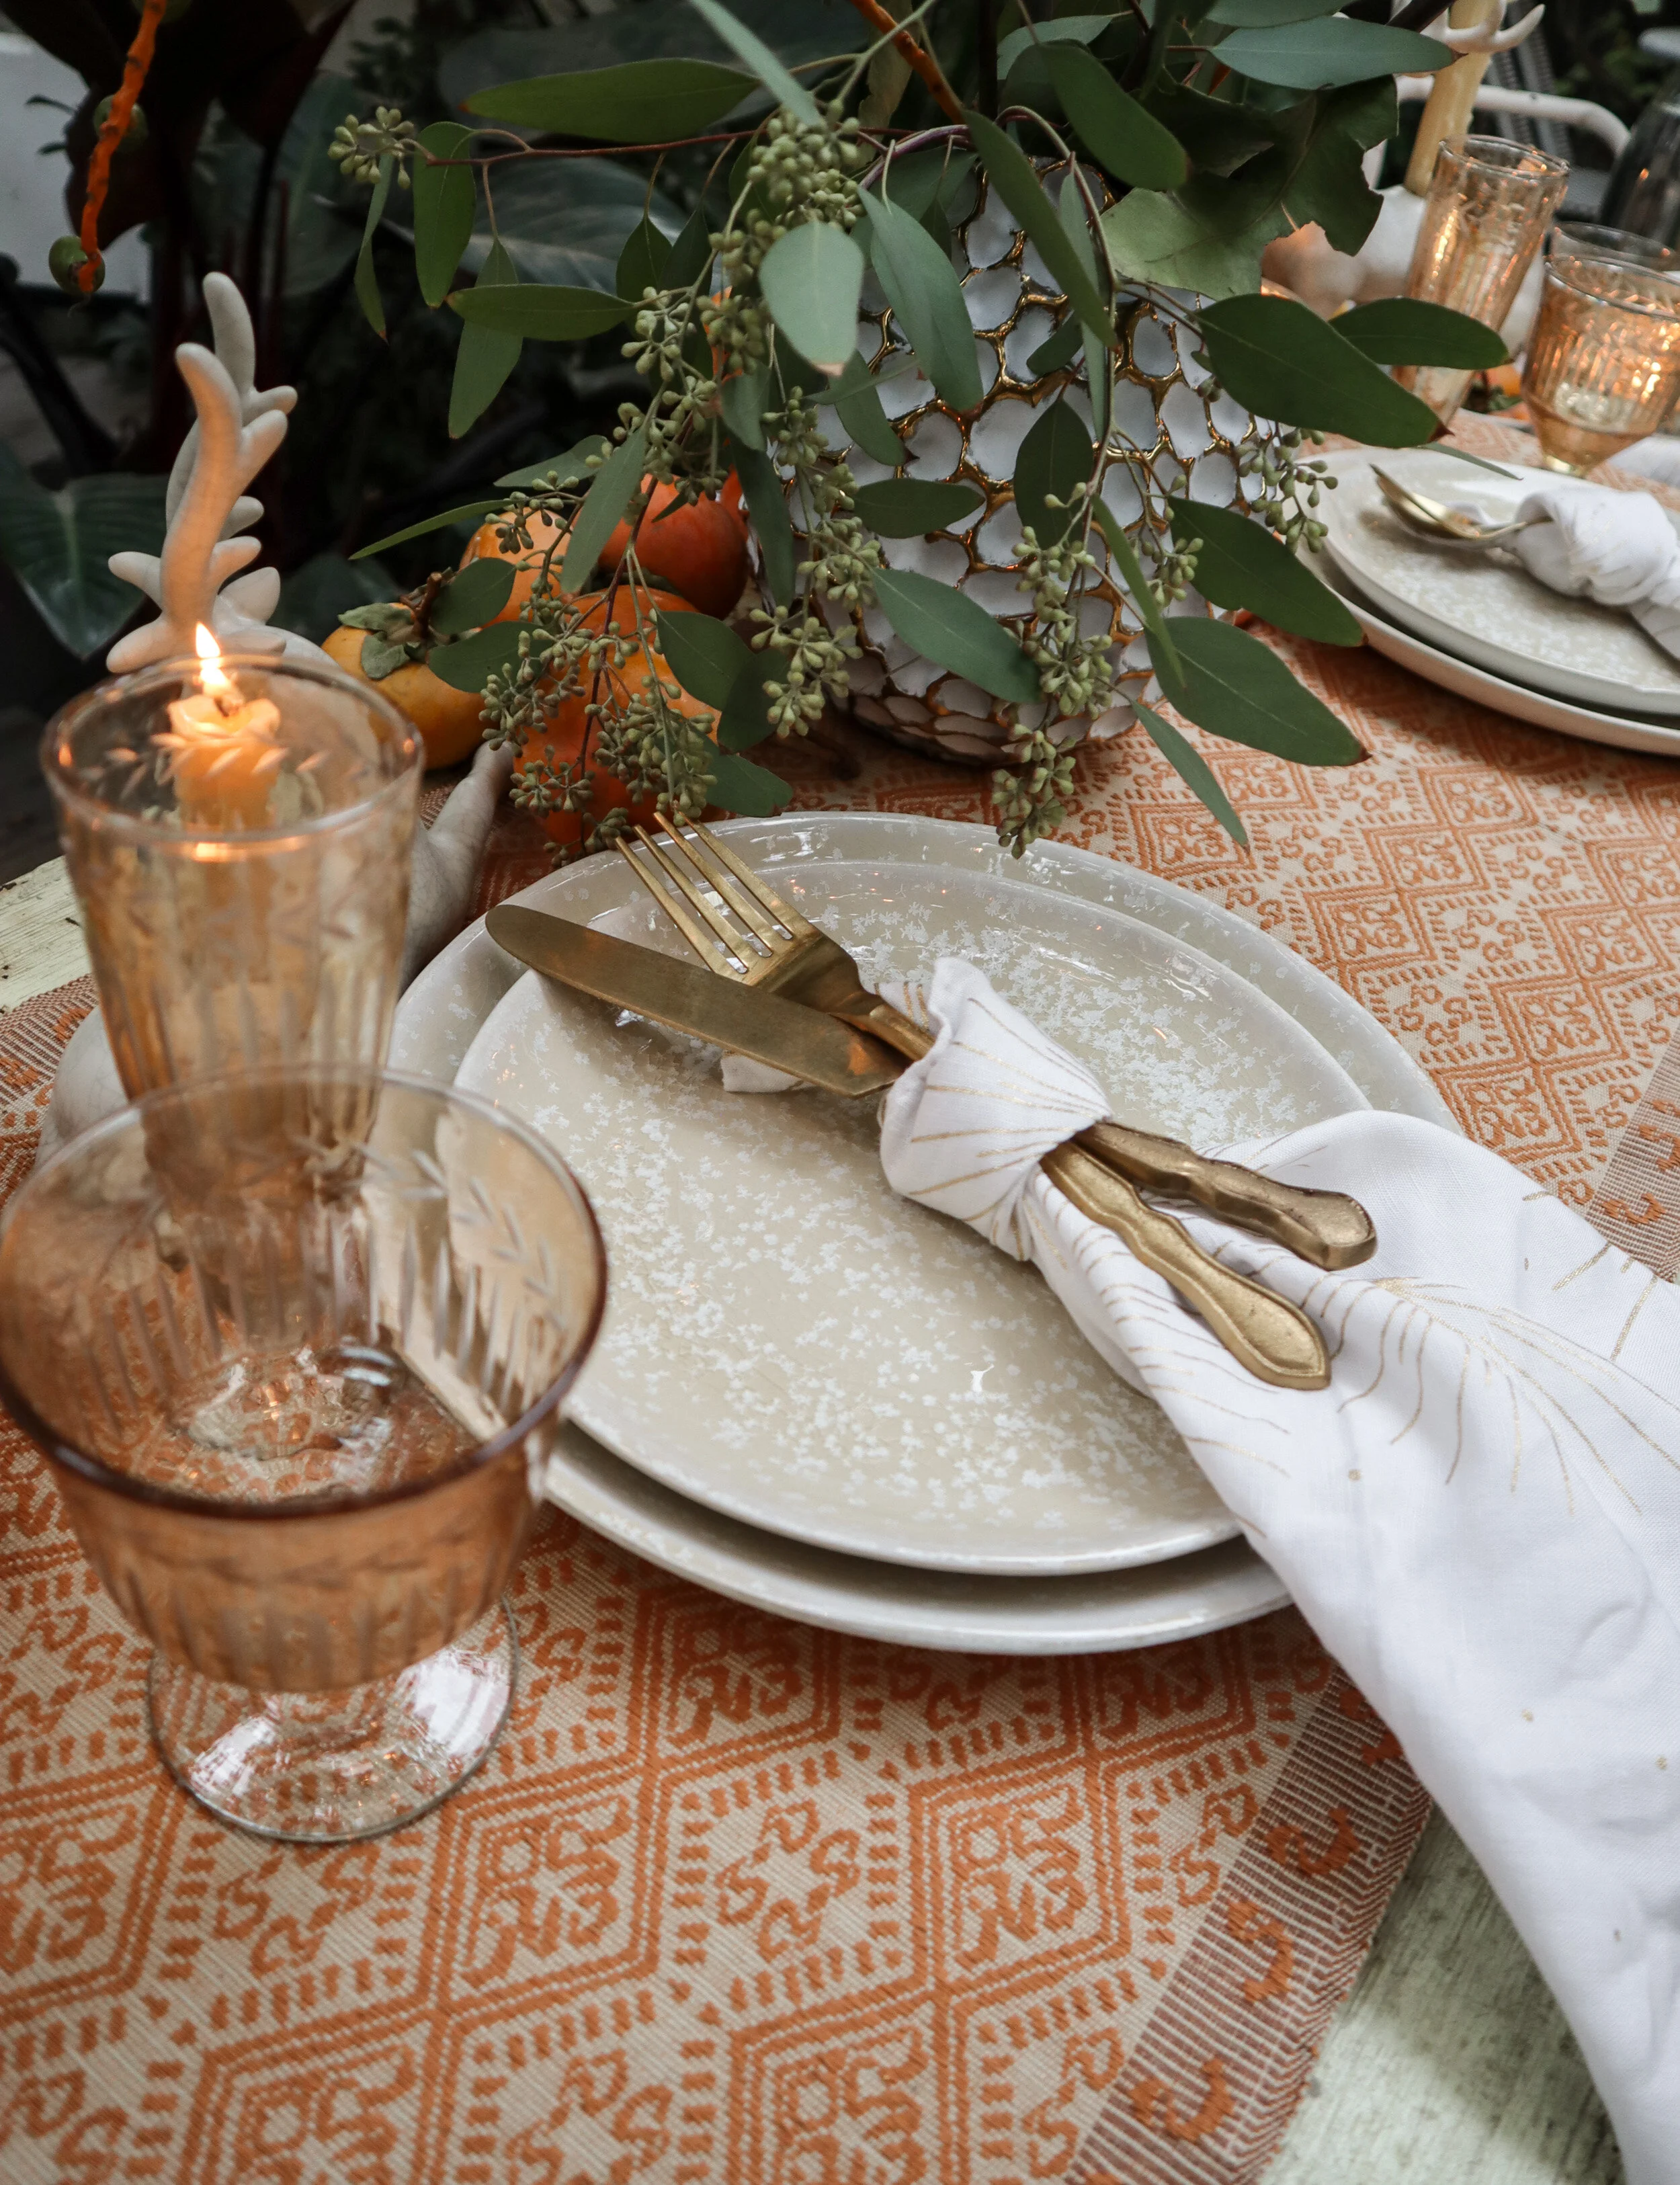
Certain items can help with this, such as rectangular plates and pedestal/cake stands. (Skipping some of the superfluous things you don’t need, such as napkin rings, chargers and placemats can save inches as well.) But if you want to add some wild branches or lush floral/greenery/dried bouquets to your table, you might be out of luck. As such, I wanted to demonstrate an easy, low waste way to add striking decor to your table without sacrificing your dining surface. (I also offer up additional suggestions in my book: Small Space Style.)
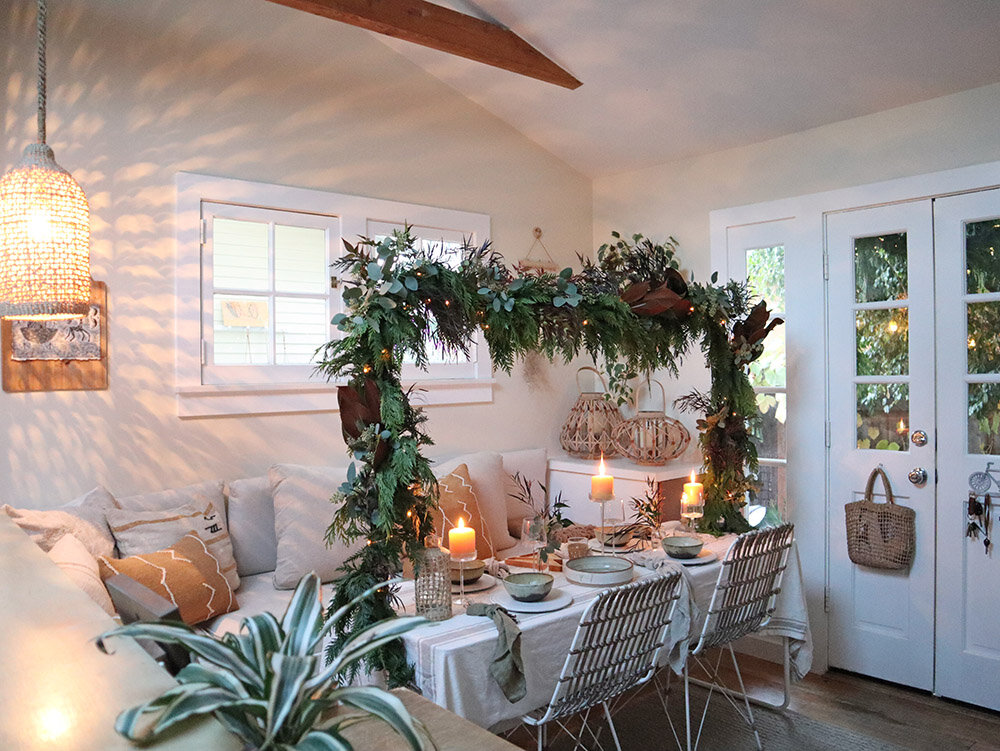
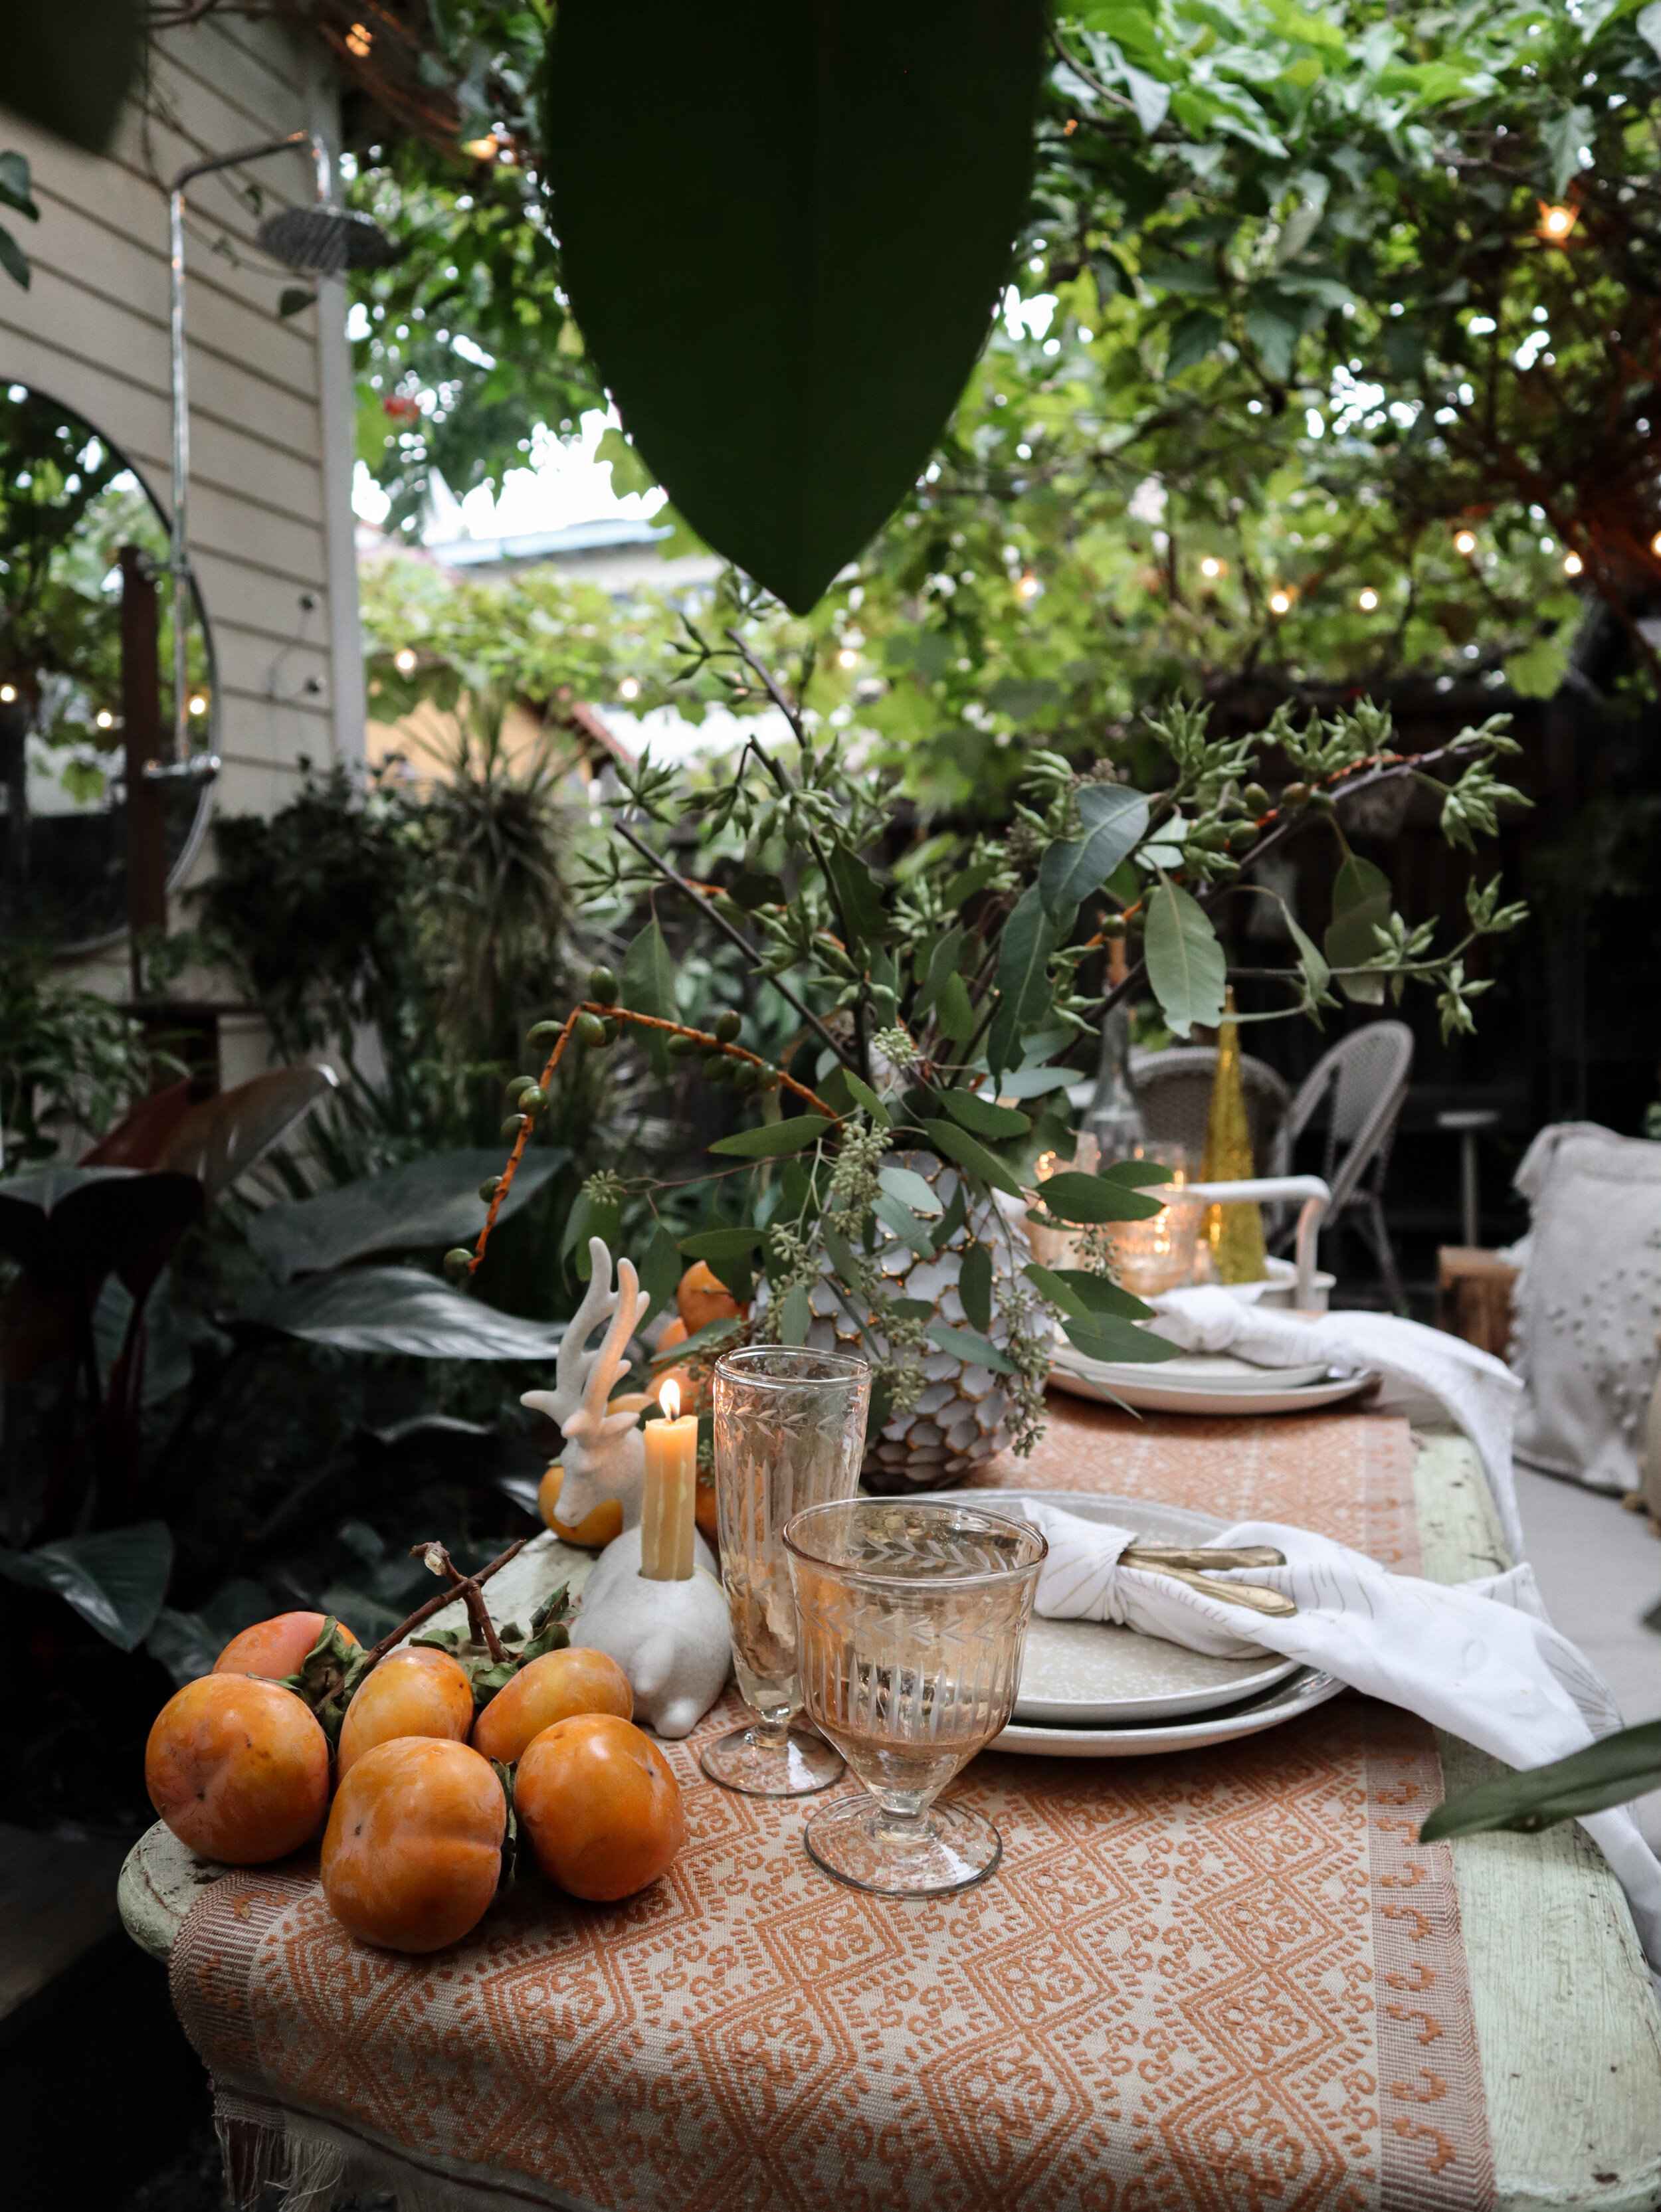
This display cost me about $150. I bought the garland and branches from a local shop, and used an over-the-table adjustable iron rod and battery operated twinkle lights (with rechargeable batteries) to create an overgrown and glittering display indoors. (I used real candles for the photos, but swapped them out for battery operated versions for safety after we snapped the images.) A bit of floral wire (and a vacuum) were the only other items I needed to attain the look.


Setting up the iron display rod took only a few minutes. The height is fixed, but the width is adjustable. When the setup is no longer needed, it breaks down easily for slim storage.

I used all living branches and clippings, so everything can be composted when the time comes.


Adding the clippings to the garland took the longest, but was simple enough.

The entire process took about 90 minutes, and it was a surprisingly relaxing activity for me.

I (still) don’t really cook, nor do we host that often these days, so I enjoyed going out of my way to do something special for the guests we’ll have over in the coming days.

I’ll share a small space, low waste holiday decor video and post in early December.


In the meantime, I’m looking forward to spending time with our friends and family here at home. (And I’ll be following along with The Conscious Kid for insights and information regarding Native American Heritage Month.)

Whatever you and yours are doing this holiday, we wish you a safe and happy long weekend.


Greenhouse Garden Plan
Note: This is a follow-up entry to our recent Climate Action Landscaping post.
When mapping out the design of our new greenhouse, it was important to me that the land beneath and surrounding the platform become a thriving outdoor space that protects biodiversity, grows food + medicine + pollinator habitat, builds soil, and restores the water cycle. For insight on how to accomplish this, we turned to our friends at Shades of Green Permaculture.
Via a 2-minute video, I provided Shades of Green with a tour of the land, and communicated my goals for the outdoor space. In return, Brandy created the following plans, as well as the incredibly informative video embedded at the bottom of this post.
Our greenhouse, which was a kit we found here via The Home Depot.
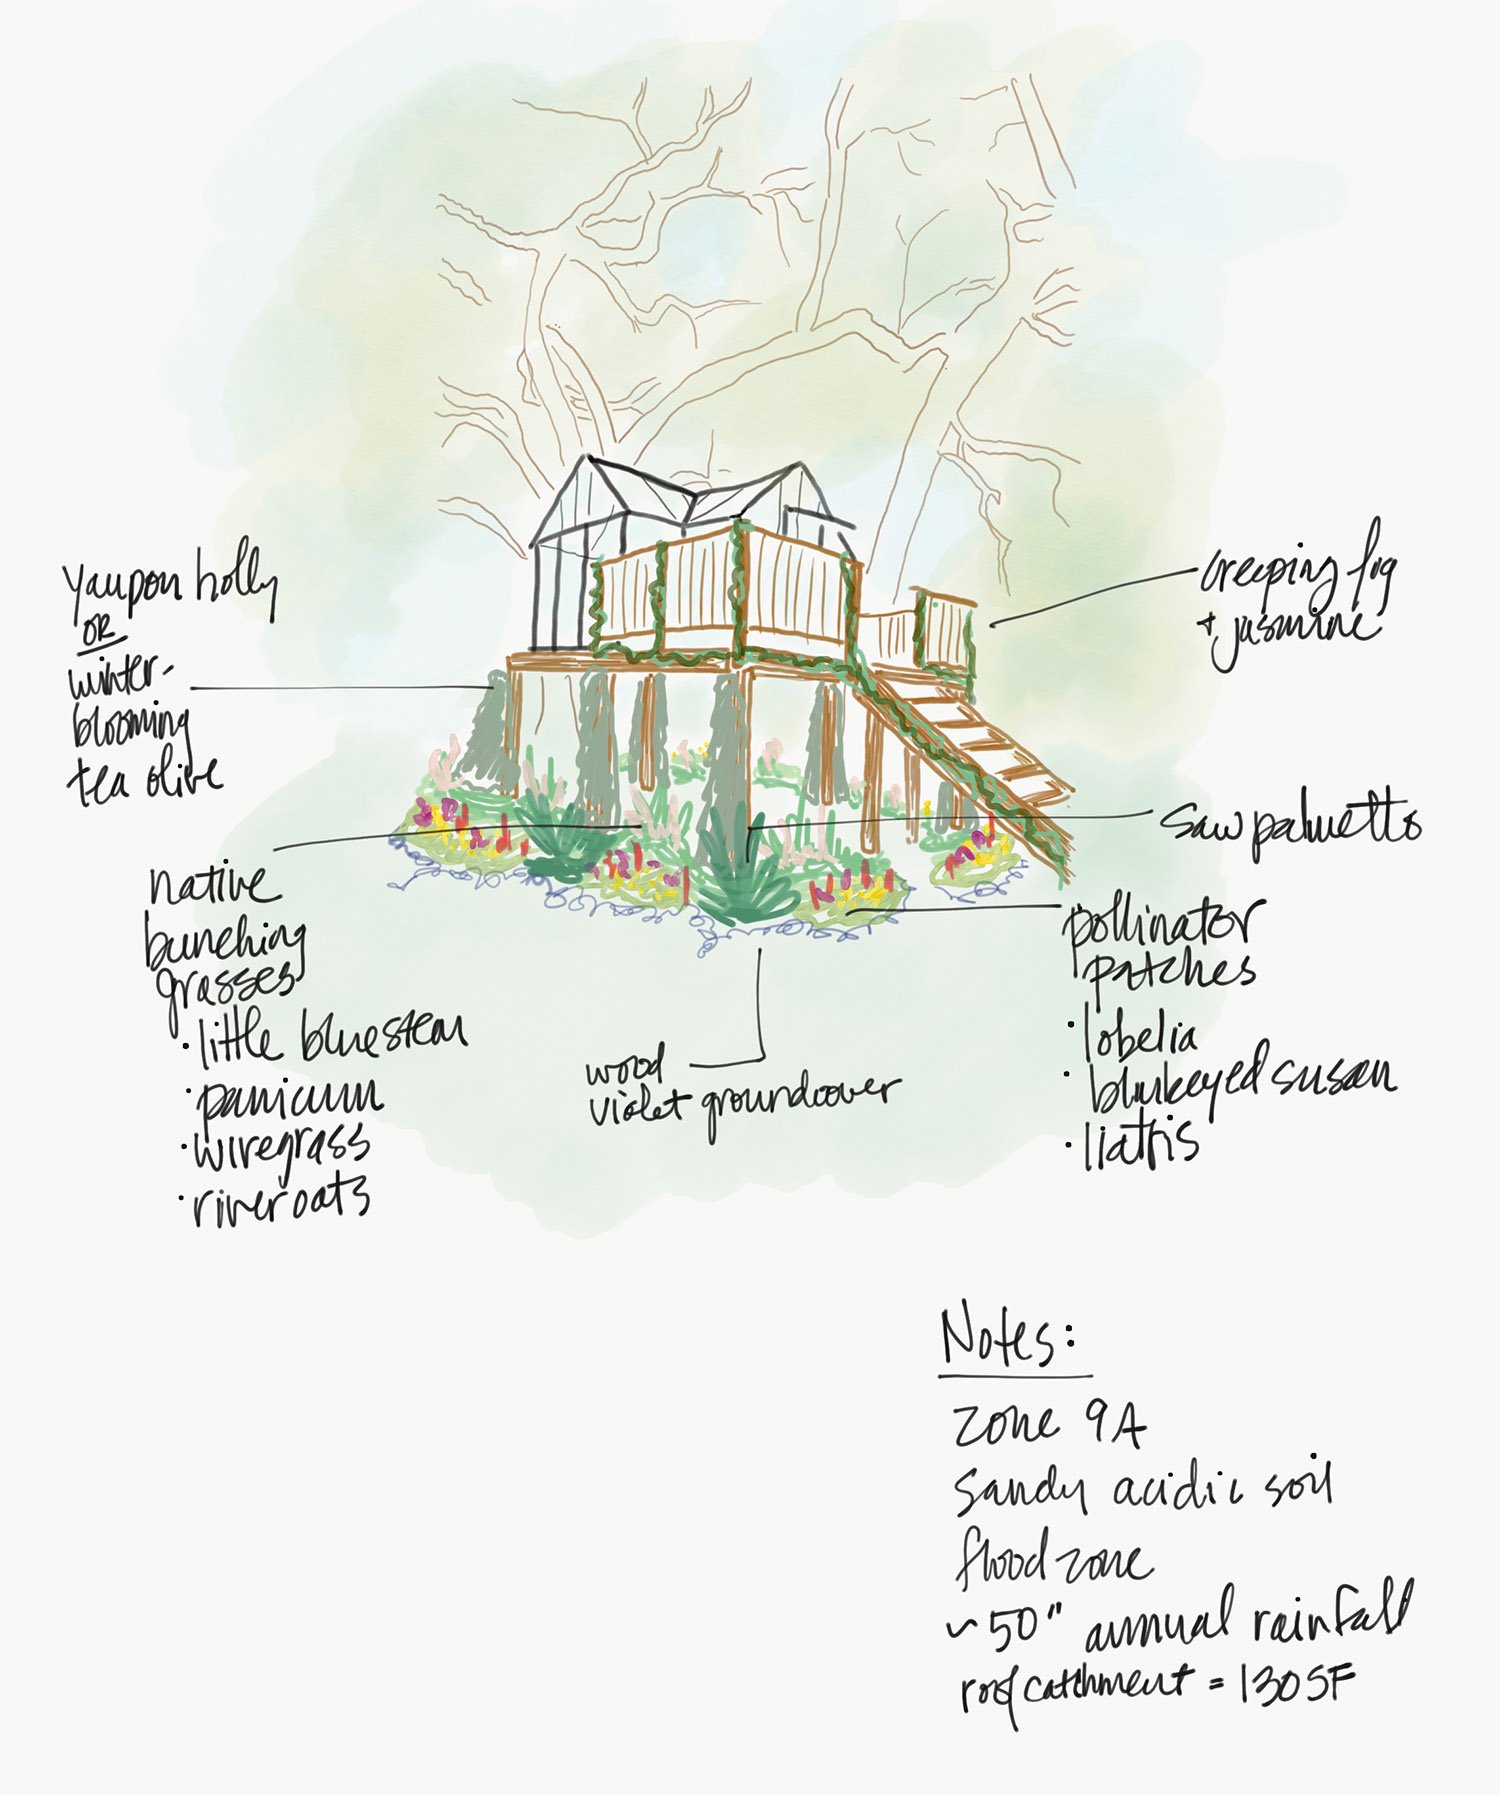

Adam and I hope to tackle this project immediately, prepping our fall garden starting this month. However, the entire scope of work will have to wait to roll out as our budget permits.
Our first step is to reduce our watering and build soil by creating hugelbeds, which are mounded beds that blend water management, debris management, and soil building into one strategy. We’ve already started gathering materials for the process:
If you steward any amount of land, you can transform it into space that has a positive environmental impact. Shades of Green Permaculture are offering a free, 1-hour training class entitled: Intro to Climate Action Landscaping. This training focuses on how a garden or landscape, no matter the size, can have a positive impact on the planet. And, if you find what you learn to be of interest to your home and lifestyle, Shades of Green Permaculture also offers an incredible Regenerative Backyard Blueprint: A step-by-step guide to transform your yard into an eco-friendly paradise.
We’ll share our entire process with you as it unfolds!

Last Minute Halloween Decor
I have a 5 year old who is, of course, thrilled by Halloween. And yet I cannot seem to get it together to decorate for the occasion this year.

In the past, while living in Venice, we would simply hop on our bikes or walk the pups through the canals to get our fill of spooky ghosts in palms, witches riding brooms on balconies, and pumpkins baking themselves in the SoCal sun. Here in the woods, however, I can no longer rely on neighbors for our fall fix. But, between running the business while in a state of limbo as far as our home is concerned (though we’ve made great progress this week — more on that soon!), the baby’s current sleep pattern, and the ongoing realities of life during the pandemic, I’ve felt depleted of the sort of creative energy that fuels festive DIY home projects… at least for the time being.

Luckily we do have a handful of old metal pumpkin stakes, which we can use on the pumpkins that we’ll get at a patch later this week. (The photos of the stakes in this post are from last year’s Halloween at the Cottage.)

Other than that, the only thing I’ve managed to muster is a dozen or so paltry paper bats, which we’ve clipped to the playroom / nursery curtains with clothespins, as well as taped to the end of chopsticks to use as shadow puppets. (These types of paper cutouts are often at craft supply stores, but they’re also easy to make at home with a compact Circuit Joy.)

Surprisingly the bats have satiated our little one. So much so that he rearranges the paper and pins while making up stories about the animals during the day, before grabbing a flashlight and continuing the activity in shadow puppet form at night.

All this to say: for those who are too exhausted to magic up a festive stoop or haunted house this Halloween, you’re most definitely not alone. Thankfully, all these wonderful children of ours seem fine with skipping the bags of landfill-bound faux spiderwebs and plastic cauldrons as long as they feel seen, heard, and loved.

Climate Action Landscaping
Post Summary: Your garden, no matter the size, can have a positive impact.

When we first moved into our tiny cottage by the canals, we found cracked dirt throughout our L shaped yard, which was little more than a shared thoroughfare with our neighbors. Over the years, the earth was transformed into rich soil, vines and plants began to grow and thrive — providing us with food and shade while supplying a habitat for hummingbirds and pollinators, and our vertical gardens produced colorful, low maintenance herbs, veggies, fruits and flowers that enhanced our privacy and cooled our small space in the hot SoCal summers.

If you steward any amount of outdoor space — whether it’s a small thoroughfare garden like ours at the Cottage in the city, a suburban yard, or rolling acreage, you can transform it into space that has a positive environmental impact.

Our friends at Shades of Green Permaculture are offering a free, 1-hour training class entitled: Intro to Climate Action Landscaping. This training focuses on how a garden or landscape, no matter the size, can have a positive impact on the planet.

If you find what you learn to be of interest to your home and lifestyle, Shades of Green Permaculture also offers an incredible Regenerative Backyard Blueprint: A step-by-step guide to transform your yard into an eco-friendly paradise. The “RBB” will teach you how to create a thriving outdoor space that protects biodiversity; grows food, medicine, and pollinator habitat; builds soil; and restores the water cycle.

By the end of the Regenerative Backyard Blueprint program, you will have:
An understanding of the climate context and why your decisions matter so you can build your garden in alignment with your values, knowing the bigger impact of your decisions.
Clearly articulated your project goal, and have a realistic idea of phasing, timeline and budget.
Made a basemap, and put pen to paper to get accurate measurements and map necessary existing conditions, having identified priority areas and elements to include in your plan.
Correctly diagnosed the challenges you face with water in your yard, and know how to manage that water as a resource.
Spotted opportunities to build soil on your site, and identified which techniques are best for your site.
Made sound choices for plant palettes, have a sense of vegetation types, and know where to go and what questions to ask when searching for the perfect plant.
Crafted a solid plan for your landscape, with associated material and plant calculations, and have a clear understanding of what is needed to execute your project.
Registration is open from October 12th through October 25th at Shades of Green Permaculture.

Using Our Tiny Greenhouse as an Adaptable Sunroom
How we styled our ~114 sqft greenhouse to function as an easily-adaptable office, an activity space for our child, a quiet reading lounge, a dining / gathering space, and a grow zone.
Summary: How we styled our ~114 sqft greenhouse to function as an easily-adaptable office, an activity space for our child, a quiet reading lounge, a dining / gathering space, and a grow zone.

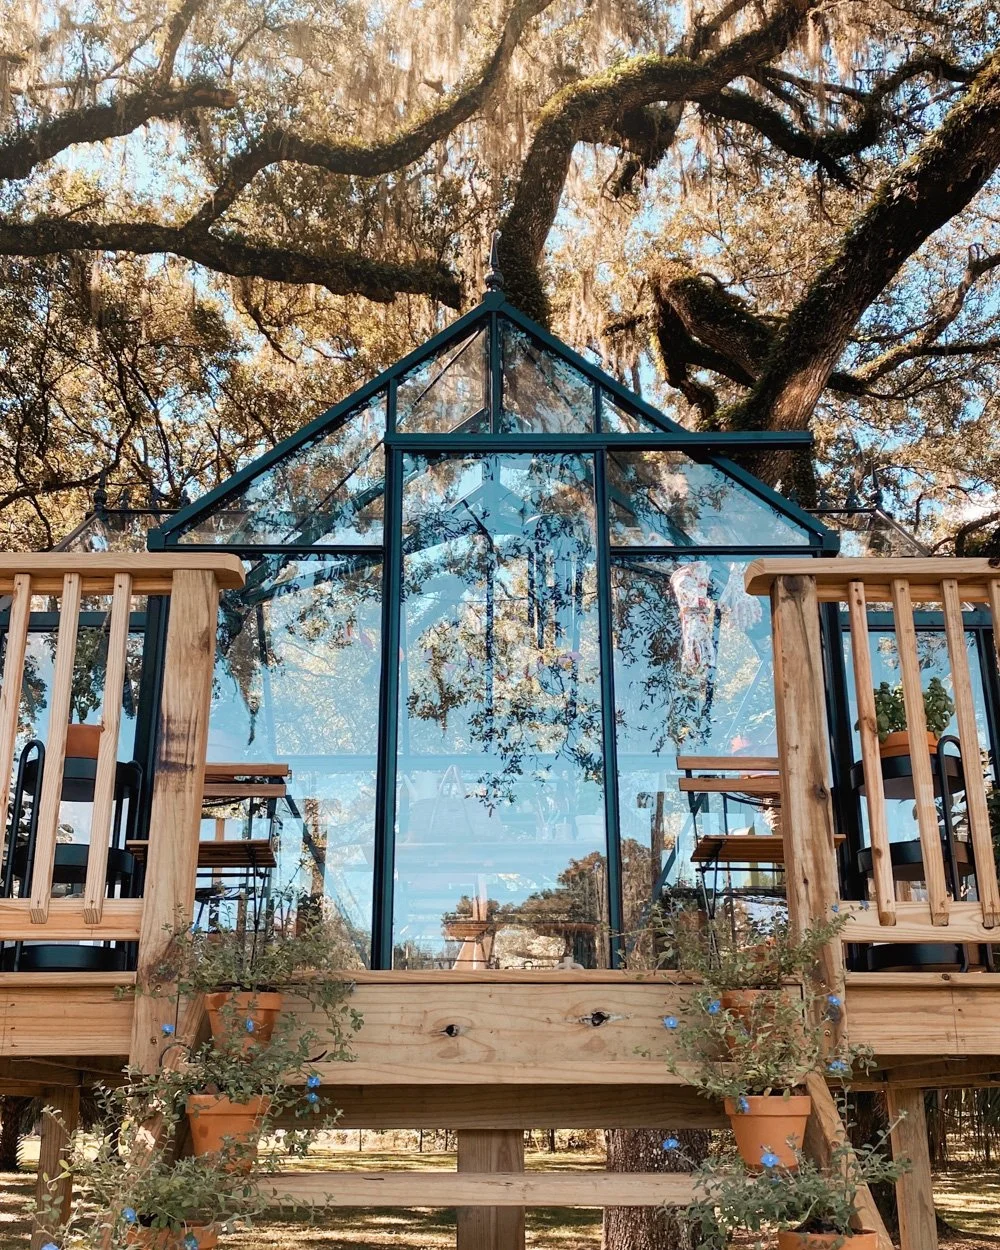
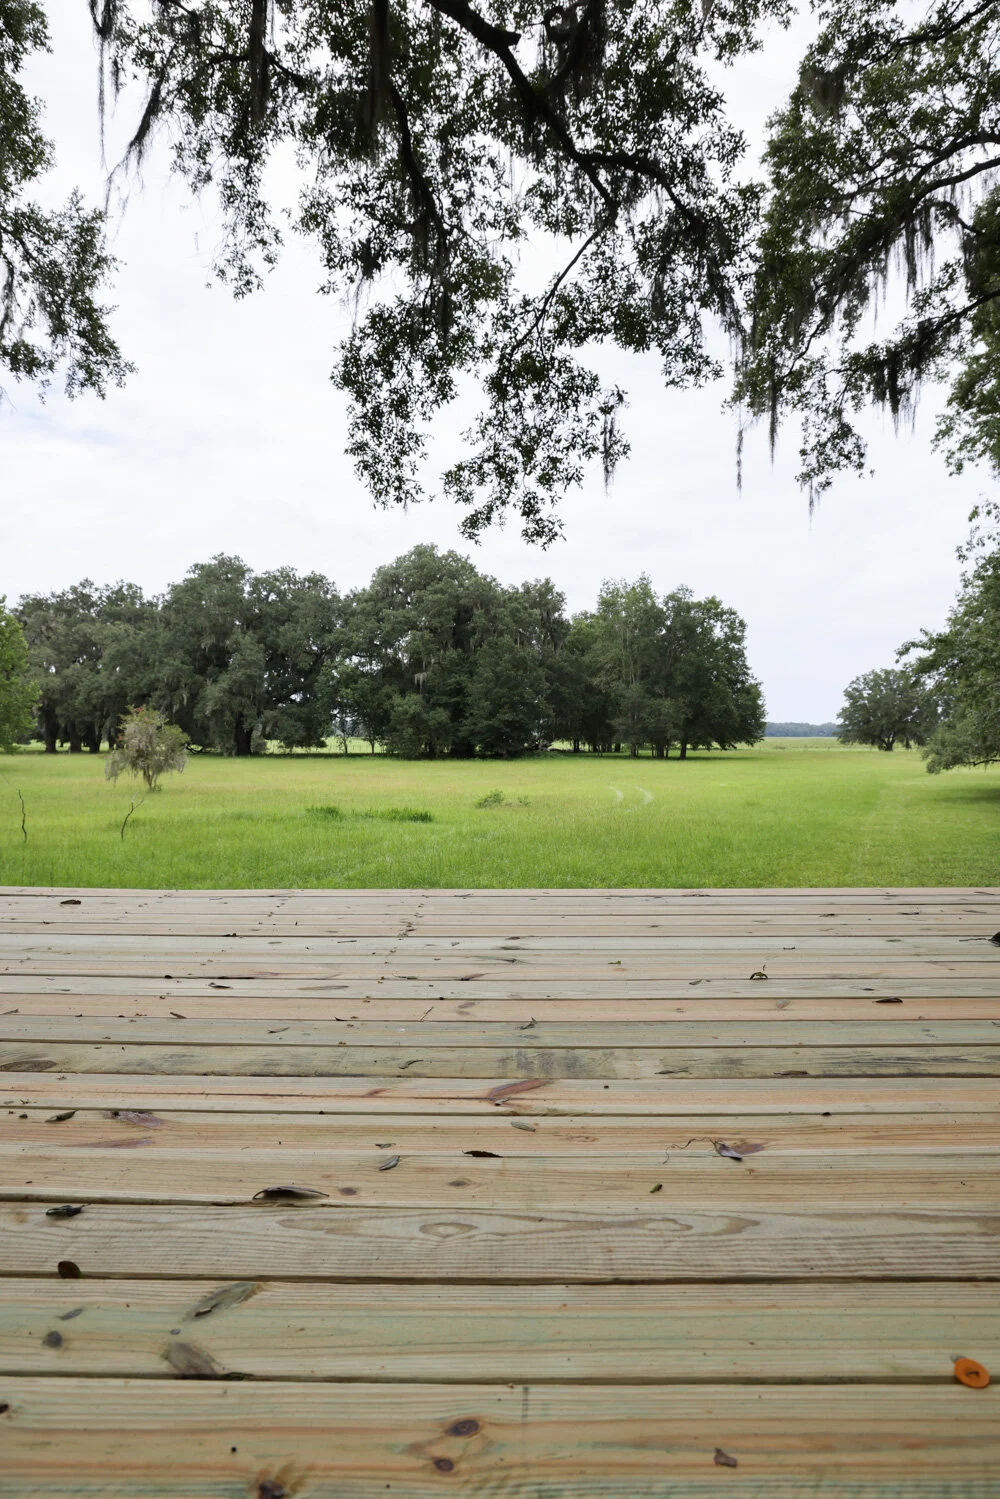
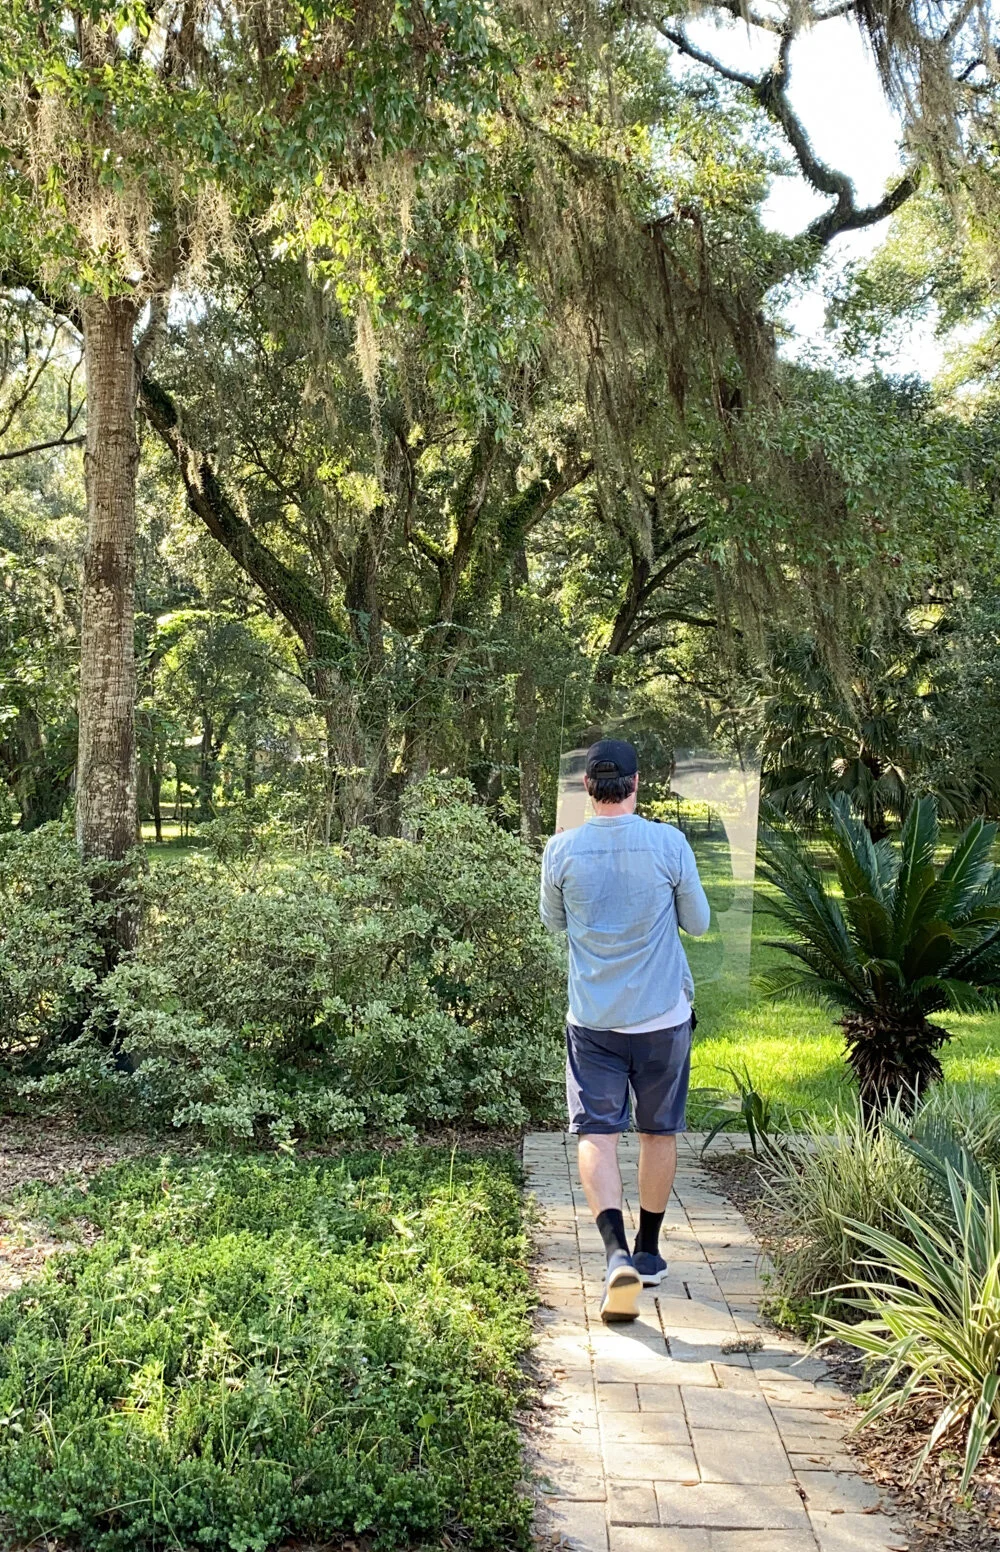
Our tiny greenhouse is a T-shaped design that straddles the sunny field of the prairie and the cool canopy of the oak trees. It’s propped up on a tall deck, resembling a house on stilts, as it’s required to sit above the flood zone in this region.


The goal behind this space was never for it to be used purely as a grow zone, though we do intend to use it for seedlings and select greenery.


Instead, it is meant to be fluid and adaptable, just all of my favorite small spaces.

Its uses already include an office, an activity zone for our child, a quiet reading/writing lounge, and a dining/gathering room.

This post contains images of the default set-up, which contains areas for working, lounging, potting and playing. The post does not contain images of the dining set-up, though it’s not hard to envision. (It also doesn’t reflect the recent railings we added to the platform the day after I captured these photos.)

Almost all of the pieces in the space are collapsible, from the standard chairs, to the second-hand potting bench from the cottage, to the corner shelves, and the desks/tables.

The remaining furnishings are lightweight and easily mobile. The focal points on either side — with a stunning view of both the woods and prairie — are two long, slim loungers from Serena & Lily.

We also have extra folding tables and chairs so we can create a farmhouse-style dining setup inside the greenhouse (after relocating the loungers), or just beyond the platform in the grass leading to the prairie:
By leaving a few extra feet in front of the greenhouse door, we’ve been able to create a useful stoop, where we rehabilitate and grow plants from/for elsewhere.

Two spare folding chairs sit out front, offering views of the prairie and a place to take off muddy shoes or drop bags of soil.

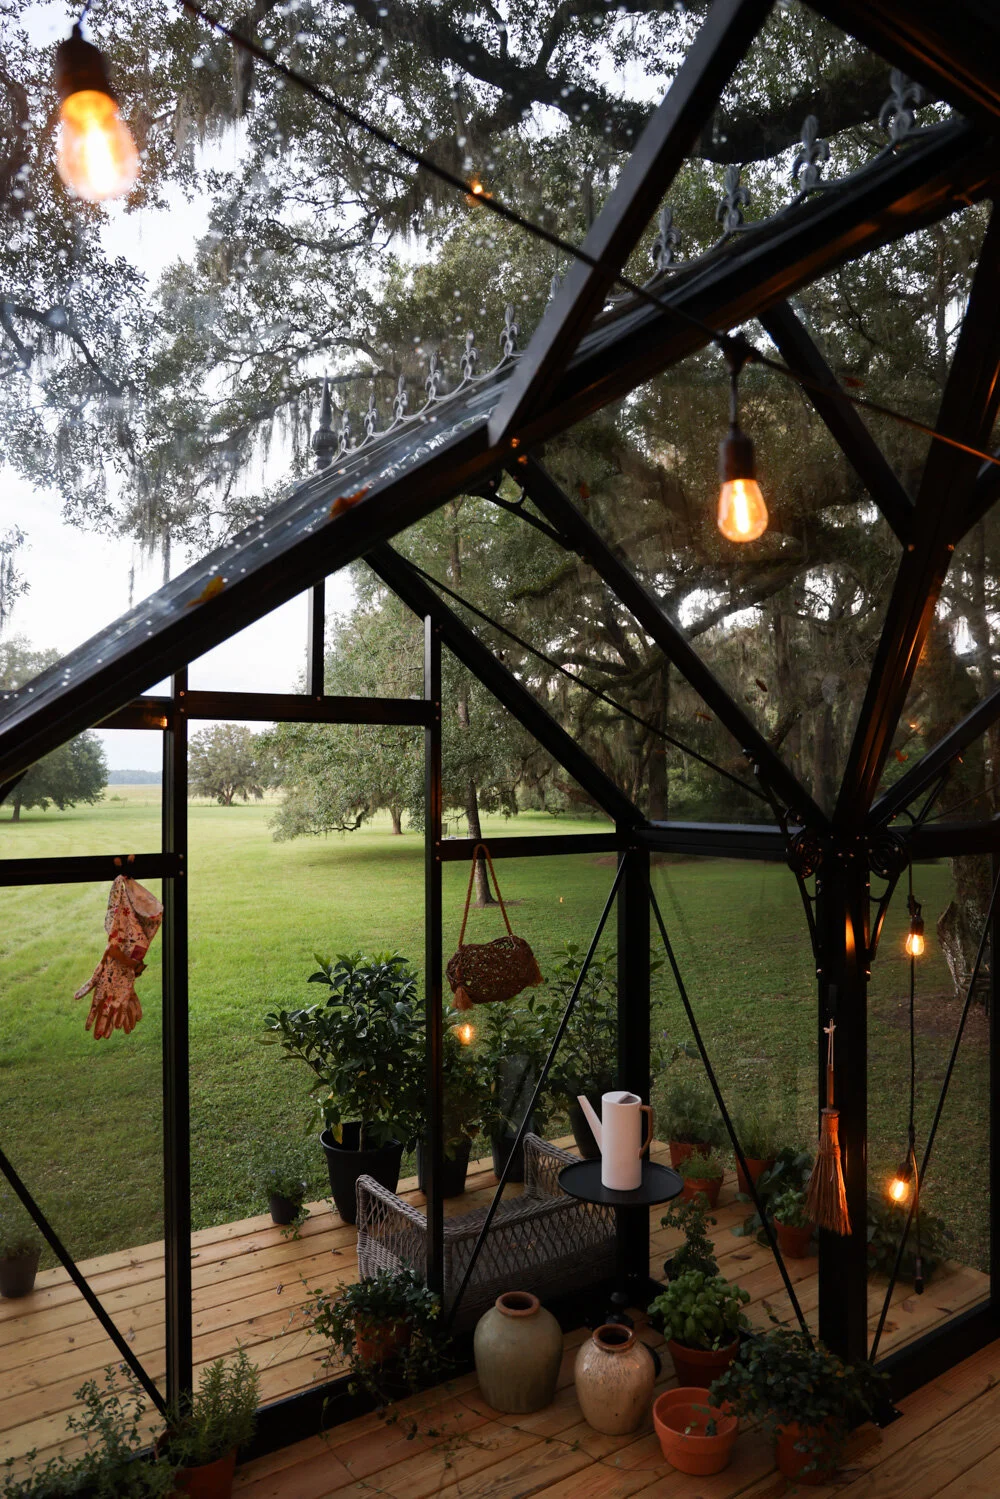
For pops of playful and functional decor, we placed gardening gloves, tools, aprons and bags to the framework along the walls.

We added beautiful bolster pillows (in moss/white ticking) from Serena & Lily, an extra-long doormat (inside the sliding glass door), cafe lights, a patio rug, and a fan to help the ceiling vents and front door cool the room a bit when needed.

We also have useful items such as reusable cleaning cloths, candles, tablecloths, matches, etc. tucked out of sight but easily within reach.


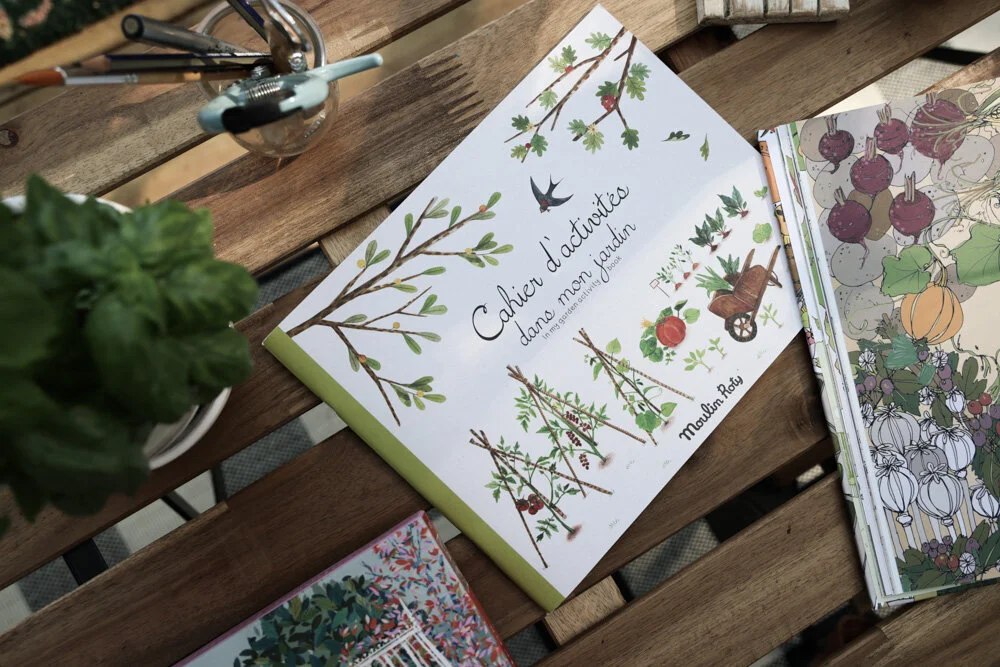
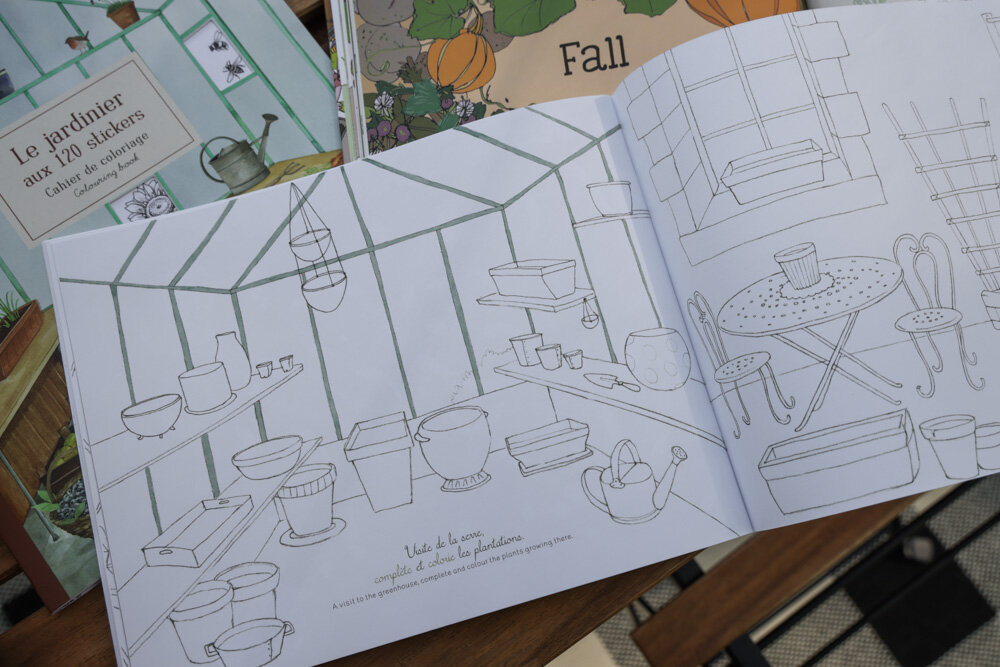
We rounded everything off with a gardening-related selection of books, games and tools for growing and learning in both French and English for our five year old.


I’ve found that I truly am so much more creative and content when working with small spaces. This little greenhouse has reignited a feeling I’d lost track of this year in my stress and uncertainty, and I’m excited to get to fully use and know this space with my family throughout the upcoming cooler, festive months.


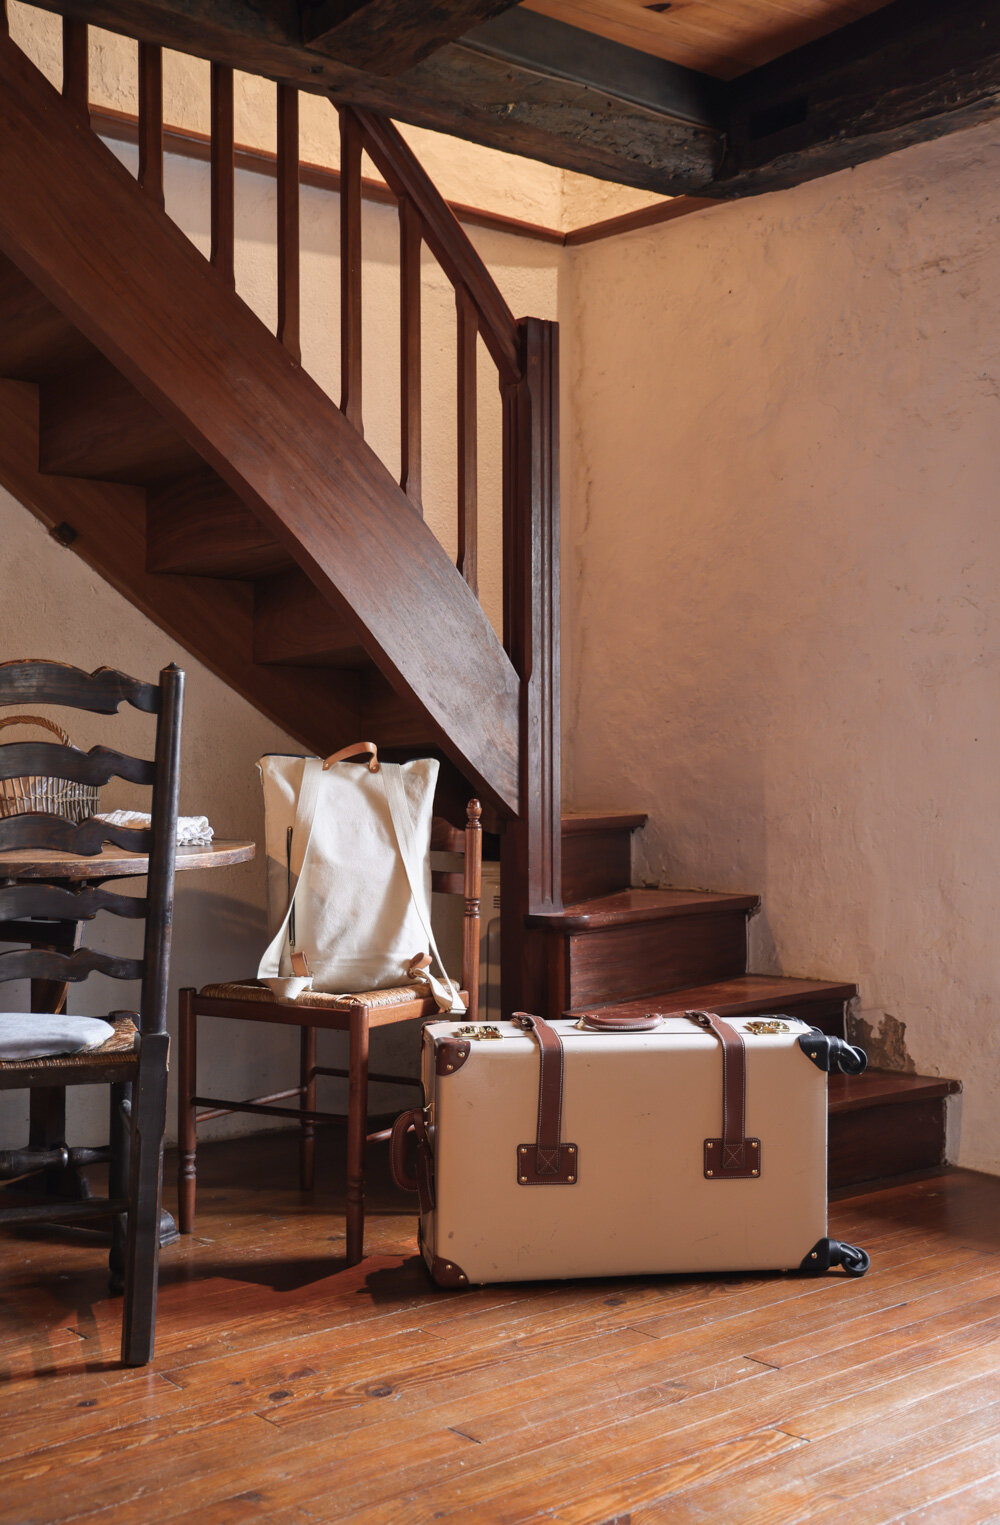
Travel with a Baby & Pre-K Child
During our past trips overseas, Adam and I prided ourselves in packing lightly— carry-ons only, even with a child and the essentials for running my small business from afar in tow. However, on this voyage to the farmhouse with our (then) 4 month old and 4 year old, we decided that the most important goal was to have our hands free as much as possible.

We packed 2 checked bags: one with clothes and shoes, the other with necessities and the Dock-a-Tot. We carried 2 backpacks: one diaper bag, one tech/work bag. And West had his little rolling suitcase, which held his books + toys, while also operating as a ride-on surface through the airport, and as a foot-rest / “bed box” for the airplane rides. We didn’t bring a stroller or carseat, opting instead for a baby carrier (like I mentioned, hands-free!), and rental safety seats upon arrival. All-in-all it was more than we would’ve liked to bring, but during our stay we repeatedly used every single item we brought.

Some items that made the packing and travel process smoother for our family at this stage of our lives are listed below:
Airline Bassinet
Did you know that on some longer flights — depending on the airline and plane model — you can request a baby basinet seat ahead of time? (There’s no extra charge.) The basinet seats are located in the bulkhead aisles of the planes, which we find to be an extra bonus for tall / long-legged folks such as ourselves. With these seats, West’s adaptable suitcase had to be stowed for take off and landing, but could be in use otherwise, as we weren’t in an exit row.


Some notes about the bassinet per the flight crew: The unit is unfolded and affixed to the bulkhead wall by the crew after takeoff, and stowed prior to landing. The baby’s head has to remain on the side of the bed that’s closest to the oxygen masks. (In the embedded video, we had the baby in the opposite direction and ultimately had to rotate her position.) The baby needs to be out of the bassinet and secured via the airline-provided belt extender loop for take off and landing, as well as turbulence.
Child Safety Bracelet
Click here
Adam and I gave West a customized safety bracelet for the trip. It contained our names (not his) and phone numbers. We explained to him that in the event he became separated from us, that any official behind a counter at the airport could locate his parents if he showed them his bracelet.

Reusable Water Bottle & Cutlery Set
For each of us, we have a small set of reusable cutlery (no knives for air travel) and stainless steel bottles for refilling at airports.

Kid’s Combo Suitcase
Click here
This ride-along suitcase hauls items and easily becomes a seat, footrest and bed-like adapter for airline seats for a child. Upon booking our tickets, we also verified that it was approved for use on the airlines we selected.

Lightweight Nursing-Friendly / Wrap Sweater
Click here
This isn’t a nursing duster, but it works well for chilly plane rides and an added touch of privacy.
Dock-a-Tot
Click here
Whether traveling or at home, the Dock-a-Tot is one of our baby essentials. It’s particularly wonderful for small spaces.
Vintner’s Daughter Travel Set
Click here
Other than SPF and my yearly bar of tea tree + charcoal face soap, the only skincare product I use daily for my face is this duo set by Vintner’s Daughter. They just released a travel version, which is long-lasting and easy to tote.

Roll-Up Art Case
Click here
Although I use this to carry some of West’s supplies, I must admit— it’s mainly for me.
Kid’s Crayon Roll
Click here
Since day one, this has been our go-to crayon roll at home and during travel of any kind.
Kid’s Roll-Up Playmat
Click here
This little mat is easy to tote, and is perfect for play as well as an on-the-fly placemat for snacks.
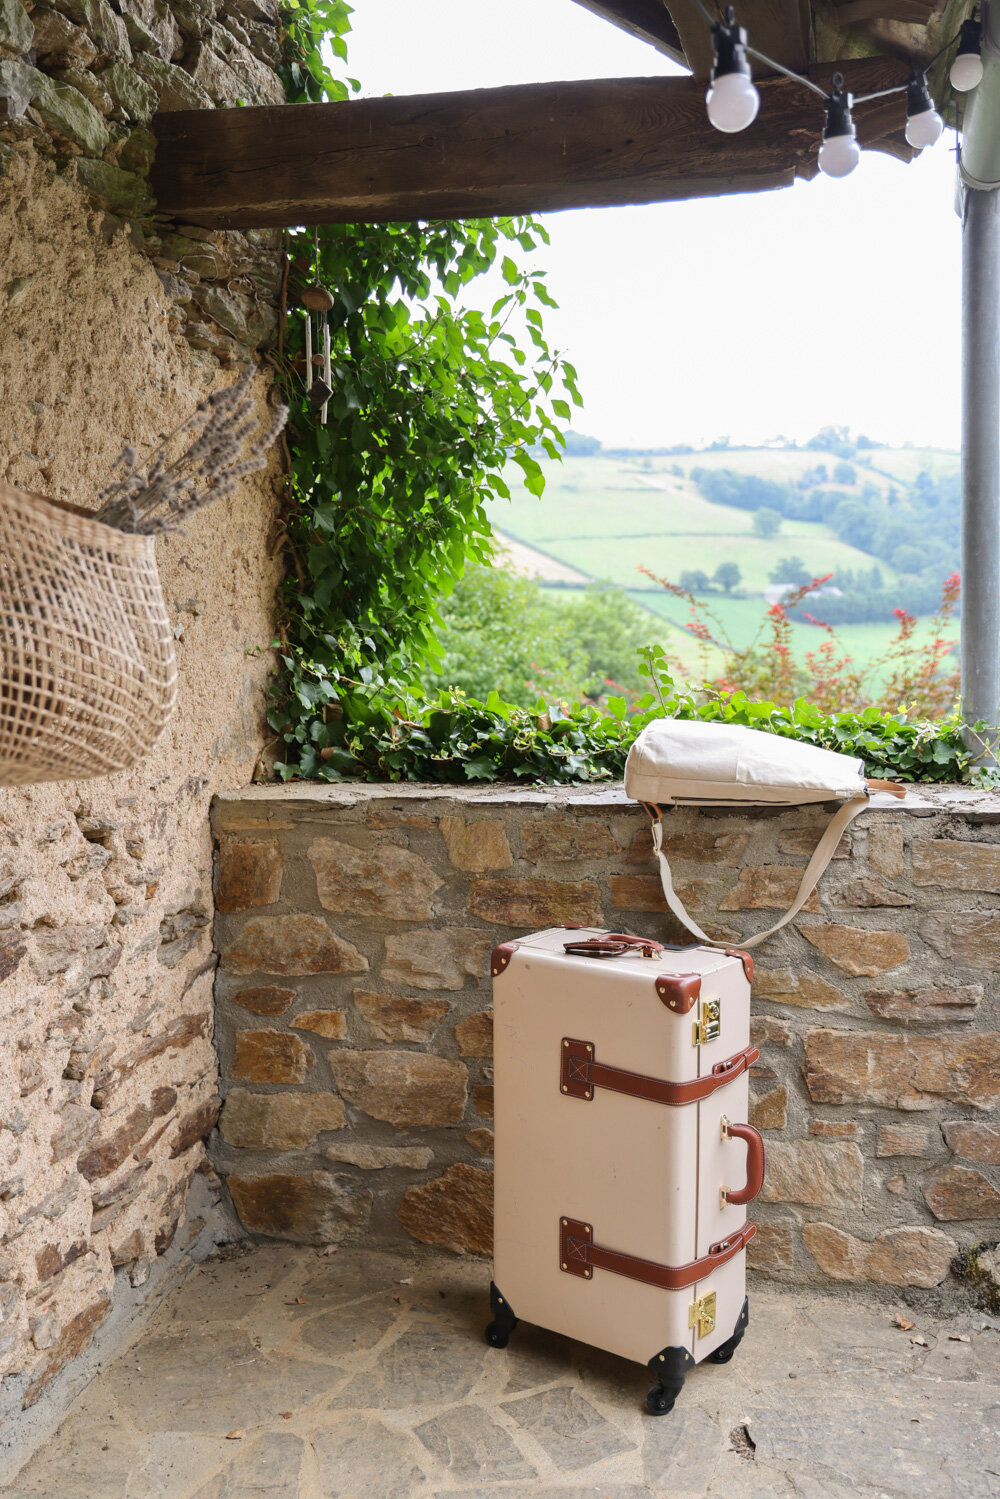
Steamline Luggage
Click here
We love our Steamline bags! However, I recommend them more for carry-on or car travel, rather than as checked bags, simply because they’re so beautiful and I cringe to see them dinged or scuffed!
Lauren Groff’s Matrix
Click here
I read this upon our return from the farmhouse, but I wish I’d had it on the trip. Groff’s stunning writing can transport her readers anywhere in mere moments, and would’ve been fantastic to absorb during those jet-lagged nights spent nursing.
Cord / Tech Organizer
Click here
Passport Cover + Luggage Tag
Click here

A Compact Thoroughfare Laundry Room Makeover (<$250)
For thirty years, my folks have been meaning to spruce up their tiny, windowless, thoroughfare laundry room. They enter and exit their house through this compact space multiple times per day. Not only has the room been long overrun with household cleaning products and dog gear, but it’s now also packed to the gills with all the typical COVID-era necessities as well.
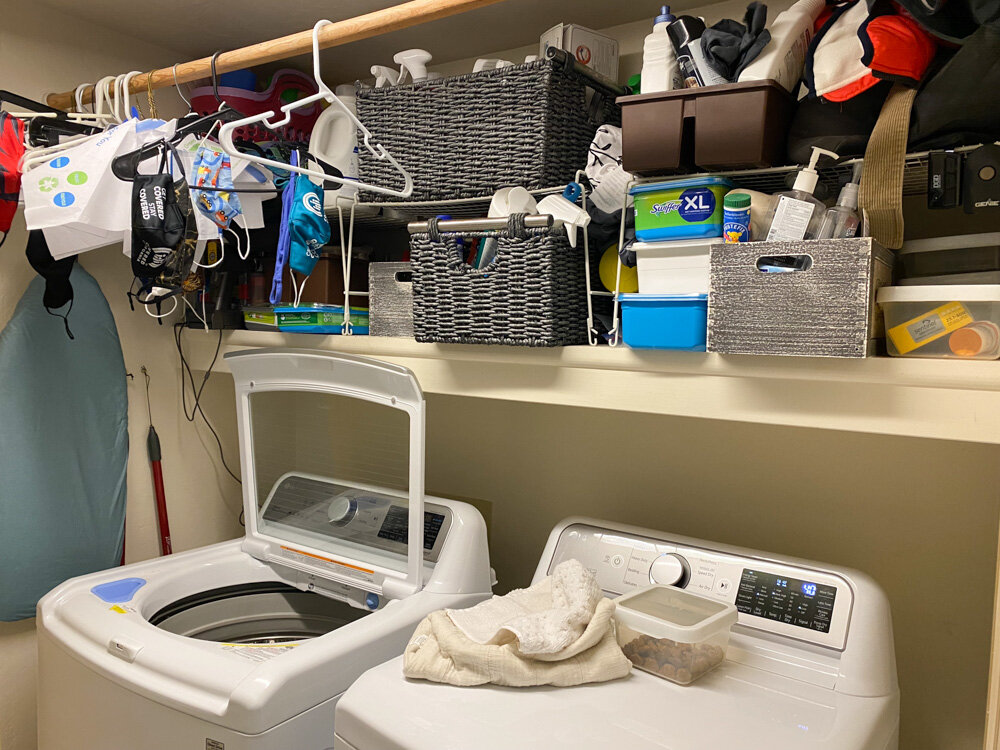
The main issue with this hallway / muck room / laundry bay isn’t its size. It’s that the overflowing supplies are on full display when the interior door to the room is ajar, which it usually is since for one reason or another.
Upon returning from France, I decided it was time to finally tackle this mini-makeover, and make it an area that my parents could keep as-is once completed, or upgrade guilt-free in the years to come. As with most of my projects of this nature, I wanted to work with that we already had on-hand to minimize waste. And since we have large projects underway (such as the restoration of the farmhouse roof and the building of the prairie ADU), I wanted to keep the updates under my budget of $250.
Our modifications were minimal but impactful:
Shelving
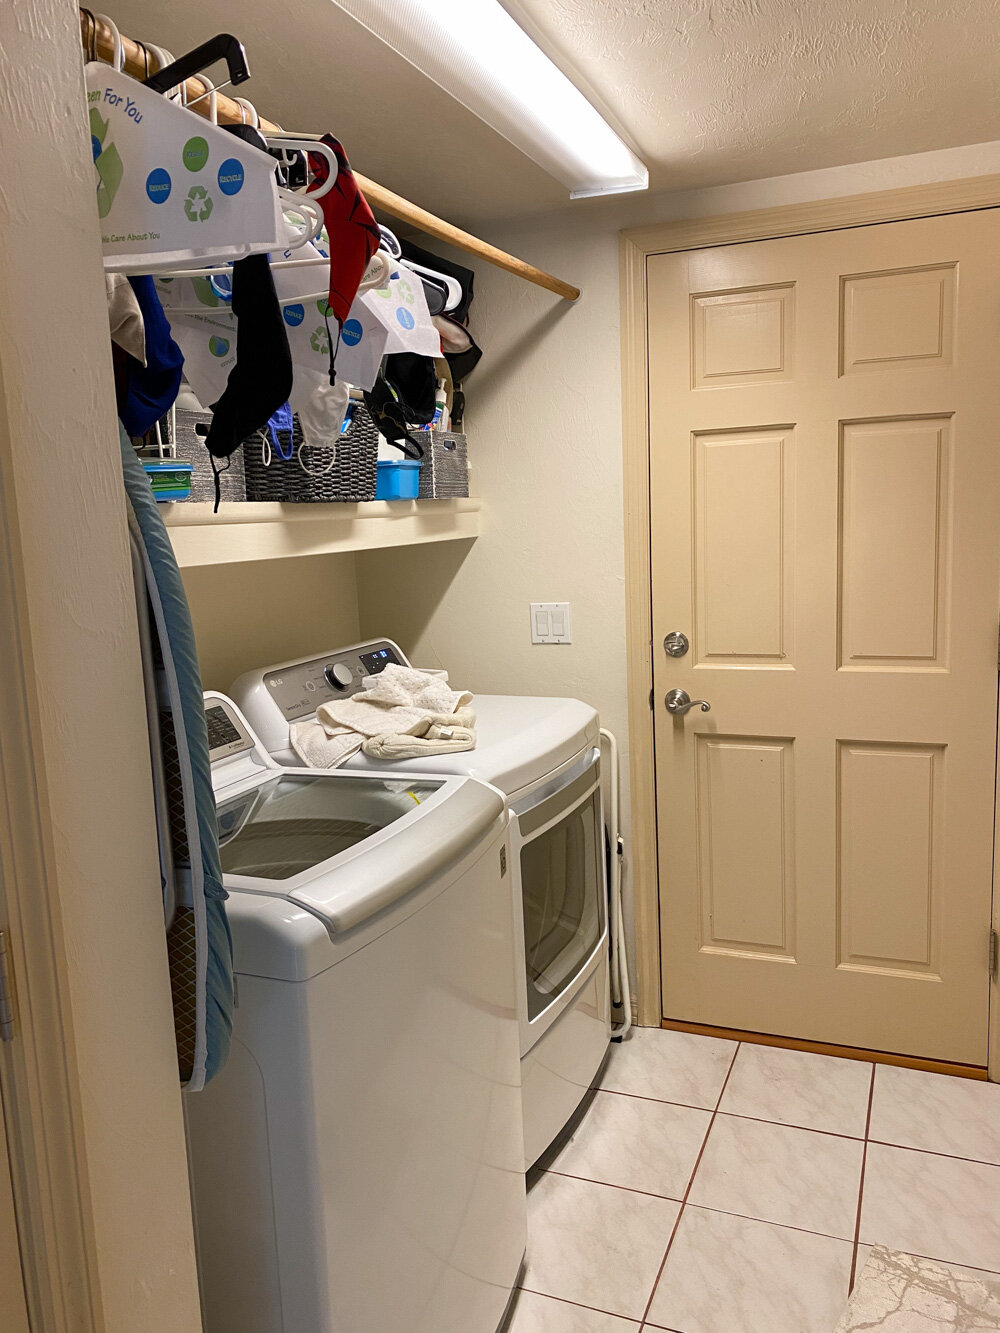
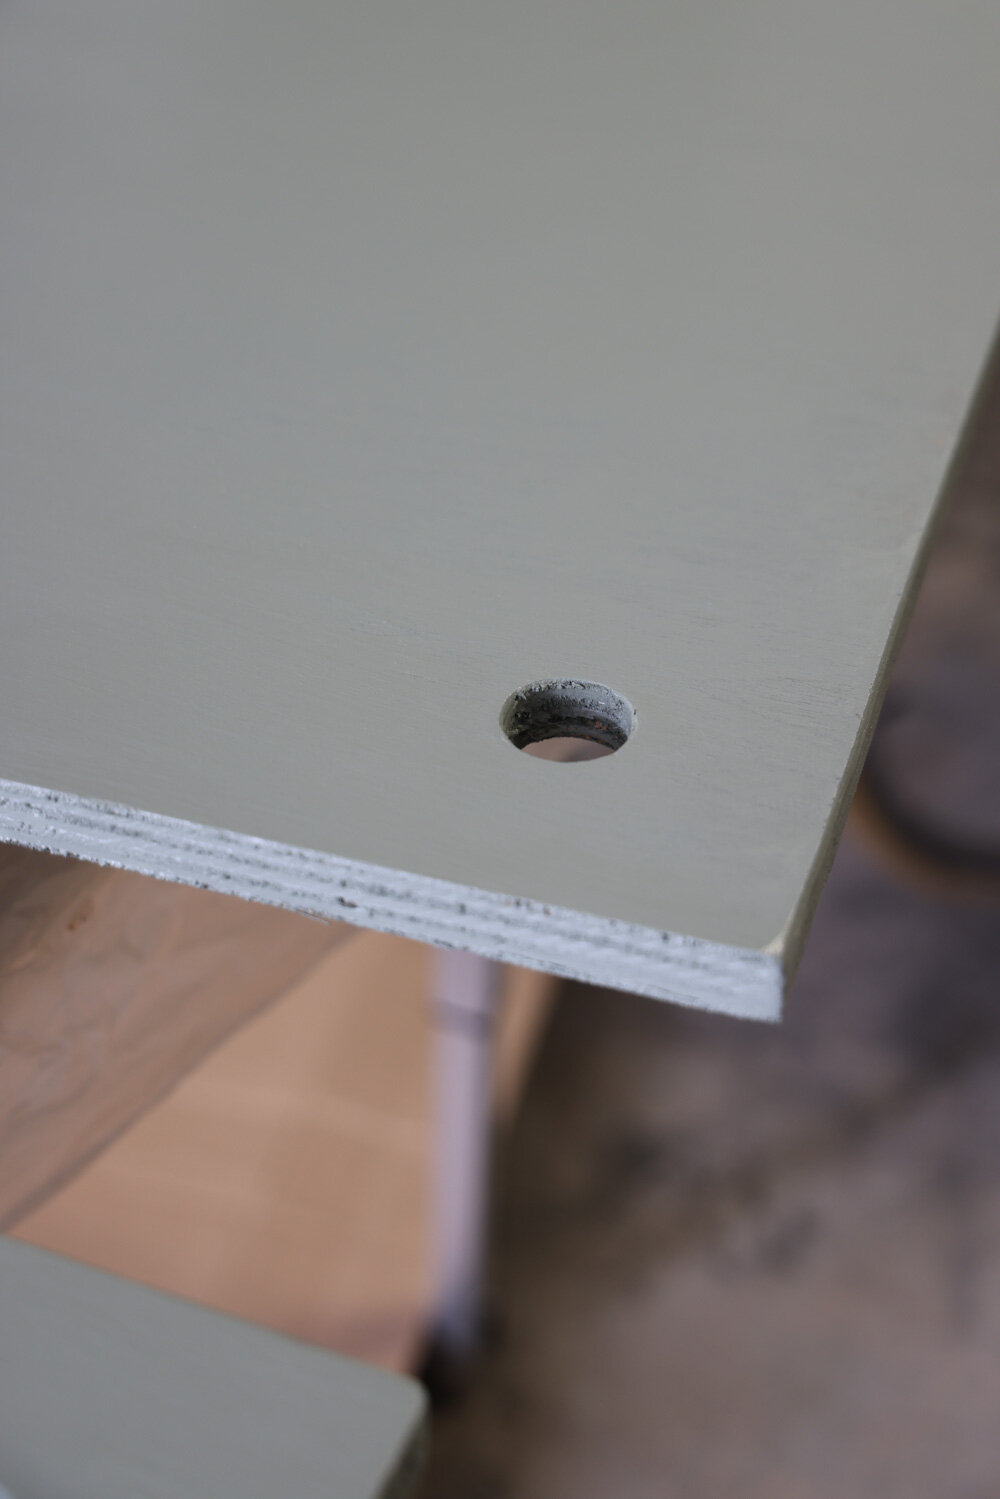
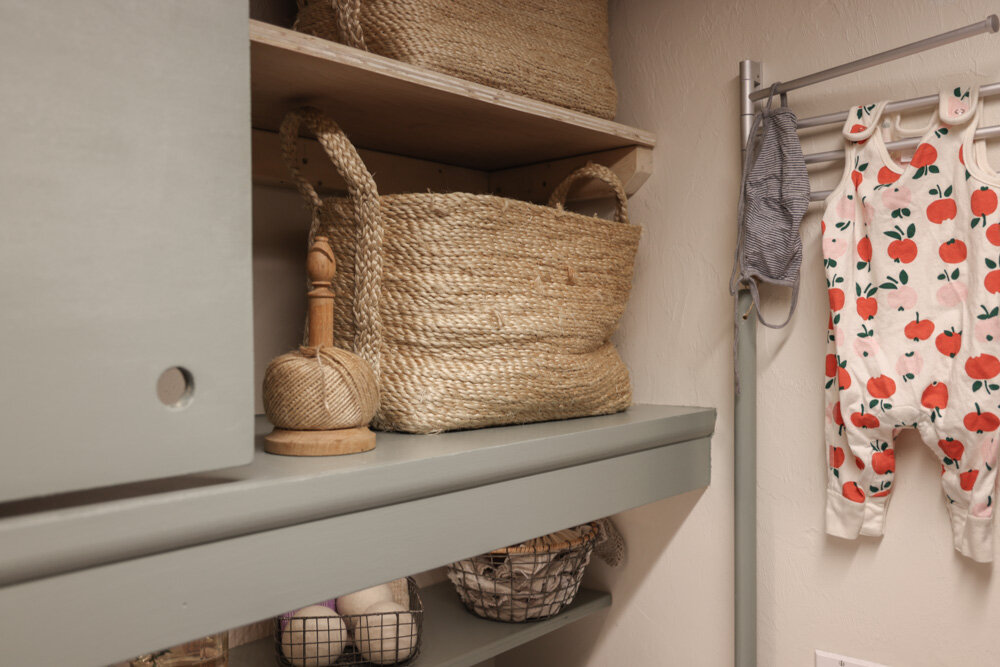
A touch of open shelving in this area is nice for quickly tipping items like masks, leashes and cleaning supplies out of overloaded hands. But having ONLY open storage is what was causing the most visual clutter. So I opted to custom-cut and install simple sliding doors to conceal the contents of the existing shelf, which we divided into 2 levels to maximize vertical space. We also added a new, low profile shelf slightly above the washer and dryer for smaller goods.

Doors
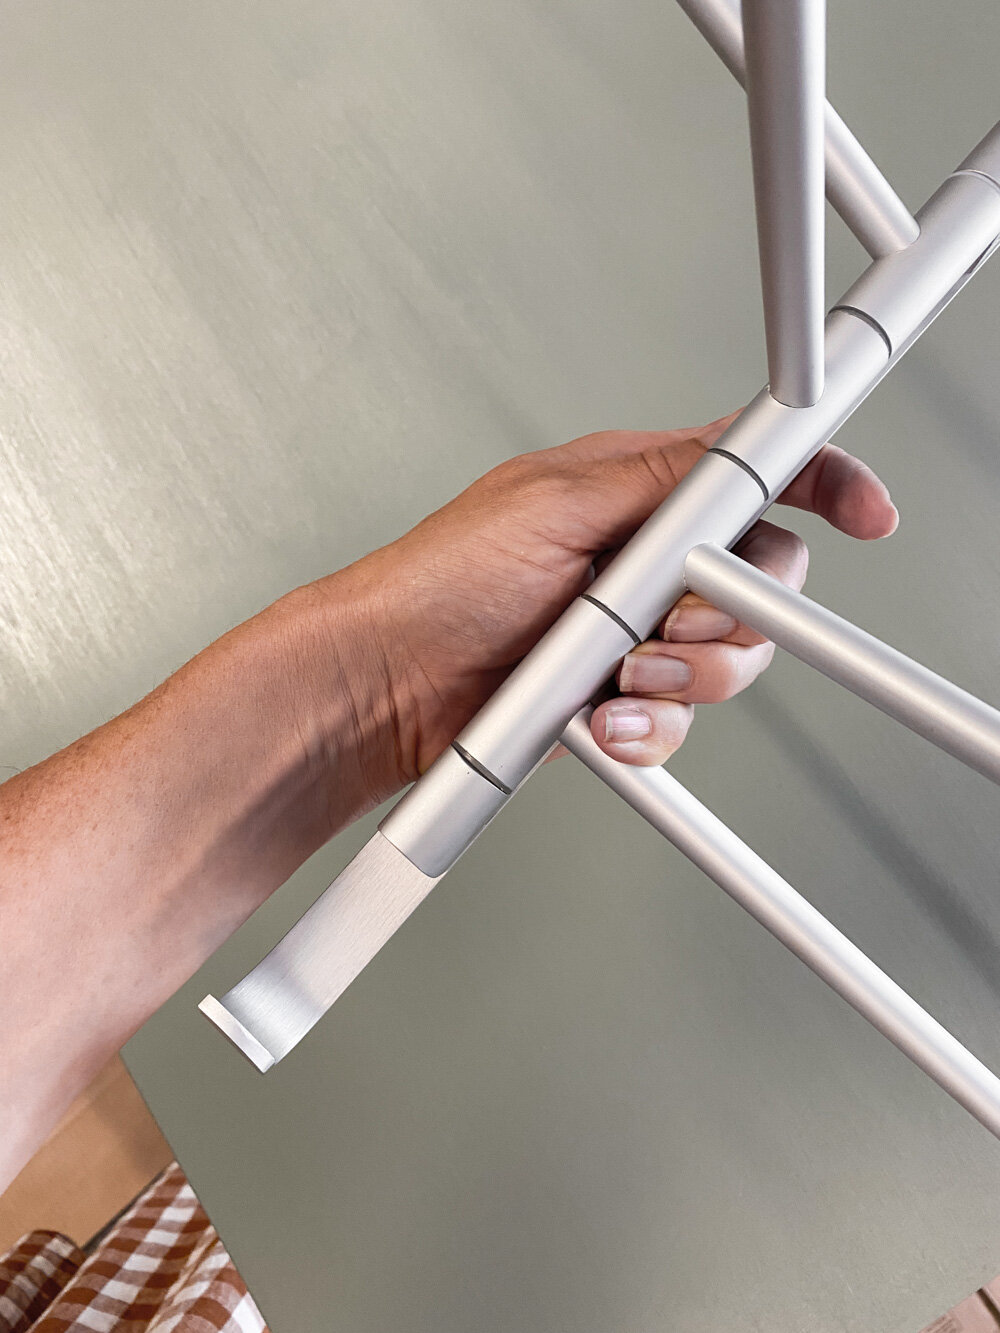
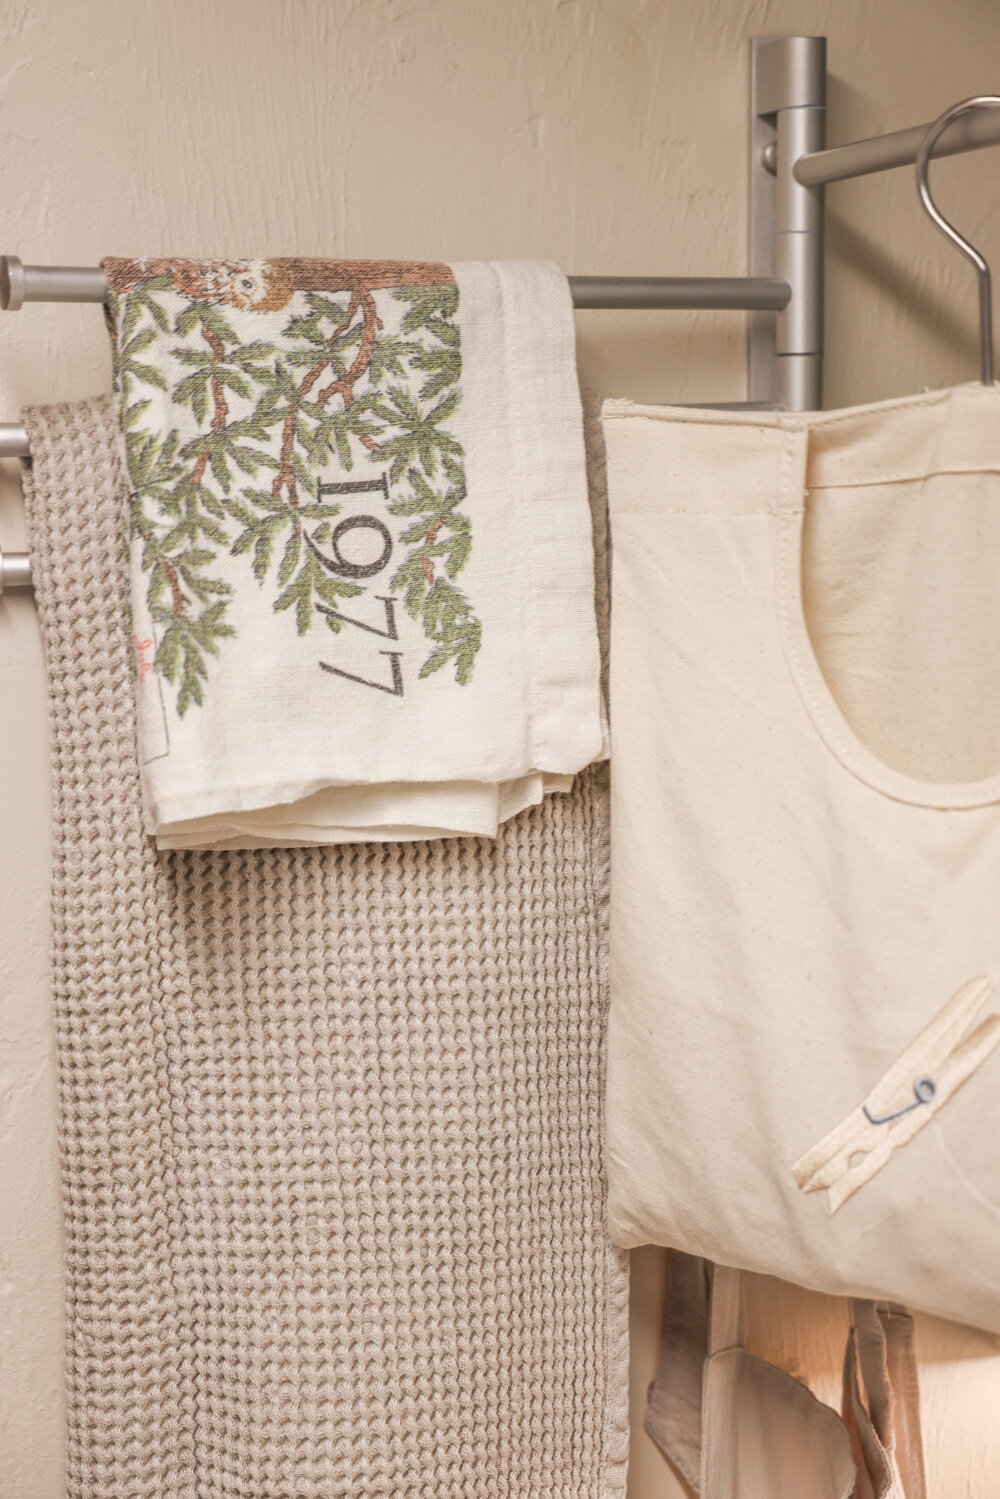
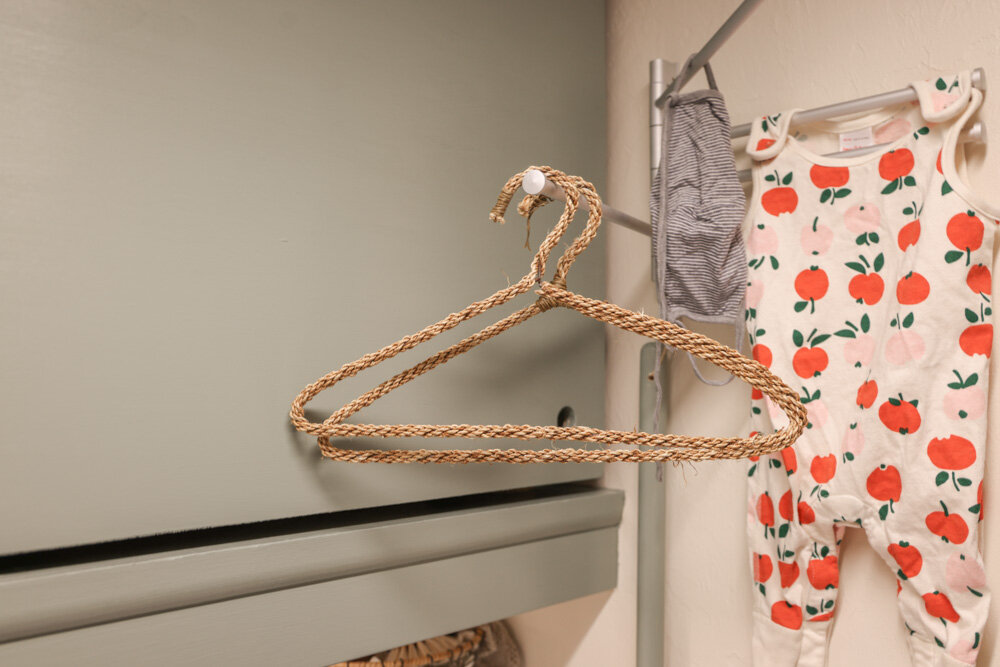
The sliding doors were a space-saving choice, as cabinets would’ve encroached into headspace when opened. We also opted to forgo handles on the doors to further save every bit of space, since the sliding panels overlap and are situated close to the collapsible, swing-arm drying racks I installed in place of the bulky overhead closet-style dowel.
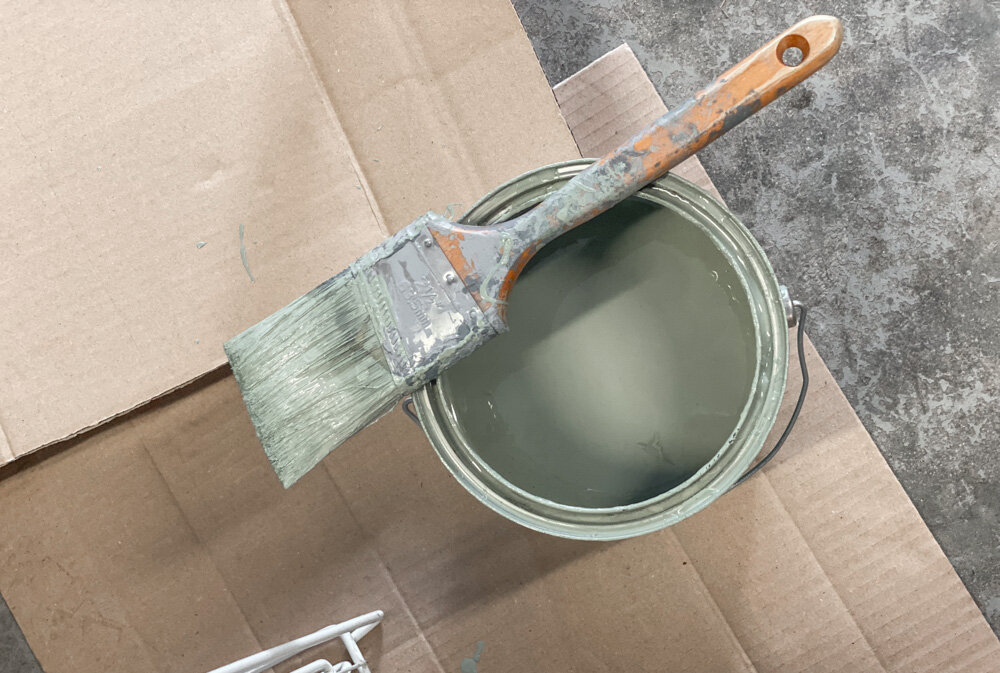
Paint
I used the paint leftover from West’s reading nook makeover (color: Sherwin-Williams Evergreen Fog SW9130) for the doors and shelves. It’s an easy-going, green-grey hue that adds a pop of personality without overcrowding a tight, windowless space such as this one. (Eventually we’ll do an additional coat and paint the interior shelf, as well as touch up the walls nearby, but one thing at a time.)
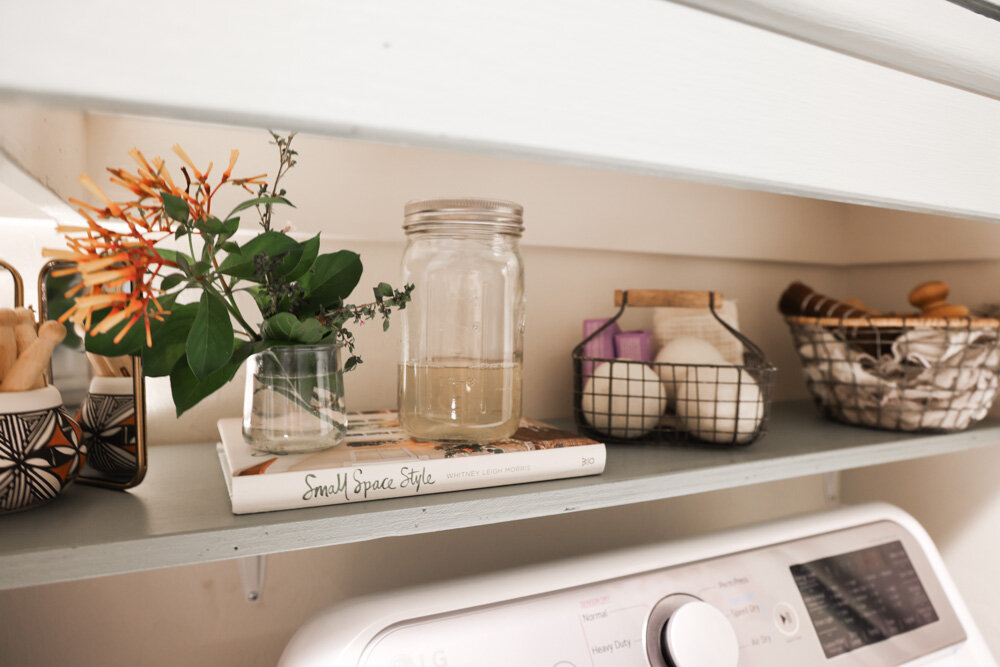
Cleaning Supplies
Over time, as my folks used up their existing supplies, I replaced their disposable dryer sheets with reusable wool dryer balls, their plastic jugs of detergent with refillable glass jars accepted by the local refill station (Life Unplastic), their numerous household cleaning liquids with a bottle of concentrate and refillable spray bottles, and their paper towels with washable cotton rags. Not only do reusable / refillable goods reduce waste and save money over time, but they also free up a remarkable amount of space. Plus they look far nicer in my opinion.


So, while it’s not perfect, it’s loads better. We can now leave the interior door open without wincing when we walk by or pass through. Remember: you don’t necessarily need more space or clever storage solutions. You just need to get a bit creative with the space you’ve got.

Our Tiny (~114 sqft) Greenhouse
Constructing a tiny, multi-purpose greenhouse.
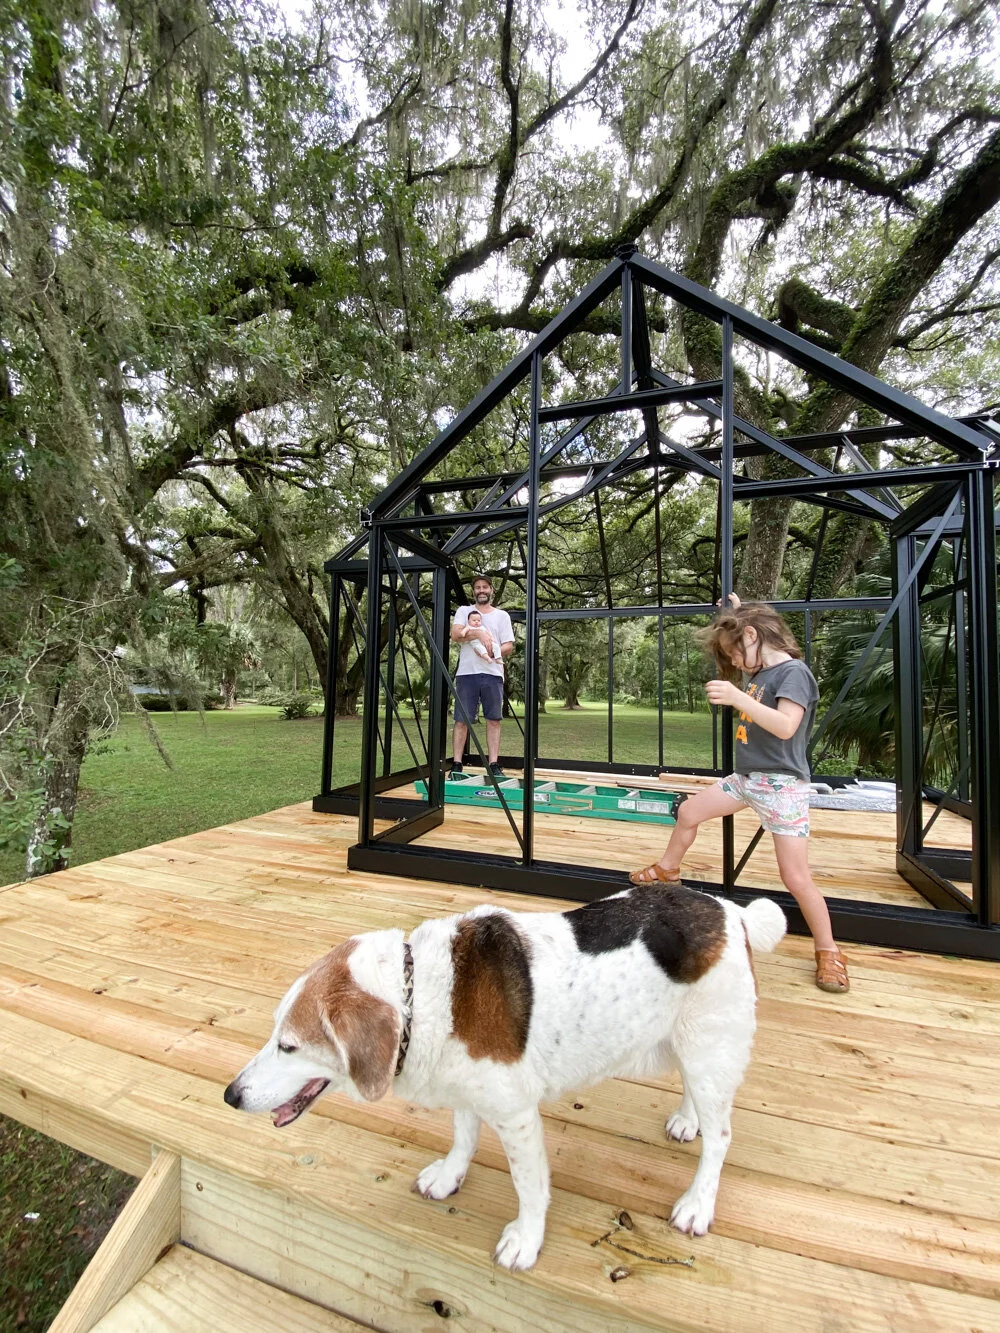
The tiny greenhouse is up, folks!
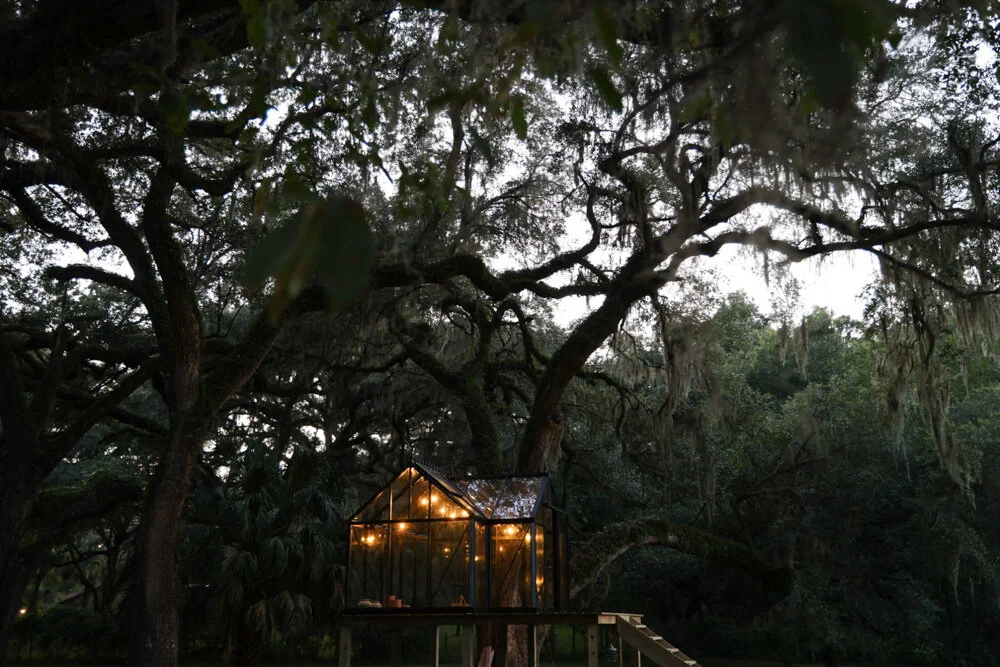
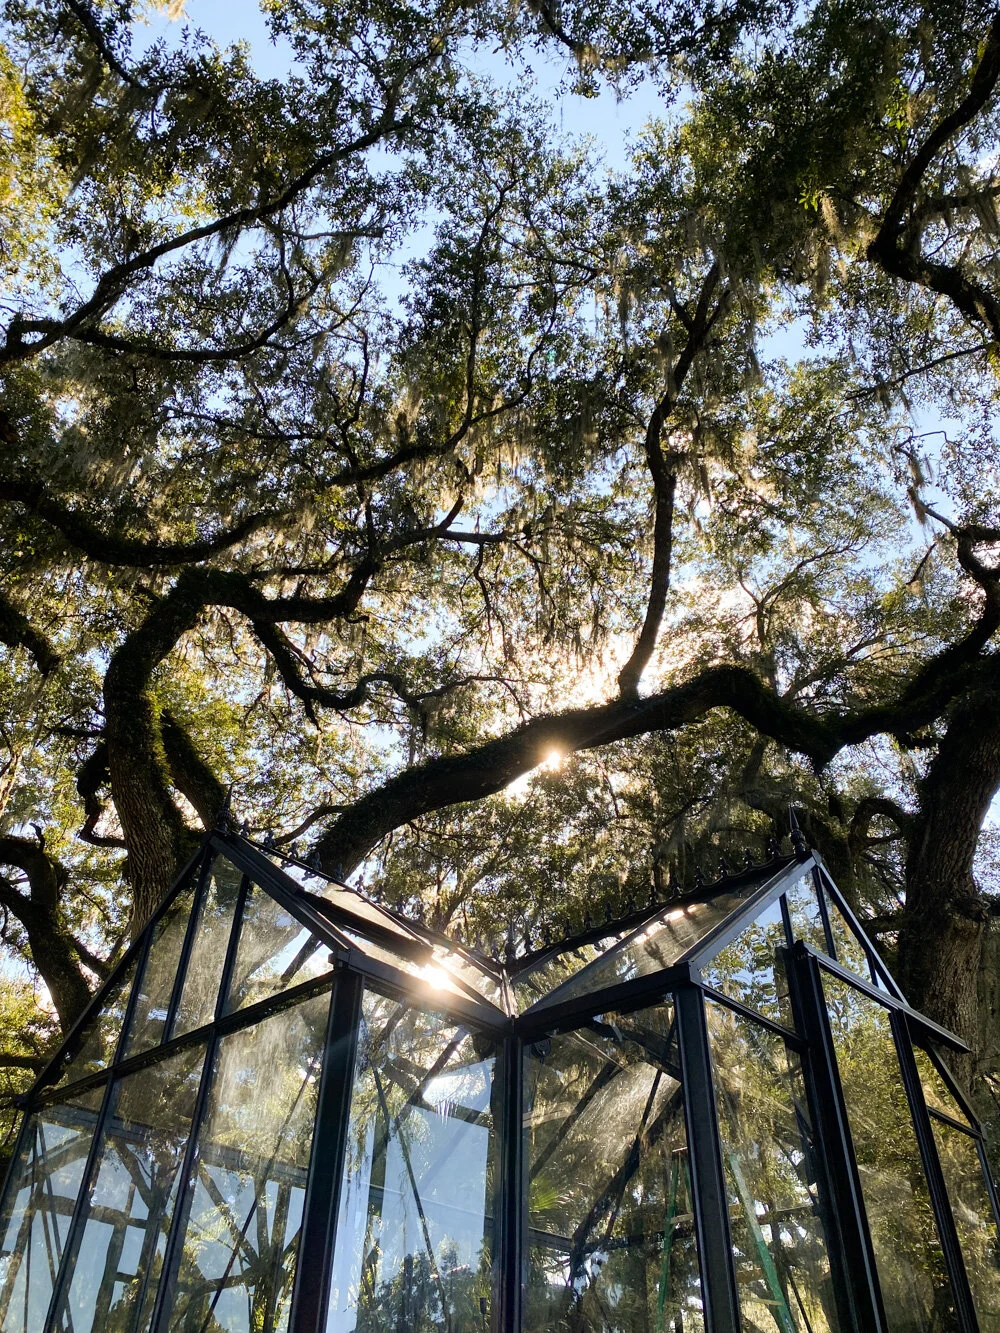
It is a ~114 sqft, T-shaped design that straddles the sunny field of the prairie and the cool canopy of the oak trees. It’s still a work in progress as far as finishing touches and styling are concerned, but that’s the easy part!

We started this project back in the spring, but first had to navigate the permitting process since we’re in a flood zone here in the Southeast. Turns out that we had to lift the structure 5’ off the ground to satisfy requirements, so now it’s got a treehouse vibe to it.
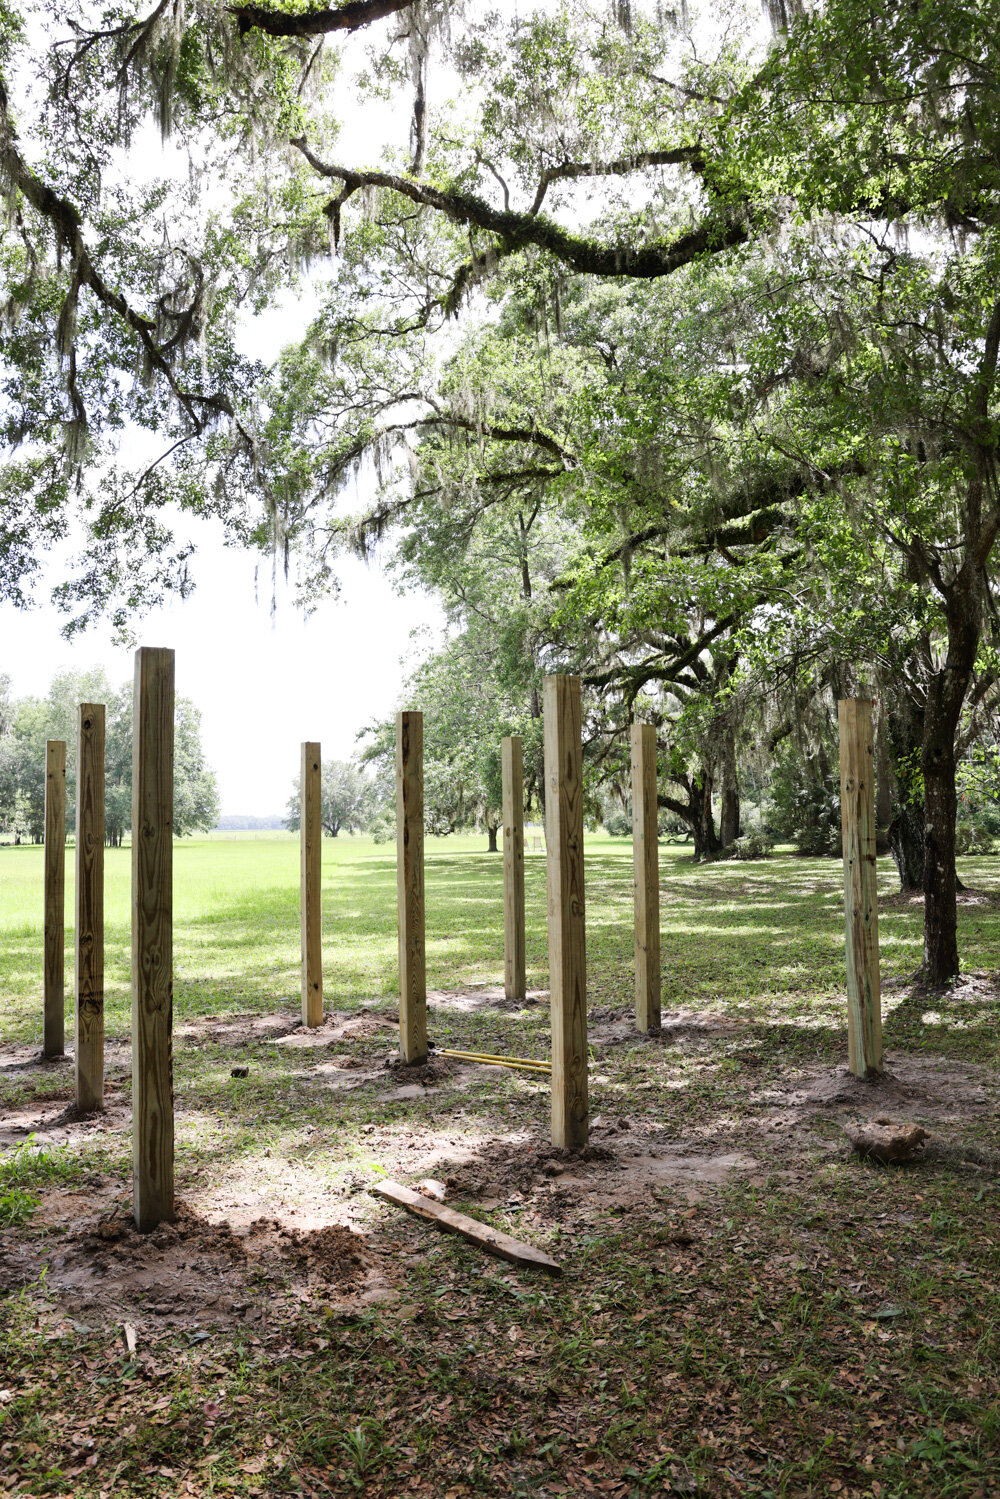
If we could’ve build it on the ground, I would’ve done so on top of a low, 2-3’ brick or stone perimeter wall to create more height and to mix-and-match textures and materials. Still, I’m so happy with how it turned out!
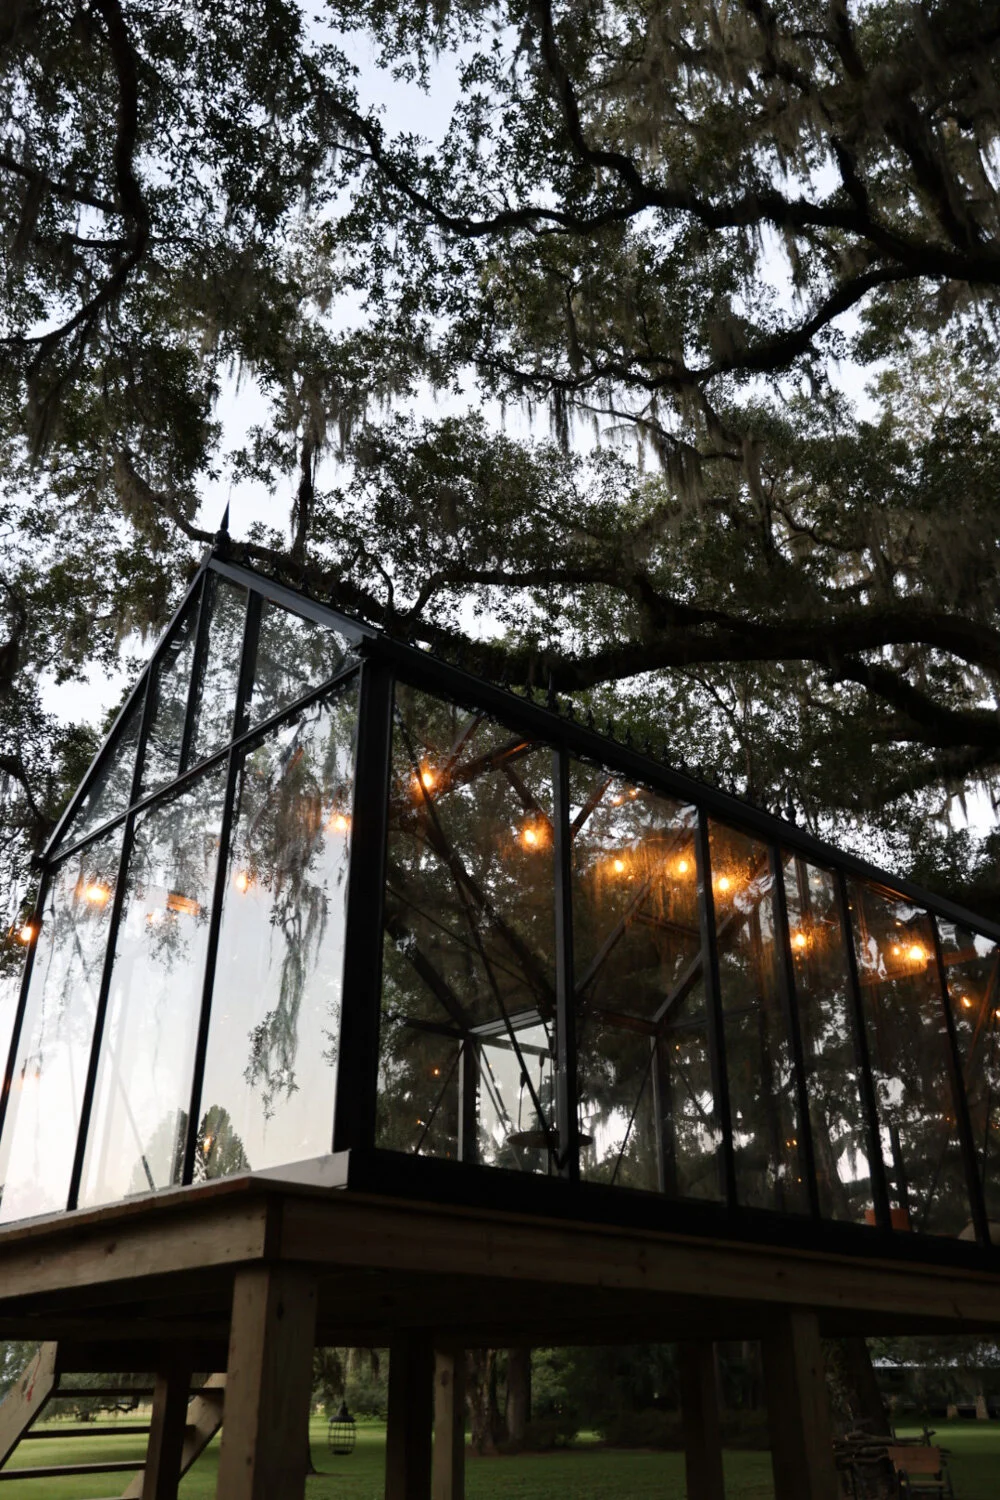
Since we’re in a high wind zone here in Florida, where there are product approvals to pass before building anything new, we couldn’t construct a structure of recycled/repurposed windows and materials. So instead, we found this sweet little aluminum + tempered glass greenhouse kit from The Home Depot.

What drew us to this partial model was its unique shape and compact but easily navigable size. Despite its small footprint, it has an overall height of 8’2” so our family can sill move comfortably around the interior. (I’m almost 6’ tall, and Adam and my father are even taller.)
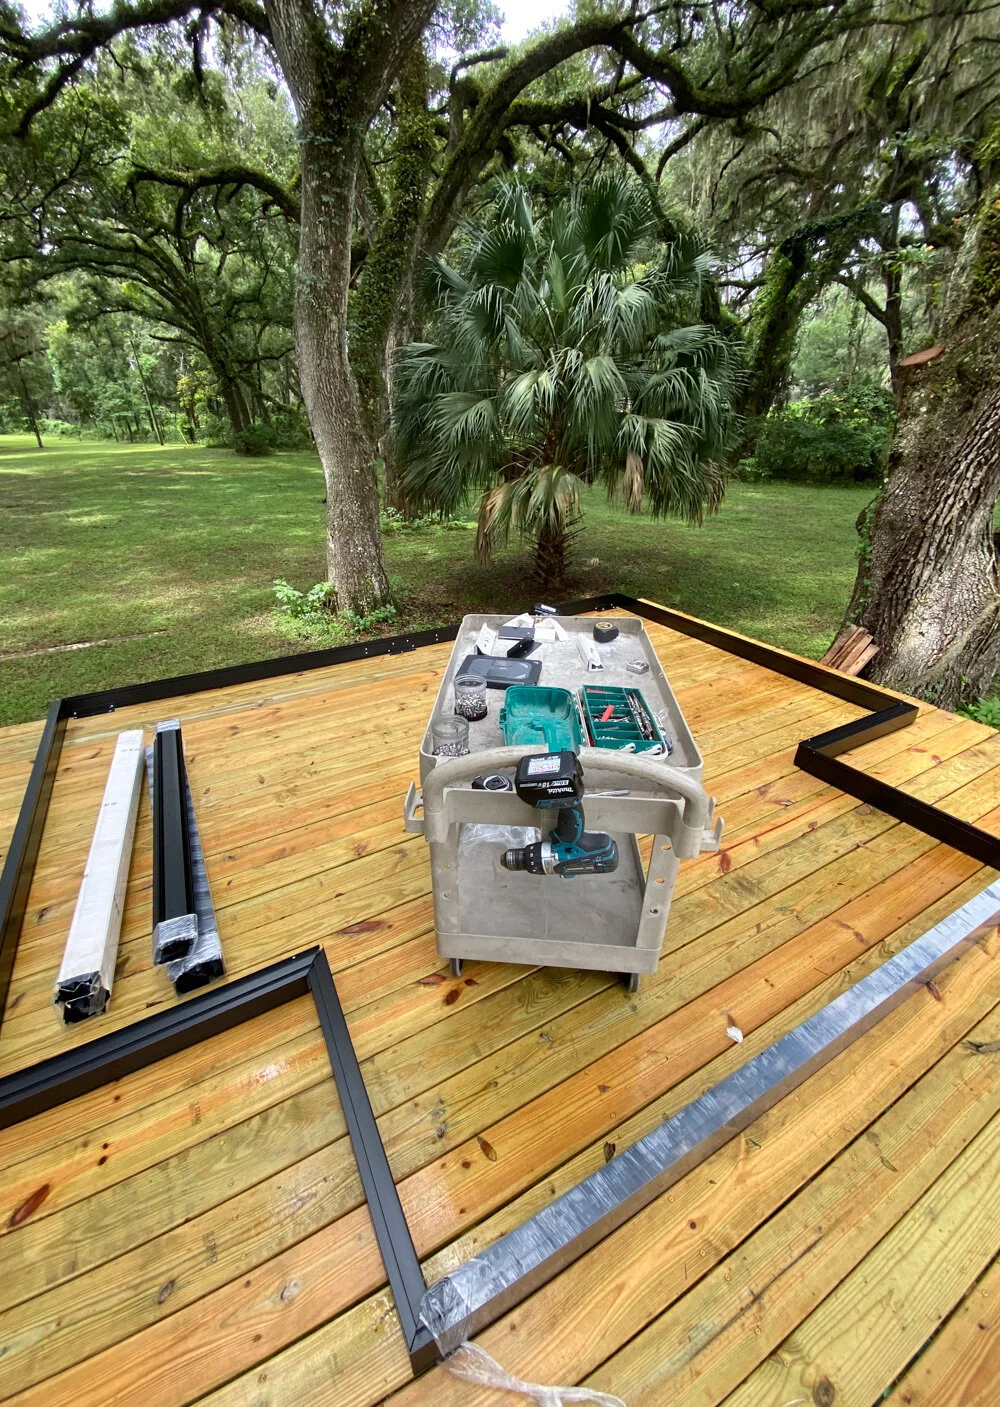
The framework base can anchor to bare level ground, a concrete slab, or a wood platform like the one we had to create. We used pressure-treated lumber from The Home Depot to make the 14’ x 14’ deck, and placed the greenhouse towards the back of the surface so that the extra square footage extends beyond the front of the greenhouse like a miniature — but very usable! — stoop.

It took about a one week for two people (our friend Alan and my husband + business partner, Adam) to construct the unit. Alan studied the instructions in advance, and came prepared with all the necessary tools and back-up materials, just in case. It would’ve all been completed sooner had they not stopped repeatedly for the summer rains. Uninterrupted, I estimate that it would’ve taken 3-4 days of work for the two of them.
Now that it’s all up, we’re debating— deck paint? Slip-proof tile? Both, I think! And of course we need to add some railings.
In the meantime, we’ll be outfitting this gem with flexible zones for potting + growing and lounging, and we fully intend to enjoy it as much in the fall and winter as we undoubtedly will when spring rolls around again.

Since the greenhouse has a sliding front door and 2 roof windows for ventilation, it’s actually quite a comfortable temperature inside — especially with a fan oscillating. This is welcome news for us, since we intend to use the space like a conservatory or sunroom, more so than strictly a greenhouse for plants.
I’m sure some readers will be concerned about the possibility of bird strikes, so I want to address that topic in this post as well. Prior to constructing the greenhouse, we spoke with a neighbor in the community about their experience with strikes on their greenhouse. They’d not yet experienced any, but we went ahead and purchased some decals on Etsy anyway, just in case. Thankfully this small house has several aluminum beams in addition to our furnishings and accessories to visually break up the glass. In the three weeks it’s been up we’ve had no incidents, but we’ll remain on alert. (As a family of vegetarians with three rescue pups, we take animal safety seriously.)
There will be many more posts featuring this beautiful little greenhouse to come. We’re thrilled with how it turned out, and I look forward to sharing more small space living stories from it with you.
I want to thank The Home Depot for working with us on this project. They’ve always been so supportive of our small business’ funny little ideas— from our tiny closet nursery at the cottage, to our galley kitchen’s more energy-efficient renovation, to our outdoor shower and mini thoroughfare garden makeover in Venice.
Note: This post features gifted product from The Home Depot. Our small business appreciates that The Home Depot has, for years, tangibly supported designers, bloggers and creators of color and from the LGBTQ community.

Creating a Closet Reading Nook for a Child
View the corresponding video for this post via Pinterest, here.
As we closet out the summer and welcome the fall, we’re still somewhat in a place of limbo as far as our home life is concerned. Our shared farmhouse in France is undergoing fundamental repairs (which we knew would be required going into the acquisition), and our small shared cottage in the Southeast has just been permitted for construction. As such, when in the USA, we’re in a temporary space. While we are comfortable, we still feel adrift, which has been a challenge for everyone, including our four year old.

Starting with our uprooting from Venice, and continuing on to our move across the country (and across the Atlantic, to a certain extent), and the arrival of baby Léa, our pathway through 2021 has been a serpentine one.

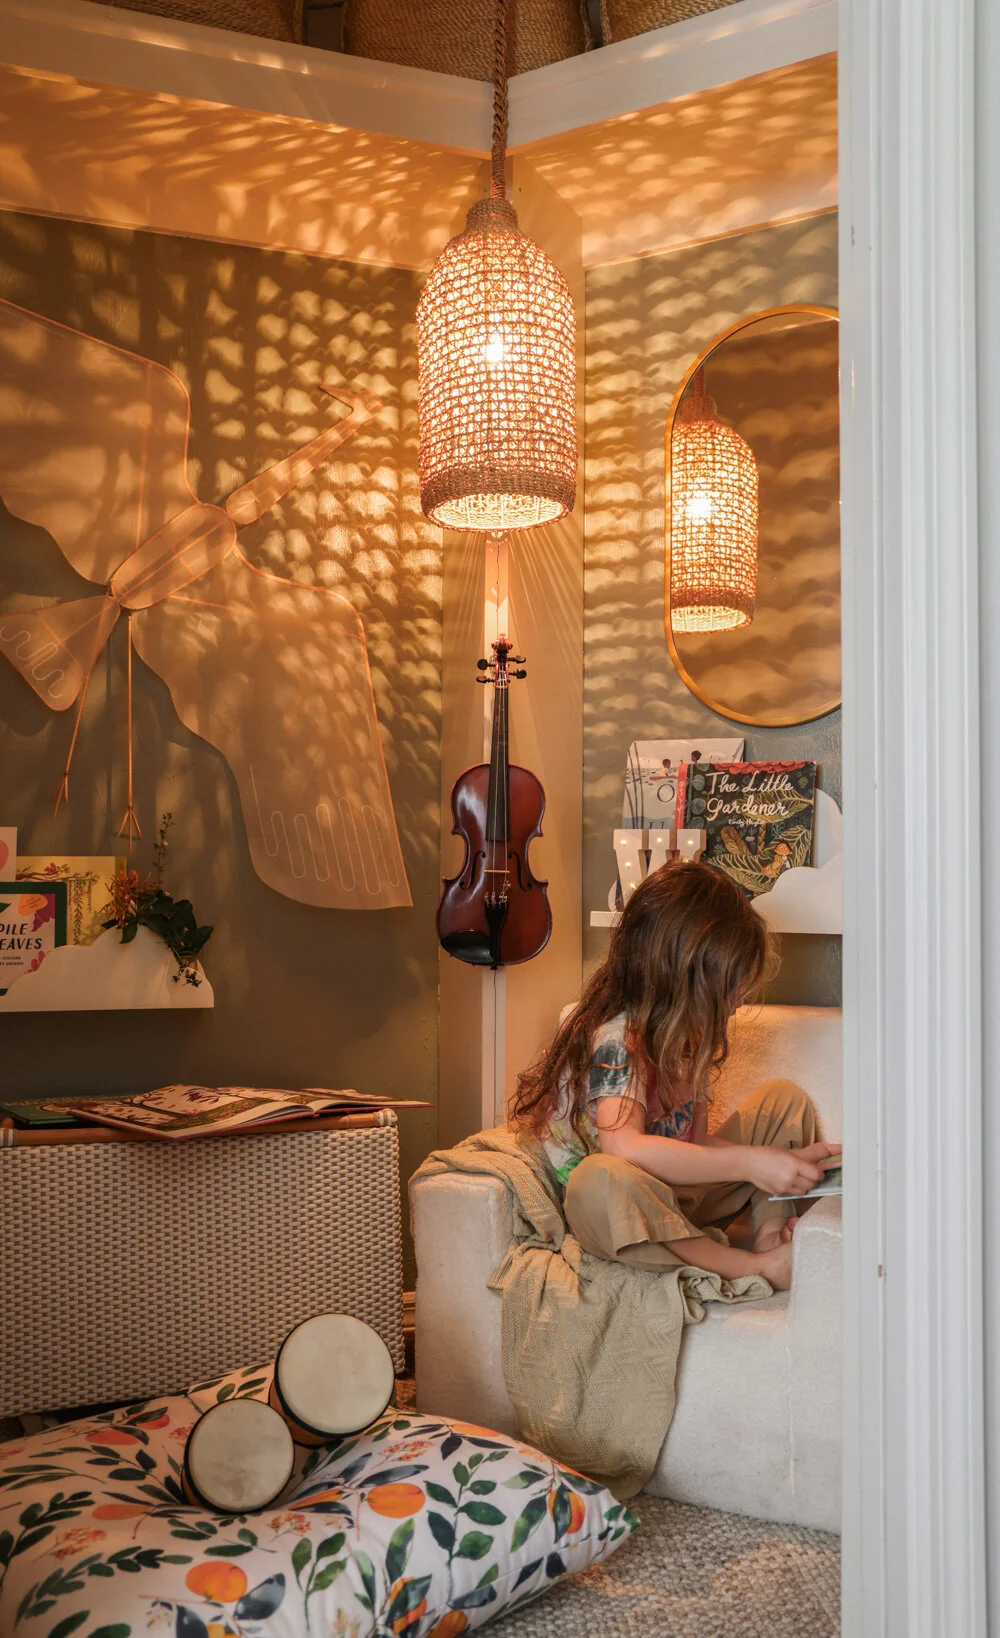
To give our pre-schooler a solid little place to catch his breath and call his own as we work on our long-term home projects, we transformed a walk-in closet into a quiet little reading nook. Here, he can escape the barking dogs, the crying baby, and his frenzied parents when need be.
We decided to simply work with the existing space, using various items left over from various partnerships and our cottage. This helped us keep the budget, waste and overall lift minimal.
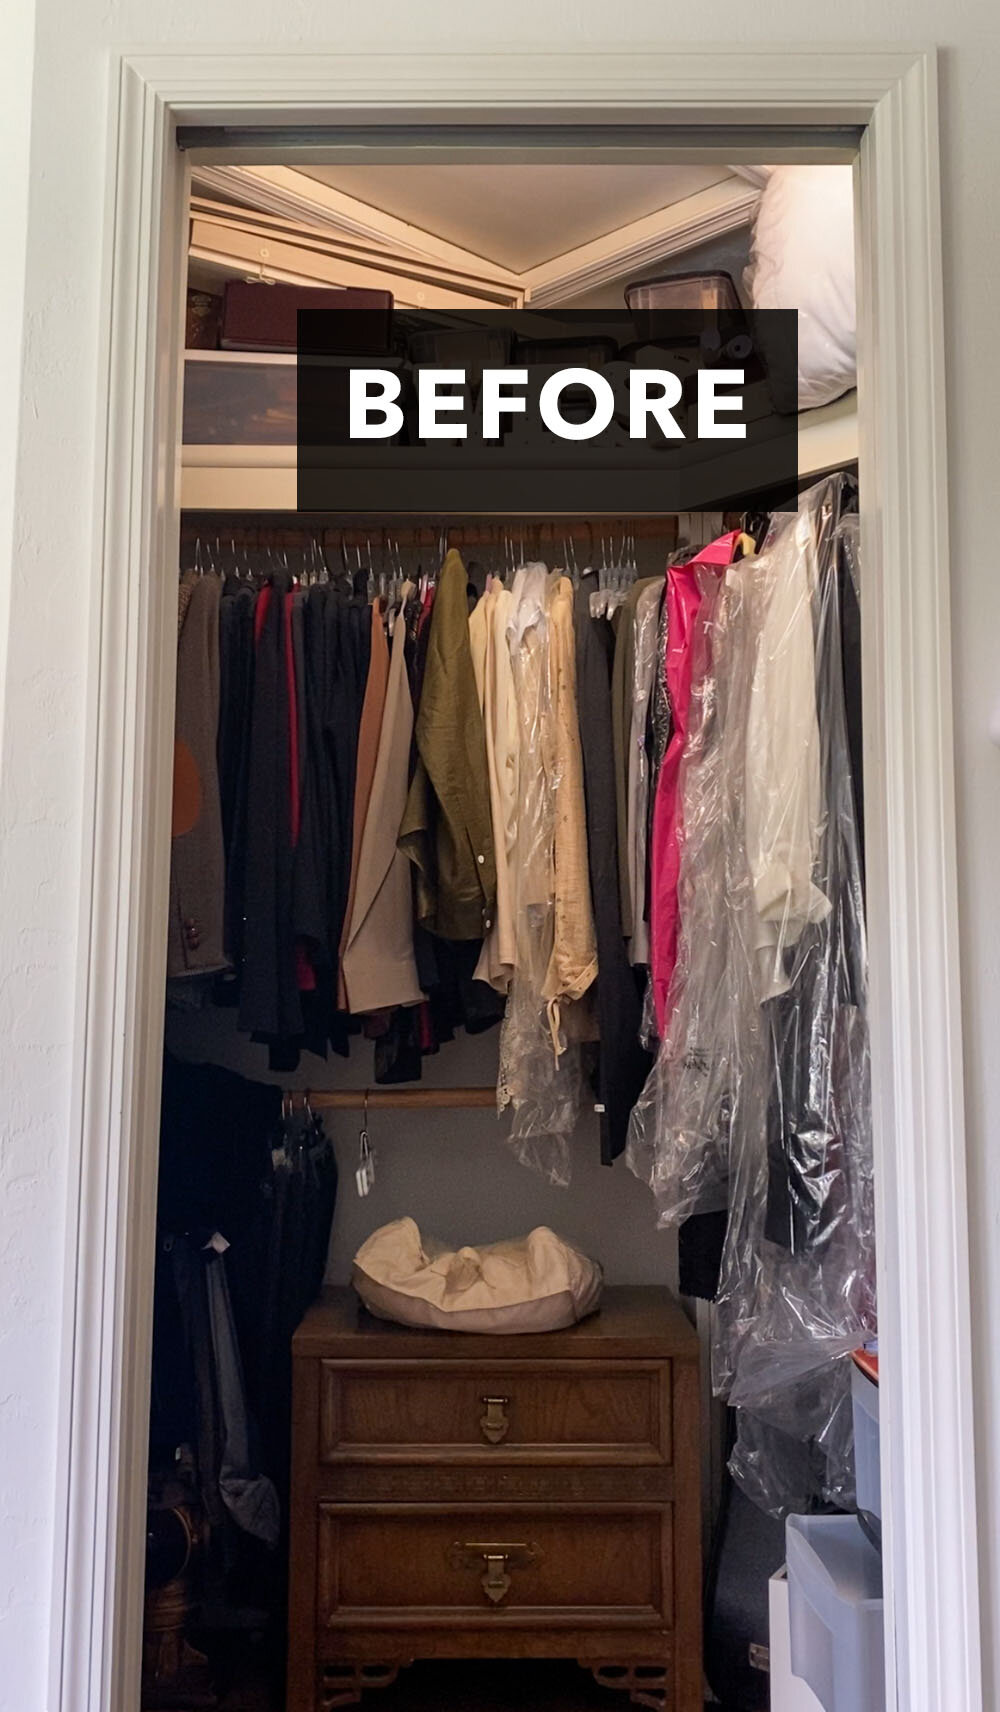
After temporarily relocating most of the closet’s clothes (which belong to other family members, as this is also a shared space), we confirmed that the walk-in was indeed quite roomy and usable for our little one.

All that was needed was a fresh coat of paint to match tones from the bedroom while adding a pop of color. We chose Evergreen Fog (SW 9130) by Sherwin-Williams, as it’s a subdued but striking green-grey blend that’s full of soothing character. Our son participated enthusiastically in the painting process, which hopefully provides him with even more of a sense of connection with the space.

With the help of floating shelves, a pendant lamp, a child’s reading chair, and a stack of library books, West now has his own escape pod. Naturally, he often finds Sophee in there waiting for him, but what else would you expect from our sweet beagle menace?

Thank you to Sherwin-Williams for providing the lovely paint used for this quick and playful small space makeover.

Leaving the Farmhouse (for Now)
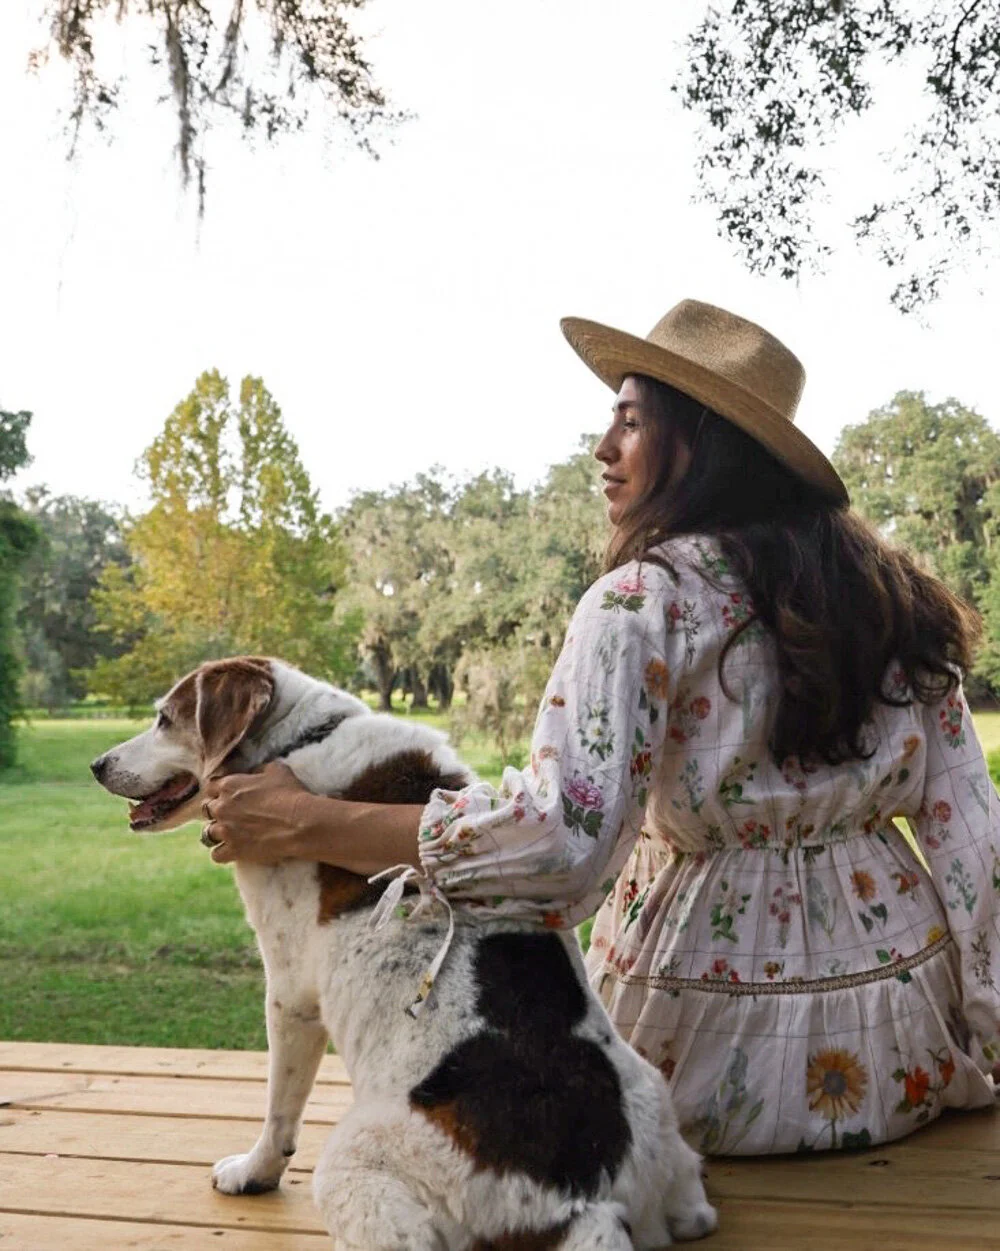
While my family was at our Farmhouse for the first time, a good friend of mine sent me a voice memo saying I looked like, “a woman in love.” She was right. The feeling I experience while in our new-to-us house is the sort of feeling I’ve only experienced while living in Venice. It’s the feeling of loving a physical place as completely as I love a person. It’s the feeling of home.
You can imagine how reluctant I was to leave. For the second time in a year, Adam and I closed and locked the front door of a (tiny) home we love, and begrudgingly left. But, unlike the cottage, we’ll return to the farmhouse one day soon.

The bright side of this is, of course, being reunited with our four-legged family members. I refuse to be separated from StanLee (our senior beagle-mix) for too long. When I first adopted him 13+ years ago I was working in France from 2-4 months per year. Eventually I just couldn’t stand being away from him, so I stopped going.
Adam and I would’ve loved to take the pups with us on this first visit to the farmhouse, but there was no way I was putting them through the trauma and risks of air travel for a one month stay… especially after driving them across the entire US earlier this year.
So, as planned, we’re back on the east coast for the time being.
Why so short a trip, rather than a forever move?
Well, lots of reasons. All of which we knew in advance.
The point of this first stay was not to relocate completely, but to instead meet with local contractors, establish plans for the first round of restoration work, get a better understanding of the land and structures since we’d purchased it all sight-unseen, and to make sure we hadn’t dreamt the whole place up to begin with.
The most pressing issue is that the farmhouse roof and ceilings are in desperate need of major repair— an issue of which we were aware going into the acquisition. There is some water damage that compromises the integrity of the building, while likely being unsafe for the little ones and their developing respiratory systems. Despite the fact that the house looks fairly large in photos due to the outbuildings, the residence is under 800 sqft, so there can be no relocating to one room or another while the restoration is underway. Instead, the entire home will be unlivable throughout the duration of the roofing project.

While this major, urgent work is being conducted (and shared with us in realtime via WhatsApp… so we can share it with you too!), we’ll be focusing on our tiny cottage build and newly completed greenhouse in the southeast. The prairie cottage is slated to be built this the fall. I’ll share the entire process here, and I’ll continue to post images and updates from the farmhouse.
Our trip to France was also brief due to medical considerations. Upon our return, I had a simple surgery from which I’m currently healing. Plus, my parents and Adam’s folks all have various health-related issues to handle, and we intend to be here in case anyone needs our help. And, of course, Léa’s doctors are keeping track of her growth and development after her IUGR. (So far so good, thankfully.)
As I’ve expressed before, the farmhouse is a forever home for us. We’ll be there again soon when the timing is even better.