
Front Tiny Garden
When we recently acquired the front tiny house next to ours, we also inherited its 10' wide front yard. If we weren't renting this unit, there are many things I would change about it, such as the garden floor and perimeter landscaping, as well as the exterior paneling and hardware. But we decided instead to do a quick and easy makeover of this previously unused square-footage. We simply added a few plants, a hand-me-down table, and some of our existing outdoor seating pieces to convert this sliver of space into a dining area for up to 6 people.

An indoor/outdoor dining table, weatherproof ottoman/benches from Fragments Identity, two folding patio chairs, cafe lights, and a mix of hanging and potted plants were all we needed to turn the front garden into a comfortable, practical place to dine with our family and friends. (We can even pass our food and dishes from the table up through the kitchen windows of the West Cottage, which helps make hosting delightful and effortless.)

The two oversized bamboo + leather lanterns are usually in the living room of the back cottage, but I love them so much that I tend to use them all over the property.

Perhaps we'll tackle a full overhaul of this lil' garden once day in the future. But it functions perfectly now, and we are thoroughly enjoying it!


Roundup: Double-Duty Accents & Inspiration
Furnishings aren't the only items in a small home that can pull double-duty to save space-- accessories should function in multiple ways as well. From mirrors that act as jewelry organizers, to everyday countertops that transform into work or dining surfaces with the help of a stool, to vertical decorative accents that save surface inches below, there's no end to the clever ways in which you can maximize the capabilities of your tiny space.
I'll forever be inspired by functional decor, such as under-the-shelf hooks and bins, to table-top risers that create instant storage. I've rounded up a selection of imagery (below) that demonstrates some simple, beautiful ways to get the most use out of select household accents. One of my favorite features from the visuals below is the last one, by Margo Hupert. Margo runs her art studio from her home, and her flat files, shipping tubes, and administrative accessories are always carefully curated and artfully organized, making her company's "warehouse" into a gorgeous, uncluttered, live-work gallery.


But before you go about trying to organize everything, be sure to get rid of a thing or two... or twelve. Remember: "When you have cleared all of your clutter, you can be of greater service to those around you." - M.B. Kitson

Creating a Divider with Greenery
When we acquired the front tiny house, we knew we needed to modify our porch to suit our updated living situation. The porch, which is 8’ wide and nestled between the two craftsman cottages, was formerly outfitted with an outdoor couch and a folding dining set. We loved it, but we found ourselves using the pieces less and less.

"BEFORE" - The porch between the cottages shortly after we moved in.

"AFTER" - The porch between the cottages. We had it set up this way for years in order to accommodate dinner guests or host happy hours.

"AFTER" ... again! The porch updated for West and his friends, as well as all the parents.
We host guests for meals very infrequently these days, whereas we spend more and more time here with West in lieu of sending him to daycare. Additionally, a fair number of our friends had children around the same year we had West, so our social gatherings now involve bringing several children (about 5-8 toddlers per event) together at once. So Adam and I decided that it was time to turn the couch into dual-purpose storage / lounge seating, collapse the dining table, and convert the resulting square footage into a play space.
A full blog post on the transformation is coming soon, but I wanted to tune in to one particular obstacle with which we needed to deal during the conversion. How would we keep the end of the porch (which drops about 1’ down to the stone garden pavers below) safe for the newly-toddling kiddos?
We borrowed a plastic baby gate from a friend to test out, but it was too flimsy for West. We then tried a temporary, metal garden gate. Unfortunately it was pretty ugly, and it felt like a barricade. We didn’t want to discourage the kids from entering the garden— we just didn’t want them falling dangerously backwards into it on accident.
I found three perfectly-shaped, compact, outdoor planters at Ikea (there were some great runners-up at CB2, too,) and I asked the skilled team at Rolling Greens to help me find friendly, space-dividing plants to add height, weight, beauty, and life to the troughs.

I love any excuse to visit Rolling Greens in Culver City.
Rolling Greens lined the planter boxes with plastic to keep the soil from falling out the slats, and then surrounded that wrap with moss to beautify the exposed segments. They then filled the boxes with little Olive Tree plants. They added a pop of color on the parameters with a touch of secondary greenery, then topped it all off with bark, and voila!

Now we have low space-dividers to trim the edge of the porch. The boxes are too heavy for the kids to push over, but light enough for us to shuffle around when needed. Adults and the pups can step between the planters, but now the kids won't go tumbling or bolting off the side of the porch!


We absolutely love our new, living porch barrier. Thank you, Rolling Greens!

Roundup: Other Lil' Living Spaces I Love
Despite the fact that I live in a small house, I'm just as fascinated by them as anyone else, so I wanted to share some of the lil' living spaces that inspire me. One of them measures under 200 sqft, while another teeters just around 1000 sqft. Some of these homes interest me with their simplicity, others stun me with their artful layers. All of them balance form and function beautifully.
Sugarhouse Homestead

Photos © Sugarhouse Homestead via Instagram
I first fell in love with the home of Natasha Lawyer &and Brett Bashaw when they began sharing glimpses of their Tincan Homestead Airstream life on Instagram. Now that they're in their 166 sqft cabin in Vermont, I find their living situation to be even more swoon-worthy than ever.
County Road Living

Photos © Angie Wendricks
I visit County Road Living’s Instagram wall and Stories daily to view an Indiana-based stylist's endless gorgeous moments from her minimalist farmhouse in the country. The passing seasons and glowing natural light provide a lovely backdrop to Angie’s visual inspiration for a more purposeful way of living.
Jungle By The Falls

Left Photo © Cat Thomas / Right Photo © Jared Soares via Domino
Hilton Carter's lush and moody Baltimore apartment is all over the internet lately, and for excellent reasons. This expertly-styled space, which Hilton enjoys with his girlfriend Fiona and their pup, has pioneered a new class of design that includes textured walls, pops of warm lighting, dozens upon dozens of thriving plants, comfy reading nooks, and creatively-mounted living wall decor.
Chelsae Anne

Photos © Chelsae Anne
I feel cheered by the color, layers, and handmade touches in Chelsae Sahlman's 640 sqft apartment. I rarely "pin" inspiration for my own projects, but a photo of the reading corner within Chelsae's bedroom was one of the few images I kept returning to when seeking creative sparks for our front tiny cottage makeover.
Craftsman Mini-Me

Luckily, one of my favorite tiny houses of all time is located just down the street from our own cottage! Susan's Craftsman Mini-Me is an old carriage-house style space, located in her own back yard here in Venice. This incredible indoor-outdoor dwelling is also available to rent on Airbnb, so you can experience it for yourself! See my entire blog post about it, here. (Fun side note: Adam and I were actually staycationing at the Mini-Me when we discovered that we were pregnant with a boy! I can't believe that he's now already 16 months old...)

Roundup: Small Space Wall Decor
One of the goals of small space living is to shift emphasis away from belongings, and redirect time and energy towards experiences instead. One of the ways we practice this philosophy and further simplify our lives at the Cottage is by finding alternatives to traditional wall art.
I feel the need to preface this by sharing that I'm a fervent lover of the Arts. My mother has been a champion of arts education, and she made sure that her own children were immersed in the arts. I've worked professionally and enthusiastically with galleries, museums, and libraries for over a decade. I am an avid believer that art experiences and appreciation are vitally important for people of every age and background.
But now, with finite walls and very limited storage options in general, we have to get creative in devising places to store our essentials for daily life. As such, I no longer regard our walls as being reserved strictly for 2-d art. Luckily, hanging a basket, guitar, plate, or scarf can be beautiful, AND save storage space. Plus you can change up your look with ease by swapping out pieces, while allotting spots here and there for more traditional works of art that speak to you.
So grab a scarf off your wall and step out! Let’s go to galleries, become museum members, support street artists, and visit art fairs with the folks we love. And when you're back home, take a quick moment to consider these easy, inexpensive, and practical ways to liven up lil' walls:
USE THEM FOR STORAGE
Create functional, decorative walls by artfully hanging select everyday items. This will free up valuable space in your drawers and cabinets.

Above: I love this simple yet personality-filled room that I visited recently. A horizontal hanging made of oversized beads takes up plenty of wall space, while providing a place for the designer-- my friend and neighbor Heather Tierney-- to hang some of her necklaces.

Left: The front tiny cottage. Market baskets are displayed as decor when not in use. Right: The front tiny cottage. Kitchen goods, such as a spoon rest, bottle carriers, candles, measuring cups, and more are on view as functional art.
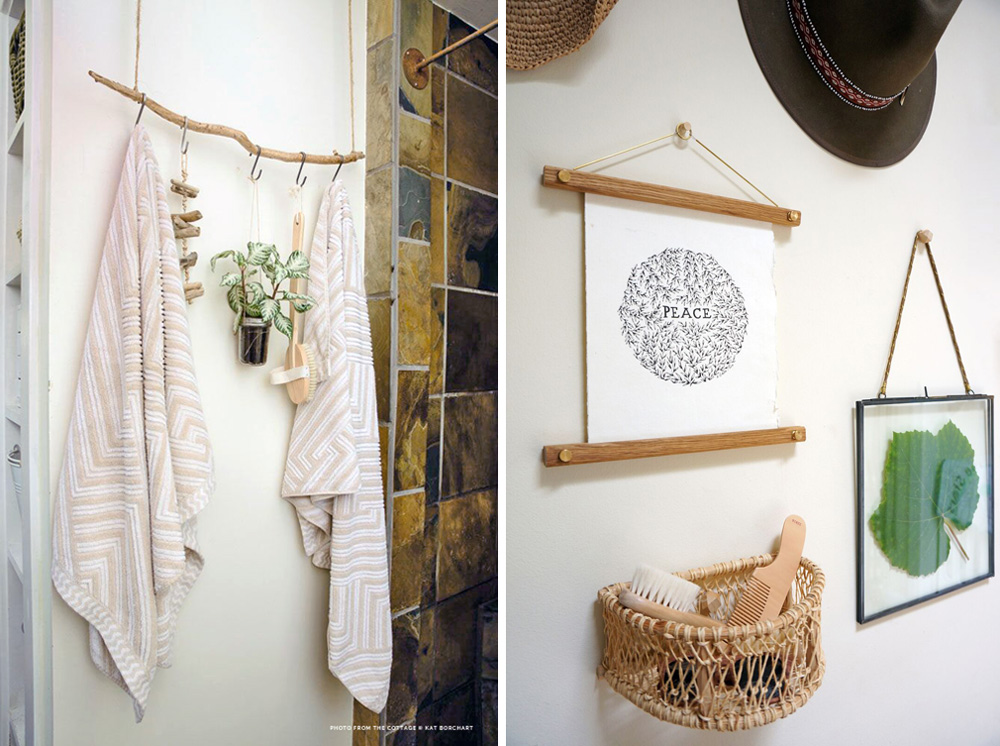
Left: The back tiny cottage. A found branch is repurposed for bath storage. Right: The back tiny cottage. A mixed-media gallery wall in the bedroom holds a half-moon basket that stores our son's brushes, alongside hats, a grape leaf from our garden, and an ink drawing by an Insta-friend/Etsy artist.
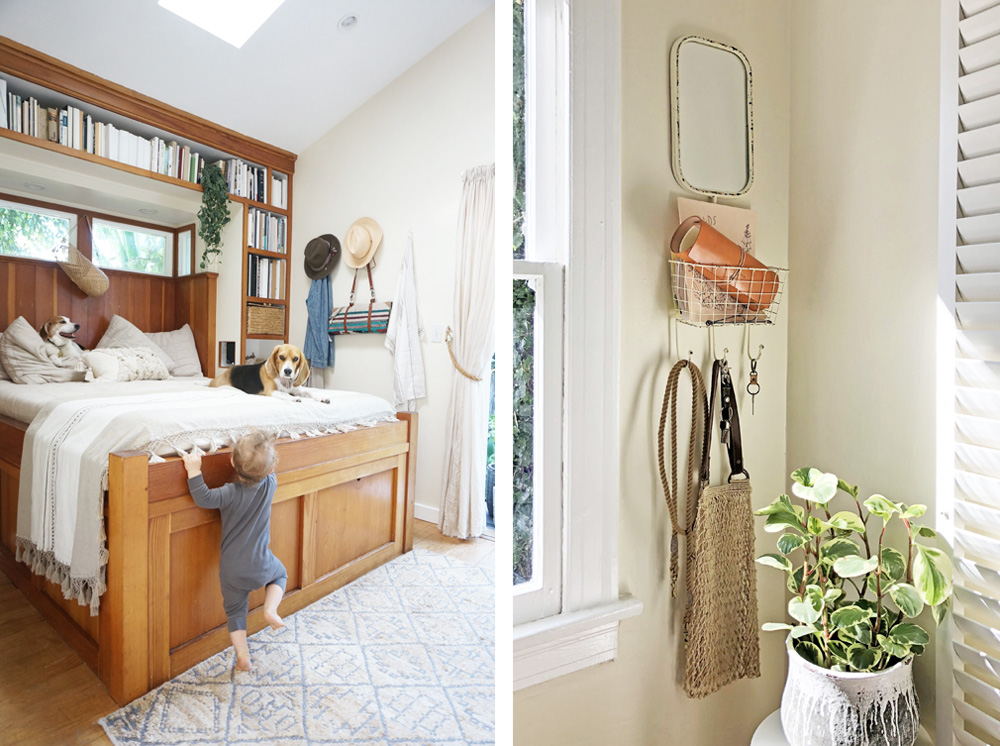
Left: The back tiny cottage. Adam's bedside wall holds our son's diaper changing roll, as well as hats and clothes. Right: The front tiny cottage. A mirrored wall basket with hooks holds a coloring book, a leather note roll, a produce bag, a leash, and keys.
OPEN THEM UP WITH MIRRORS
No new news here-- we all know that mirrors can help make a small space feel larger. Reflect light and open up a room by using an oversized mirror, or give your walls more depth by using multiple smaller sizes.
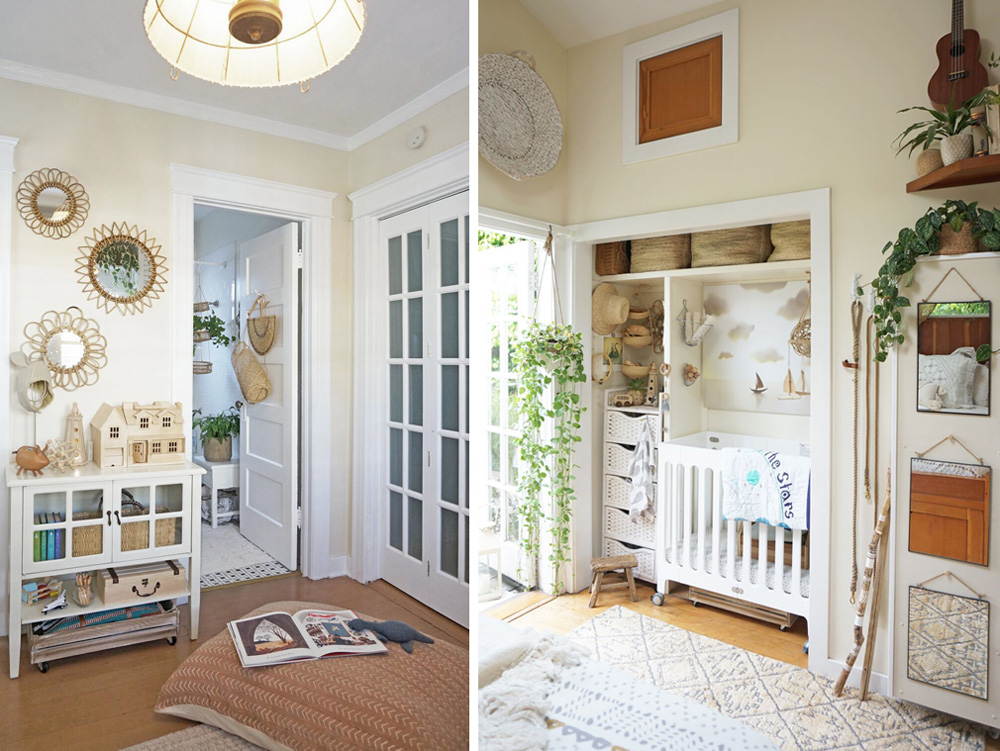
Left: The front tiny house. A collection of rattan mirrors in West's room bounce sunlight around an otherwise dark section of the space. Right: The back tiny house. A series of simple hanging mirrors enlarge the tiny bedroom and help disguise an ugly (disconnected) wall heater.
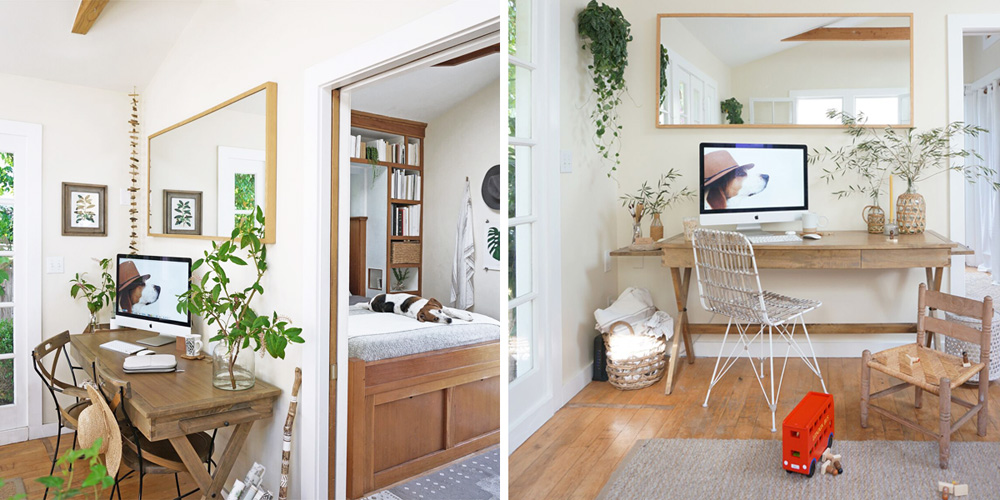
Left: The back tiny house. Here are two views of the same space. The oversized mirror above the desk makes this room feel exponentially brighter and more cheerful. (We once removed the mirror to repaint the wall, and the house instantly felt darker and duller.)
BRING THEM TO LIFE WITH PLANTS
Plants will immediately make a home feel more inviting, while adding color and pattern, and even improving the air quality. I place most of our plants on invisible floating bookshelves. It's a quick and easy way to create a dynamic and easily updatable look at a very low cost. I don't even buy pots for the plants, and opt instead to continue using the containers in which the plants came. This makes everything even more affordable, while also ensuring that there's nothing to shatter if the plants tumble down during an earthquake.

Above: The back tiny cottage living room, with plants propped on invisible floating bookshelves.
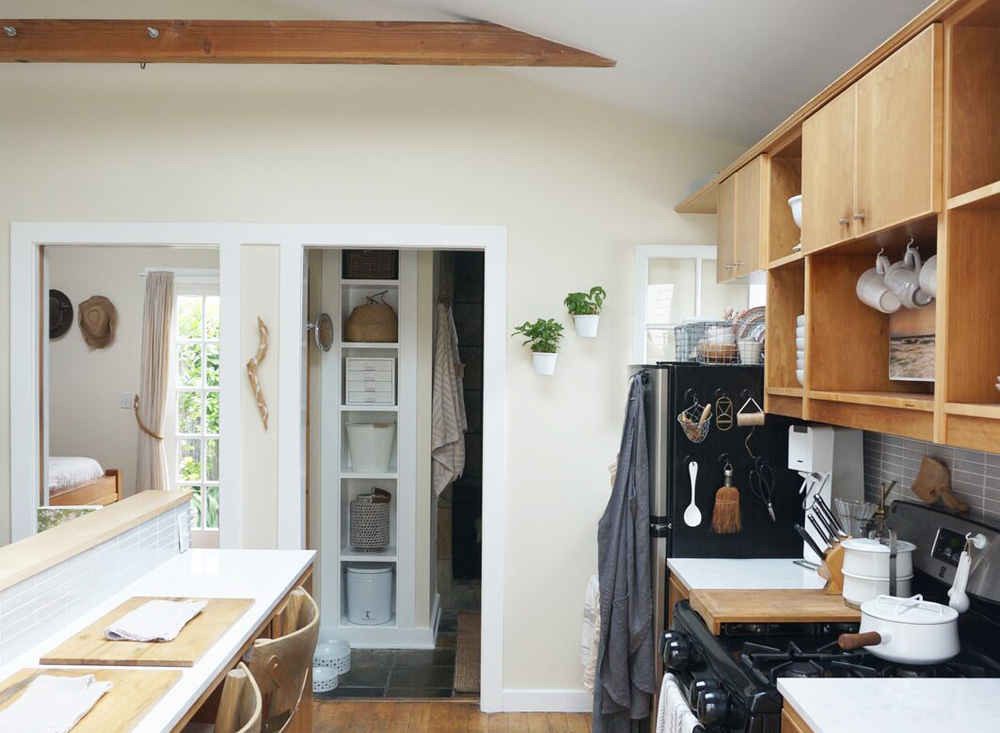
Above: The back tiny cottage kitchen, with herbs planted in wall pots near a window.
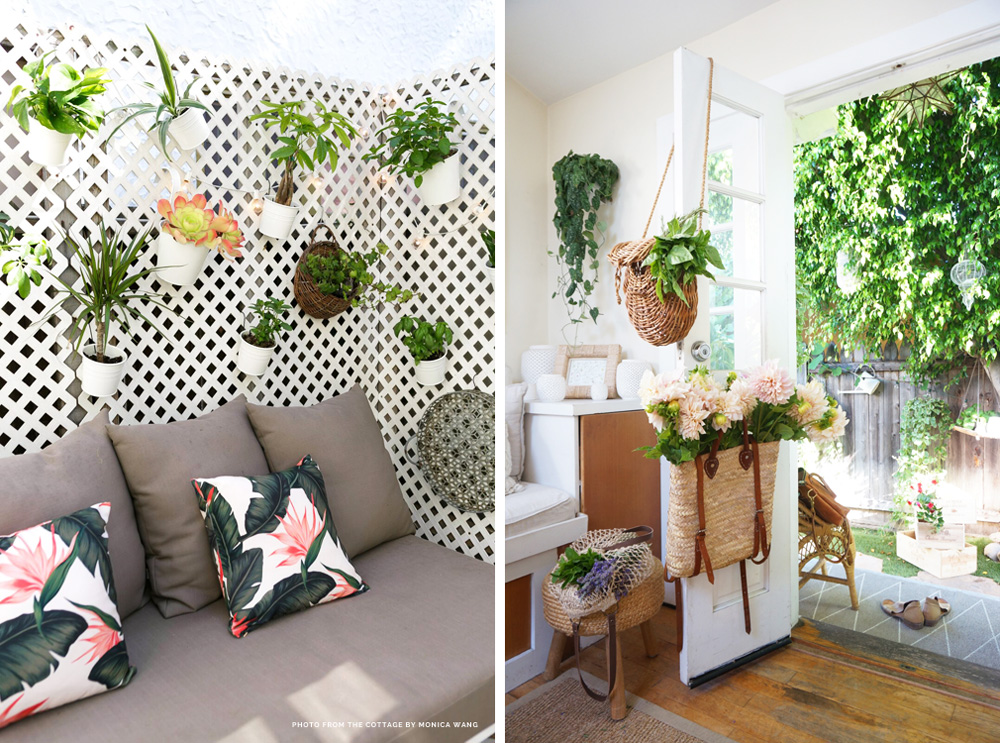
Left: The cottage porch, with a living garden wall. Right: The back tiny cottage, with a plant on a floating shelf in the background, and market greenery displayed via reusable bags.

Above: My friend Lindsay's stunning home, Casa Joshua Tree. I love how she created a beautiful mantel vignette (at a low cost) with potted cacti.
GIVE THEM TEXTURE WITH CLIPPINGS
If you don't have the patience for plants but you still want the look, try dried items or clipped greenery. There are a myriad of ways to display lightweight bundles or branches from your walls.

Above: My friend and neighbor Heather Tierney used a dried branch above her bed in lieu of a headboard or framed art. The draped capiz shells catch and reflect the sunlight in this Venice home.
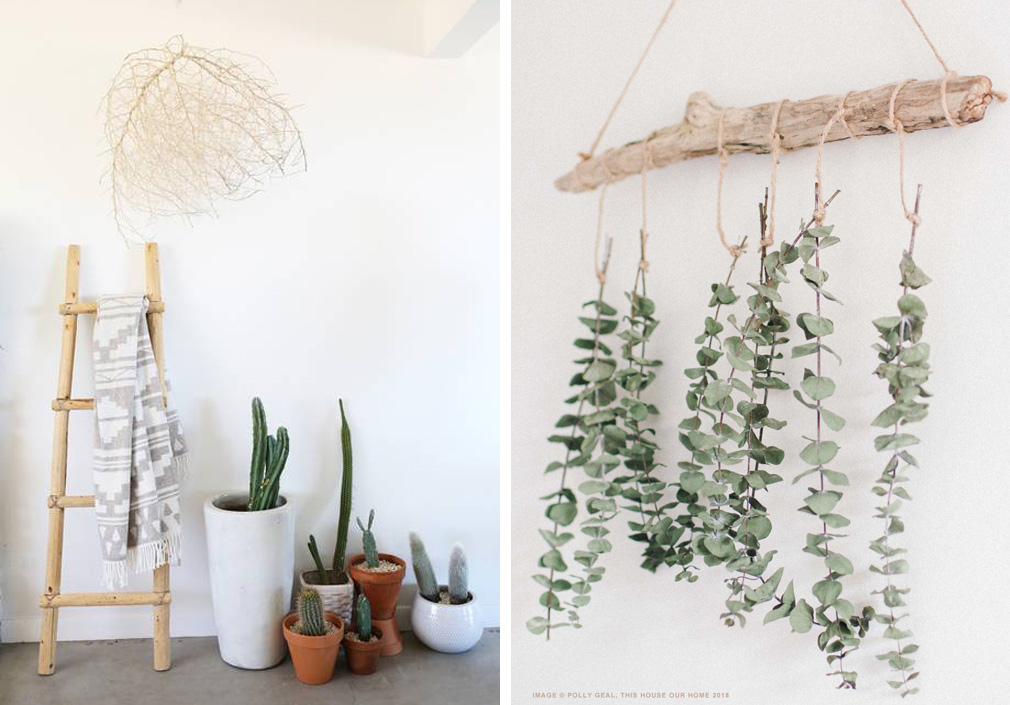
Left: My friend Lindsay of Casa Joshua Tree suspended a tumbleweed from her ceiling to create striking visual impact at no cost. Right: Polly of This House Our Home tied dried eucalyptus to a driftwood branch, creating a lovely, natural work of wall art that can be modified to be as full or sparse as desired.

Above: The cottage porch, decorated with inexpensive glass beaker vases (simply tacked to the wall), and market clippings.

Above: These simple strings of faux-florals made Olive & June one of the most instantly recognizable spots on Instagram. The garlands leave the walls feeling open and airy, while adding color and texture. Bunting like this can be made to accoMmodate walls of any size.
TURN THEM INTO A LIBRARY
Put your books on double-duty by storing them in a decorative way.
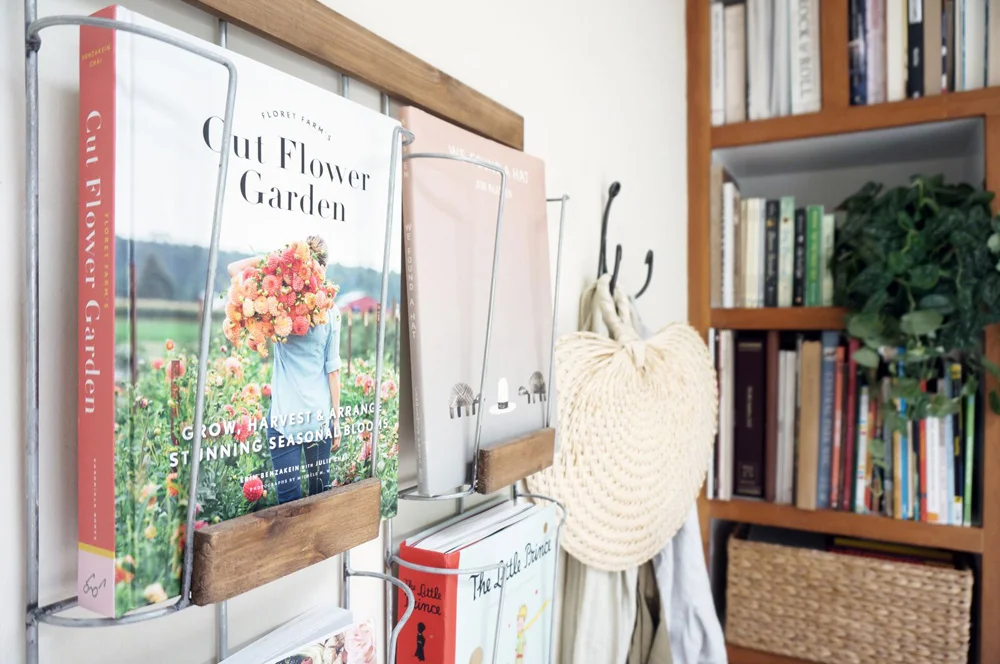
Above: The back tiny cottage: A wood + wire bookshelf mounted on the wall displays books as art.

Above: The headboard of @AllThatIsShe

Left: A hand-crafted bookshelf-nightstand on Etsy. Right: Hanging book bins that keep kids titles on view and at-the-ready.
COVER THEM WITH TEXTILES
You can decorate your walls with textiles without feeling like you're tossing up a tapestry from college. Repurpose beautiful rugs, blankets and scarves by bringing them up onto your walls.
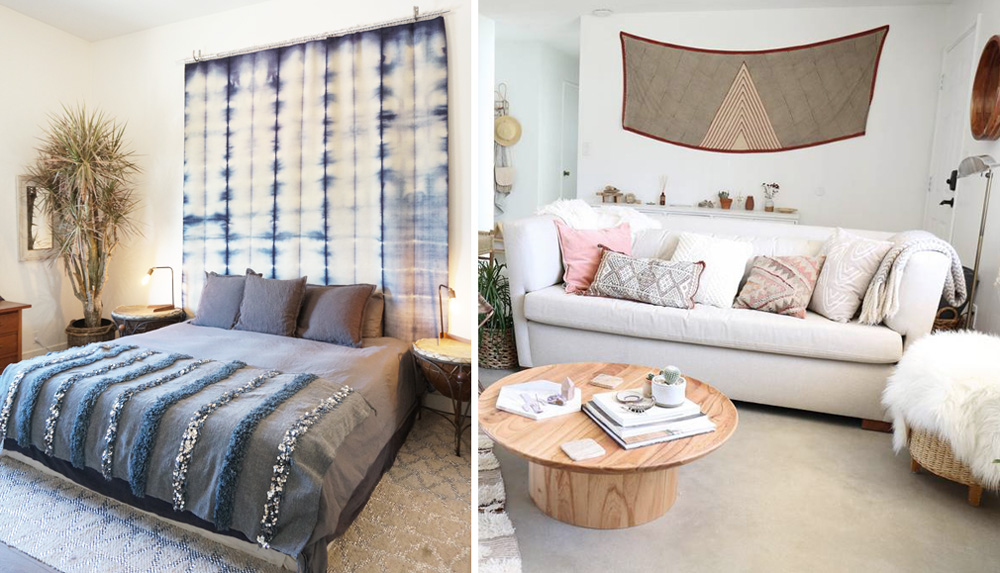
Left: My neighbor Heather Tierney used an indigo cloth to decorate a larger wall. The textile draws the eye upward, adding height to the room. Right: My friend Lindsay of Casa Joshua Tree used a Blockshop scarf to add color and a modern, geometric look to her entryway.

Tiny House Tour: The West Cottage
Let’s stop and chat about interior design on Social Media for a second. After scrolling through thousands upon thousands of decor-related photos over the years, I have to take a step back and remind myself that lots of us— MOST of us— don’t have the disposable income for the major overhaul projects and dream properties like the ones we see online. (And, in addition to budget constraints, what about the renters out there who want to make interior updates, but aren’t permitted to do so? What types of creative solutions are available?) It’s easy to get sucked into feeling like life will be better when we have a new home, more money, and free rein to craft our ideal house. This is where I always pump the breaks.
I don’t want to live my life waiting for the next phase. I want to be satisfied and content in the now. And, personally, I don’t want to spend my time agonizing over items and details that pull my focus away from the things that matter most in my life— family, friends, and community.
Having said that, I obviously care about how my home looks and functions. I’ve made a career of it. But my aim is for everything to be accessible, and to create beauty, function and joy in simple ways.
When the opportunity arose to rent the front cottage on our property late last year, we jumped on it. We knew it would be the perfect place for my parents to stay when they visit LA, as well as a convenient spot for the events and creative crews that regularly set up shop here. (After all, this tiny house is a twin to our own, and sits just 8’ away from ours.) But the house needed some love— certain elements were rotting away, and others were simply, well, not our style But as renters on a very tight budget, we had to pick-and-choose what to tackle, and what to accept. We took our time, weighing out everything we wanted to do, versus everything we felt like we needed to do. Here’s how it turned out
LIVING ROOM
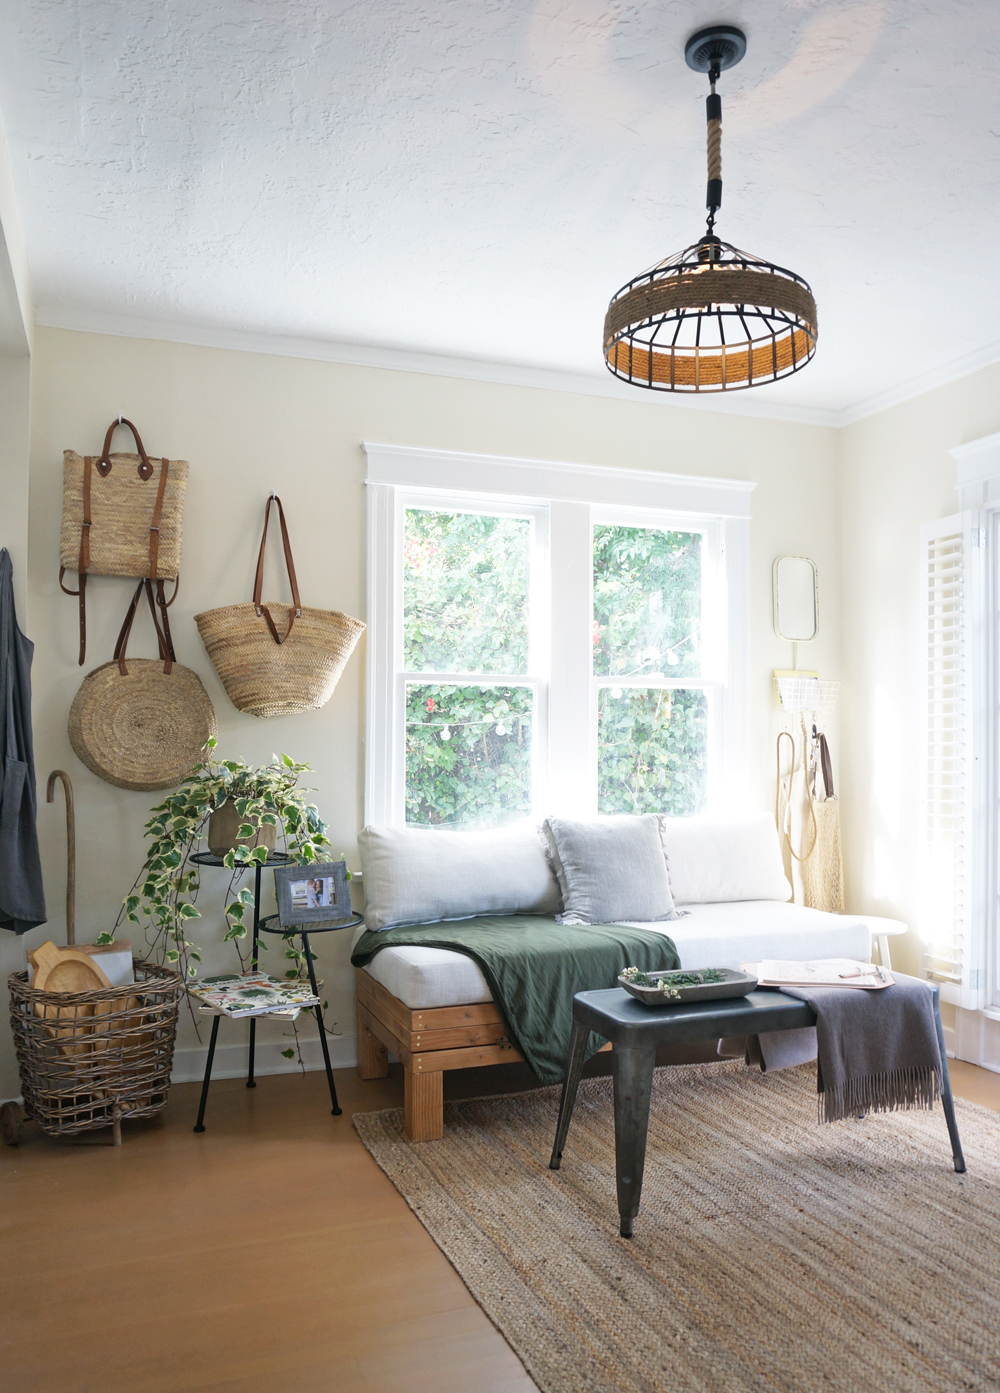
WHAT WE DID:
Just like the main room of The Tiny Canal Cottage, this room is TINY. We knew that we needed the ability to fit a queen-sized bed in here, but the solution wasn’t going to be a quick fix. Inflatable beds are fine, but I wanted to offer my parents something a bit sturdier and more suitable to their needs. A typical pull-out or fold-down sleeper couch wasn’t an option either. Besides getting lumpy and warped, they also tend to take up a lot of room on the back side, and we couldn’t spare those precious inches. Plus I did’t want to block the living room windows, yet I knew the couch would be best situated in front of them.
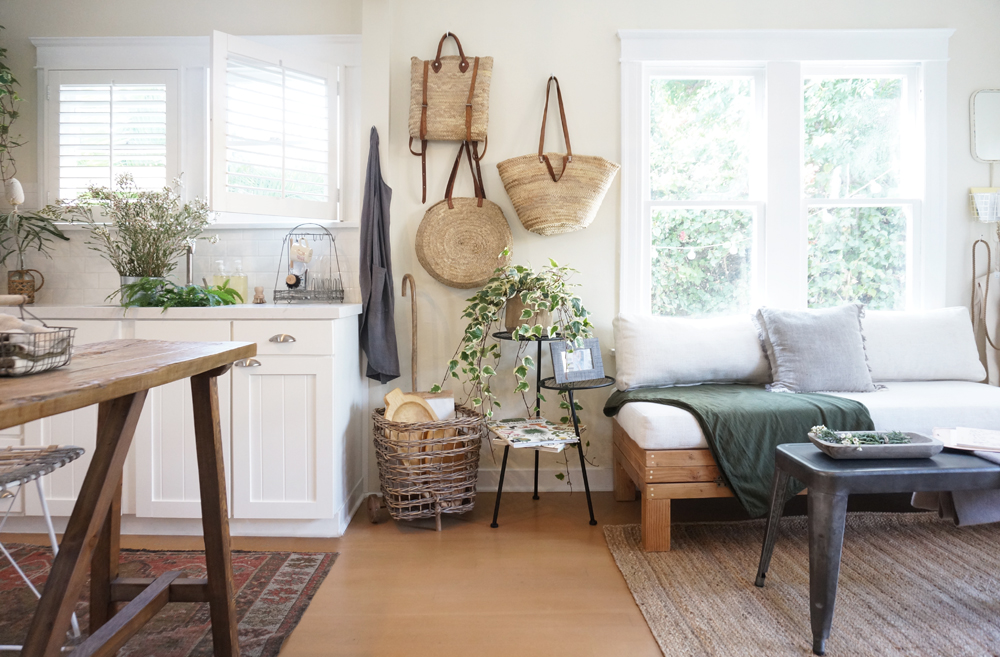
Our solution was a custom accordion fold-out bench by Tumbleweed & Dandelion here in Venice, CA. The bench is a perfect height for our (very) tall family when in couch-mode, and the cushions are comfortable without being too bulky to stash when the bench is extended. To adapt the piece into a queen bed, we simply fold it out and twist on its wooden legs (which we keep stashed in a a wine crate on the nearby built-in bookshelf, where the spare linens are also kept). We can use a traditional or inflatable mattress. The conversion process takes about 5 minutes. As long as we scoot the bed over by a few feet, the front door can still open completely.

I also scrapped traditional window treatments on the living room windows. When we have overnight guests, a simple tension rod is added to the top of each window, and I suspend the same curtain panels that we once used in West’s nursery nook when he was a newborn.

WHAT WE SKIPPED:
We would’ve loved to remove the front door, widen the doorframe, and create custom French doors (like the ones in our “main” cottage), but that was beyond our budget as renters.
Similarly, we would’ve liked to remove the custom plantation shutters on the door and neighboring windows. They look pretty, but they’re horribly impractical in a small space. However, the interiors of the window frames would've had to be sanded, refinished and repainted, and we chose to reallocate that amount of money into savings for our son.
OFFICE

WHAT WE DID:
There was a giant built-in desk in the living room. I found it to be depressing (it faced the wall, and was partially enclosed on the sides), and outdated— it included a keyboard pull-out tray, which prevented many types of office chairs from being able to slide under the desk. I decided that with all the other surfaces available on the property, we didn’t need another work surface. So I ripped out the desk and replaced it with two high-backed chairs, which instantly enlarged the room, and made it into the perfect spot for reading, chatting, and relaxing.

We also removed the standard interior door that divided the office from the bedroom, and replaced it with a space-saving bifold door. We painted it white and finished it with a custom knob, and it's one of the best changed we made to the house. The accordion design saves so much room when the door is left open, and the frosted, tempered glass provides ample privacy, while still permitting soft light to flow through.

WHAT WE SKIPPED:
I was also interested in removing the built-in bookshelves, as we didn’t need all that extra storage space. A big mirror in its place would’ve opened up the room, and reflected the bougainvillea, sunlight, and cafe lights from the windows on the opposite wall. But the bookshelves are in great condition, and proved to be useful when paired with book baskets and wine crates that hold the spare linens, so we kept them.
KITCHEN

WHAT WE DID:
Our biggest investment was the kitchen… which is a bit ridiculous because (between both of our tiny houses,) we now have TWO kitchens in under 800 square feet. But we knew that these relatively small adjustments would completely transform the tiny house, which they did.

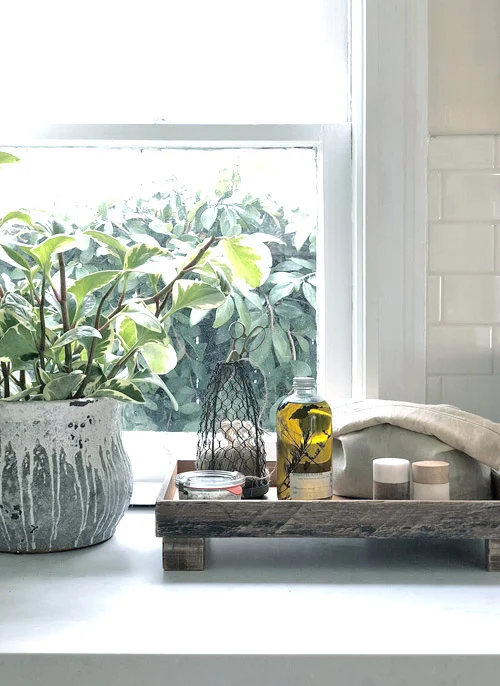
We removed the builder-grade wall cabinets, swapping them out for two open shelves, handmade from reclaimed wood. We also removed the 30” range hood, which hung over a 24” range and overpowered the space. We replaced the oven with a model that actually fit the space allocated for it. In doing so, we eliminated the sliver of space where the narrow trash can stood, so we decided to build a pull-out can into the base cabinets.

We installed exposed shelving by Tumbleweed & Dandelion. We added a pull-out trash drawer, a new sink and faucet, and new countertops from Cambria, installed by Giallo Stone. We recycled and adjusted the old wall cabinets doors for the updated base cabinets. An upcycled console table, counter stools, and vintage rug from New England Loom round off the kitchen.
The base cabinets and counter had an unnecessary 90-degree corner at the end, which partially-enclosed the kitchen, and made it feel cramped. Because of that corner, the sink wasn’t aligned with the windows above it. (The sink was horrible anyway— you could pop it out with a pencil.) We removed the 90-degree corner, and installed the pull-out trash and recycling in its place. We upgraded the sink to a larger Kohler, and added a pull-out Purist pull-out faucet. Then we repurposed and modified the old wall cabinet hardware and doors on the newly modified base cabinets. We topped everything off with a beautiful, milky matte slab of Weybourne from Cambria, which made the space feel polished and clean, without appearing too sterile.

We updated the lighting, and swapped out the butcher-block pub table and standard stools for a console table made from upcycled floor boards. We added two high-backed counter stools with an open-weave design, which keeps the space feeling airy and uncluttered. Lastly, we unified and defined the kitchen by adding a multi-color vintage runner rug from New England Loom




WHAT WE SKIPPED:
I would’ve very much liked to replace the base cabinets and the white subway tiles in the kitchen to give the room more personality. But both are in fine condition and function as needed, so we opted to save the money and headache and accept the kitchen without those upgrades. Despite the standard tiles and cabinets, we now love the room, which has so much more texture and depth than it did before.
BEDROOM

WHAT WE DID:
We turned the bedroom of the front cottage into West’s play space. We mainly made repairs in here, focusing on keeping it clean and safe for our toddler. We repaired the windows that were in horrible condition, and we patched and painted the walls, which were cracked, chipped and full of holes (some tiny, some several inches wide) after years of neglect.

We did make one hugely helpful design change: the doors. In this small room, which measures about 8’ x 10’, there were FOUR DOORS. (Why?!) The porch and closet doors would crash into each other when opened, much like the bathroom and living room doors did on the opposite side. One door from each corner was going to have to go.

We found a wonderful wood and frosted, tempered glass bi-fold door for the doorway between the bedroom and living room. Then we removed the closet door entirely and commissioned a gorgeous hand-made curtain from Luna Zorro to suspend in the frame. We couldn’t have used sliding barn doors, as we didn’t have the available wall space for those. And pocket doors require construction and are thus far more expensive. The bi-fold door and curtain were simple, fast, and affordable solutions that instantly made a huge difference in the appearance and functionality of the entire house.

West's closet and porch doors used to crash open into one another, so we swapped the closet door out for a custom, handmade curtain from Luna Zorro. We added rattan mirrors on the little wall between the closet and the bathroom to reflect sunlight, and we set up a little diaper changing storage station via a low, windowed hutch.
Our son still co-sleeps with us at night, but he now naps, reads, and snuggles with the pups in his amazing new convertible crib / toddler bed / daybed. (The items on the shelf above are anchored with earthquake putty.)


WHAT WE SKIPPED:
West has a tiny bathroom and (an empty) closet off his room that function perfectly well, but aren’t beautiful or interesting. As renters, we decided to skip construction, but freshen up the bath as best we could. A vintage rug, a linen shower curtain, hanging baskets, and cascading plants livened up the room without impacting our wallets.

Disclaimer: I received select products of my selection in exchange for inclusion in the front cottage makeover and subsequent coverage. All words and opinions are my own.

The West Cottage is on Domino!
Our "new" front house, The West Cottage, is on Domino today! This lil' craftsman home stands just 8' west of #TheTinyCanalCottage. The two units are so small and closely situated that they share a porch, garden, and washer + dryer.

Thank you, Domino!
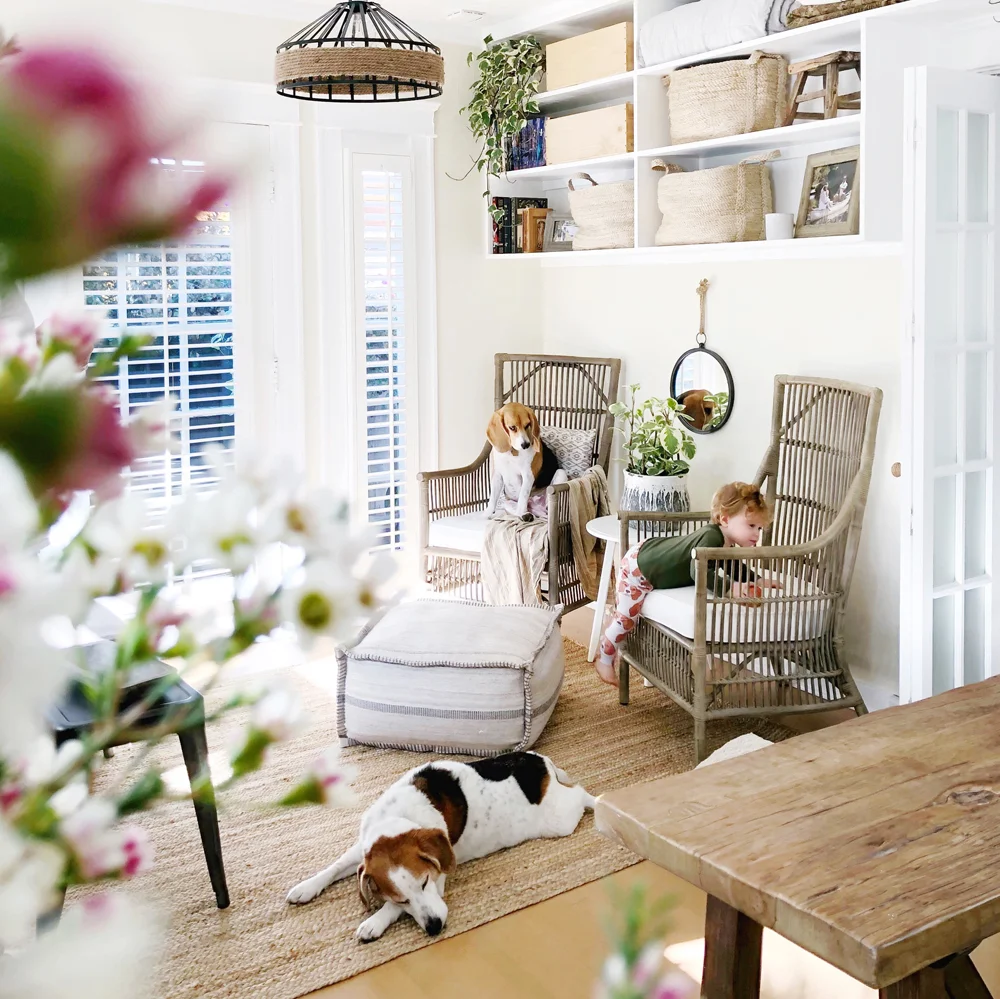
The West Cottage: Before & After
Before posting all of the sources and story behind the front tiny house renovation and makeover via a Home Tour (coming soon), I want to share some clear before and after photos of the space. We outfitted this second cottage to suit our evolving business and personal needs, and we hope it demonstrates to renters of small spaces (and folks working on a budget) how some relatively little changes can make a large impact.
On a side note, we hosted our first overnight guest (my life-long friend, Lindsay of Casa Joshua Tree) just days after completing the front house project, and she gave us the best housewarming gift ever-- a name for it! She suggested The West Cottage, because it's is situated on the West side of our "main" home, and it's primary use is oriented around our son, West. Simple and sweet. I love it.
So here it is-- "before-s" on the left, "after-s" on the right!

New custom bench/sofa/queen bed by Tumbleweed & Dandelion. Pendant and bench-turned-coffee table.
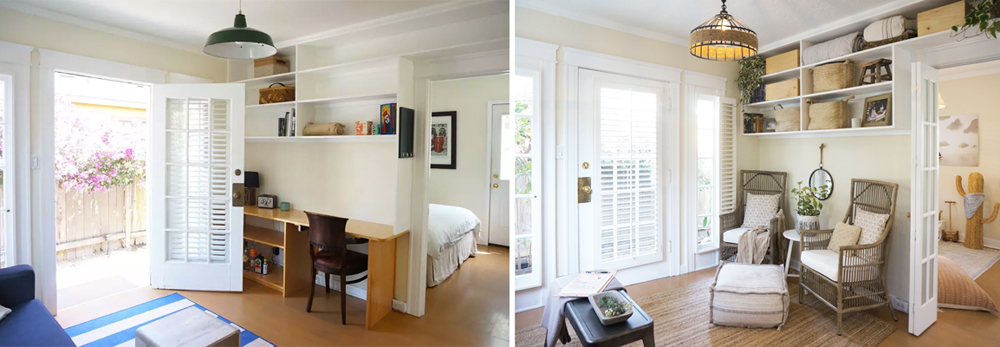
We removed the build-in desk and replaced it with two cozy reading chairs and an ottoman.

The bookshelf now stores books AND guest linens. Everything is contained in the overhead baskets or upcycled wine creates. Having West's books in the easy-to-carry jute baskets helps us stay organized. The new interior French door from saves space and lets light pass through, while still providing privacy between the main room and the bedroom.

The view from the front door. The most eye-catching difference is the absence of the oversized range-hood, and the wall cabinets. We replaced the hood with a ceiling vent, and the swapped the cupboards for exposed shelving by Tumbleweed & Dandelion.

We removed the 90-degree counter turn in the kitchen, opening up the space dramatically. We added a pull-out trash drawer, a new sink and faucet, as well as new countertops from Cambria, installed by Giallo Stone. We recycled and adjusted the old wall cabinets doors for the updated base cabinets. An upcycled console table, counter stools, and vintage rug from New England Loom round off the kitchen.

We removed the wall cabinets, slid the sink space over to be centered with the windows. We then replaced the sink and faucet, and adjusted and replaced the countertops with Cambria via Gaillo Stone.

We converted the only bedroom into a playroom for West. We replaced the overhead light fixture, refinished the walls and windows, and added elements such as a convertible crib/toddler bed, crib bedding from Parachute, a floor cushion from our neighbors at The Wolf Nest, a vintage reading chair, and a corner cabinet. Some fun touches include an oversized woven cactus, a sea turtle floor basket, and letters above his bed that are reminiscent of Venice's famous street sign. (All items above the bed are secured with earthquake putty.)

West's closet and porch doors used to crash open into one another, so we swapped the closet door out for a custom, handmade curtain from Luna Zorro. We added rattan mirrors on the little wall between the closet and the bathroom to reflect sunlight, and we set up a little diaper changing storage station via a low, windowed hutch.

We opted to save money and leave the bathroom as-is, other than updating the paint color from blue to Muscat Blanc by Dunn Edwards. We modified the accents within the tiny bath, adding a vintage rug from New England Loom, a linen shower curtain, a small accent table, and hanging baskets and plants.
Other posts about The West Cottage:
• Solving the small space interior door issues
• The accordion bench/bed

Tiny House Closet Nursery and Wardrobe on Cosmopolitan
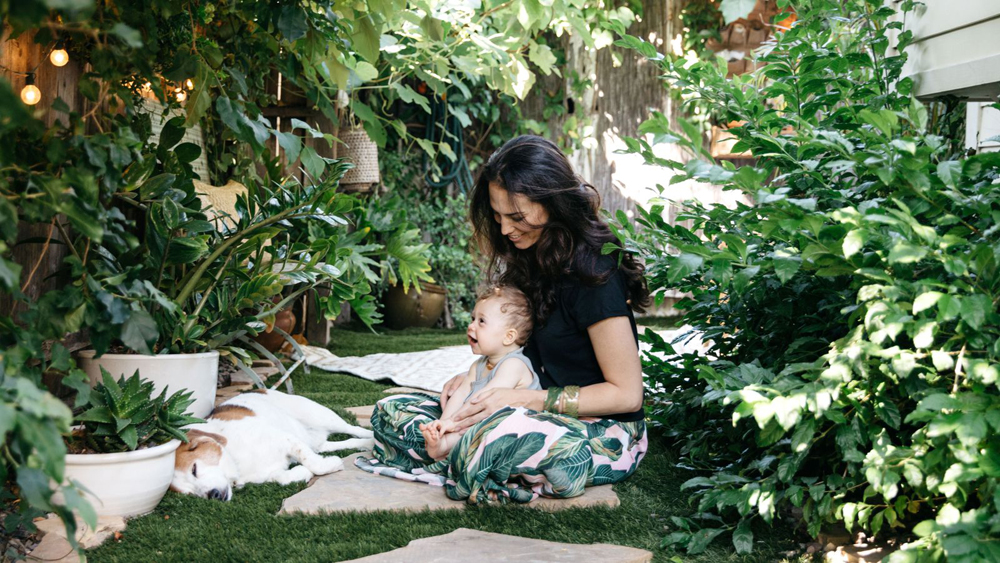
Our lil' home is on Cosmopolitan today. It's such a joy to see these photos from last summer, when West was still so small. The feature explains how Adam and I stumbled into tiny house living, and explains how we converted the closet into the nursery, and a shed into our closet. (Oh, I miss that little baby's bay already...)

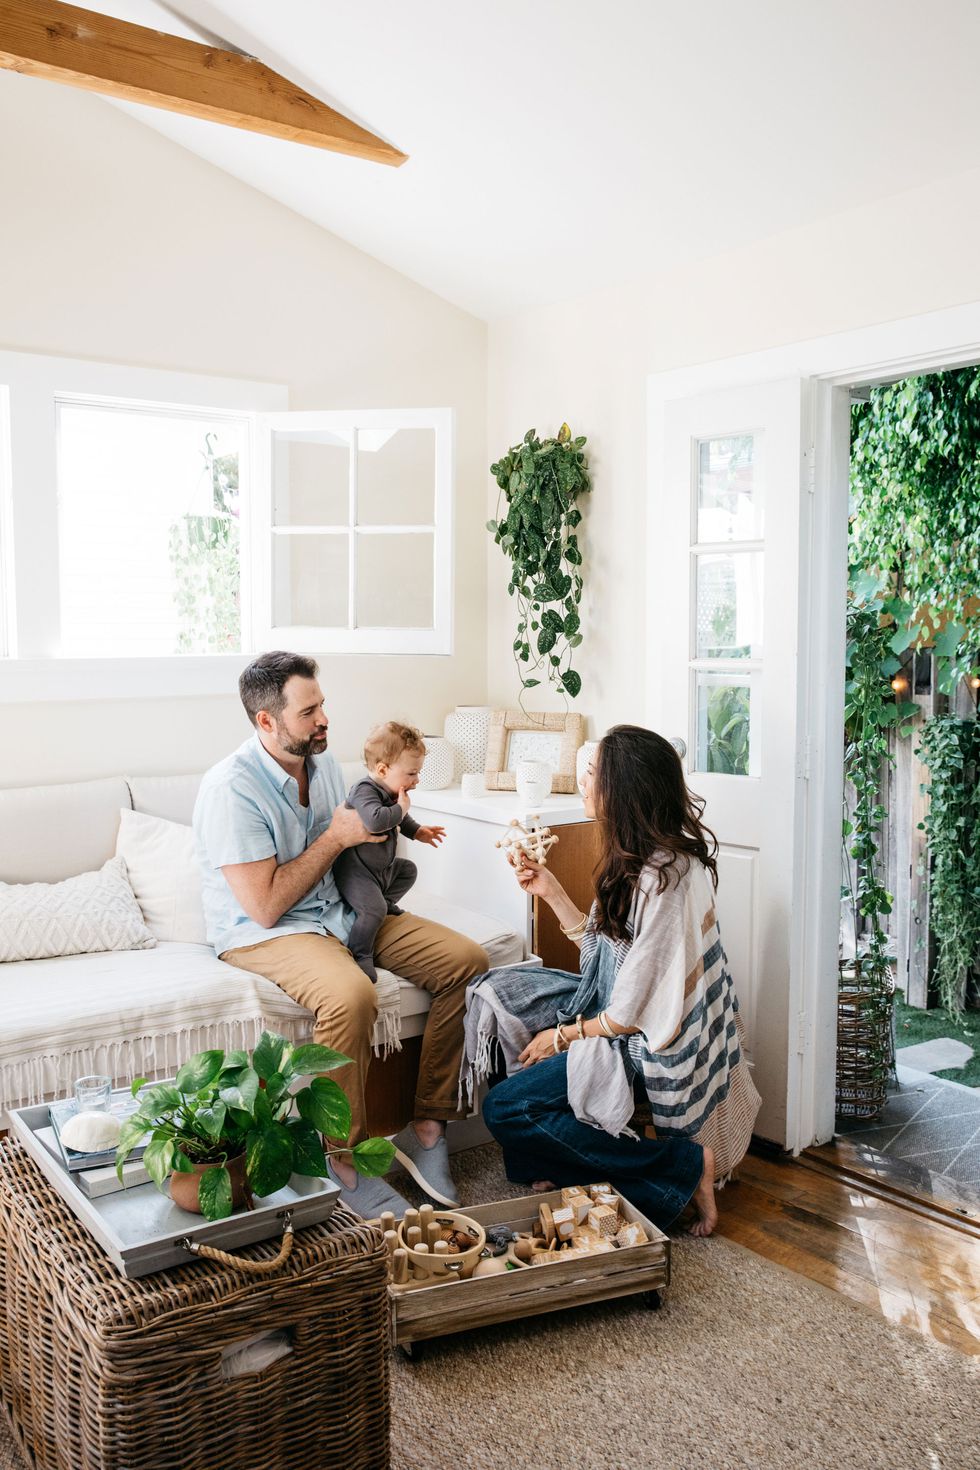
Photos by the incredible Sami Drasin, courtesy of Cosmopolitan.

Co-Sleeping in the Cottage
Note: Please consult professional sources and keep safety as the top priority when making sleep decisions with and for your child. I am neither advocating for or against bed-sharing via this blog post. I am simply sharing our personal experience in case it helps anyone else on their journey.
We receive lots of questions about how we manage the family’s sleep situation in our tiny home. Where does West sleep? What about the pups? How do we handle noise and keep from disturbing one another? What are our plans for the future? Would we recommend bed-sharing to other new parents living in small spaces?

Left: WEST In the DockATot Deluxe in the Cottage bedroom. Right: West In THE mini-crib in our tiny house nursery nook.
Adam and I never had a sleep plan in place for our life with the baby. We decided to go with what felt natural for us, day by day. The short story is that we’ve bed-shared for the past 16 months. The longer version involves many more layers, including a DockATot, mini-crib, and convertible toddler bed.
Months 1-12
Our Baby:
For the first year with West, we had a mini-crib. When our son was a newborn, he would take his naps there, or in his MamaRoo or the small DockATot. He would also begin his nights in the crib.
I worked full-time throughout my entire pregnancy and after our son was born, and I simply felt too tired to get in and out of bed for each feeding. As such, we would bring West into bed with us after his mid-night wakeups. At that point, he slept safely and snugly between Adam and me in the center of our bed in the DockATot.
West fit perfectly in the mini-crib until around 7 months, when he began to flail around a bit too much to sleep in there for more than a couple of hours at a time. We kept the mini-crib for for an additional 3 months for his naps. Sometimes we rolled the crib into other areas of the house and the garden, just to get him used to other views and environments.
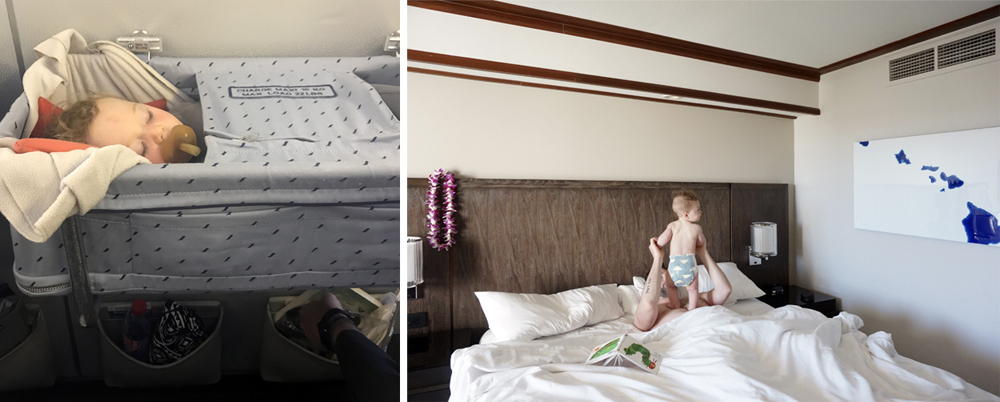
Left: In the airplane bassinet, flying to France. Right: Up from a nap in a hotel in Maui.
Bed-sharing has been made life easier when we travel. West will fall asleep anywhere when his natural bedtime rolls around.
Our Dogs + The Noise:
Sophee sleeps at our feet in the bed, and Stanlee like to curl up on the floor in the tiny space between my side of the bed and the wall. They have THE LOUDEST beagle barks, but they rarely wake up West. I think it’s because West has been listening to those barks since the moment he could hear in the womb. I even remember him physically reacting to being startled by the barks when he was still just a bump in my belly. By his earliest days in the Cottage, he was very used to the sound. West doesn’t even wake up when Adam and I watch movies on the laptop in bed next to him. And, due to the skylights and numerous curtainless windows in the cottage, the light has never phased him either. We lucked out.
Months 12-16
Our Toddler:
West still sleeps with us in bed at night, but we no longer use the DockATot. We believe he's big enough now to sleep safely by our sides without it. He also uses his new convertible crib / toddler bed / daybed in the front cottage for naps, and at night when my parents or a sitter are with him.
Travel:
When we take quick trips by car we bring the large DockATot with us for the versatile options it provides. When we travel by plane, we simply plan on West sleeping in a regular bed with us.

Left: In the DockATot Grand in the garden. Right: Slumber party in the front cottage guest bed.
The Bottom Line:
Personally, I love sharing our bed. Since I work for most of the day, the nights are a wonderful way for me to be close to my son. It can’t last forever, I know, but it’s still enjoyable for us right now. Yes, he kicks and pivots and smacks us in the eyeballs. Yes, we are tired. But what parent isn’t? And the magic of it all far outweighs the disruptions. We plan to wean ourselves slowly off of co-sleeping at some point this year, when it feels right for all of us.

The Accordion Bench/Bed
I've yet to share the full house tour of the front tiny cottage, but we're already welcoming our first overnight visitor this weekend, so I wanted to share how we adapt the space to accommodate guests.
Much like our Tiny Canal Cottage, this little house is under 400 square-feet and only has three rooms: the bedroom (with a narrow sliver of a closet), the bathroom, and the main room (which includes the kitchen). So the issue was this: how would we create a playroom for West in the bedroom, while ensuring that we also have a comfortable place for my parents to sleep when they visit for long stretches of time? We knew we'd need some sort of Queen-sized sleeper-sofa option, but every style we explored either had a cushion that folded (which would eventually get lumpy), or chunky backs and/or bases, which would've taken up more inches than we could spare (and obscured too much of the window). We could've opted for an extra-high air mattress, but having a bed in addition to a couch would've overcrowded the room to a degree that would've made it impossible to navigate. We decided instead to have something tailor-made for our situation:

I contacted my friend Lizzie from Tumbleweed & Dandelion here in Venice to discuss the design and creation of a custom couch. Lizzie dazzles me with her wit, talent, positivity, and endless energy. I explained to her what we wanted, and what we didn't want. As we brainstormed, she drew up the perfect plan-- an accordion-style bench that folds out easily into a Queen bed platform:

Lizzie and her team brought the design to life, and the results are perfect for our needs. Keep scrolling to view the bench-to-bed set-up process, which takes us about 5-10 minutes.


We keep the bed legs and guest linens within easy reach on the living room shelf, and in old wine crates.

The seat cushion can be stored beneath the bed once it's assembled, while the seat-back cushions function as a headboard.

The bed accordions out smoothly, and the extra legs twist on easily.

We had planned to use an air mattress on the platform for an ideal space-saving solution. But then we were surprised with the gift of this cozy new mattress to try for the guest bed. With this unique situation, and since West's narrow closet is almost completely empty, we slide the mattress upright in there for storage when it's not in use. Obviously most smalls pace dwellers don't have an empty closet available (ours is empty since this house is used mainly for my parents, West's playroom, and visiting camera crews), so for those folks seeking a compact solution and would prefer to try something other than an inflatable mattress, there are roll-up and folding designs out there. Or Tumbleweed & Dandelion can make a version with the folding cushion included. And an air mattress is always an easy option.

The entire set-up worked out better than I'd hoped. The bed is a comfortable and sturdy sleeping surface for my parents or our other guests, and there's still plenty of space to navigate the room. We don't normally need curtains on these windows, but two white tension rods wait at the ready in the window frames, so I just attach the curtains from West's old nursery nook to give our visitors some privacy. Lastly, we slide everything over a couple feet so the front door can open fully. Voila!

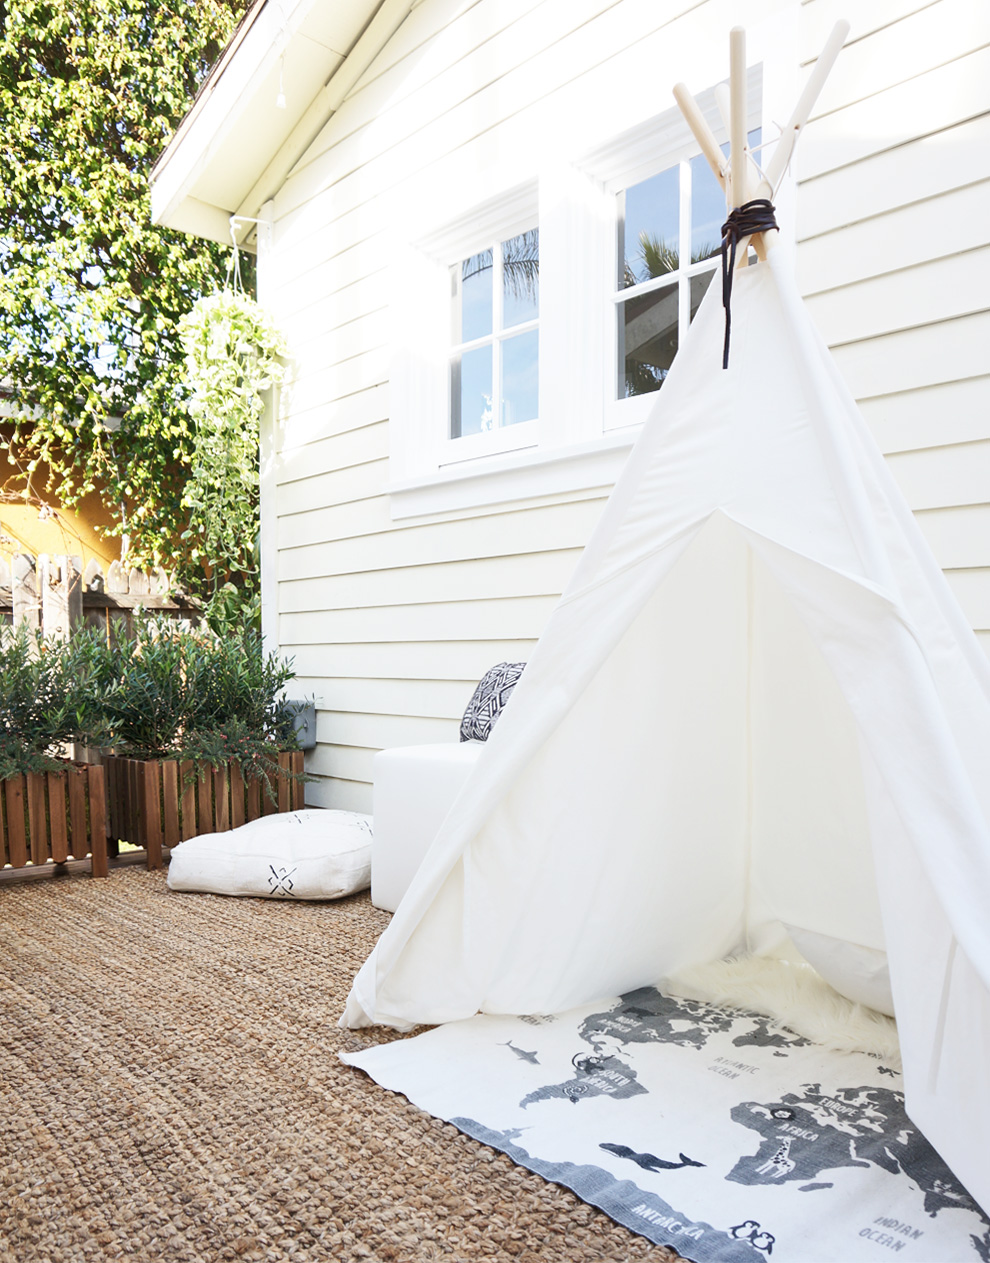
Space-Saving Toy Tents for Kids
Children (and pets) so enjoy tents and forts. But in a small home, a store-bought toddler tent can easily eat up an entire room (if it even fits at all), and a DIY fort can quickly eliminate the limited space required for your daily routine.

Tablecloth tents could be a handy solution for your little one(s) in your little home. I found this one via Etsy, and it's a big hit here at our tiny cottage. Folding card-table sizes are also available, and custom-sized options are also commissionable. Throw one over your dining table or desk to encourage a child's creativity while also working within the realities of your square-footage. (And if you can't fit a tablecloth tent, not to worry-- use a doorway or hallway hanging playhouse instead!)


Update: Many of you loved West's beagle pants, so I thought I should share the details on those! They're handmade by an Etsy artist-- some of my favorites from her shop are below:

Cottage Plants
I receive a lot of questions about the plants we have at the cottage-- are they real? Are they toxic? How long do they take to grow? How much care do they require?
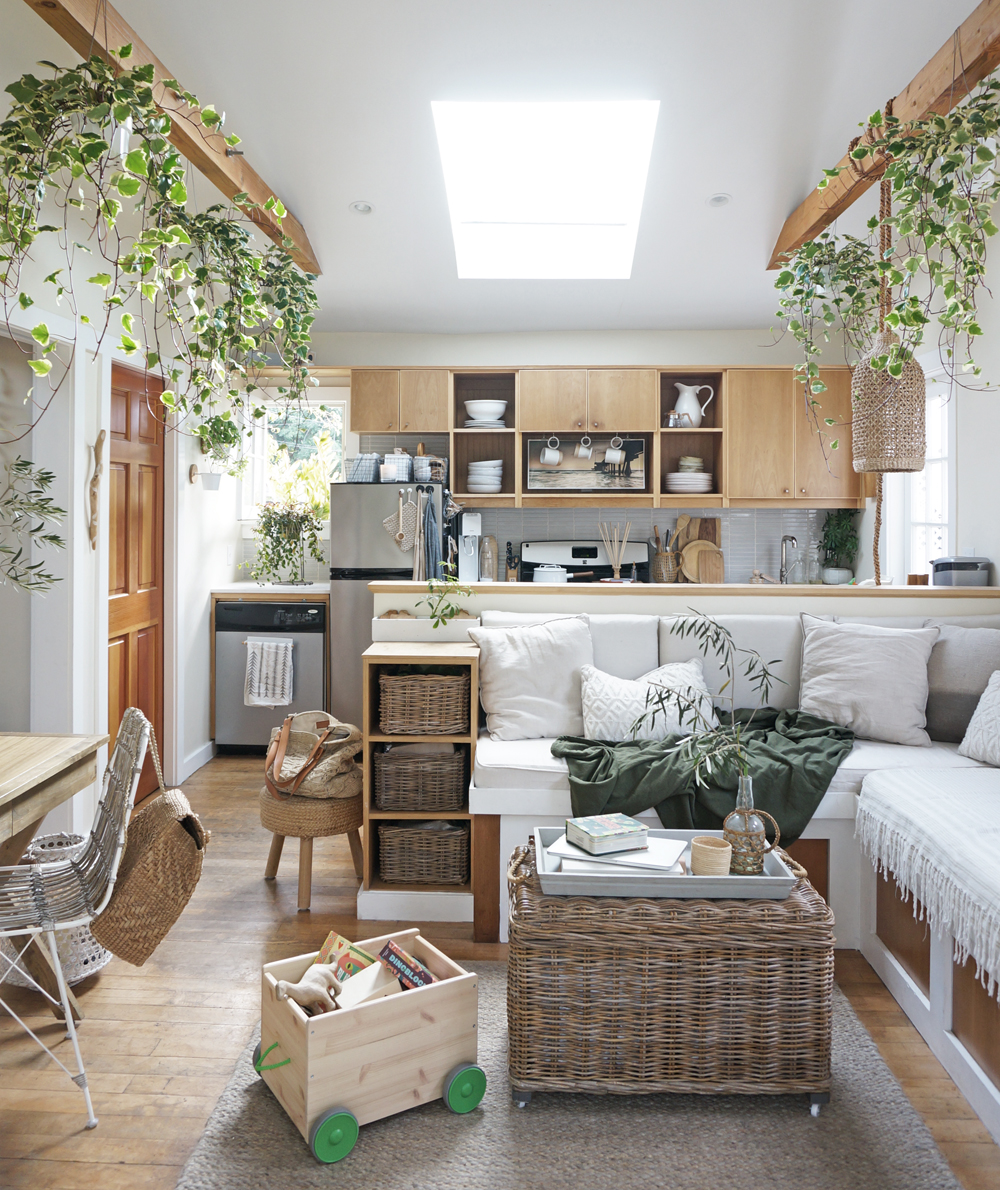
I am by no means a plant expert-- faaar from it. I look to Hilton Carter if I need help with my houseplants, and I am inspired by the creative ways that my friend Justina Blakeney of The Jungalow decorates with her plants. But I can certainly share what has worked for us here in our tiny home-office. While we have a wide variety of indoor and outdoor greenery, we routinely decorate with these three particular plants:
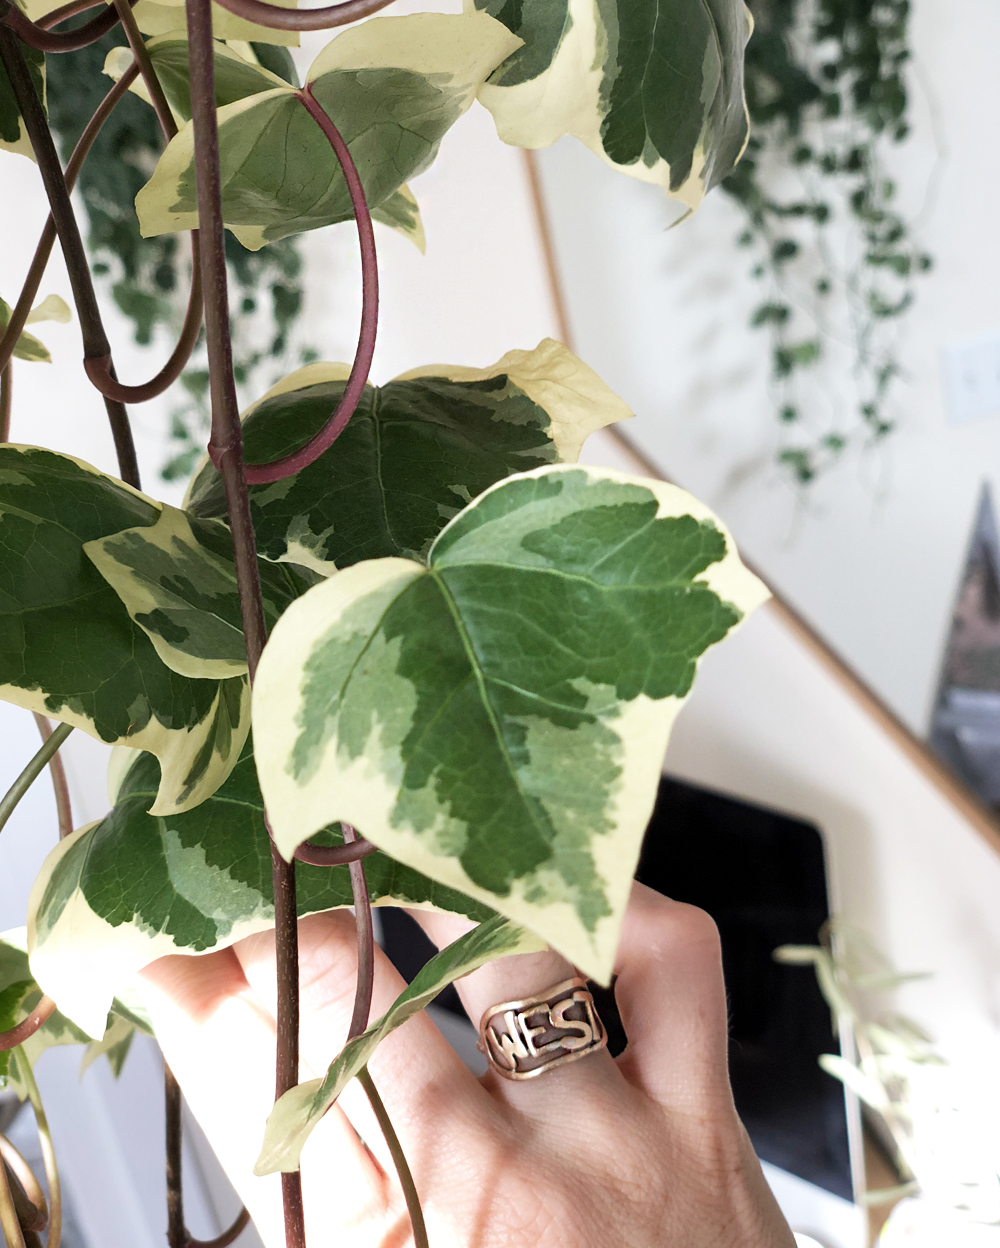
Algerian Ivy - I love this variegated vine, which drapes beautifully in hanging pots/baskets, and can also be used for ground cover. The mid-toned green and pale yellow help show off the texture and shape of the leaves, while the brown/red stalks contrast beautifully with the rest of the plant. Algerian Ivy can tolerate a decent amount of sun, but continues to thrive in times of lower light exposure. I usually display this ivy on shelves because it takes up a fair amount of space, allowing me to fill a room with warmth without cluttering it up with miscellaneous tchotchkes.

Silver Philodendron - Silver Philodendron is one of my favorite plants. In fact, it was one of the main visual inspirations for our home-wedding. This house plant grows rapidly, and has interestingly speckled grey-green leaves. In my experience, the vines will get sparse up top if the soil isn’t healthy and if the pot doesn’t drain well, so don’t forget to give these plants a bit of tending-to each week. My favorite spot to place these plants is on hidden/floating bookshelves on our living room walls. It is toxic to pets and people when ingested, so we simply keep ours high up out of the reach of all our little ones.

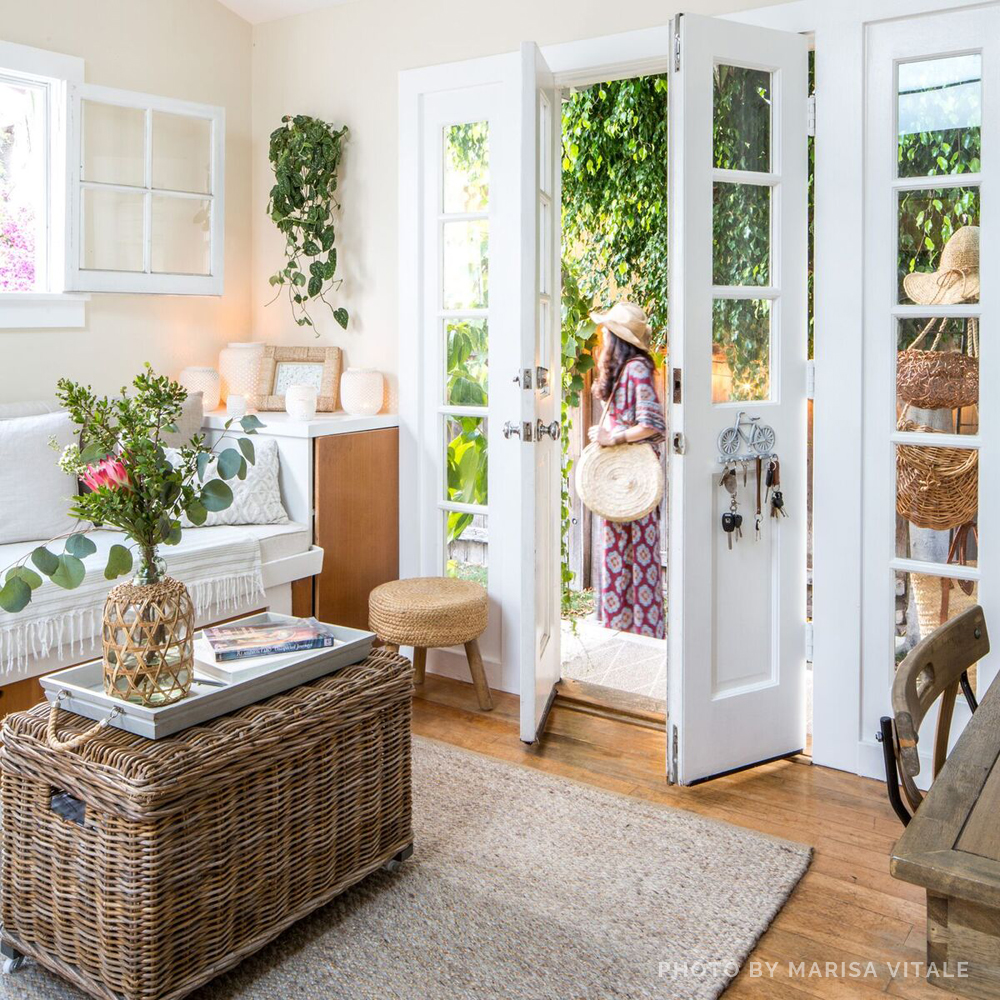
Vinca Vine - Vinca is one of my absolute favorites, because it grows incredibly long, and yet it barely sheds. This plant is simple and understated without being boring. It cascades and frames beautifully, adding depth and color wherever needed. My favorite place to hang them is near windows and outdoor corners, where the greenery livens up several feet of bare walls or moldings without consuming space. I’ve found that Vinca Vines require a touch of extra care in the winter, so I personally don’t leave them out in the cold. (Even here in SoCal they prefer to be indoors during the cooler months.) In the warmer season, they enjoy a few hours of sun, or regular dappled light-- nothing too harsh Cutting the vines back around Spring is a great way to spark new, healthy growth. (And don’t worry— they grow back in a blink.)

Tiny Toolboxes
When I left for college, I inherited several tools from my parents. I felt sentimental about the pieces that they generously gave me, and I used those hand-me-down supplies to assemble furniture and make minor repairs in nine of the ten places I’ve lived since leaving home at 18. The last major project in which I used the tools was West’s nursery nook.

Over the years, the tool collection evolved and grew. I added more and more little things to it— particularly when I was set styling over recent years. Eventually I found myself with a multi-level, wheeled cart that I dragged around our cottage with me, despite the fact that I usually only used a handful of items within it when at home.
As we began working on the front tiny cottage, I realized— I only need a small, specific grouping of tools and hardware. Everything else is always brought and handled by the professionals with whom we work. So why was I struggling to store a 3’-tall toolbox in our tiny house when I didn’t have to? True small space dwellers know— there is absolutely no room for something like that in a compact home. The poor thing was was a mess inside, and it was routinely left outside for days on end, crammed onto one stoop or the other, and shoved into the back of our 2’ shed. (It was so oversized that West would even climb into the bottom 1/3 of it so we could roll him around the house. It was adorable, but ridiculous.)
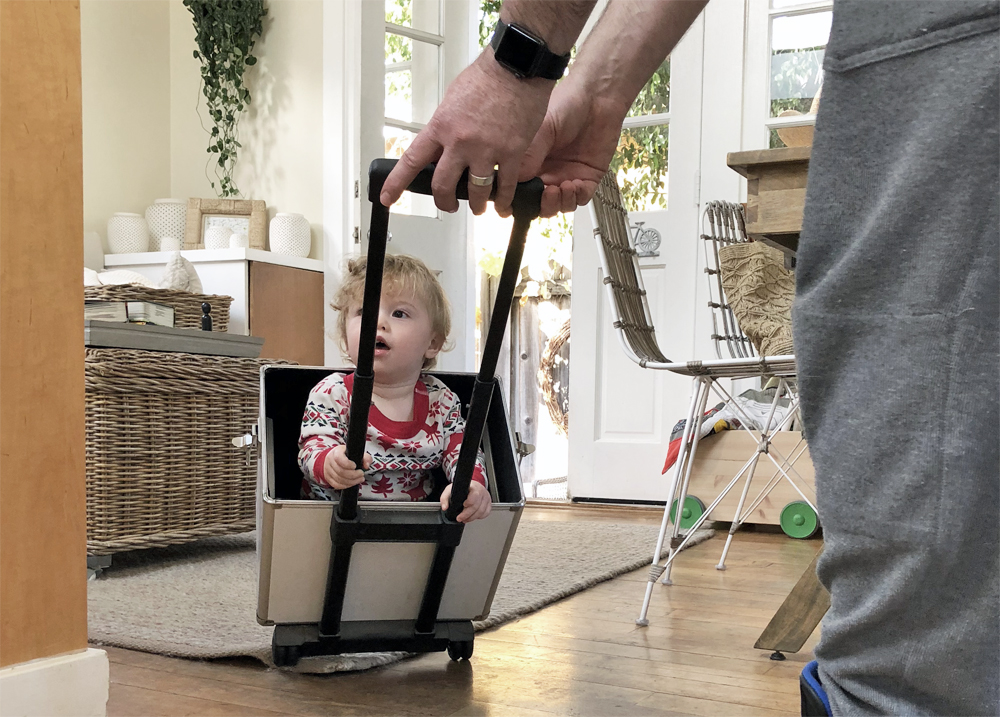
I got to thinking about the individual items within my collection. The ones I used regularly could be condensed into a multi-tool, and most of the other products I could do without entirely. (And, surprisingly, I was missing a tool or two that would’ve been extremely helpful to have here on a regular basis.)

I realized that a toolbox makeover was in order. I had to separate the sentiment behind select items and part ways with them. Plus, I needed to come up with out-of-the-ordinary ways to store the necessities. I played around with a few ideas, testing out what ACTUALLY worked (not just for photos), and what was easily accessible, without standing out in our tiny house or consuming space needed for other uses. I combined few methods of storage, and thus far, this mix has been practical and hassle-free:

1. Small Tool Roll (Rather than Box)
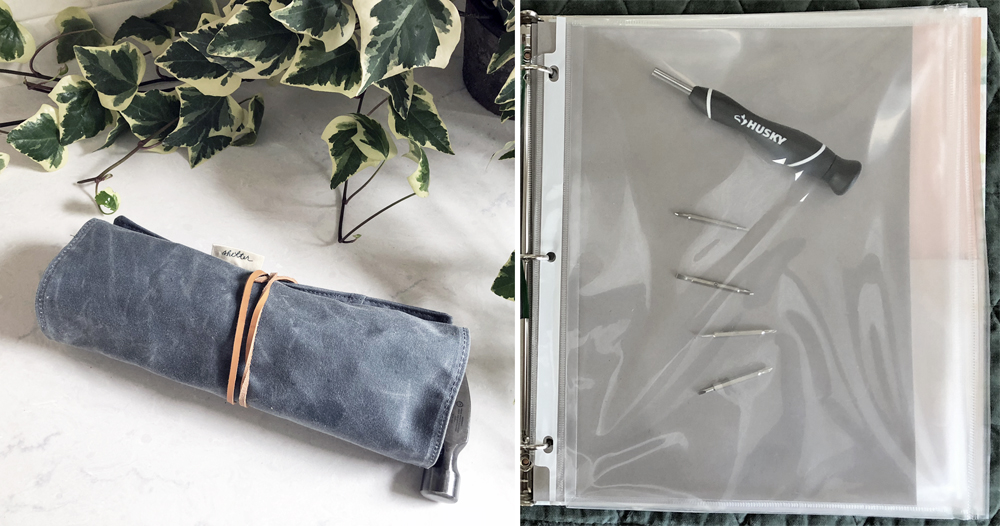
A tool roll has proven much easier to store than a box of any size. It’s portable, it can easily be kept out of West’s reach, and it’s neat and organized even when left out in the open. I use these waxed canvas pockets to store the handle of our new Husky 16-in-1 interchangeable screwdriver set from The Home Depot, our new Husky pick + probe set, our hammer, touch-up paintbrushes, and a miscellaneous multi-tool that I use on our bikes. (The Pick & Probe set was one of the items I realized I needed but was missing. Our cottages are from the 1920s and have a lot of imperfections, and West somehow finds them all, and then gets all sorts of stuff trapped in the smallest slivers of space. The picks help Adam and me reach and clear those spots.)
2. Hardware Notebook
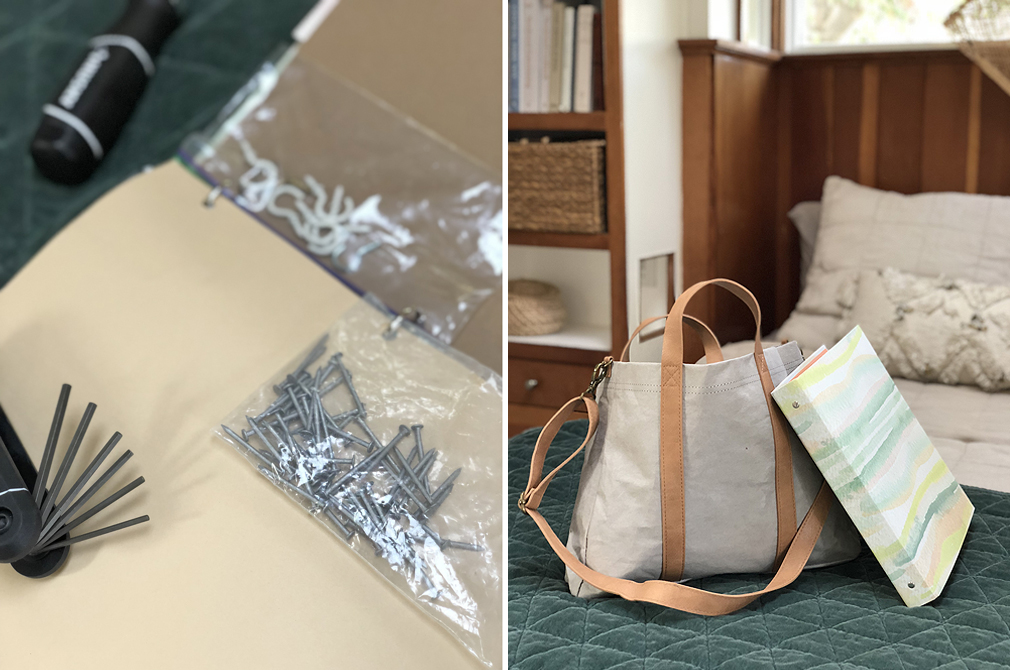
It’s easier to make room on our bookshelf than anywhere else in our home, because books can live countless lives by being re-gifted onward to friends and family for their enjoyment. I couldn’t find a hardware organizer that worked well on our built-in bookshelf, so I upcycled a 3-ring binder for the job. I used a combination of basic plastic bags and binder pouches to hold a mix of hardware, along with the various heads for our screwdriver and drill.
3. Large Tool Hanging Bag
After giving away anything I no longer needed, then outfitting the tool roll and notebook, I was left with a few compact yet larger items that were scattered around the house: a 30’ tape measure our Ryobi multi-tool base (which I use to build our suspended shelves and to cut/sand wood), our Hex Key sets, and extra water-resistant gloves. It got obnoxious to have all these items separated, so I gathered them together and dropped them into a washable garden bag that I can hang on the wall. Not only is the bag easy to tote around, but it hangs mere inches away from the notebook, and can also contain the tool roll.

No longer having to track down and lug our nomadic, oversized toolbox has saved time me and frustration. I now have everything organized side-by-side in a way that really works for our funny little space. As we finally wrap up months of repairs to the front cottage this week, I realize that I now have delightful new memories associated with our updated tools.

My advice to anyone in a small space who's looking to get a fresh start on their tool/hardware/craft collection is to carefully select multi-tools, and to think beyond the usual toolbox when it comes to how to store them. Find means of organization that work well for the spaces you have available, keeping size, shape, accessibility, and aesthetic in mind.
Select tools from this post were gifted to me by The Home Depot. All words/opinions are my own.

Roundup: Compact Speakers
One of the first realities I had to accept when we moved into our little home was that several forms of non-digital media simply had to go. I donated hundreds of books, keeping in mind that I could always download a copy of anything on my iPad if need be. I stopped receiving printed magazines and the Sunday newspaper, and opted instead for online subscriptions. I also got rid of any old DVDs and CDs, which was fine by me-- I can't remember the last time I had a computer with a disc slot anyway. The hardest decision was parting with our record player. However, we only brought it out for special occasions-- such as our home wedding (below), and over long weekends. So, ultimately, we gave the player to a friend. (It would've been tough to use with Sophee and West anyway-- I'm sure they would've toyed with the turning records constantly.)

We have three compact speakers on the property: an older Big Jambox (in white) over the kitchen cabinets in our cottage, a Bose SoundLink behind a plant on the exposed kitchen shelves in the front tiny house, and a tiny portable speaker that we use on the bikes, stroller, and/or while working out in the garden. I like them all, and have discovered that it makes a huge difference in sound quality if we place them in particular spots around the houses where the sound bounces and better fills the rooms.
For those who are in the process of downsizing their audio system, I've rounded up a diverse group of small or portable speakers, including the ones we have here. (I'd love to try that beautiful Stockholm Speaker, but it's on the pricier end of the spectrum. One day!)

Reusable Bags
Reusable shopping bags are everywhere these days. You're given polypropylene totes in checkout lines, you receive canvas slings for swag at events, and many makers and retailers use drawstring sacks when wrapping their online orders. While it's wonderful that we're no longer requiring and disposing of endless plastic bags, it can be a bit tricky for those of us living in a small space to find a practical place to keep the bulkier, reusable totes. Since these items come into play nearly every day, I thought the topic warranted a post. Here's how I deal with reusable bags and food wraps at the Cottage. Below, I've provided information on the styles I love, were I store them, and how I go about giving some away.

I have three groupings of reusable bags at the cottage, and I organize each category differently, based on their sizes and how I use them:

Market Baskets - I use these for the bulky or heavier duty items-- laundry detergent, beverage cans, oversized branches, beach towels, weekender bags, etc. These stay on display via a coatrack, either inside or on the stoop, depending on the weather. I also hang them on the walls as functional decor from time to time.

Canvas / String Shopping Bags - I have these in multiple sizes, and I use them for everyday groceries and errands. Canvas Shopping Bags - I keep these folded up in a wire, wall-mounted bin. Another bundle of bags stays in the car, and we keep a few in the base West's stroller.

Reusable Bee's Wrap + Sacks - I use these as often as possible in lieu of plastic wrap. They're ideal for sandwiches, baguettes, loaves of bread, and for preserving the freshness of almost anything other than meats. I roll these up when they're not in use and place them in a wire mesh vertical file/folder basket mounted magnetically to the side of the fridge. (Such baskets work well affixed to the inside of kitchen cabinet doors, too.)

EXISTING PLASTIC BAGS - Organizing existing plastic bags in easy-to-reach spots requires minimal time and cost if you simply repurpose select household items. For example, you can always recycle a used tissue box or canning jar to keep shopping or pet bags at the ready:

When (and How) to Give Reusable Bags Away - First off, I love the 4 or 6-compartment wine bags from the grocery store. As my mom pointed out, they're a handy way to safely store (and tote) sandals and flats. For this reason, they are usually the only "freebie" bags that I keep.

The SWAG and retail totes never stay in the Cottage for long. The minute they're empty, I challenge myself to load them up with donations, or I use them as gift wrap for outgoing presents. This can be an effortless way to keep track of how much you're bringing into your home, vs how much you're clearing out.
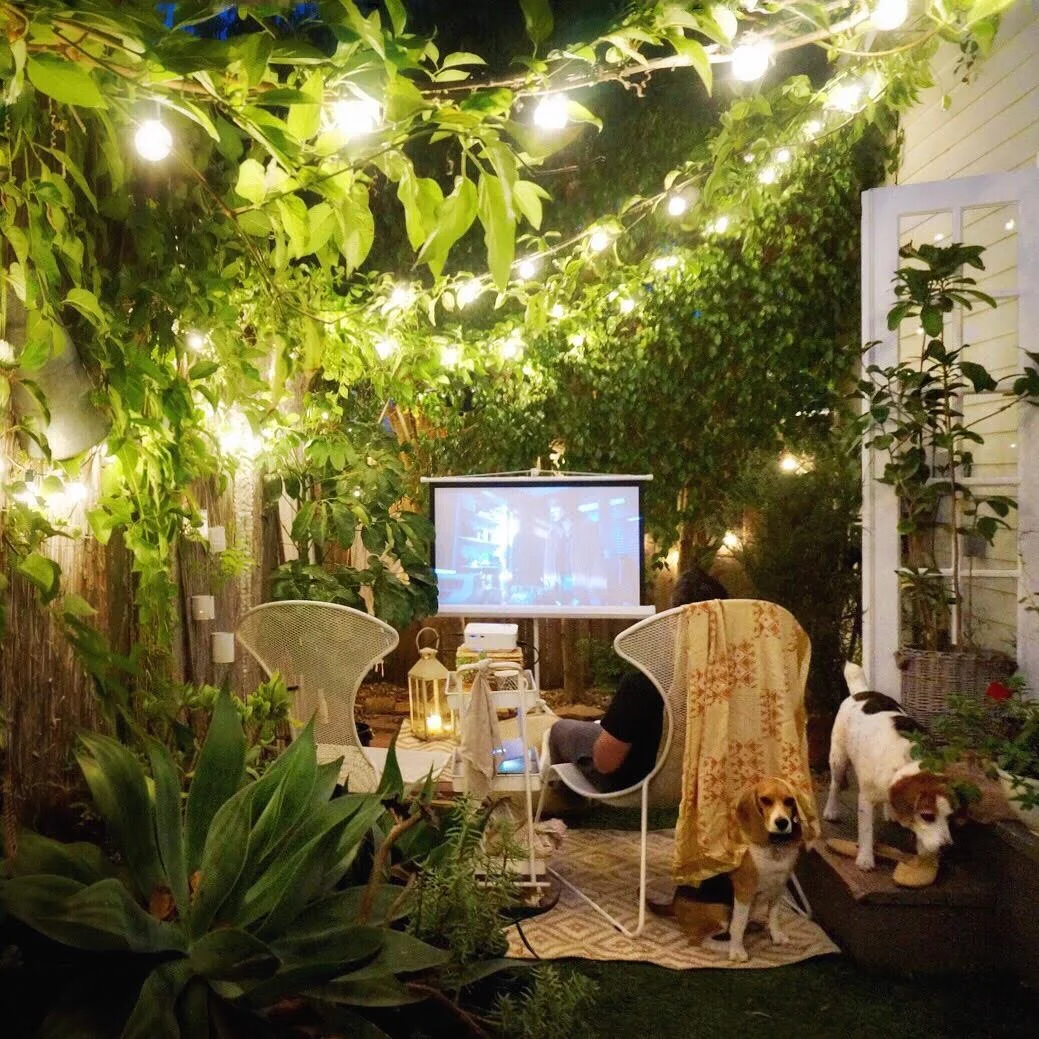
Date Nights at Home
Since West was born, Adam and I have orchestrated date nights at home more often. It eliminates the cost of hiring a babysitter, it allows us to eat a bit healthier (and have a drink without breaking the bank), and encuorages us to continue to connect as couple without being separated from our son and the pups.

Left: Movie night with Adam in the back garden. Right: A little family time in the yard (with flameless lanterns and a folding toddler-sized table and chairs) before West goes to bed.
While out little home inspires us to get out and involved in our community during the day, we never want it to feel limiting. For date nights, we take a few extra minutes to set up something out of the ordinary, such as a projector in the garden, or a pop-up dining table in the multi-purpose room (which functions as the living room / guest room / office / dining room).

The winter here in LA has thus far been fairly mild, so we can leave the doors cracked open and enjoy a modified version of our usual indoor/outdoor set up. And since West was born into our tiny home (and is always surrounded by barking beagles), he is used to noise and doesn't wake up when we cook, laugh, or watch a movie.

Spending more non work-related time together as a couple was a goal that Adam and I set forth for ourselves in 2018. In order to be the best parents, business partners, and friends possible, I think it's important for us to take some time and quietly catch up with each other-- even right here, in the same wonderful <400 sqft we share every day.

Roundup: My Top 12 Small Space Essentials
I'm commonly asked about my small space living essentials-- what would I recommend to others who are about to downsize, and what can I simply not live without?
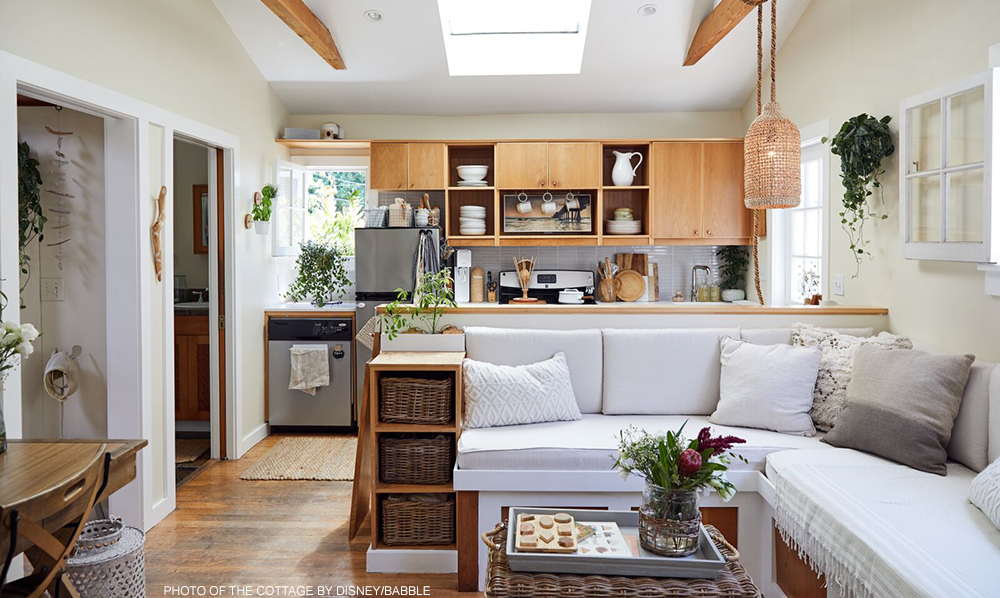
The answer, of course, depends on the context. My life with West (our toddler) is so different than it was with just Stanlee and Sophee (our pups). And my life with all three of them is almost unrecognizable to what it was when Adam, Stanlee and I moved into the Cottage years ago. (Similarly, my office and business needs have evolved enormously as well.)
In other words, there's no easy answer. It all depends on what you love, who is sharing your space, and the ways in which you need your home to function. But, for what it's worth, here are my go-to, must-haves, across all categories:
WHAT: DockATot
FOR: Life with a baby
WHY: The DockATot is a portable, affordable, overnight bassinet, changing table, and tummy-time / play mat all rolled into one.

WHAT: Gathre Mats
FOR: Life with a baby, toddler, pets, outdoor adventuring, etc.
WHY: These clever mats are versatile, affordable, and adaptable. (And they only require as much room to store as a blanket.) They come in numerous sizes and colors. For babies, you can toss a small mat over your Dock-a-Tot or changing table, making it easy to clean. For toddlers, you can slide a medium-sized version beneath their high chair. For pets, you can wrap a larger mat around your sofa cushions to keep them clean and wipeable. For picnics, playrooms, and furniture assembly, they are useful temporary ground coverings.

WHAT: This Is Ground (organizational accessories)
FOR: Home-office needs
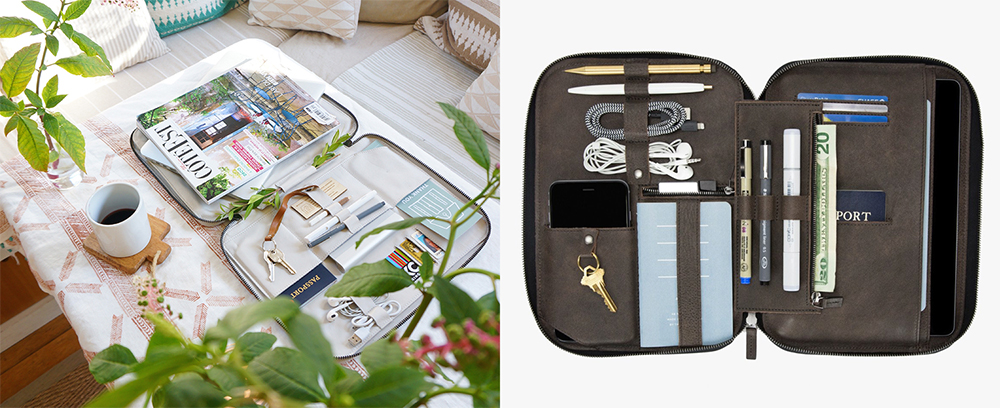
WHY: Travel accessories are great for everyday use in a small space, and This Is Ground makes my favorite leather gear for folks on-the-go. Swap out a standard workstation for a beautiful, organized, mobile office via these types of brilliantly designed tech accessories.
WHAT: Collapsible Vacuum Cleaner
FOR: Everyone
WHY: You can make room for a full-sized, cordless vacuum in the smallest of homes, as long as the model breaks apart into components. (View the full post on the cottage vacuum cleaner / storage solution here.)
WHAT: Compact Scanner
FOR: Home office needs + everyday decluttering
WHY: Use this portable scanner to keep your business and personal records digitally organized and accessible while eliminating your paper piles and file boxes. (Read more about the scanner here.)
WHAT: Compact air filter with heating and cooling features included
FOR: Everyone
WHY: Clear your home of air pollutants while also heating/cooling multiple rooms via a compact, all-in-one air filter. If you're in a small home or apartment, this handy little unit will most likely service the entire place. The heating and cooling functions might save you from having to buy (and store) fans, space heaters, and even an AC unit. (We got this one when West was born-- we love it, and regret not buying it sooner.)
WHAT: iPad (I know, I know, but hear me out...)
FOR: Everyone
WHY: Most of us have a love/hate relationship with our gadgets. Whether we like it or not, they now hold our record collections, libraries, maps, photo albums, televisions, cameras, address ledgers, games, and so much more. Consider opting for digital versions of items you used to buy or collect in tangible form, when possible.
WHAT: Single-Cup Automatic Coffee Maker
FOR: Everyone
WHY: As romantic and beautiful as pour-over and French press coffee methods are, many people just want a modern, automatic coffee maker. Try a model that requires no pods and no filters, like this single-cup brewer, which is small, uncomplicated, and easy to clean
WHAT: Over-the-burner cutting board
FOR: Everyone
WHY: All small-space dwellers could use a bit of spare counter space. Provide yourself with a few extra surface inches by using an over-the-burner cutting board in your kitchen. (As always, please keep safety in mind.)

WHAT: Roll-up Drying Rack
FOR: Everyone + Life with a baby
WHY: Regardless of whether or not you have a dishwasher, we all need a place to dry kitchen items. Keep your counters uncluttered by using an over-the-sink drying rack that can roll up when not in use. This item is particularly handy when it comes to drying baby bottles and breast pump parts, but it's also ideal for drying standard dishes and plastic bags.
WHAT: S-Hooks
FOR: Everyone
WHY: I can't tell you the number of times a basic S-hook has saved the day in our tiny cottage. Apply an S-hook to turn any grommet, railing, hooked ledge, or dowel into a makeshift spot for drying clothes, hanging accessories, stashing reusable shopping bag, keeping items out of the jaws of pets or hands of kids, and so forth.
WHAT: Vintage Hardware Organizer
FOR: Everyone
WHY: Create a straightforward spot for items such as jewelry, makeup, plugs, batteries, craft materials, and miscellaneous smaller items via a standard hardware organizer. (Pick a tall, shallow design that consumes less space, and can tuck out of sight in a closet or cupboard.) Or consider devising a makeshift organizer yourself by finding unused vessels around your home that can be grouped together and repurposed to hold these odds-and-ends in a unified place and/or manner.
RUNNER UP: Flexi Bath or Inflatable Baths
FOR: Life with a baby / toddler

RUNNER UP: Vertical shoe rack
FOR: Everyone
RUNNER UP: Lightweight hanging mirrors with built-in shelves
FOR: Everyone
WHY: You'd be amazed at what tacking one of these up on any wall can do to brighten and enlarge your space.


Roundup: Ideas for Tiny Corners
Struggling to find a way to make your small space function for all your daily needs? Don't overlook your corners! When outfitted wisely, corners can become highly practical (and beautiful!) spots within your home or office.
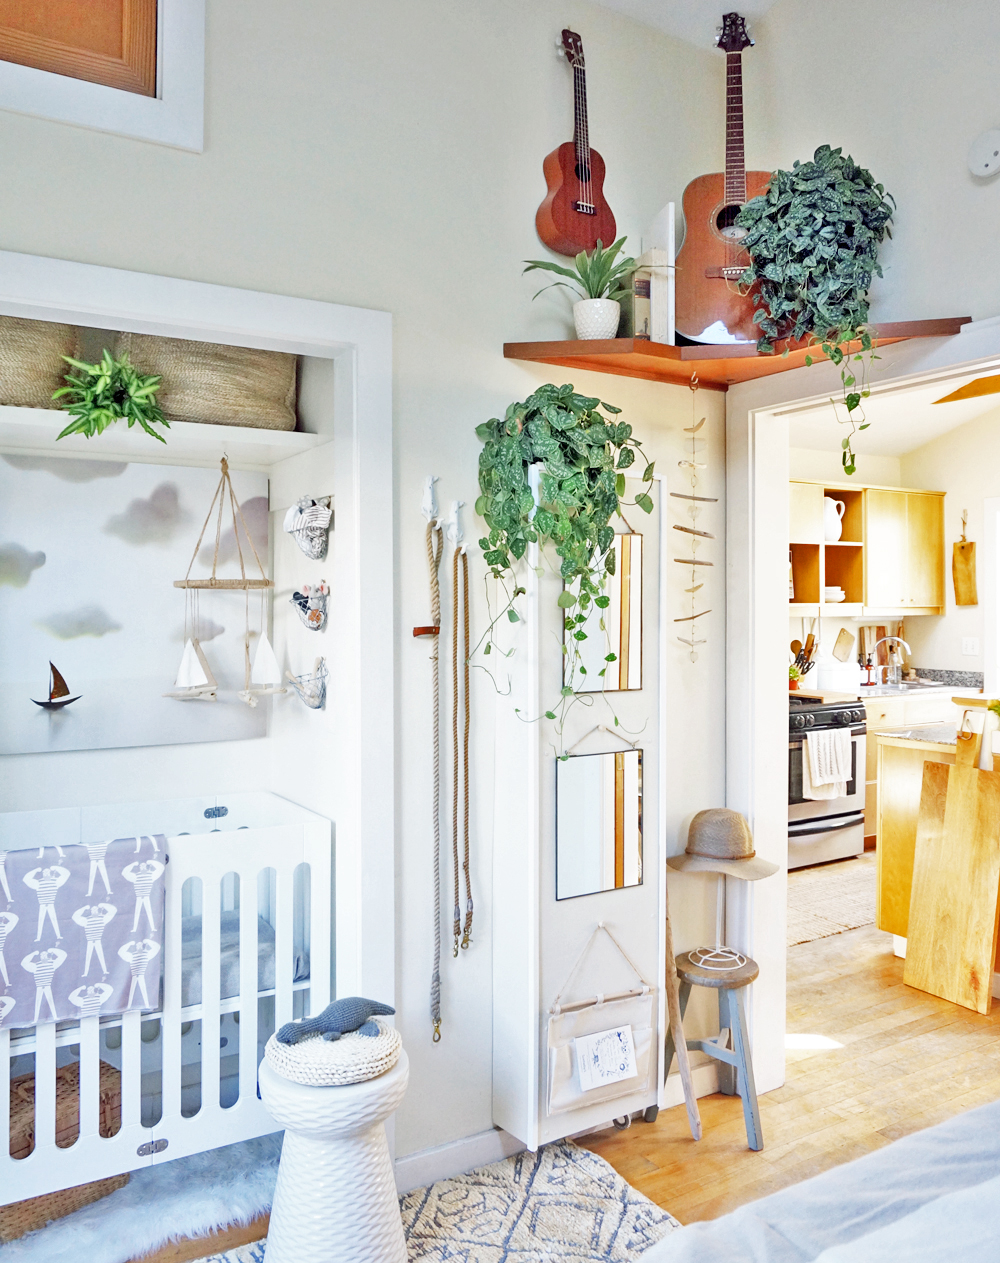
An old tv shelf above the cottage bedroom pocket door holds books, plants, tethered musical instruments, and a hanging sculpture.
Your corners can easily become any of the following:
Shoe / coat / bag drop
Source of light (just make sure your lamp shade has a small circumference)
Collapsable (or permanent) table or desk
Changing table
Bassinet or reading nook
Plant collection
Instrument storage + display
Misc. storage hutch
Hanging levels for decor and accessories
Mirrors
Decorative / blanket ladder or valet
Cat perch
Wardrobe Alternative
Bookshelves

Like a Local: Late Sunday Afternoon
(UPDATE: 01/08/18 - Interview with Late Sunday Afternoon about Tiny Home living and blogging here.)
Looking back at 2017, one of the experiences we loved the most was a collaboration with our incredible friends at Late Sunday Afternoon here in Venice.

I first fell in love with this unique shop the moment I stepped through its gorgeous doors here in Venice. But after meeting its founder, Matthew, I discovered the wonderful depth of LSA.
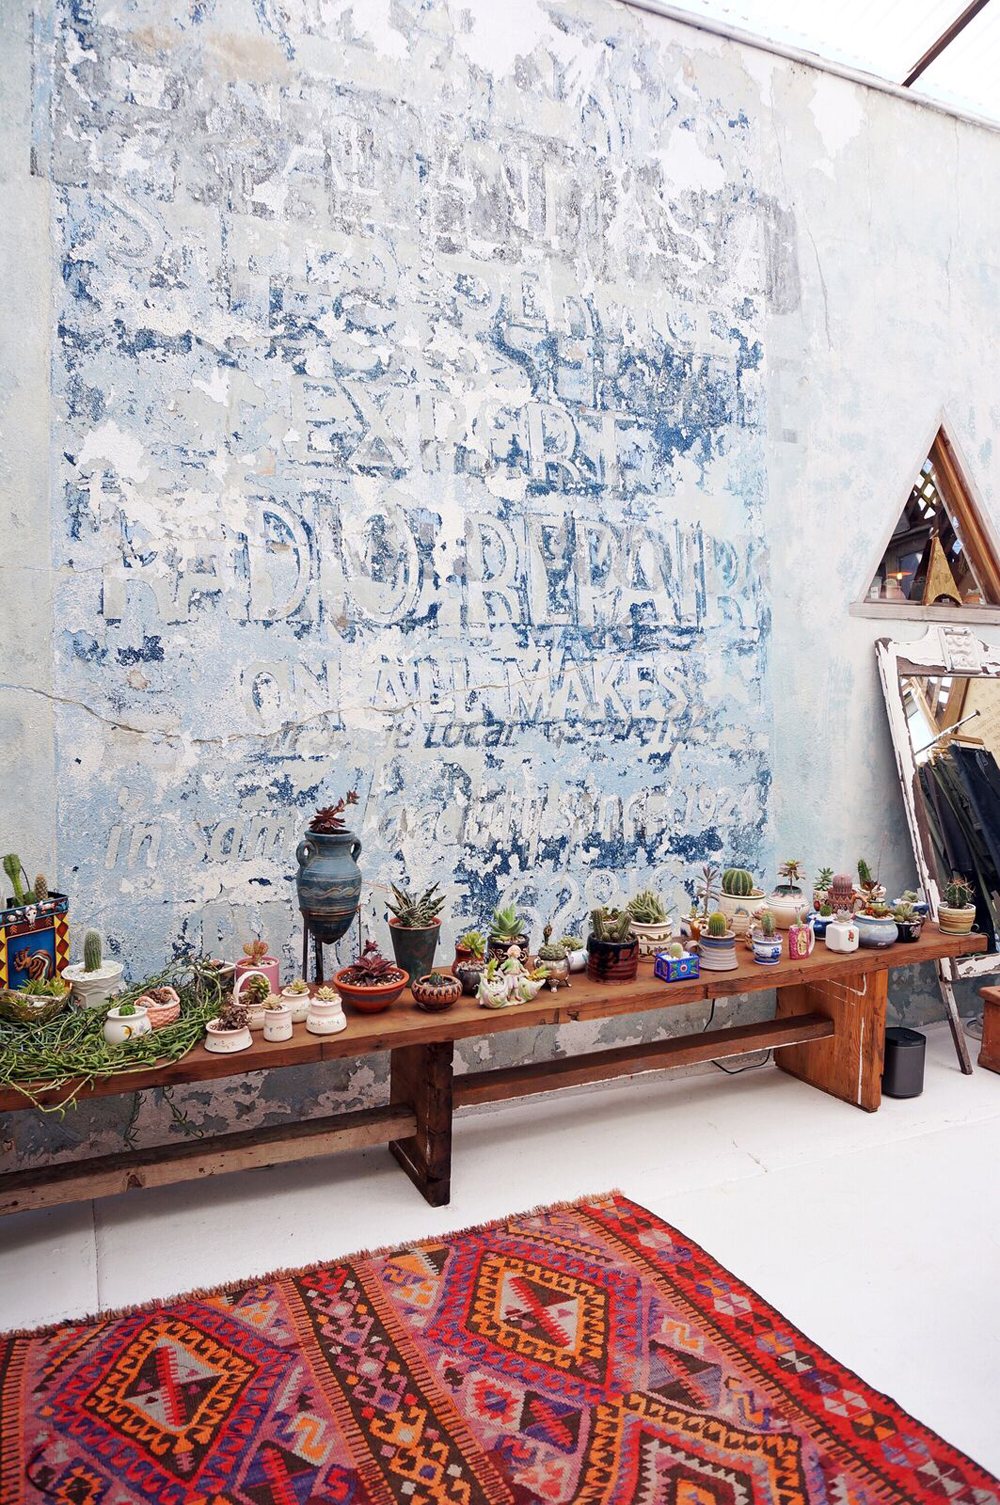
The team, products and give-back mission behind LSA all made me eager to collaborate. (Read more about everything here.) So we were thrilled when they approached us about a brand ambassador photo + video shoot.

The scarves we have from LSA have traveled thousands and thousands of miles with us, and West's blankie was made by them as well. We also have hats and books from their shop, all of which we enjoy often.
LSA sells original and small-batch items from their beautiful indoor/outdoor store and gathering space in Venice. They also hand-create and donate comfort blankies to young children in the foster care system, and they use their excess fabric scraps to produce dog beds that they then donate to local animal shelters.

Late Sunday Afternoon is an Instagram dream. But it also operates with a tangible sense of community and responsibility, and for that, we admire and adore them.


We're featured in Chapter 2 of the video below (starting at 1:19), but we recommend watching the entire thing-- it's completely delightful!
Canal photos © Sebastian Artz, with selects by Thomas Brodahl. Video by Chance Foreman. Ambassador shoot content courtesy of Late Sunday Afternoon. (Thank you for the dreamy day of canoeing, biking, and strolling the canals with friends, LSA crew!)